how to fix wifi ip configuration on laptop

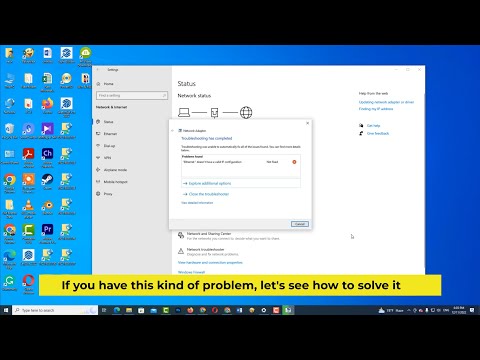
Title: WiFi Doesn't have a valid IP configuration on Windows 10
Channel: FIXsage
WiFi Doesn't have a valid IP configuration on Windows 10 by FIXsage
how to change wifi ip address on laptop, how to find wifi ip address on laptop
WiFi Nightmare? FIX Your Laptop's IP Address NOW!
WiFi Woes Got You Weeping? Conquer Your Laptop's IP Address!
Are you staring down a WiFi abyss? Is the internet a distant, flaky dream? Don't fret! We’ve all been there, right? The frustration of a sputtering connection is infuriating! Therefore, let's tackle the root of many WiFi headaches: your laptop's IP address. After all, understanding this technical stuff can often feel like decoding ancient hieroglyphs. Prepare yourself to unravel this mystery, and you'll be back online in a flash.
Decoding the Digital Dial Tone: What is an IP Address Anyway?
First, consider your IP address the unique identifier for your laptop on the internet. In other words, think of it like your home address but for the digital world. Moreover, this address allows devices to find and talk to each other. Consider a mail carrier; it needs an address to deliver a letter. Similarly, your computer needs an IP address to receive online information. However, you probably don't need to know every single nuance of this function. In fact, understanding its basic function is enough.
Static vs. Dynamic: The Great IP Address Debate
Next, every laptop has two primary types of IP addresses: static and dynamic. A dynamic IP address is assigned automatically by your router and changes regularly. It's like renting an apartment. Moreover, this is the most common setup for most home users. Conversely, a static IP address is a fixed address. This is more like owning a house, where the address remains the same. For the most part, you'll likely be dealing with dynamic. So, now that you have a basic understanding, let's get started.
Step-by-Step: Fixing Your IP Address Issues
- Restart Your Router: Before diving into techy solutions, try the simplest one first. A simple router reboot can often work wonders. Therefore, unplug your router and modem from the power. Wait for about 30 seconds and plug them back in. After doing this, give everything a few minutes to power up.
- Release and Renew: In many cases, the issue may be a problem with your network connection. For Windows users, search for 'cmd' in the search bar and open the command prompt. Then, type
ipconfig /releaseand press Enter. Following this, give your computer a new IP address by typingipconfig /renewand pressing Enter. - Check Your Network Settings: Navigate to your network settings. Verify that your network connection is set to obtain an IP address automatically. In other words, this setting ensures your router assigns an address. If by chance, this setting is incorrect, it likely causes problems. Change it to “Obtain an IP address automatically” and save the settings.
- Flush Your DNS Cache: Sometimes, outdated DNS (Domain Name System) information can cause connectivity disruptions. To flush your DNS cache, open the command prompt (as before) and type
ipconfig /flushdns. Press Enter. This clears the old data, and your computer gets a new IP address.
Advanced Troubleshooting Techniques
- Network Adapter Driver Updates: Outdated network adapter drivers can cause issues. Head to your device manager, locate your network adapter, and check for updates. Furthermore, ensure you have the latest drivers for optimal performance.
- Disable and Re-enable Your Network Adapter: As a troubleshooting step, disable your network adapter. Then, wait a few seconds and re-enable it. Restarting the adapter might refresh the connection.
- Run the Network Troubleshooter: Windows has a built-in network troubleshooter. Access this tool in your settings and let it scan for potential issues. It often provides helpful suggestions for resolving connection problems.
Staying Connected: Pro Tips for a Smoother WiFi Experience
Additionally, let's look at a few proactive measures. For instance, consider the placement of your router. Position it centrally and away from obstructions. Microwaves and other electronic devices can interfere with the signal. Be sure to secure your WiFi network with a strong password. Finally, update your router's firmware regularly.
Conclusion: Reclaiming Your Digital Life
In short, fixing your laptop's IP address doesn't have to be a daunting task. Therefore, with these steps, you can overcome most connectivity issues. Although technology can be frustrating, you are now equipped with the knowledge to troubleshoot and resolve these common problems. Go forth and conquer those WiFi nightmares! And after that, enjoy seamless browsing and streaming. In other words, enjoy the internet again!
Toshiba Satellite WiFi: The SHOCKINGLY Easy On/Off Switch!WiFi Nightmare? FIX Your Laptop's IP Address NOW!
Hey there, fellow tech traveler! Ever felt like your laptop’s internet connection is playing hide-and-seek with you? One minute you're streaming your favorite show, the next, poof – gone. That buffering wheel starts spinning its endless dance, and you're left staring, frustrated, at the screen. Sound familiar? We've all been there. More often than not, the culprit behind this digital disappearing act is something called an IP address. And guess what? We're going to unravel the mystery and get you back online, pronto!
1. The Elusive IP Address: Why Does It Matter?
Think of your IP address as your laptop's unique postal code in the vast internet universe. It's how websites, servers, and other devices find your computer and send information back to you. Without a valid IP address, you're essentially invisible online. You can't browse, stream, or even send a simple email. It’s like trying to send a letter without an address – it just won't get there! So, understanding and, crucially, fixing your IP address issues is the first step in banishing those frustrating WiFi nightmares.
2. Static vs. Dynamic: Decoding the IP Address Types
There are two main types of IP addresses: static and dynamic.
- Dynamic IP Addresses: These are like rental apartments. Your internet service provider (ISP) assigns you a temporary IP address that changes periodically. This is the most common type of IP address, offering convenience and ease of management. Think of it like a revolving door – new address, new user.
- Static IP Addresses: Picture these as owning your own house. You get a permanent, unchanging IP address. It's usually something you pay extra for, and it's beneficial if you're running a server or need a consistent online identity. This is less common, and likely not what's causing your Wi-Fi woes unless you've specifically requested a static IP.
3. When Your IP Address Goes Rogue: Common Symptoms
Okay, so your IP address is acting up. How do you know? Here are some telltale signs:
- No Internet Connection: This is the biggie. You see that "No Internet" error message, and your heart sinks.
- Slow Browsing Speeds: Websites load at a glacial pace, making you want to throw your laptop out the window.
- Frequent Disconnections: You're constantly being booted off the network. It's like your Wi-Fi is playing a cruel game of "tag."
- Unable to Access Certain Websites: Some sites might work, while others remain stubbornly inaccessible.
- Error Messages: Specific error messages related to IP address conflicts, like "IP address conflict detected."
4. Peeking Behind the Curtain: How to Find Your Laptop's IP Address (Windows)
Let's get practical. Before we can fix anything, we need to find out what your current IP address is. Here’s how to do it on a Windows laptop:
- Open the Command Prompt: Type "cmd" in the Windows search bar and press Enter.
- Type
ipconfig: In the Command Prompt window, typeipconfigand hit Enter. - Look for the Information: You'll see a bunch of text. Look for the "IPv4 Address" section. That’s your current IP address. You'll also find the "Default Gateway," which is usually your router's IP address.
5. The IP Address Detective: Finding Your IP (Mac)
Mac users, we haven't forgotten you! Here's how to find your IP address on a Mac:
- Open System Preferences: Click the Apple icon in the top-left corner of your screen and select "System Preferences."
- Go to Network: Click on the "Network" icon.
- Select Your Connection: Make sure you've selected your active Wi-Fi connection (e.g., "Wi-Fi").
- Find Your IP: Your IP address should be displayed next to "IP Address."
6. The Reboot Remedy: The Simplest Fix First
Before you dive into complex solutions, try the simplest one: a good old-fashioned reboot. Restart your laptop and your router. This often clears up temporary glitches and allows your devices to re-establish a healthy connection. It's like hitting the reset button on your brain – sometimes, that's all you need!
7. Renewing Your Lease: Releasing and Renewing Your IP Address (Windows)
Sometimes, the problem isn't the information itself but the way it's being delivered. Let's try "kicking" your computer off and then back onto the network, getting a new IP address in the process.
- Open Command Prompt (again): As we did before, type "cmd" in the Windows search bar and press Enter.
- Release the Old Address: Type
ipconfig /releaseand hit Enter. This tells your computer to release its current IP address. - Renew the Lease: Type
ipconfig /renewand hit Enter. This requests a new IP address from your router. - Check Your New IP: Use the
ipconfigcommand again (justipconfig) to verify that you now have a new IP address.
8. A Fresh Start: Renewing Your IP (Mac)
Mac users can do something similar, albeit with a slightly different approach:
- System Preferences & Network: Follow steps 1-3 from heading 5.
- Advanced Settings: Click the "Advanced…" button.
- TCP/IP Tab: Select the "TCP/IP" tab.
- Renew DHCP Lease: Click the "Renew DHCP Lease" button. This will ask your router for a new IP address.
9. The Router Rodeo: Troubleshooting Your Router
Sometimes, the problem isn't your laptop; it's the router. So, let’s get our hands a little dirty and check the Router.
- Checking Your Router's Address: You can often find your router's IP address on a sticker attached to the router itself or in the "Status" or "Network" section of its configuration. Common router IP addresses include 192.168.1.1 or 192.168.0.1.
- Access the Router's Settings: Open a web browser and type your router's IP address in the address bar. You'll need to enter a username and password to access the router's settings. (This information might be on the router or in its documentation.)
- Check DHCP Settings: DHCP (Dynamic Host Configuration Protocol) is what assigns the IP addresses. It's the backbone of your home network. Make sure DHCP is enabled on your router.
- Restart the Router: A simple reboot can work wonders. Unplug your router from the power outlet for about 30 seconds, then plug it back in. This is like a digital exorcism, clearing out any gremlins causing trouble.
10. Avoiding the Conflict: Static IP Address Considerations
If you're still facing issues, there might be an IP address conflict. This means two devices on your network are trying to use the same IP address, causing chaos. In rare cases, you might need to assign a static IP address to your laptop. Be cautious, as this is more advanced, and a misconfiguration can worsen the problem. If you're comfortable, here's a quick overview:
- Choose an IP Address: You'll need to pick an IP address that's outside of the DHCP range your router uses. This information is in your router's settings.
- Enter the Details: Go to your laptop's network settings and manually enter the IP address, subnet mask, default gateway (your router's IP), and DNS servers (can also be found in the configuration).
- Consider Your Router's Manual: Check your router's manual for specific instructions on setting up static IPs.
11. The DNS Dilemma: Resolving Domain Name Issues
Think of DNS (Domain Name System) servers as the internet's phone book. They translate website names (like google.com) into IP addresses. If your DNS settings are incorrect, you might not be able to reach websites.
- Check Your DNS Settings: In your laptop's network settings, you can manually configure DNS servers.
- Try Public DNS Servers: Popular, free DNS servers include Google's (8.8.8.8 and 8.8.4.4) and Cloudflare's (1.1.1.1 and 1.0.0.1). They often provide faster and more reliable service. Try changing your DNS settings.
12. Firewall Follies: Unblocking Internet Access
Your firewall is your laptop's security guard, but sometimes, it can be overzealous and block internet access. Double-check that your firewall isn't interfering.
- Check Your Firewall Settings: Go to your security settings and ensure that your firewall isn't blocking your web browser or other essential applications.
- Temporary Disable: As
Fix ethernet doesn't have a valid ip configuration issue in windows 10 Windows 11
By IT Magics Fix ethernet doesn't have a valid ip configuration issue in windows 10 Windows 11 by IT Magics
2025 Fix Ethernet doesnt have a valid IP configuration in Windows 1011

By How To Fix Tech 2025 Fix Ethernet doesnt have a valid IP configuration in Windows 1011 by How To Fix Tech
How to Change IP Address on Windows 10 8 7 100 Helpful Change IP Address Windows 10 Easy
By How to Fix Your Computer How to Change IP Address on Windows 10 8 7 100 Helpful Change IP Address Windows 10 Easy by How to Fix Your Computer

Title: Cara Mengatasi Wifi Tidak Konek Internet - wifi2 doesnt have a valid ip configuration
Channel: TRAR
Cara Mengatasi Wifi Tidak Konek Internet - wifi2 doesnt have a valid ip configuration by TRAR
Change Wifi Settings
WiFi Nightmare? FIX Your Laptop's IP Address NOW!
Have you ever experienced the maddening frustration of a laptop that refuses to connect to your WiFi network? The endless spinning wheel, the cryptic error messages, the desperate attempts to refresh the connection – it’s a familiar story, and often, the culprit is a problematic IP address. We understand your pain, and we're here to guide you through the process of fixing this common issue, ensuring your laptop is back online and functioning at its best.
Understanding the IP Address: Your Laptop's Digital ID
Imagine your home network as a bustling city. Each device, from your smartphone to your smart refrigerator, needs a unique address to navigate the digital streets and communicate with each other and the outside world. This is the purpose of the IP address: to identify your laptop on the network. There are two primary types: static and dynamic. A dynamic IP address is automatically assigned by your router's DHCP server, offering convenience. A static IP address, on the other hand, is manually configured and remains constant. While both have their place, understanding how they function is crucial for troubleshooting connectivity issues.
Diagnosing the Problem: Is Your IP the Issue?
Before diving into solutions, let's determine if your IP address is the source of your WiFi woes. Several telltale signs can point to an IP conflict or misconfiguration.
- "Limited" or "No Internet Access" Error: This is a classic indicator. Your laptop connects to the WiFi but cannot reach the internet. This often stems from an IP address that doesn't correspond with your network's settings.
- Inability to Connect: If your laptop struggles to even join the WiFi network, an IP-related problem is possible. The router might not be assigning an IP address, or there might be an address conflict.
- Slow Speeds and Intermittent Disconnections: While not always IP-related, these symptoms can be caused by an IP address problem, especially if the laptop is constantly requesting a new IP or is conflicting with another device.
- Website Errors: If you're getting messages that websites are unreachable, it is likely an IP issue.
The DHCP Solution: Refreshing Your Dynamic IP Address
The most common solution for IP-related WiFi problems involves renewing your DHCP lease. This forces your laptop to request a new IP address from your router. Here’s how to do it on various operating systems:
Windows:
- Open Command Prompt: Search for "cmd" in the Windows search bar, right-click "Command Prompt," and select "Run as administrator."
- Release the IP: Type
ipconfig /releaseand press Enter. This releases your current IP address. - Renew the IP: Type
ipconfig /renewand press Enter. This requests a new IP address from your router. - Check Configuration: Type
ipconfig /alland press Enter. Verify that an IP address has been assigned.
macOS:
- Open System Preferences: Click the Apple menu and select "System Preferences."
- Network Settings: Click "Network."
- Select your WiFi connection: Highlight your WiFi network in the left-hand pane.
- Advanced Settings: Click "Advanced" in the bottom right corner.
- TCP/IP Settings: Click the "TCP/IP" tab.
- Renew DHCP Lease: Click “Renew DHCP Lease,” and then click “OK.”
Static IP Configuration: A More Permanent Fix
For some, especially users who require consistent access, a static IP address offers more control and can resolve persistent connectivity problems. However, you must carefully configure the settings to avoid conflicts.
Understanding Static IP Configuration:
Assigning a static IP address involves manually inputting the IP address, subnet mask, default gateway, and DNS server information. You will need this information which can be found by logging into your router.
Windows Configuration:
Open Network & Internet Settings: Right-click the WiFi icon in the system tray and select "Open Network & Internet settings."
Change Adapter Options: Click "Change adapter options."
Select Your WiFi Adapter: Right-click your WiFi adapter and select "Properties."
Internet Protocol Version 4 (TCP/IPv4): Select "Internet Protocol Version 4 (TCP/IPv4)" and click "Properties."
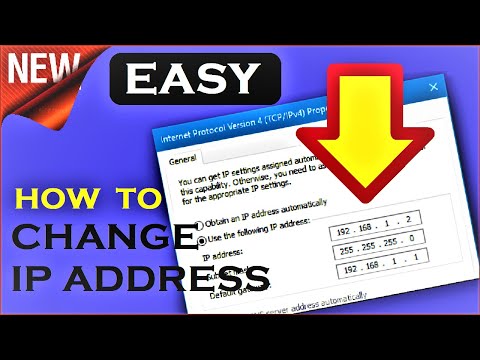
Use the Following IP Address: Select "Use the following IP address."
Enter the Information: Input the following:
- IP address: Choose an IP address within your network's range, but outside the DHCP server's range to avoid conflicts. The router's configuration page should show the address range.
- Subnet mask: Typically, this is 255.255.255.0.
- Default gateway: This is your router's IP address.
- Preferred DNS server: This is often your router's IP address or a public DNS server like Google's (8.8.8.8 and 8.8.4.4) or Cloudflare's (1.1.1.1 and 1.0.0.1).
Save Changes: Click "OK" on all windows.
macOS Configuration:
Open System Preferences: Click the Apple menu and select "System Preferences."
Network Settings: Click "Network."
Select Your WiFi Connection: Highlight your WiFi network in the left-hand pane.
Configure IPv4: In the "Configure IPv4" dropdown, select "Manually."
Enter the Information: Input the following:
- IP Address: Choose an IP address within your network's range, but outside the DHCP server's range.
- Subnet Mask: Typically, this is 255.255.255.0.
- Router: This is your router's IP address.
- DNS Servers:, enter your desired DNS servers.
Apply Changes: Click "Apply."
Router Troubleshooting: The Source of the Problem?
Sometimes, the issue lies within the router itself. It's important to consider these crucial troubleshooting steps before deciding on a solution.
- Restart Your Router: This simple step fixes a multitude of network anomalies. Unplug your router, wait 30 seconds, plug it back in, and wait for it to fully restart.
- Restart Your Modem: If you have a separate modem, restart it as well. First, unplug your modem and wait for 30 seconds. Then, reconnect it and wait for it to reboot.
- Check Router Logs: Access your router's administrative interface (usually by entering your router's IP address in your web browser) and examine the logs for any error messages related to IP address assignments or DHCP failures.
- Update Router Firmware: Outdated firmware can cause connectivity problems. Check your router manufacturer's website for the latest firmware and install it.
- Check Your Router's DHCP Settings: Make sure the DHCP server is enabled and configured to assign IP addresses. Verify the IP address range your router is using.
- Reset Your Router to Factory Settings: As a last resort, you can reset your router to its factory settings. This will erase all custom configurations, so you’ll need to reconfigure your network settings afterward.
Advanced Troubleshooting: Digging Deeper
If the basic steps haven't resolved the problem, you'll want to use more advanced techniques.
- Flush DNS Cache: Corrupted DNS cache entries can sometimes interfere with network connectivity. Flushing the DNS cache removes these entries and forces your computer to obtain fresh ones. Use the following command in the command prompt (
ipconfig /flushdns). - Check Network Adapter Drivers: Outdated or corrupted network adapter drivers can cause IP-related issues. Ensure you have the latest drivers installed from your laptop manufacturer's website.
- Run Network Diagnostics: Windows and macOS have built-in network diagnostic tools that can often identify and fix connectivity problems. Run these tools and follow any recommendations.
- Bypass Your Router: Try connecting your laptop directly to your modem via an Ethernet cable. If this resolves the issue, it suggests the problem lies within your router.
- Check for IP Conflicts: Use an IP scanner tool (available online) to scan your network and identify any devices using the same IP address as your laptop. Resolve the conflict by assigning a different IP address to one of the devices.
- Firewall Issues: Ensure your firewall isn't blocking any network connections.
Preventative Measures: Keep Your Network Running Smoothly
Once your laptop is connected, take these steps to prevent future IP-related problems:
- Regularly Update Your Router Firmware: This keeps your router secure and optimized.
- Secure Your WiFi Network: Use a strong password and enable WPA3 encryption.
- Monitor Your Network: Keep an eye on your network devices to identify potential problems early.
- Consider Using Static IPs Judiciously: Configure static IPs only when really needed. Avoid assigning static IPs to all networked devices, as this can cause confusion.
Conclusion: Back to Blazing-Fast WiFi
Troubleshooting IP address issues can be a
