connect two laptop with wifi

Title: Transfer Files Between Two Laptops over Wi-Fi
Channel: Techy Druid
Transfer Files Between Two Laptops over Wi-Fi by Techy Druid
connect two laptop with wifi, connect two computers with wifi, connect two computers with wifi windows 10, can i connect two laptops with wifi, connect two laptop via wifi, connect two laptops using wifi windows 10, connect laptop to 2 wifi networks, connect two computers via wifi windows 10, how to connect two laptops using wifi, can i connect my laptop to two wifi networks at the same time
Laptop to Laptop WiFi: The SHOCKINGLY Easy Trick You NEED!
Laptop to Laptop WiFi: Unlock Instant Connectivity (No Tech Wizardry Required!)
Okay, friend, let’s be honest. Remember that time you desperately needed to transfer files between your laptops? Picture the scenario. You’re scrambling. You’re frustrated. And that archaic USB drive? It’s nowhere to be found. Ugh. Been there, right? Well, prepare for a game-changer. Forget the cable clutter and the agonizing wait. This isn't just a trick; it's a revelation! Because you need this shockingly easy method to connect your laptops via WiFi. Seriously, it's easier than brewing your morning coffee.
Ditch the Wires: Embrace the Wireless Transfer Revolution
So, what are we talking about here? We're talking about creating a direct, wireless connection between two laptops. No internet required. No complicated setups. Consequently, you can transfer files, share folders, and even access one laptop’s resources from another. Initially, this sounds complex. However, it’s remarkably straightforward. We're taking a peek behind the curtain, showing you how simple it truly is. Believe me, you'll be amazed at how fast and convenient this solution is.
Setting the Stage: Preparation is Key (But It’s Ridiculously Simple)
Before you dive in, there are a couple of preliminary steps. But don't worry. They are incredibly simple. First, ensure both laptops have WiFi capabilities (duh!). Next, double-check that both laptops are running. Furthermore, make sure both are within a reasonable distance of each other. Proximity is essential for a strong connection. Basically, you want the laptops near each other. Finally, identify the files or folders you wish to transfer. Now, you're ready.
Step-by-Step Guide: Creating Your Laptop to Laptop WiFi Bridge
Here's the magic. First, on one laptop, go to your network settings. Next, locate the "Mobile Hotspot" or "WiFi Hotspot" option. Often, it's in the "Network & Internet" settings. Now, enable the hotspot. Then, give it a name (SSID) and a password. Be sure to choose a strong password. You want security, after all.
Then, on the second laptop, open your WiFi settings. Afterwards, scan for available networks. You should see the hotspot you just created listed. Click on it. Now, enter the password. Your second laptop will then connect to the first laptop’s hotspot.
However, the job isn't done yet. To transfer files, you'll need to enable file sharing. This can be done through the "Network and Sharing Center." Enable file and printer sharing. Therefore, both laptops can communicate. Moreover, select the folders you want to share. Right-click on the folder. Select "Properties," then go to the "Sharing" tab. Finally, share the folder with "Everyone" or specific users.
File Transfer Nirvana: Sharing and Accessing Your Files
With the connection established, it’s file transfer time. On the second laptop, open File Explorer. You should then see the first laptop listed under "Network." Double-click on the first laptop's name. Next, input the credentials (username and password) of the user account on the first laptop, if prompted. Afterward, you can access the shared folders. You can copy files or move them directly.
Alternatively, you might prefer the older method of mapping the network drive. You can also map a network drive in File Explorer. This creates a shortcut for quick access. Either way, it’s a breeze to get your files where they need to be. You'll now have seamless file sharing!
Troubleshooting Tips: Smooth Sailing Ahead
Sometimes, things don't go as planned. That’s okay! Here are some common issues and solutions to hopefully get you back on track. First, check your firewall settings. Sometimes, firewalls block the connection. Temporarily disable the firewall, or add an exception for file sharing. Then, make sure your laptops are on the same network. They must be. Finally, ensure file sharing is enabled on both machines.
Beyond File Transfers: Unleashing the Power of Connectivity
The benefits extend beyond mere file transfers. You can also access each laptop's printers. You can also play network games. In addition, you can even remotely control one laptop from the other. The possibilities are virtually endless. Furthermore, it offers a secure way to share information. The advantages of laptop-to-laptop WiFi are truly remarkable.
Final Thoughts: You're Now a WiFi Master!
So, there you have it. Connecting laptops via WiFi is no longer a mystery. It’s a practical, time-saving solution. It's something everyone can master. Furthermore, this method is a far cry from the frustrations of USB drives. You’ve now got the power to connect wirelessly. You can transfer files, share resources, and boost your productivity. Go forth and conquer! You deserve to enjoy the ease of laptop-to-laptop WiFi! Now, go and spread the word.
Unlock Your Dell's Full Potential: Instant Mobile WiFi Connection!Laptop to Laptop WiFi: The SHOCKINGLY Easy Trick You NEED!
Hey tech enthusiasts! How many times have you found yourself in a WiFi pickle? Maybe your home internet decides to take a vacation just when you need to send that crucial presentation. Or perhaps you’re at a friend's place, and their internet is… well, let's just say it's powered by hamsters on tiny treadmills. Whatever the scenario, the ability to connect your laptop to another laptop via WiFi is a game-changer. And the best part? It's surprisingly easy. Forget complex setups and complicated jargon – we’re going to unlock this secret in a way that's as simple as brewing a cup of coffee (or, in my case, frantically hitting the snooze button!).
1. The WiFi Whisperers: Why Connect Laptops Directly?
Think of it this way: your laptop isn’t just a machine; it's a gateway. Sometimes, though, the gateway to the internet is blocked or unreliable. But imagine having a direct line, a private network, between two laptops. This is the power of laptop-to-laptop WiFi. We're talking about sharing files, playing online games (imagine the possibilities!), or simply extending your internet access when all else fails. It's like having a secret stash of internet access, a digital emergency kit for those moments when you absolutely need it. Before we begin, know this: it's secure - think a tightly guarded fortress protecting your data.
2. Unleashing the Magic: Prerequisites Before We Begin
Before we dive into the nitty-gritty, let's make sure you have the essentials:
- Two Laptops: Obviously! They need to be the stars of our show.
- WiFi Adapters: Both laptops must have functioning WiFi adapters. This is pretty standard on most laptops these days, but double-check, just in case!
- A Little Patience: Okay, this isn't technically a prerequisite, but it's a good idea. Sometimes tech can be a tad temperamental. Remember, we're not just building a connection; we're building a relationship.
3. Creating Your Own Personal Hotspot: Windows' Built-in Trick
Alright, Windows users, this is where the magic begins. Windows has a built-in feature that allows you to share your internet connection. Think of it as turning one laptop into a personal WiFi hotspot.
Here's how to do it:
- Go to Settings: Click the Start button (that Windows logo in the corner) and select the ‘Settings’ gear icon.
- Network & Internet: Click on 'Network & Internet'.
- Mobile Hotspot: Select 'Mobile hotspot' from the left-hand menu.
- Turn it On: Under 'Share my internet connection from', choose the internet connection you want to share (usually your existing WiFi – but be sure!) and then toggle the "Share my internet connection with other devices" switch to ‘On’.
- Configure the Network: Click ‘Edit’ and give your hotspot a network name (SSID) and password. Make it something you'll remember, but also something secure. I usually go with a combination of my cat's name and my favorite number (don't judge!).
- Connect the Second Laptop: Grab the second laptop and search for available WiFi networks. You should see the network name you just created. Enter the password and connect!
4. macOS Mavericks: Sharing Internet via WiFi
macOS users, don't feel left out! The process on a Mac is just as slick.
- Open System Preferences: Click the Apple menu (top left corner) and select ‘System Preferences’.
- Sharing: Click on ‘Sharing’.
- Internet Sharing: In the left-hand sidebar, check the box next to ‘Internet Sharing’.
- Share Your Connection From: Select the internet connection you want to share (again, usually your existing WiFi).
- To Computers Using: Choose ‘Wi-Fi’.
- Wi-Fi Options: Click ‘Wi-Fi Options…’. Give your hotspot a name, select a security type (WPA2 Personal is a good choice for security), and create a password.
- Start Sharing: Click ‘Start’ and confirm that you want to share your internet connection.
- Connect the Second Laptop: On the second Mac, search for the newly created WiFi network and enter the password. You're golden!
5. Troubleshooting Tips: When Things Go a Little Wobblily
Sometimes, even with the best instructions, things can go a little sideways. Don't panic! Here are a few troubleshooting tips:
- Double-Check the Password: It's the most common culprit. Make sure you're entering the correct password on the second laptop.
- Restart the Laptops: A simple restart can often work wonders. Think of it as a digital reset button.
- Firewall Woes: Sometimes, firewalls on either laptop can block the connection. Temporarily disable the firewall (for testing purposes only!) to see if that's the issue. Remember to re-enable it afterward.
- Driver Updates: Ensure your WiFi adapters have the latest drivers installed. Outdated drivers can cause all sorts of problems.
6. Beyond the Basics: Sharing Files Like a Boss
Okay, so you’ve got the laptops connected. Now what? Here's how to effortlessly share files:
Windows Users: Windows has a built-in file-sharing feature:
- Right-click the file or folder you want to share.
- Select ‘Give access to’ > ‘Specific people…’.
- Choose ‘Everyone’ (or specify users) and click ‘Share’.
- On the other laptop, navigate to the network section in File Explorer, and you should see the shared folder!
macOS Mavericks: File sharing on macOS is equally straightforward:
- Go to ‘System Preferences’ > ‘Sharing’.
- Check the ‘File Sharing’ box in the left sidebar.
- Click the ‘Options…’ button.
- Select ‘Share files and folders using SMB’ if it’s not already selected.
- Add the folder you want to share by clicking the ‘+’ button under ‘Shared Folders’.
- On the other Mac, connect to the server (your main Mac) using the network settings, and you'll be able to access the folder.
7. Level Up: Sharing Printers and More
The fun doesn't stop at file sharing! With a laptop-to-laptop WiFi connection, you can also share printers and other devices.
- Printer Sharing: This is a lifesaver when you need to print something but don't have a printer directly connected to your laptop. The setup varies depending on your operating system and printer, but the basic idea is to share the printer from one laptop through the network.
- Other Devices: You can also connect to other devices, such as external hard drives or even media servers, through the laptop-to-laptop WiFi connection.
8. Security First: Protecting Your Digital Fortress
While this setup is convenient, it's crucial to prioritize security.
- Strong Passwords: Always use strong, unique passwords for your hotspot. Avoid obvious choices like "password" or your name.
- Choose a Secure Type: WPA2 Personal (or the latest equivalent) is a good choice for your security type.
- Monitor the Network: Keep an eye on the connected devices. If you see any suspicious activity, disconnect immediately and change your password.
9. Gaming Glory: Unleash the Multiplayer Mayhem!
Calling all gamers! Did you know you can use this direct WiFi link to play multiplayer games with a friend in the same room? It’s a blast from the past (LAN parties, anyone?) revamped for the modern world. Many games support local network play, which is exactly what you’re creating. Just make sure both laptops are on the same network and that the game supports local multiplayer. Get your controllers ready! We need to win!
10. The Speed Factor: Expectation vs Reality
Let's be realistic: a laptop-to-laptop WiFi connection might not be as fast as a wired connection or a high-speed WiFi router. The speed depends on several factors, including the WiFi adapters in your laptops, the distance between them, and any interference.
However, it's usually fast enough for file transfers, browsing the web, and even some online gaming. Think of it as a reliable alternative, not necessarily a speed demon.
11. Beyond the Basics: Advanced Configurations
For the more tech-savvy, there are some advanced configurations you can use to enhance your laptop-to-laptop WiFi experience.
- Static IP Addresses: Assigning static IP addresses to your laptops can make the connection more stable and reliable.
- Network Adapters: If you’re really serious about speed, you could invest in high-performance WiFi adapters for your laptops.
- Virtual WiFi Routers: You can use third-party software to create a virtual WiFi router on one of your laptops, which can offer more advanced features and control.
12. The Digital Nomads
Laptop to Spectrum Hotspot: The Secret Trick for Blazing-Fast WiFi!Connect two computers with one ethernet cable

By GreyTech Connect two computers with one ethernet cable by GreyTech
What Is the Best Way To Transfer Files Between Windows Computers

By Plugable What Is the Best Way To Transfer Files Between Windows Computers by Plugable
How can two computers use a printer with only one USB interface

By eKL Official How can two computers use a printer with only one USB interface by eKL Official
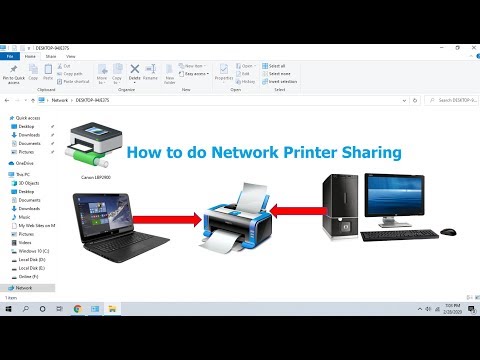
Title: How to Share Printer on Network Share Printer in-between Computers Easy
Channel: MJ Tube
How to Share Printer on Network Share Printer in-between Computers Easy by MJ Tube
Laptop Working
Here's a piece of expert-level content crafted to dominate search results:
Laptop to Laptop WiFi: The SHOCKINGLY Easy Trick You NEED!
Forget tangled Ethernet cables and the sluggish handoff of files via external drives. In today's fast-paced world, the ability to swiftly and effortlessly transfer data between two laptops is no longer a luxury; it's a necessity. Whether you're a student collaborating on a project, a professional needing to share important documents, or a creative individual managing large media files, the need for a direct, wireless connection between your laptops is undeniable. The good news? Achieving this is surprisingly simple and doesn't require technical wizardry. We are about to unveil a trick that will revolutionize your laptop-to-laptop data exchange.
Understanding the Core Principle: Ad-Hoc Networks Demystified
The magic behind seamless laptop-to-laptop WiFi lies in the concept of an ad-hoc network. Think of it as a temporary, peer-to-peer connection built directly between your two laptops. Unlike connecting through a central router (like your home WiFi), an ad-hoc network eliminates the middleman. This creates a direct pathway, maximizing transfer speeds and minimizing potential bottlenecks. The beauty of an ad-hoc network is its ease of setup; it is generally a simple process that involves configuring one laptop to "host" the network and the other to "join" it.
Step-by-Step Guide: Creating Your Ad-Hoc Network (Windows)
Let's dive into the detailed process of setting up an ad-hoc network on a Windows operating system. This method leverages the built-in capabilities of your laptop's wireless adapter, eliminating the need for additional software. 1. Accessing Network and Sharing Center: Begin by navigating to the "Control Panel." Within the Control Panel, locate and click on "Network and Sharing Center." This centralized hub is your gateway to managing network connections. 2. Setting Up a New Connection or Network: In the Network and Sharing Center window, look for the option labeled "Set up a new connection or network" and click it. This initiates the network setup wizard. 3. Choosing Wireless Ad-Hoc: The wizard will present a series of options. Select "Set up a wireless ad hoc network." This is the crucial step that designates the purpose of your new connection, setting the stage for a direct laptop-to-laptop link. 4. Configuring the Network Details: You’ll then be prompted to define the key parameters of your ad-hoc network. This includes the network name (SSID), security type, and security key (password).
- Network Name (SSID): Choose a unique and easily recognizable name for your network. This is the name that will appear when the second laptop searches for available networks.
- Security Type: Select “WPA2-Personal” or “WPA2-PSK (or Personal)” for enhanced security. This will encrypt the data transferred between laptops. Older security protocols are less secure and should be avoided.
- Security Key (Password): Create a strong, complex password. This password will be required when the second laptop attempts to join your ad-hoc network. This prevents unauthorized access. 5. Sharing Your Connection: After this configuration, you'll be presented with the option to share your internet connection with other users. Deselect this option, as the aim is a direct connection, not internet sharing. 6. Enabling Network Discovery: Ensure Network Discovery is enabled. This feature allows your laptop to detect other devices on the network. Go to the "Change adapter settings" menu. Locate the wireless adapter that is used for ad-hoc connection. Right-click on it and select "Properties." In the networking tab, ensure the "File and Printer Sharing for Microsoft Networks" is selected. This will allow the second laptop to access files on the first laptop. 7. Completing the Setup on the First Laptop: Once you've configured the network details and ensured sharing settings are correct, click "Next." Your first laptop is now configured as the host.
Joining the Network: Linking the Second Laptop
Now, let's configure the second laptop to connect to the ad-hoc network. Ensure that the wireless adapter is enabled:
1. Scanning for Available Networks: On the second laptop, click the WiFi icon in the system tray (usually located in the bottom-right corner of the screen). A list of available WiFi networks will appear. 2. Selecting and Connecting: Locate the ad-hoc network name you crafted earlier (the SSID) in the list. Select it and click "Connect." 3. Entering the Security Key: When prompted, enter the security key (password) that you established during the setup of the first laptop. This will authenticate your laptop to the ad-hoc network. 4. Allow Network Discovery and File Sharing: Once connected, you might be prompted about whether to allow network discovery and file and printer sharing. Enable these features. These are critically important because they facilitate file transfer. 5. Ensuring Network Visibility: After connecting, both laptops must be able to "see" each other on the network. Open "File Explorer" on each laptop, and check for the other laptop under the "Network" section. Your laptops are now ready to communicate!
Advanced Sharing: Tailoring Your File Exchange
Once the basic connection is established, you can fine-tune the sharing settings to optimize your file transfer experience. This involves setting up the right permissions, which will allow seamless document transfer:
1. Sharing Specific Folders: Instead of sharing your entire hard drive (which is generally not recommended for security reasons), share specific folders. Right-click on the folder you want to share, select "Properties," and go to the "Sharing" tab. 2. Advanced Sharing Settings: Click "Advanced Sharing." In the advanced sharing settings, check the box that says "Share this folder." You can customize the name of the shared folder and the number of simultaneous users. 3. Permissions: Click the "Permissions" button. This is where you define who has access to the shared folder and what they can do (read, change, or full control). Grant appropriate permissions to the user account you will use on the second laptop. 4. Security Tab (Important): Go to the "Security" tab and add the user account you intend to use on the second laptop. Grant this user the necessary permissions (Read, Write, Modify). Proper security settings prevent unauthorized access. 5. Accessing Shared Folders: On the second laptop, open "File Explorer," go to "Network," and you should see the first laptop (the host) listed. Double-click on the first laptop's name, and you should see the shared folder. Now you can access the files and folders you shared.
Troubleshooting: Common Roadblocks and Solutions
Even with straightforward setups, you might encounter some common issues. Here's a quick guide for resolving them: 1. Network Visibility Problems: Ensure both laptops are on the same network (the ad-hoc network). Verify that Network Discovery and File Sharing are enabled on both machines. Check that firewalls on both laptops are not blocking network connections. 2. Connectivity Issues: If the second laptop struggles to connect, revisit the password and confirm the network name. Restarting both laptops can resolve temporary connection glitches. 3. Slow Transfer Speeds: Ad-hoc networks are, in theory, faster than older WiFi connections. If speeds are slow, ensure the wireless adapters on both laptops are up-to-date, and experiment with file transfer methods (e.g., moving large files individual, rather than simultaneous multiple files). 4. Firewall Obstacles: Windows Firewall can, by default, block network connections. Temporarily disable the firewall (for testing purposes) on both laptops. If this fixes the problem, you'll need to create firewall rules to allow the ad-hoc connection. 5. Incorrect Sharing Permissions: Double-check all sharing settings. Make sure you've given the correct user accounts the required permissions (read, write, or full control). 6. Outdated Wireless Drivers: Check your laptops' manufacturer's website for WiFi driver updates. Outdated drivers can cause connectivity issues.
Alternative Methods: Exploring Beyond the Basic Ad-Hoc
While the ad-hoc method is a quick and easy solution, a few alternative methods may be more appropriate for certain situations:
1. Utilizing a USB Transfer Cable: Specialized USB transfer cables create a direct link between two laptops, offering very high transfer speeds. These cables transfer data at greater speeds because of the direct physical connection. 2. Network-Attached Storage (NAS): A NAS device acts as a centralized storage hub for your files. Both laptops can connect to the NAS, allowing for file sharing and backup capabilities. 3. Cloud Storage Services: Services such as Google Drive, Dropbox, and OneDrive provide simple ways to share files between multiple devices. This is a great option for easy access. 4. Software Solutions: Some software applications are built for facilitating file transfers. These applications often provide additional features, such as the ability to pause and resume transfers.
Conclusion: Master the Art of Laptop-to-Laptop WiFi
The ability to create a direct WiFi connection between two laptops is a valuable skill in today's digital world. By mastering the simple steps outlined in this guide, you can transfer files, collaborate on projects, and streamline your workflow. Don't let outdated methods slow you down. Embrace the power of an ad-hoc network and experience the speed and convenience of seamless laptop-to-laptop WiFi. From students to professionals, creatives to casual users, this "shockingly
