how to make my laptop wifi hotspot windows 8.1

Title: Turn your Windows 8 Laptop into Wifi Hotspot
Channel: Tricks That Make you Smart
Turn your Windows 8 Laptop into Wifi Hotspot by Tricks That Make you Smart
Turn Your Windows 8.1 Laptop into a WiFi Hotspot: The SHOCKINGLY Easy Trick!
Unleash Wi-Fi Freedom: Transform Your Windows 8.1 Laptop into a Hotspot!
Ever wished you could share your laptop's internet connection with other devices? Perhaps you are tired of paying for extra data plans. Well, you are in the right spot. It’s easier than you think. And, honestly? It is a game-changer. So, get ready to learn a very cool trick!
The Secret Weapon: Your Windows 8.1 Laptop
Your trusty Windows 8.1 machine is a hidden powerhouse. Did you know it has the capability to create its own Wi-Fi hotspot? Yes, you read that right. It is ready to share its internet connection with your phone, tablet, or other laptops. It is a brilliant feature. Best of all, it is simple to set up. Therefore, prepare to be amazed.
Setting the Stage: Pre-Flight Checklist
Before we jump in, let's ensure you are prepared. First, you'll need a Windows 8.1 laptop with a working internet connection. This could be via Ethernet cable or a Wi-Fi network. Secondly, you must have administrator privileges on your laptop. This is very important. And, finally, grab your phone or tablet. These are your test subjects.
Step-by-Step: The Hotspot Creation Process
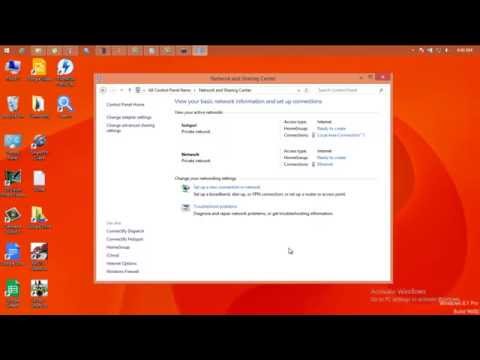
Now, let's dive into the step-by-step process. This is where the magic happens. Firstly, access your Network and Sharing Center. You can find this in the Control Panel. Once there, look for the option "Set up a new connection or network." Click on it. Secondly, select "Set up a wireless ad hoc network." It is in the listing of options. Then, click ‘Next.’
Now, you will see the option to create a hotspot. You will need to setup a network name. Also, you will need to choose a security type. WPA2-Personal is generally a solid choice. Next, create a strong password for your new network. Make sure the password is unique. Finally, click 'Next.'
Sharing the Internet: The Crucial Step
You've created the network. However, you have to enable internet sharing to use it. Go back to the Network and Sharing Center. Click on "Change adapter settings." You will discover a list of network connections. Right-click on the connection that has the internet access. This is usually your Wi-Fi or Ethernet connection. Select ‘Properties.’
Now, click on the “Sharing” tab. Tick the box that says, "Allow other network users to connect through this computer’s internet connection." Select the name of your newly created hotspot. Confirm by pressing “OK.” And, suddenly, you've shared your internet! It is truly amazing.
Connecting Your Devices: The Moment of Truth
Now, take your other devices. Go to their Wi-Fi settings. Look for the Wi-Fi network you just created. Enter the password you set earlier. And there you have it! Your devices should now connect to the internet. Remember to check the connection.
Troubleshooting: Smooth Sailing Ahead
Sometimes things don't go perfectly the first time. Don’t worry! These are common issues. For example, you cannot find the network? Make sure your Wi-Fi is turned on. Also, check your Windows 8.1 laptop for driver updates. Is your internet slow? Consider the distance between your devices and your laptop. Also, consider the internet traffic.
Benefits Beyond Belief: Why This Matters
This simple trick opens up a world of possibilities. Perhaps you are traveling. You can share your laptop's internet to your other devices. Furthermore, it is a lifesaver for guests. Also, it works with devices that don't have their own internet access. It is convenient. And, it saves money.
Final Thoughts: Empowering Your Connectivity
So, there you have it! You have unlocked a powerful feature within your Windows 8.1 laptop. You can now share your internet connection and increase your overall connectivity. Go forth and embrace the freedom! You are now a Wi-Fi hotspot master. This is a truly remarkable capability. Enjoy your newfound freedom! Now, go share the wealth!
Xfinity Wi-Fi Nightmare? Laptop Refuses to Connect! (Solved!)Turn Your Windows 8.1 Laptop into a WiFi Hotspot: The SHOCKINGLY Easy Trick!
Hey guys, are you tired of scrambling for a Wi-Fi connection, especially when you're in a pinch? We've all been there, right? Stuck in a hotel with terrible internet, at a friend's place with a sketchy connection, or just needing to share your precious data with a friend whose phone is on its last bar. Well, what if I told you that your trusty Windows 8.1 laptop could become your personal Wi-Fi hotspot, saving the day (and your sanity) in a matter of minutes? And the best part? It's shockingly easy! Buckle up, buttercups, because we're about to dive in.
1. The Pain of Data Scarcity: Why You Need This Trick
Let's be honest, Wi-Fi access isn’t always a given. Imagine you're on a road trip, streaming your favorite tunes, and suddenly, BAM! You're out of data. Or perhaps you're working remotely, tethered to a coffee shop's spotty signal. That frustration? We all know it. That's why this simple trick to turn your Windows 8.1 laptop into a hotspot is a game-changer. It’s like having a portable Wi-Fi router, ready to deploy whenever and wherever you need it.
2. Unveiling the Secret Weapon: Introducing the Hosted Network Feature
Windows 8.1 actually has a hidden weapon: the "Hosted Network" feature. Think of it as a built-in Wi-Fi router, cleverly disguised within your laptop. Forget complicated setups or expensive hardware. We're talking about a simple command-line entry that unlocks the magic. It's like finding a secret compartment in your laptop, brimming with potential.
3. Before We Begin: What You'll Need (Spoiler Alert: Not Much!)
Before we get our hands dirty, let’s make sure we have the essentials. Thankfully, it's a short list:
- A Windows 8.1 Laptop: Pretty self-explanatory, right?
- An Active Internet Connection: This could be from your Ethernet cable, a mobile broadband connection (through a USB dongle, for instance), or a pre-existing Wi-Fi connection.
- A Few Minutes of Your Time: This is literally a five-minute setup. Seriously!
4. Step-by-Step: The Foolproof Guide to Hotspot Nirvana
Alright, here's the moment you've been waiting for. Prepare to be amazed. Follow these steps meticulously, and you'll be sharing your internet connection in no time. Think of it as a recipe, and you're the culinary artist (or the tech wizard!).
Fire Up That Command Prompt: Click the Windows key, type “cmd,” and right-click on “Command Prompt.” Choose “Run as administrator.” We need those admin powers! It’s like you are the captain and Command Prompt is your loyal ship.
Unleash the Magic Command: In the Command Prompt window, type the following command and hit Enter:
netsh wlan set hostednetwork mode=allow ssid=YourHotspotName key=YourPassword- Replace
YourHotspotNamewith the name you want to give your hotspot (e.g., "MyAwesomeHotspot"). - Replace
YourPasswordwith a secure password (at least 8 characters) to protect your hotspot. Important: Make it strong! This guards your bandwidth like Fort Knox.
- Replace
Activate the Hosted Network: Now, type the following command and hit Enter:
netsh wlan start hostednetworkThis is like flipping the switch and turning on the lights.Share Your Internet Connection: This step is crucial. Open Network Connections (search for it in the Windows search bar). Locate the internet connection you're currently using (e.g., your Ethernet or Wi-Fi connection). Right-click on it, select "Properties," and go to the "Sharing" tab. Tick the box that says "Allow other network users to connect through the computer's Internet connection." Then, under "Home networking connection," select the name of your hosted network (the one you just created). Click "OK."
Connect Your Devices: Grab your phone, tablet, or other devices, scan for Wi-Fi networks, and connect to your newly created hotspot using the password you set. Viola! You're connected! It's like magic, isn't it?
5. A Few Troubleshooting Twists and Turns (Don't Panic!)
Tech glitches happen. Don't let them derail you. Here are a few common issues and quick fixes:
- "The Hosted Network Could Not Be Started": Restart your laptop. Sometimes, a simple reboot does the trick. Also, ensure your Wi-Fi adapter is enabled.
- "Can't Connect to the Internet": Double-check that you’ve enabled Internet connection sharing in the "Sharing" tab in Network Connections (step 4). Also check that your other devices are entering the password correctly.
- Slow Speeds: This could be because of the speed of your original internet connection. The more devices connected, the slower the speed for all, so consider how many you want to share with.
6. Customizing Your Hotspot: Beyond the Basics
Want to get fancy? You can tweak your hotspot settings. For instance, you can:
- Change your hotspot name and password by running the
netsh wlan set hostednetwork ssid=NewHotspotName key=NewPasswordcommand. - Stop your hotspot using
netsh wlan stop hostednetwork. - View your hotspot's status using
netsh wlan show hostednetwork.
7. The Power of Flexibility: When This Trick Shines
Think about the scenarios where this is a lifesaver. Imagine you're in a waiting room, and the free Wi-Fi is abysmal. Or you're stuck on a train with no internet and need to complete an urgent task. Or maybe you are just trying to help a friend. Creating a personal hotspot gives you control and puts you firmly in the driver's seat. We will all face these scenarios, at some point.
8. Security First: Protecting Your Digital Fortress
While this method is incredibly easy, don't skimp on security. Always use a strong, unique password for your hotspot. Avoid public hotspots whenever possible, as they’re like open invitations to digital thieves. Remember, your online security is a serious matter.
9. Data Usage: Keeping an Eye on the Meter
Be mindful of your data allowance. Streaming videos or downloading large files on your hotspot can quickly eat through your monthly data. Keep an eye on your data usage to avoid any nasty surprises on your bill. It’s like being careful with your grocery budget - you don’t want to overspend!
10. Battling Battery Drain: Conserving Your Laptop’s Energy
Creating a hotspot can drain your laptop's battery faster than usual. When using your hotspot, consider plugging in your laptop or adjusting your power settings to optimize battery life. It's like pacing yourself during a marathon – you want to conserve your energy for the long haul.
11. The Mobile Broadband Advantage: Your Laptop, Your Router
Have a laptop with a mobile broadband connection (like a 4G or 5G dongle)? This trick is pure gold! You can create a hotspot directly from your mobile broadband connection, giving you Wi-Fi on the go. It’s like having a personal Wi-Fi router, wherever you are.
12. Compared to Dedicated Routers: The Pros and Cons
Is a dedicated router better? For constant, high-demand Wi-Fi, yes. But for occasional use, this method is a cost-effective and convenient solution. Think of it like this: A dedicated router is your house, while your laptop's hotspot is your mobile office.
13. Beyond Windows 8.1: The Broader Hotspot Landscape
This method works on other Windows versions too, although the steps might vary slightly. Exploring the built-in features of newer Windows versions, such as Windows 10 and 11, will enable you to discover a lot of the same functionality.
14. Ethical Wi-Fi Sharing: Being a Good Digital Citizen
Always respect the terms of service of the internet connection you’re sharing, especially if it’s not your own. Don't engage in any illegal activities. Think of it this way: Sharing Wi-Fi is like sharing food – sharing a little makes everyone happy, but stealing isn’t cool.
15. The Future of Connectivity: Where Hotspots Are Headed
As technology rapidly evolves, we can expect even more seamless and accessible Wi-Fi solutions. The ability to turn your laptop into a hotspot is a testament to the power of readily available features. Be prepared for even greater flexibility and convenience in the years to come.
The Final Thoughts: Your Tech Superpower Awaits!
There you have it! You've got the power to turn your Windows 8.1 laptop into a Wi-Fi hotspot. This trick is simple, effective, and will save you from countless Wi-Fi woes. So go forth, connect, and share the internet with the world (or at least your friends and family). It
**Windows 8.1 WiFi Password Change: The SHOCKINGLY Easy Trick!**Make a Wi fi Hotspot Using your Windows 8 Laptop

By Syed Shah Zahurullah Hussaini Make a Wi fi Hotspot Using your Windows 8 Laptop by Syed Shah Zahurullah Hussaini
Turn Windows 8 Laptop into WiFi HotSpot How To

By TechEmpty Turn Windows 8 Laptop into WiFi HotSpot How To by TechEmpty
Create WiFi Hotspot in windows 8.1, 8, 7 LaptopPC
By ANDREW CRUZ Create WiFi Hotspot in windows 8.1, 8, 7 LaptopPC by ANDREW CRUZ

Title: How to Create WiFi Hotspot in Windows 8.1
Channel: TechBuzz
How to Create WiFi Hotspot in Windows 8.1 by TechBuzz
Change Wifi Settings
Turn Your Windows 8.1 Laptop into a WiFi Hotspot: The Surprisingly Simple Method!
In today's hyper-connected world, the ability to share your internet connection is almost as crucial as having the internet itself. Whether you're on the road, in a hotel, or simply need to extend your network coverage at home, turning your Windows 8.1 laptop into a WiFi hotspot provides a convenient and accessible solution. Forget complicated setups and technical jargon; we'll guide you through a user-friendly process that transforms your laptop into a personal wireless access point in minutes. Prepare to be amazed by how effortlessly you can create your own mobile WiFi hub.
Understanding the Fundamentals: Why Create a WiFi Hotspot?
Before we dive into the "how," let's briefly explore the "why." Creating a WiFi hotspot from your Windows 8.1 laptop offers several advantages:
- Connectivity on the Go: Ensure your other devices – smartphones, tablets, and other laptops – stay connected while you travel, eliminating the need for multiple data plans or unreliable public WiFi.
- Share Your Existing Connection: Distribute the internet connection from your laptop's Ethernet port, a mobile broadband adapter, or another WiFi network. This is especially useful in areas with limited access to traditional wireless routers.
- Extend Network Coverage: In larger homes or offices, a laptop-based hotspot can effectively extend the range of your existing wireless network, eliminating dead zones and ensuring consistent connectivity.
- Eliminate the Need for Dedicated Hardware: Save money and space by eliminating the need to purchase a dedicated wireless router, especially if your need is occasional or temporary.
- Enhanced Security and Control: By controlling the devices connected to your hotspot, you can boost your network's security and monitor data usage.
Step-by-Step Guide: Creating Your Windows 8.1 WiFi Hotspot
The process of setting up a WiFi hotspot in Windows 8.1 is remarkably straightforward. Follow these steps, and you'll be enjoying shared internet access in no time:
Access the Command Prompt (Administrator): The gateway to controlling your network configuration is the Command Prompt. Search for "cmd" in the Windows search bar. Right-click the "Command Prompt" result and choose "Run as administrator." This is critical to ensure you have the necessary permissions to make network changes. Failing to run as administrator will likely result in errors.
Activate Hosted Network: In the Command Prompt, type the following command and then press Enter:
netsh wlan set hostednetwork mode=allow ssid="Your_Hotspot_Name" key="Your_Password"- Replace
"Your_Hotspot_Name"with the desired name of your WiFi hotspot. Choose a memorable and unique name. - Replace
"Your_Password"with a strong password (at least 8 characters). Use a combination of uppercase and lowercase letters, numbers, and symbols for enhanced security. Remember this password; it will be needed for devices to connect.
This command configures the hosted network, setting the SSID (Service Set Identifier, or network name), and the security key.
- Replace
Start the Hosted Network: Once the hosted network is configured, type the following command in the Command Prompt and press Enter:
netsh wlan start hostednetworkThis command initiates the WiFi hotspot, making it ready for other devices to connect. You should see a confirmation message indicating the hosted network has started.
Share Your Internet Connection: The final step involves sharing your internet connection.
- Open the "Network and Sharing Center." You can access this in several ways: Click the network icon in the system tray (bottom right), and select "Open Network and Sharing Center" or go to the Control Panel, then Network and Internet, then Network and Sharing Center.
- Click "Change adapter settings" in the left-hand panel.
- Identify the adapter that provides your internet connection (e.g., Ethernet, Wi-Fi adapter connected to your main network).
- Right-click the appropriate adapter, and select "Properties."
- Go to the "Sharing" tab.
- Check the box that says "Allow other network users to connect through this computer's Internet connection."
- In the "Home networking connection" drop-down menu, select the "Microsoft Hosted Network Virtual Adapter" or the name of your hotspot. If you don't see this, restart your computer.
- Click "OK."
This setting designates the connection to be shared and specifies the network to which it will be linked.
Troubleshooting Common Issues and Solutions
While the setup process is generally smooth, you might encounter some hurdles. Do not be discouraged. Here's how to address some common problems:
"The hosted network couldn't be started" error: This likely indicates a problem with the network adapter drivers or that hosted network support is disabled.
- Solution: Update your wireless adapter drivers by right-clicking on the network adapter in “Device Manager” (search for it in the Windows search bar) and selecting "Update driver". Alternatively, your wireless adapter might not support hosted networks. Double-check the specifications of your wireless adapter to ensure it supports hosted networks.
- Solution: Ensure the Wireless LAN AutoConfig service is running: Open the services app by typing 'services' in the search bar and find 'WLAN AutoConfig’. Make sure the service has a 'started' status by right-clicking and choosing ‘Start’ option and that the startup type is set to 'Automatic’.
Devices cannot connect to the hotspot: Verify the password that you provided during the setup. Also, ensure that the hotspot is running by running the
netsh wlan show hostednetworkcommand in the Command Prompt, and checking its status.- Solution: Double-check that the correct security type (usually WPA2-Personal) is selected during the connection attempt on the device trying to connect.
- Solution: Ensure there are no firewalls or security software blocking the connection. Temporarily disable the firewall on your Windows 8.1 laptop if it’s still not connecting to test it. Then, if it works, ensure that the firewall settings enable the connection.
- Solution: Restart your laptop and the device trying to connect. Sometimes, a simple restart can resolve connectivity issues.
Slow internet speed on connected devices: This can happen for several reasons:
- Solution: Place your laptop in a central location, and minimize obstructions such as walls or metal objects.
- Solution: Limit the number of connected devices. The more devices connected to the hotspot, the more bandwidth is consumed.
- Solution: Run a speed test on the host laptop. If the speed is already slow, it's likely an issue with your internet service provider (ISP), not the hotspot itself.
No Internet Access on Connected Devices:
- Solution: Double-check that you've successfully shared your primary internet connection via the Network and Sharing Center (as directed above). Confirm that the sharing settings are correctly configured. Restart the laptop and any devices that won’t connect to the internet.
Advanced Customization: Boosting Your Hotspot's Performance
Once your hotspot is up and running, you can customize it for optimal performance and user experience:
- Changing the Hotspot Name and Password: To change these settings, you'll need to stop the hosted network first by using the command
netsh wlan stop hostednetworkin the Command Prompt. Then, utilize thenetsh wlan set hostednetwork mode=allow ssid="Your_New_Hotspot_Name" key="Your_New_Password"command again, replacing the placeholder information as needed. Finally, restart the hosted network with the commandnetsh wlan start hostednetwork. - Monitoring Connections: You can determine the number of devices that are connected to your hotspot by using the command
netsh wlan show hostednetworkin the Command Prompt. The output will provide details on the clients. - Understanding Bandwidth Limitations: Be mindful of the bandwidth limitations of your primary internet connection. If you have slow internet, the hotspot you set up with your Windows 8.1 laptop will likely have the same bandwidth limitations. Sharing a faster connection ensures a better experience for all connected devices.
- Security Considerations: Always use a strong password to safeguard your network. Regularly monitor the connected devices to ensure there are no unauthorized users. Consider changing your password periodically to enhance security. Also, be aware of the potential risks when using public WiFi.
Beyond the Basics: Additional Tips for Optimal Hotspot Usage
Here are some additional tips to get the most out of your Windows 8.1 laptop hotspot:
- Power Management: Running a hotspot can drain your laptop's battery quickly. When possible, keep your laptop plugged in. Configure your power settings to optimize performance for your hotspot; adjust the power plan settings to keep your Wi-Fi adapter consistently active to avoid interruptions.
- Network Adapter Selection: If your laptop has multiple network adapters (Ethernet and Wi-Fi), ensure you select the correct adapter for sharing your internet connection. This is the one that is receiving internet access from your ISP.
- Software Interference: Certain software applications might interfere with hotspot functionality. Be mindful of applications that have a strong network component, such as VPNs or other network firewall programs. Disable the VPN temporarily to see if it restores hotspot functionality.
- Wireless Interference: Other wireless networks in the immediate area can
