how to use a laptop as a wifi extenderrt

Title: How to make any Windows computer or laptop as WiFi Repeater or WiFi Extender
Channel: UniqueTutorials
How to make any Windows computer or laptop as WiFi Repeater or WiFi Extender by UniqueTutorials
Laptop Wi-Fi Extender: The SHOCKINGLY Easy Trick You NEED to Know!
Boost Your Wi-Fi: The Undeniably Simple Laptop Trick You're Missing!
Ever felt your Wi-Fi signal vanish into thin air just when it mattered most? That irritating buffering wheel, the frustrating silence during a video call – we have all been there. You might be blaming your internet provider or even considering a new router. But before you spend any money, there's a surprisingly simple trick hidden in plain sight, literally on your laptop. Believe it or not, your laptop can become your own personal Wi-Fi extender. Sounds unbelievable, doesn't it? Let's delve in.
Unveiling the Secret Weapon: Laptop's Wi-Fi Extender Mode
Most modern laptops possess the capability to share their Wi-Fi connection. Therefore, you can transform your portable machine into a Wi-Fi hotspot. It's often overlooked yet incredibly effective. This is especially useful in areas with weak Wi-Fi coverage. For instance, hotels, coffee shops, or even certain areas of your home. So, instead of suffering through a sluggish connection, why not take control? After all, you've already got the hardware.
How to Turn Your Laptop Into a Wi-Fi Booster: A Step-by-Step Guide
Now, getting started is actually quite straightforward. First, you need a laptop that already possesses an active Wi-Fi connection. Then, depending on your operating system the process varies, but it's typically not complex.
- For Windows Users: Navigate to your Network and Sharing Center. You can usually find this through your Control Panel. Afterwards, select "Change adapter settings." Then, choose the Wi-Fi adapter you’re using. Right-click on it and select "Properties." Next, click on the "Sharing" tab. Check the box that says "Allow other network users to connect through this computer's Internet connection." Finally, select the network you want to share from the dropdown menu.
- For Mac Users: Check your System Preferences. Then, click on "Sharing." In the left panel, choose "Internet Sharing.” Select "Wi-Fi" from the "Share your connection from" dropdown. Then, in the same window, click “Wi-Fi Options.” You will then be prompted to create a network name and password to secure your new hotspot. After that, check the box next to "Internet Sharing," and your Mac is now a Wi-Fi extender.
These are basic outlines. So, consult your operating system's specific instructions for more detailed guidance. But trust me, it's usually a matter of a few clicks.
Enhance Your Signal Strength: Strategic Placement and Optimization
Simply turning on the Wi-Fi extender mode isn’t always enough. Indeed, you need to consider where you position your laptop for optimal results. Placing it in a central location, where it can receive a strong Wi-Fi signal, works best. Also, be aware of potential obstructions. Walls and metal objects might interfere with the signal. Therefore, experiment with different locations to find the sweet spot.
Furthermore, to maximize performance, consider tweaking some settings. For instance, ensure your laptop’s Wi-Fi adapter drivers are up to date. That way, you can ensure peak performance from your Wi-Fi card.
Troubleshooting Common Wi-Fi Extender Issues
Sometimes, things don’t go as smoothly as planned. For example, the connection may be slow, or the hotspot may not appear. Frequently, simple fixes resolve these problems.
- Slow Speeds: Over time, several devices may be connected to your new hotspot, decreasing its speed. You should consider limiting the number of devices connected. Furthermore, make sure your laptop is receiving a strong, stable Wi-Fi signal.
- Hotspot Not Appearing: Thus, double-check that you correctly enabled the hotspot feature. Then, make sure that the network name and password are correct on the connecting device.
- Connection Drops: It is essential to ensure your laptop’s power settings are not too aggressive. The power-saving mode could disconnect the Wi-Fi when you least expect it.
Beyond the Basics: Advanced Wi-Fi Extension Techniques
If you're feeling adventurous, there are more advanced techniques, too. For instance, you could explore using third-party software designed to enhance Wi-Fi sharing capabilities. Similarly, you could even create a more permanent Wi-Fi extender setup. However, these methods require some technical knowledge and may be less straightforward.
The Takeaway: Embracing the Power of Your Laptop
In conclusion, you have a powerful tool at your disposal. Your laptop is far more than just a device for work or entertainment. It can be your personal Wi-Fi extender. Instead of suffering through a weak signal, you can readily boost your Wi-Fi range and enjoy a smoother internet experience. Therefore, give this deceptively simple trick a try. You'll be amazed at the difference it makes. Don't wait; start enjoying better Wi-Fi today.
Unlock Your Laptop's WiFi Secrets: Find That Password NOW!Laptop Wi-Fi Extender: The SHOCKINGLY Easy Trick You NEED to Know!
Hey there, fellow Wi-Fi warriors! Let's be honest, we've all been there. That frustrating moment when your laptop's Wi-Fi signal decides to stage a disappearing act, leaving you staring blankly at your screen, cursing the digital gods. I've lost count of the times I've paced around my house like a caged lion, trying to find a sweet spot where the connection actually works. We rely on our laptops for everything – work, streaming, staying connected with loved ones. And when the Wi-Fi fails us, it’s like a crucial part of our lives gets switched off! But guess what? I've got a secret weapon, a ridiculously easy trick, that's been a game-changer for me. And trust me, once you know it, you'll wonder how you ever lived without it.
1. The Wi-Fi Woes: Recognizing the Struggle
Let's face it, weak Wi-Fi is a modern-day torment. It's like trying to sip water through a clogged straw. You’re trying to get something flowing, but it's slow, frustrating, and ultimately, ineffective. Those buffering circles, those dropped Zoom calls… they’re the bane of our existence. Walls, distance, even the materials your house is made of can all play havoc with your signal strength. You might blame your internet provider, your router, even the weather! But the truth is, often, the solution is simpler than you think.
2. Decoding the Secret: What Actually Extends Your Wi-Fi?
Before we get to the "secret weapon," let's clear up a common misconception. We're not talking about magic here (though, sometimes it feels like it!). We're talking about understanding the basics of Wi-Fi and how it works. Think of your Wi-Fi signal as a wave, radiating outwards from your router. The further away you get, and the more obstacles it encounters, the weaker that wave becomes. A Wi-Fi extender is a device that repeats that wave, boosting the signal and extending its reach. It’s like having a relay runner in a race, constantly pushing the signal further.
3. Beyond the Router: Why a Laptop Isn't Always the Answer
Now, you might be thinking, "Can't I just use my laptop as a Wi-Fi extender?". Sure, in theory, some laptops can be configured to act as a hotspot and rebroadcast the Wi-Fi signal. However, using your laptop this way is like asking a marathon runner to also be an Olympic sprinter: it's not designed for that purpose! It can be clunky, drain your battery like crazy, and the performance usually suffers. So, while it's technically possible, it's rarely the best solution.
4. Introducing the SHOCKINGLY Easy Trick! (Brace Yourself!)
Okay, drumroll please… the secret? The simplest and most effective solution isn't necessarily a complicated gadget or some tech wizardry. It’s often about positioning! And the "trick" isn't a trick, but rather a clever, strategic approach.
5. The Art of Strategic Placement: Finding the Sweet Spot
The key to maximizing your Wi-Fi reach is understanding the optimal placement for both your router AND your extender. This is where many people stumble. They just place their router somewhere convenient, and the extender wherever the signal currently disappears.
- Router Placement: Think central location! Put your router in a central area of your home, ideally elevated (on a shelf or desk). Avoid walls, metal objects, and electronics that can interfere with the signal. Think of your router as the sun; you want to give its rays the best possible chance to reach everywhere.
- Extender Placement: The extender should be placed between your router and the area where you need the strongest Wi-Fi signal. It needs a decent signal from the router to repeat that signal effectively. Think of your extender as a friendly companion, picking up and amplifying the signal when it starts to get weak.
6. Evaluating Signal Strength: Your Wi-Fi Detective Work
Before you start moving things around, you need to know where the weak spots are. Thankfully, there are easy-to-use tools to help you with this.
- Built-in Wi-Fi Analyzers: Most laptops have built-in Wi-Fi analyzers that show the signal strength of available networks. Look for bars or numerical values that indicate signal quality.
- Free Apps: Several free smartphone apps (like Wi-Fi Analyzer) can map your Wi-Fi coverage. They're like a Wi-Fi Geiger counter, helping you identify dead zones.
7. Choosing the Right Wi-Fi Extender: A Few Friendly Tips
Okay, so you've decided you need a Wi-Fi extender. Choosing the right one can feel a bit overwhelming, but here's a simple guide:
- Compatibility: Ensure it's compatible with your existing router's Wi-Fi standards (802.11ac or Wi-Fi 6 are the most common).
- Speed: Look for a device that supports the speed your internet plan provides to avoid bottlenecks.
- Ease of Setup: Opt for an extender with a simple setup process (many offer one-button setup).
- Coverage: Consider the square footage of your home and choose an extender with sufficient range.
8. Setting Up Your Extender: Step-by-Step Simplicity
The setup process varies slightly depending on the extender, but most are incredibly simple.
- Plug it in: Place the extender near your router.
- Connect to your network: Follow the instructions (often involving connecting to the extender's temporary network).
- Enter your Wi-Fi password: This allows the extender to connect to your main network.
- Position it strategically: Once connected, move it to your chosen location, between your router and the dead zone.
9. Troubleshooting Wi-Fi Woes: When Things Go Awry
Even with the best setup, things can go wrong. Don't panic! Here are some common troubleshooting tips:
- Restart everything: Router, extender, and laptop. It's the tech equivalent of "turning it off and on again."
- Check the placement: Sometimes, moving the extender a few feet can make a world of difference.
- Interference: Ensure nothing is blocking the signal (e.g., thick walls, metal objects).
- Update the firmware: Keep your extender's software up to date.
10. Amplifying Your Signal: The Power of Dual Band Extenders
If your router supports it, consider a dual-band extender. These devices broadcast on both the 2.4 GHz and 5 GHz bands, providing more options and potentially less congestion. Think of it as having two lanes on a highway; more capacity means smoother traffic flow.
11. The Benefits of Extended Wi-Fi: Freedom and Connectivity
Once you've got a strong Wi-Fi signal throughout your home, the benefits are immense.
- Seamless Streaming: No more buffering! Enjoy smooth, uninterrupted movie nights.
- Reliable Video Calls: Stay connected with friends, family, and colleagues without dropped calls.
- Enhanced Gaming: Lower latency (reduced lag) for a better gaming experience!
- Complete Coverage: Surf the web, work online, and connect all your devices in any room.
12. Beyond the Basics: Exploring Advanced Extender Features
Some extenders come with advanced features, like:
- Mesh Wi-Fi: A more seamless and sophisticated Wi-Fi system, where multiple devices work together to create a single, unified network.
- Ethernet Ports: Allow you to connect devices directly via Ethernet cable for even faster, more stable connections (ideal for gaming consoles or smart TVs).
- Guest Networks: Create a separate network for guests, keeping your primary network secure.
13. Wi-Fi Extender vs. Wi-Fi Mesh: Understanding the Differences
While both are designed to extend your Wi-Fi coverage, there are key differences. Extenders repeat the signal, which can sometimes lead to a slight reduction in speed. Mesh Wi-Fi systems create a more sophisticated and seamless network, but they are also typically more expensive. Think of it like this: an extender is a helpful assistant, while a mesh Wi-Fi system is a well-coordinated team.
14. Avoiding Common Mistakes: Wi-Fi Extender Pitfalls
- Incorrect Placement: The most common error. Place your extender strategically!
- Ignoring Interference: Move other electronics away from your router and extender.
- Using an Old Extender: Technology moves fast! Upgrade if your extender is outdated.
- Forgetting to Secure Your Network: Always use a strong password and enable encryption.
15. The Bottom Line: Embrace the Freedom of Strong Wi-Fi
We've covered a lot of ground, haven't we? From the frustration of weak Wi-Fi to the shockingly easy trick of strategic placement and selection, we've armed you with the knowledge to conquer your Wi-Fi woes. Now, go forth and enjoy the freedom and connectivity that strong Wi-Fi brings! You
Steal Your Phone's WiFi Password – Instant Laptop Access!Turn Windows 10 Laptop As WiFi Range Extender
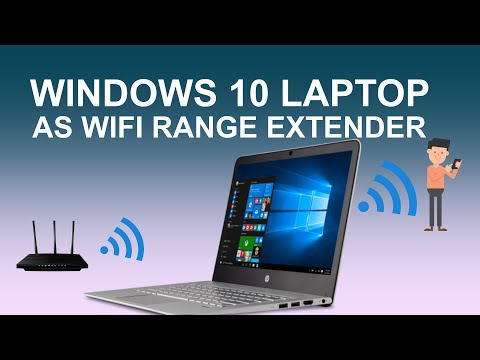
By Sandeep Singh Turn Windows 10 Laptop As WiFi Range Extender by Sandeep Singh
Use Your PC or Laptop as a Wireless Router
By Guiding Tech Use Your PC or Laptop as a Wireless Router by Guiding Tech
Use Your Computer As WiFi Router Without Any Software

By A2MTech Use Your Computer As WiFi Router Without Any Software by A2MTech

Title: Cara Menjadikan Laptop SEBAGAI PEMERLUAS WIFIWIFI EXTENDER
Channel: Achmad Tutorial
Cara Menjadikan Laptop SEBAGAI PEMERLUAS WIFIWIFI EXTENDER by Achmad Tutorial
Wifi On Laptop Phone
Laptop Wi-Fi Extender: Unlock Seamless Connectivity with This Ingenious Method
We’ve all been there: the dreaded Wi-Fi dead zone. Your laptop, your lifeline to work, entertainment, and staying connected, suddenly finds itself unable to reach the internet. The frustration can be immense, especially when you're in the middle of something important. But what if we told you there's a shockingly simple trick, a method you can implement in minutes, to transform your laptop into a powerful Wi-Fi extender? A solution that goes beyond the typical router reset and offers a truly reliable boost to your wireless signal. Let's delve into the specifics of this transformative technique. Understanding the Wi-Fi Challenge
Before we unveil the trick, let’s briefly discuss the core problem. Wi-Fi signals, while incredibly convenient, are susceptible to a range of interference. Walls, furniture, and even other electronic devices can weaken the signal, causing dropped connections and slow speeds. Distance also plays a major role. The further you are from your router, the weaker the signal becomes. This is why the concept of extending your Wi-Fi’s reach is so compelling. The goal is to bridge the gap between your laptop and the internet, ensuring a consistently strong and reliable connection.
The Revolutionary Laptop as a Wi-Fi Extender Strategy
The brilliance of the technique we’re about to explore lies in its simplicity and effectiveness. Instead of purchasing a dedicated, often expensive, Wi-Fi extender, or installing complex software, you can leverage a built-in feature of most modern laptops: the ability to create a mobile hotspot. This allows your laptop to act as a repeater, rebroadcasting the Wi-Fi signal it receives, thereby extending its reach. It's a clever workaround, and one that eliminates the need for additional hardware in many situations. Let's walk through the step-by-step instructions.
Step-by-Step Guide: Transforming Your Laptop into a Wi-Fi Extender
The exact steps may vary slightly depending on your operating system (Windows or macOS), but the core principles remain consistent. We’ll provide detailed instructions for both, ensuring you can easily implement this trick regardless of your laptop’s platform. This is where the rubber meets the road.
For Windows Users
Accessing Network Settings: Begin by navigating to your Windows settings. You can typically do this by clicking the Start button and then selecting the "Settings" icon (it looks like a gear). Alternatively, you can right-click on the Start button and choose "Settings" from the menu.
Network & Internet: Within the Settings panel, click on "Network & Internet."
Mobile Hotspot: On the left-hand side, you'll see several options. Select "Mobile hotspot."
Enable and Configure: Toggle the switch to "On" to enable your mobile hotspot. You can now configure the settings for your hotspot.
Edit/Change Settings: Click the "Edit" button to customize your hotspot. This lets you change the Network name (SSID) and password; use a memorable name, and create a strong password to ensure network security.
Select Internet Connection to Share From: Under "Share my internet connection from," select the Wi-Fi adapter used to receive the internet signal. This is usually the Wi-Fi adapter that connects your laptop to your primary router.
Connect Devices: Now, other devices, including other laptops, tablets, and smartphones, can connect to your laptop's hotspot. Locate the Wi-Fi settings on the device you wish to connect and select the network name you chose in step 5. Enter the password when prompted. For macOS Users
Open System Preferences: Click the Apple menu (top-left corner of your screen) and select "System Preferences." Alternatively, you can click the System Preferences icon in your Dock.
Sharing: Click on "Sharing."
Internet Sharing: In the left-hand sidebar, select "Internet Sharing."
Share Your Connection From: In the right-hand pane, select the internet connection you wish to share. This will typically be "Wi-Fi" if you're connected to your primary router.
Select the Appropriate Wi-Fi Adapter: Choose the adapter that is receiving the Wi-Fi signal from your router.
Using Wi-Fi as the source connection: Ensure the "Using Wi-Fi" option is selected.
Wi-Fi Options: Click the "Wi-Fi Options…" button. This is where you'll configure your hotspot name (Network Name), the Channel and the security. Choose a name that's easy to recognize and a strong password. Select WPA2 Personal for security.
Start Sharing: Check the box next to "Internet Sharing" to enable hotspot functionality. A pop-up window may appear asking you to confirm your actions. Confirm the action.
Connect Devices: Other devices can now connect to the hotspot you've created, using the Wi-Fi network name and password you set up in step 7.
Optimizing Performance for Your Laptop Wi-Fi Extender
While the basic setup is straightforward, there are a few additional tips to optimize the performance of your laptop-as-extender:
Positioning is Key: Experiment with the location of your laptop. Place it in a spot where it receives a strong Wi-Fi signal from your primary router while also being accessible to the devices you want to connect. A central location is often best.
Channel Selection (Advanced): In the Wi-Fi options (Windows and Mac), you can sometimes select a specific Wi-Fi channel. If you experience interference, try switching to a different channel. Use a Wi-Fi analyzer app (available for both Windows and macOS) to identify the least congested channels in your area.
Security Protocols: Always use WPA2 or WPA3 security for your hotspot to protect your network from unauthorized access.
Battery Considerations: Creating a mobile hotspot will consume more battery power. Plug in your laptop whenever possible to avoid running out of juice, especially if you need to extend the Wi-Fi signal for an extended period.
Monitor Connected Devices: Keep an eye on the number of devices connected to your hotspot, as each one will draw on the bandwidth. If performance lags, consider disconnecting devices you aren't actively using.
Advantages of Utilising Your Laptop as a Wi-Fi Extender
The benefits of this approach are numerous.
Cost-Effectiveness: You're using a device you already own, eliminating the need to purchase an external Wi-Fi extender.
Simplicity: The setup is quick and easy, requiring no specialized technical knowledge.
Portability: This solution is ideal for travel or temporary situations, as your laptop can act as a hotspot wherever you go.
Flexibility: You can quickly create a hotspot whenever and wherever you need one.
Situations Where This Trick Shines
This method is particularly useful in a multitude of scenarios:
Hotel Rooms: Extend the Wi-Fi signal to all your devices without the limitations of a single-device connection.
Temporary Setups: During business trips, or while working remotely in spaces with poor Wi-Fi.
Expanding Coverage in Your Home: Reach those Wi-Fi dead zones in remote corners of your house.
Sharing Internet with Guests: Easily provide internet access to visitors without sharing your primary Wi-Fi password.
Troubleshooting Common Issues
While this technique is generally reliable, you might encounter some common issues:
Slow Speeds: Ensure your laptop is receiving a strong Wi-Fi signal from your primary router. The speed of your hotspot will be limited by the signal quality it receives. Consider repositioning your laptop or moving it closer to the router.
Connection Drops: Check your Wi-Fi connection on your laptop and restart your laptop’s Wi-Fi adaptor if the issue persists.
Unable to Connect: Double-check the hotspot name and password, ensuring they are entered correctly on the connecting device. Also, check that the hotspot is enabled on your laptop.
Interference: Other devices or appliances are sometimes creating interference if the signal isn’t as strong as expected.
Beyond the Basics: Advanced Considerations
For tech-savvy users, there are some additional points to keep in mind. While your laptop won't provide the same level of performance as a dedicated, high-end extender, these advanced configurations can refine the process.
Bandwidth Management: With specific software, you could try to control incoming and outgoing bandwidth, providing a more stable Wi-Fi connection.
Dual-Band Routers: If your laptop and router support it, attempt to connect your laptop to the 5 GHz band of your router and rebroadcast a 2.4 GHz signal for wider compatibility and range (if your devices cannot see the 5 GHz band, then the 2.4 GHz band can be used for compatibility).
Guest Network: If your router has a guest network feature this should be used in order to increase security.
The Bottom Line: Unlocking Seamless Connectivity
By following the described method, you're no longer at the mercy of Wi-Fi dead zones. You've armed yourself with a simple yet powerful tool to extend your Wi-Fi range, improve your connectivity, and boost your productivity. This
