how to connect one laptop to another laptop using wifi

Title: Transfer Files Between Two Laptops over Wi-Fi
Channel: Techy Druid
Transfer Files Between Two Laptops over Wi-Fi by Techy Druid
how to connect laptop to laptop using wifi, how do i connect my laptop to someone else's wifi, how to connect laptop to another laptop wirelessly, can you connect a laptop to another laptop
Laptop to Laptop WiFi: The SHOCKINGLY Easy Trick!
Laptop to Laptop WiFi: The Surprisingly Simple Connection You Need to Know
Have you ever found yourself in a digital bind? Perhaps you're stuck needing to transfer files between two laptops, and a USB drive seems impossibly slow. Or maybe your internet connection sputtered out at the worst possible moment, leaving you stranded. Indeed, there's a surprisingly easy solution that most people overlook: directly connecting your laptops via WiFi. This method, often referred to as an "ad-hoc network," is a lifesaver. Fortunately, it's far less complicated than it sounds.
Bypassing the Bureaucracy: Why Direct WiFi is Your Best Bet
Consider the alternatives. Moving large files with a USB drive can feel like watching paint dry. Cloud storage is convenient, sure, but your upload and download speeds are dependent on your internet connection. Let's face it, sometimes the simplest solutions are the best. Consequently, creating a direct WiFi connection between your laptops cuts out the middleman. This allows for blazing-fast file transfers and eliminates the need for internet access.
Setting Up Your Digital Bridge: The Step-by-Step Guide
Now, let's get down to brass tacks. Establishing this connection is remarkably straightforward, regardless of whether you're using Windows or macOS. First, determine which device you want to serve as the "host" or the access point. From that device's perspective:
Windows Wizards Unite: First, head to your Windows settings. You should select "Network & Internet." Then, click on the "Mobile Hotspot" option. Next, toggle the "Share my internet connection with other devices" button to "On." You might have to choose your internet connection in the "Share my internet connection from" dropdown menu. Finally, click "Edit" to adjust your network name and password. Choose a suitable network name and create a secure password. After this, you're ready.
macOS Mavericks: For macOS, go to "System Preferences," then "Sharing." Then, select "Internet Sharing" from the list. In the "Share your connection from" dropdown, choose your internet connection (if you are using it). Afterward, in the "To computers using" section, select "Wi-Fi." Now, click "Wi-Fi Options…" and assign a network name and password. Tick the "Internet Sharing" box to enable the access point.
Joining the Party: Connecting the Second Laptop
Once your host laptop is ready, you can now connect your second laptop. Here’s how:
Joining the Windows Team: On the second laptop, click the WiFi icon in the system tray (usually at the bottom right of your screen). Find the network name you created on the host laptop. Enter the password when prompted and connect.
Embracing the macOS Community: Again, on the second laptop, click on the WiFi icon in the menu bar. Choose the WiFi network you set up on the host computer. Input the password, and join the network.
Sharing is Caring: Accessing Files Across Devices
So, you have connected. Great! Now, how do you actually transfer files? This is where things get even easier.
Windows File Sharing: On the host laptop, locate the folder you want to share. Right-click the folder, choose "Give access to" and then "Specific people…". Select "Everyone" from the dropdown menu and click "Add." Set the permission level to "Read/Write" so you can modify files. Then, click "Share." You can also access this shared folder by opening File Explorer on the second laptop, going to "Network," and finding your host laptop.
macOS File Sharing: On the host computer, go to "System Preferences" then "Sharing." Click the "File Sharing" option. Check the box next to "File Sharing." In the right-hand panel, click the "+" button and add the folder you wish to share. You'll need to give your user account read/write permissions. On the second laptop, open "Finder," then navigate to "Network" and select your host laptop under the "Shared" section.
Troubleshooting the Connection: Smooth Sailing Ahead
Of course, problems can arise. However, usually they're simple to fix.
- Can't See the Network? Double-check the host laptop's WiFi settings. Make sure the hotspot is enabled and the network name is correct. Ensure that both your laptops are within range of each other.
- Password Woes: Always, double-check the password you entered on the second laptop. Make sure you type it correctly!
- Firewall Frustrations: Windows and macOS firewalls sometimes block file-sharing. Temporarily disable them (for your private network) to test, or adjust the settings to allow file sharing.
Beyond Basic Transfers: Unleashing the Full Potential
Beyond simple file transfers, you can unlock other possibilities. Consider using this connection for playing multiplayer games that support LAN play. You could also use it for network printing. You can even use the host laptop's internet connection for basic browsing if your other device isn’t connected.
The Takeaway: A Surprisingly Simple Solution
In conclusion, creating a laptop-to-laptop WiFi connection is a remarkably easy trick. It is a valuable skill for anyone who works with multiple devices. It saves time, and it eliminates any frustration. So, the next time you need to transfer files or share an internet connection between two laptops, remember this surprisingly simple solution. You'll be glad you did!
HP Laptop WiFi Nightmare? This ONE Trick Fixes It!Laptop to Laptop WiFi: The SHOCKINGLY Easy Trick!
Hey tech adventurers! Ever found yourself stranded, craving that sweet internet connection, and the usual Wi-Fi isn't playing ball? Maybe you're in a remote cabin, a friend's house with a dodgy setup, or just trying to transfer files without the hassle of cables. Well, buckle up, because we're diving into a surprisingly simple solution: connecting your laptops directly via Wi-Fi. We're talking about creating your own personal, on-demand network, like conjuring a digital portal! And you know what's even better? It's far easier than wrestling with a tangled mess of Ethernet cables.
Why Bother With Laptop to Laptop WiFi Anyway?
Let's be real; in this age of ubiquitous internet, you might be thinking, "Why bother?" But trust me, knowing how to connect laptops via Wi-Fi directly is like having a secret superpower. Think about it:
- File Transfers Without Limits: Moving massive video files, entire music libraries, or colossal project folders becomes a breeze. No more agonizing over slow USB speeds or fiddling with cloud storage uploads. It's like having a digital express lane between your laptops.
- The Great Remote Desktop Rescue: Need to access files or programs on another laptop remotely? This trick lets you do it even without a typical network connection. Imagine troubleshooting your parents’ computer from miles away, all thanks to this knowledge.
- Emergency Internet Access: When the main Wi-Fi goes down (and let's face it, it always does at the worst possible moment), you can use one laptop's internet connection to share with the other. It's like having a spare, hidden internet lifeline.
- Offline Collaboration: Working on a project with a friend and want to share files and collaborate without needing to upload to the internet first? This method is perfect for seamless offline teamwork.
The Two Main Ways: Ad-Hoc and Hosted Network
We'll walk through the two primary methods, both remarkably user-friendly. Think of them like choosing your weapon in this digital duel: both get the job done, but one might suit your style better.
Method 1: The Ad-Hoc Network - Simplicity Incarnate
This old-school method is incredibly straightforward. It’s like setting up a tiny, temporary Wi-Fi hotspot directly between your two laptops. It’s perfect for quick file transfers or a fast connection when you need it.
Here’s how it works, step-by-step:
On the "Sharing" Laptop (the one with the internet, if you're sharing that):
- Open Network and Sharing Center: In Windows, search for "Network and Sharing Center" in the Start menu. On a Mac, go to System Preferences > Network.
- Create an Ad-Hoc Network (Windows):
- Click on "Set up a new connection or network."
- Choose "Set up a wireless ad-hoc (computer-to-computer) network."
- Give your network name (SSID) a catchy name, like "SecretSquirrelNetwork" or "FileTransferExpress."
- Choose a security type (WEP is simplest, but WPA2-Personal is more secure—but will require the other laptop to enter the password). Set up a password!
- Click "Next," and voilà! Your ad-hoc network is live.
- Create an Ad-Hoc Network (Mac):
- Click on the Wi-Fi symbol in the top right corner of your screen.
- Select, "Create Network.."
- Give your network name (SSID) a catchy name, like "SecretSquirrelNetwork" or "FileTransferExpress."
- Choose a security type (WEP is simplest, but WPA2-Personal is more secure—but will require the other laptop to enter the password). Set up a password!
- Click "Create", and voilà! Your ad-hoc network is live.
On the "Receiving" Laptop (the one connecting/without internet):
- Connect to the Network: Search for Wi-Fi networks as you normally would. You should see the name you gave your ad-hoc network.
- Enter the Password: If you set one, enter the correct password.
- Check for Internet Access: Sometimes, the "receiving" laptop might not automatically think it has internet. If accessing a website doesn't work, configure "sharing" laptop to share its internet connection.
- Share your Internet Connection (optional): If you want to share the internet from the sharing laptop, go to Network and Sharing Center, click Change adapter settings, right-click on your active network adapter and choose properties. Now, go to the "Sharing" tab and enable "Allow other network users to connect through this computer's internet connection." You will then see a dropdown menu to select the other network connection.
Now you can share files!
- Open File Explorer (Windows) or Finder (Mac) on the "receiving" laptop.
- Find the sending laptop on the network. It might appear under "Network" or "Shared."
- Enter the password and then "send" the files in a folder.
Method 2: The Hosted Network - The More Advanced Approach
This approach is like creating a mini-Wi-Fi hotspot from your laptop, allowing other devices to connect. It's similar to using your phone as a hotspot, but with your laptop as the source.
Setting up a Hosted Network (Windows):
Open Command Prompt as Administrator: Type "cmd" in the search bar, right-click "Command Prompt," and select "Run as administrator."
Check for Wi-Fi Card Support: Type
netsh wlan show driversand press Enter. Look for a line that says "Hosted network supported: Yes." If it says "No," you will not be able to create a hosted network.Enable the Hosted Network: Type the following commands, pressing Enter after each one:
netsh wlan set hostednetwork mode=allow ssid="YourNetworkName" key="YourPassword"(Replace"YourNetworkName"and"YourPassword"with your preferred network name and password. Keep it secure!)netsh wlan start hostednetwork
Share your Internet Connection:
- Go to Network Connections by searching "network" in the Start Menu and opening "Network Connections."
- Right-click the connection you use to access the internet (Wi-Fi or Ethernet) and select "Properties."
- Go to the "Sharing" tab and enable "Allow other network users to connect through this computer's internet connection."
- Select the hosted network you just created from the dropdown menu.
Connect the Other Laptop: Search for Wi-Fi networks on the second laptop and connect to the network you created.
Connecting on a Mac:
Unfortunately, Mac doesn't have as a simple command-line process or a user-friendly way to create a Hosted Network. However, there a couple of ways around it;
- Using Shared Internet (similar to Windows method): This is the most similar approach.
- Go to System Preferences > Sharing.
- Select “Internet Sharing.”
- Choose "Share your connection from:" (select the internet source: Wi-Fi or Ethernet).
- Select "To computers using:" (select Wi-Fi)
- Click "Wi-Fi Options." Configure your network name, security type (choose WPA2 Personal), and password.
- Check the "Internet Sharing" box to start the hotspot.
- Connect the other laptop to the Wi-Fi network you just created.
- Using Third-party software: Programs like "Virtual Router" can allow you to create a hotspot by using Mac.
Troubleshooting Tips: When Things Get a Little Hairy
Sometimes, even the simplest tricks can throw you a curveball. Here's what to do if things go sideways:
- Check Your Firewall: Your firewall might be blocking the connection. Temporarily disable it (on both laptops) as a test to see if that's the culprit. Don't forget to re-enable it afterward!
- Restart Your Laptops: The classic "turn it off and on again" often works wonders. It's like shaking the snow globe of your operating system.
- Check Wireless Adapter Drivers: Outdated or corrupted drivers can be a problem. Update them through Device Manager (Windows) or by checking for updates on macOS.
- Network Discovery: Make sure network discovery is turned on. On Windows, go to Network and Sharing Center -> Change advanced sharing settings -> Turn on network discovery.
- IP Address Conflicts: Although rare, conflicting IP addresses can cause issues. Ensure your laptops obtain IP addresses automatically (DHCP).
Making it Work: Adapting to Your Unique Situation
The beauty of this technique lies in its versatility. How you use it depends entirely on your needs:
- For File Transfers: Start transferring files immediately.
- For Emergency Internet: Share the connection.
- For Remote Access: Configure settings on both laptops to enable file sharing and remote access.
How to use a Laptop a Second Monitor
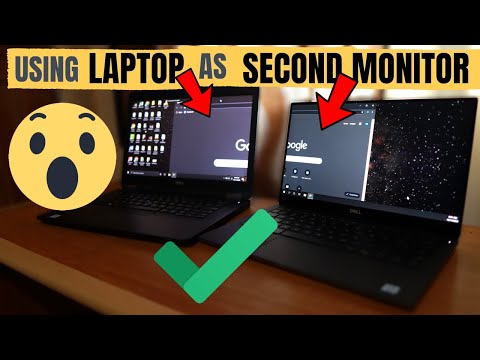
By Torogi Pro How to use a Laptop a Second Monitor by Torogi Pro
HOW TO Connect Two Computers WIRELESSLY

By Online Tech Tips HOW TO Connect Two Computers WIRELESSLY by Online Tech Tips
Windows 1110 - How to create a local network and share files between computers over the network

By ipMalik Windows 1110 - How to create a local network and share files between computers over the network by ipMalik

Title: How to Share your Laptop Screen to Another Laptop Screen Share between 2 laptops Wireless screen
Channel: Foysal Hossen
How to Share your Laptop Screen to Another Laptop Screen Share between 2 laptops Wireless screen by Foysal Hossen
Change Wifi Settings
Laptop to Laptop WiFi: The SHOCKINGLY Simple Method for Seamless Connectivity
Have you ever found yourself in a situation where you urgently needed to transfer files, share a presentation, or even collaborate on a project, but a reliable internet connection was nowhere to be found? Perhaps you were on a train, at a remote location, or simply experiencing a frustrating Wi-Fi outage. The good news is, you don't need to be tethered to a router or rely on spotty public Wi-Fi to connect two laptops. We're going to unveil a method that’s so simple, so straightforward, and so effective, it’s almost shocking. Prepare to discover the secret to direct laptop-to-laptop Wi-Fi connectivity.
Understanding the Core: Ad-Hoc Networks
The underlying technology at play is the ad-hoc network, sometimes referred to as a "computer-to-computer" network. Unlike the more familiar infrastructure network, which requires a central access point (like your home router) to manage and direct traffic, an ad-hoc network allows devices to connect directly to each other. This peer-to-peer connection creates a mini-network, enabling seamless data transfer and collaboration without the need for an intermediary. Think of it as a direct, wireless connection between two laptops, bypassing the complexities of a traditional network setup.
Setting the Stage: Hardware and Prerequisites
Before diving into the steps, let's ensure you have everything you need. The good news is, if you own two laptops manufactured within the last decade, you almost certainly have everything you need. The essential component is a Wi-Fi adapter in each laptop. Most laptops come equipped with this as standard equipment. Furthermore, ensure that both laptops have their Wi-Fi functionality enabled. Check your settings, and make sure that the Wi-Fi switch is on.
Step-by-Step Guide: Creating the Ad-Hoc Network on Windows
We'll begin with the process on Windows, as it's a common operating system. Follow these precise steps, and you'll be connected in minutes.
Accessing Network and Sharing Center: Start by navigating to your Windows Control Panel. You can often find this by searching for "Control Panel" in the Windows search bar. Once in Control Panel, look for "Network and Sharing Center" and click on it.
Setting Up a New Connection or Network: Within the Network and Sharing Center, locate the option "Set up a new connection or network." Click this link. A wizard will open, guiding you through the process.
Choosing the Right Connection Type: In the wizard, select the option "Set up a wireless ad hoc (computer-to-computer) network." Click "Next."
Network Configuration: You'll now be prompted to configure your ad-hoc network. This is where you give your network a name (SSID) and potentially set a security key. Choose a network name that you'll easily recognize. For security, it is always wise to set a password.
Sharing Options: Carefully consider your sharing settings. Decide what you want to share across the network. You can adjust file and printer sharing permissions.
Starting the Network: Once the configuration is complete, Windows will begin creating the ad-hoc network. It might take a few moments.
Connecting the Second Laptop: Searching for the Network: Take the second laptop and access its Wi-Fi settings. Look for available Wi-Fi networks. Your newly created ad-hoc network, identified by the SSID you defined, should appear in the list.
Connecting the Second Laptop: Joining the Network: Select your ad-hoc network on the second laptop. If you set a security key, you'll be prompted to enter it. Input the key, and the second laptop should now connect to the ad-hoc network.
Verification: Is the Connection Successful? After the connection, return to the first laptop. Confirm whether the second laptop has successfully connected. Check the network settings and sharing options.
Step-by-Step Guide: Creating the Ad-Hoc Network on macOS
The process on macOS is equally straightforward:
Accessing Wireless Options: Click on the Wi-Fi icon in the menu bar (usually in the top right corner of your screen). From the drop-down menu, select "Open Network Preferences."
Creating a Computer-to-Computer Network: In the Network Preferences window, click the "+" button in the bottom-left corner to add a new network connection.
Configure the Network: Select Wi-Fi from the "Interface" drop-down menu. Then, in the "Name" field, create a friendly name for the network (SSID). Choose “Computer-to-Computer” from the “Configure” drop-down menu. Optional: Set a password for enhanced security. Click "Create".
Sharing Preferences: Go to "System Preferences" (also accessible from the Apple menu) and choose "Sharing." Under "Internet Sharing," select "Share your connection from:" and choose your Wi-Fi adapter. Below that, select "Using:" and make sure "Wi-Fi" is checked. Click the "Wi-Fi Options…" button.
Configure Wi-Fi Options for Sharing (if prompted): Ensure that the network is named, and that a password is set for security. Click OK, then check the “Internet Sharing” box to begin sharing the connection, starting the service.
Connecting the Second Laptop: Search and Join: On the second macOS laptop, click on the Wi-Fi icon in the menu bar. Your ad-hoc network (identified by the previously set SSID) should be visible. Select it. Enter the password (if one was set).
Confirmation of the Connection: Final Step: Confirm successful connection. Access Finder on both laptops. You should now see the other laptop listed under "Shared," allowing you to transfer files seamlessly.
File Transfer and Collaboration: Unleashing the Power
Once connected, the possibilities are endless.
- Direct File Transfer: The primary benefit is the ability to transfer files directly between the laptops. After the connection, browse the shared folders on each laptop, and simply copy and paste or drag and drop files to transfer them. Large files, such as videos or high-resolution images, can be transferred much faster than via email or external storage.
- Shared Workspaces: For collaborative projects, you can set up shared folders where two or more people can access and work on the same documents simultaneously. This is extremely useful for team projects.
- Data Syncing: If needed, you can use dedicated synchronization software to sync important folders between both laptops. This ensures that your crucial files are up-to-date and available on both devices.
Troubleshooting Common Issues
Sometimes, the process doesn’t go as smoothly as planned. Let’s address some typical problems:
- Connection Problems: If you're having issues connecting, make sure both laptops are within a reasonable distance (ideally within 30-50 feet) and that there are no major obstructions, like thick walls, between them. Also make sure that network discoverability or file sharing is enabled on the devices.
- Security Key Issues: If you're prompted for a security key and it's not working, double-check that you've entered it correctly, including any uppercase or lowercase letters.
- Firewall: Firewalls on either laptop can sometimes block the connection. Temporarily disable the firewalls on both laptops to see if this is the problem. If it resolves the issue, you can re-enable the firewalls and configure them to allow ad-hoc network traffic.
- Driver Issues: In rare cases, outdated or corrupted Wi-Fi drivers can cause problems. Make sure the Wi-Fi adapters on both laptops have the latest drivers installed. This can typically be done through the device manager on Windows or through the software update mechanism on macOS.
Beyond the Basics: Advanced Uses
While the primary use case involves file transfer and collaboration, the ad-hoc network offers even more advanced possibilities:
- Printer Sharing: If one of the laptops is connected to a printer, you can share that printer over the ad-hoc network, enabling both laptops to print documents.
- Playing Multiplayer Games: Some older or local area network-based multiplayer games can be played over an ad-hoc network.
- Network Device Control: In specific, technical setups, you can use the ad-hoc network to control and manage network devices, such as servers, printers or other equipment.
Conclusion: Connecting With Ease
Laptop-to-laptop Wi-Fi connectivity, facilitated by ad-hoc networks, is a powerful, yet often overlooked, tool. It’s a game changer for situations where a router isn't available or when you require a simple, direct method of connecting your laptops. The process is remarkably straightforward and accessible to everyone, regardless of their level of technical expertise. Next time you find yourself in a situation requiring immediate file sharing or collaboration, remember this guide. You now possess the knowledge to instantly connect two laptops, unlocking a world of easier connectivity.
