why won't my windows 7 laptop connect to wifi

Title: Windows was unable to connect wifi windows 7 Laptop and Desktop
Channel: IT Magics
Windows was unable to connect wifi windows 7 Laptop and Desktop by IT Magics
why won't my windows 7 laptop connect to wifi, why is my windows 7 laptop not connecting to wifi, why is my windows 7 not connecting to wifi, why won't my windows 7 computer connect to wifi
Windows 7 WiFi Nightmare? This FIX Works EVERY Time!
Finally Conquer Windows 7 WiFi Woes: A Guaranteed Solution!
Remember those days wrestling your Windows 7 machine into connecting to the internet? Before we dive in, let's acknowledge it. The struggle was real. If you’re here, you’ve probably encountered the infamous Windows 7 WiFi connectivity issues. The frustration is palpable. You attempt to connect, only to be met with silence. The dreaded "limited connectivity" message pops up. Now, you're ready for a fix. Fortunately, there's a solution that works.
The Windows 7 WiFi Phantom: Understanding the Problem
The problem isn’t always obvious. It's like a phantom in the network. Sometimes, the issue lies within the drivers. Other times, it's a conflict in the settings. In certain cases, Windows 7 simply refuses to play nice with modern routers. It could be a security protocol disagreement. You might be tearing your hair out. The symptoms are consistent: unreliable connections, dropped signals, and complete WiFi dropouts. This problem plagued many users. Think of it as a digital headache.
Step 1: The Driver Detective – Unmasking the Culprit
Firstly, determine the source of the issue. Begin by checking your network adapter drivers. These drivers are essential for communicating with your router. They often become outdated. Then, right-click on "Computer" and select "Manage." You should see "Device Manager" on the left side. Click on that.
Expand the "Network adapters" section. This will list all of your network adapters. Look closely for any with a yellow exclamation mark. That indicates a driver problem. However, if a yellow exclamation mark isn't present, don't despair. Go directly to your adapter manufacturer's website. Download the latest driver for your specific network adapter model. This is extremely vital. Older drivers often lack compatibility.
After downloading, install the new driver. Reboot your computer. This action will refresh all of the settings. Moreover, test your WiFi connection again. Hopefully, this resolves your issue. If not, let's proceed.
Step 2: Unleashing the Network Troubleshooter: A Digital Diagnosis
Next, embrace the built-in network troubleshooter. Windows 7 actually has a tool for this. Often, it identifies common problems and offers solutions. Right-click on the WiFi icon in your system tray. Select "Troubleshoot problems." Windows will then run a diagnostic scan.
Follow the troubleshooter's recommendations. Be patient. Sometimes, the solution involves resetting the network adapter. The troubleshooter might prompt to reset the adapter. If it does, authorize the tool to do so. It might also suggest updating your network adapter drivers. This would lead back to step one. The troubleshooter acts as your first line of defense. Afterward, attempt to reconnect to your WiFi network.
Step 3: Wireless Adapter Power Saving – Taming the Energy Beast
Power settings can cause problems. Your wireless adapter might be overly aggressive in saving power. Go back to "Device Manager" again. Locate your network adapter. Right-click on it and select "Properties." Click the "Power Management" tab.
Uncheck the box labeled "Allow the computer to turn off this device to save power." This prevents Windows from shutting down your network adapter. Click "OK" and restart your computer. This simple tweak often makes a big difference. It ensures your adapter stays active. It also prevents intermittent disconnections.
Step 4: WEP, WPA, and WPA2: Choosing the Right Armor
Your router uses different security protocols. These protocols protect your WiFi. Windows 7 might struggle with the newest security protocols. Specifically, the new security protocols are WPA3. Your router's settings are of utmost importance. Log into your router’s configuration page. Access this by typing your router’s IP address into your web browser.
Change your security setting to WPA2-PSK. This protocol offers solid security and broad compatibility. Alternatively, your computer might not be compatible with the new security protocols. Save the settings and restart your router. Then, reconnect to your WiFi.
Step 5: The Static IP Gambit: A Tactical Adjustment
Sometimes, assigning a static IP address can resolve conflicts. Open the "Network and Sharing Center" in the Control Panel. Click on "Change adapter settings." Right-click your WiFi adapter. Select "Properties."
Click on "Internet Protocol Version 4 (TCP/IPv4)" then click "Properties." Select "Use the following IP address." Enter an IP address manually. For example, 192.168.1.100 (or something similar, but not your router’s address). Enter the subnet mask, usually 255.255.255.0, and your router's IP address as the default gateway. Set the DNS server addresses to those of your internet service provider (ISP) or Google's public DNS servers (8.8.8.8 and 8.8.4.4). Click "OK" on all windows and test your connection.
Step 6: Final Checks and Considerations: The Finishing Touches
Furthermore, double-check your firewall settings. Firewalls sometimes block network traffic. Ensure your firewall isn't blocking your network adapter. Additionally, check for physical interference. Keep your router away from microwaves. Keep it away from other electronic devices.
Consider upgrading your router. A newer router offers better compatibility. Consequently, it provides increased reliability. Finally, ensure your Windows 7 installation is up-to-date. Install all available updates. That is extremely important.
Success! Your WiFi is Back!
In conclusion, the Windows 7 WiFi problem is a common one. Nevertheless, with these steps, you can regain control. You’ve got the steps for stable connectivity. Embrace a world free from WiFi frustrations. You've conquered the digital beast. Go forth and browse with confidence. Enjoy your restored WiFi connection! You deserve it.
Acer Laptop WiFi: Emergency Fix! (No Keyboard Needed!)Windows 7 WiFi Nightmare? This FIX Works EVERY Time!
Hey everyone, it’s that familiar sinking feeling, isn't it? You're settling down for a night of binging, ready to finally catch up on that show everyone's raving about, or maybe you're about to knock out some work, and… nothing. Your Windows 7 laptop stubbornly refuses to connect to the Wi-Fi. The dreaded "Limited Connectivity" message, the agonizing spinning wheel, the sheer, unadulterated frustration. We've all been there. And honestly? Windows 7's Wi-Fi can be a real pain in the…well, you get the picture. But don’t despair! I’m here to tell you, after years wrestling with this beast, I've got a fix that consistently works. It’s not a magic bullet, but it’s pretty darn close. So, grab a coffee (or your preferred beverage), settle in, and let's banish those Wi-Fi woes for good!
Why Is My Windows 7 WiFi So Terrible? The Usual Suspects and Beyond
First things first, let’s get down to the nitty-gritty. Why does Windows 7 seem to have a personal vendetta against Wi-Fi? Well, the reasons are numerous, and often intertwined like a tangled ball of Christmas lights. Think of your Wi-Fi connection as a complex network of tiny digital roads; problems can arise at any intersection. We're talking driver issues (the computer's "translator" being out of date), network conflicts (like a crowded room), or even something as simple as a faulty setting.
- Outdated Drivers: This is the most common culprit. Your Wi-Fi adapter is like a car engine; it needs the right "fuel" (drivers) to run smoothly. Outdated drivers are like using expired gas – the engine sputters and stalls.
- Network Conflicts: Sometimes, your Wi-Fi is competing with other devices on your network for the same bandwidth. It's like trying to have a conversation at a rock concert – you're not going to hear a thing.
- Router Issues: Your router, the gatekeeper of your internet, might be the source of the problem. Think of it as the security guard at the club; if he's not doing his job right, you're not getting in.
- Windows 7 Glitches: Let's face it, even though it has its loyal fans, Windows 7 isn’t getting any younger. Sometimes, the operating system itself can throw a wrench in the works.
- Hardware Failure: This is rarer, but sometimes your Wi-Fi adapter has simply given up the ghost.
The Ultimate Fix: Unlocking Wireless Peace of Mind on Windows 7
Alright, let's get down to brass tacks. This is the fix that’s saved my sanity countless times. It involves updating your network adapter drivers. Trust me, it's a lot easier than it sounds.
- Open the Device Manager: Go to your Start Menu (that little Windows logo in the bottom left), and type "Device Manager" into the search bar. Click on the result with the same name. Alternatively, you can right-click on "Computer" (either on your desktop or in the Start Menu) and select "Manage", then click "Device Manager" in the window that opens.
- Locate Your Network Adapter: In the Device Manager window, look for "Network adapters." Expand the list by clicking on the little arrow beside it. You'll see a list of devices, including your Wi-Fi adapter. It will usually be named something like "Wireless Network Adapter" or something similar.
- Right-Click and Update: Right-click on your Wi-Fi adapter. A menu will appear. Select "Update driver."
- Choose Your Update Method: You'll be presented with two options:
- "Search automatically for updated driver software": This is the easiest option. Windows will search online for the latest driver for your adapter.
- "Browse my computer for driver software": If you've already downloaded a driver (perhaps from your adapter manufacturer's website), you can use this option to install it.
- Follow the Prompts: Follow the instructions provided by Windows. It might take a few minutes to download and install the new driver.
- Restart Your Computer: Once the driver installation is complete, restart your computer. This is crucial! It allows the new driver to take effect.
Image Alt Text: A user updating the Network Adapter driver on their Windows 7.
Image Caption: Updating the Network Adapter drivers is the best procedure for resolving your Wi-Fi Connectivity issues.
Troubleshooting Twists: What if It Still Doesn't Work?
So, you’ve followed the steps, restarted your laptop, and… still no Wi-Fi? Don't panic! We've got some extra tricks up our sleeves, to address more specific problems that might have happened.
Resetting Your Network Settings
Sometimes, the issue is simply with your stored network settings. Think of these as the "saved preferences" your computer uses to connect to the Wi-Fi. Corrupted settings are comparable to a scrambled recipe. Resetting them can often clear things up.
- Open the Network and Sharing Center: Go back to the Start Menu and type "Network and Sharing Center" into the search bar. Click on the result.
- Manage Wireless Networks: On the left-hand side of the window, select "Manage wireless networks."
- Remove Your Network Profile: Right-click on the profile for your Wi-Fi network (the one you're trying to connect to), and select "Remove network." This will delete the saved settings.
- Reconnect to Your Wi-Fi: Click on the Wi-Fi icon in your system tray (the little icons in the bottom right corner of your screen) and reconnect to your network, using your password.
Checking Your Router
Your router could be the root of the problem. Let’s perform some checks.
- Restart Your Router: This is the equivalent of turning it off and on again, which works wonders. Unplug your router from the power outlet, wait 30 seconds, and plug it back in.
- Check the Router's Settings: Access your router's settings (usually by typing its IP address into your web browser – check your router's manual for instructions). Make sure Wi-Fi is enabled. Make the most of the router’s manual which can inform you how to connect, alter the security methods or other functionalities which you could consider.
- Firmware Updates: Firmware updates for your router are crucial, but sometimes neglected. The router is like a computer, and it requires updates. This can also resolve problems.
Firewall Considerations
Your Windows Firewall (or a third-party firewall if you have one) might be blocking your Wi-Fi connection.
- Check Your Firewall Settings: Go to the Control Panel (Start Menu -> type "Control Panel" in the search bar).
- Allow Programs Through the Firewall: Click "System and Security," then "Windows Firewall." In the left-hand menu, click "Allow a program or feature through Windows Firewall." Make sure your Wi-Fi adapter (you won’t see it listed as such, but look for Wireless Network Connection) is allowed to communicate through the firewall (both in the "Private" and "Public" column).
Beyond the Basics: Advanced Tips and Tweaks
Sometimes, the solution requires a little more finesse. Here are a couple of more advanced methods for tackling those stubborn connection issues.
Flushing the DNS Cache
Your DNS cache stores websites' addresses, to help your browsing become quicker. If this cache is corrupted, you could have wireless problems.
- Open Command Prompt as Administrator: Go to the Start Menu, type "cmd" (without the quotes), right-click on "Command Prompt," and select "Run as administrator."
- Type the following commands, pressing Enter after each one:
ipconfig /flushdnsipconfig /registerdnsipconfig /releaseipconfig /renewnetsh winsock reset
- Restart Your Computer: Again, a restart is your friend!
Experimenting With Adapter Properties
There are some advanced settings you can adjust in your Wi-Fi adapter's properties.
- Open Device Manager (again!).
- Right-click on your Wi-Fi adapter and select "Properties."
- Go to the "Advanced" tab. Here, you'll see various settings. Experiment with them one at a time. Here are a few to consider:
- 802.11n Channel Width for 2.4 GHz: Try setting this to "20 MHz only."
- Wireless Mode: Experiment with different modes (e.g., "802.11b/g/n").
- Power Saving Mode: Set this to "Maximum Performance."
Decoding the Error Messages: What Your Computer Is Trying to Tell You
Error messages are like the computer's way of whispering, "Hey, something's wrong!" Knowing what they mean is half the battle.
- **
Not connected no connections are available windows 7 laptop

By IT Magics Not connected no connections are available windows 7 laptop by IT Magics
How to enable your network connection in Windows 7

By MHELP2U How to enable your network connection in Windows 7 by MHELP2U
Windows 7 wifi connection problem Fix

By Being Selftech Windows 7 wifi connection problem Fix by Being Selftech
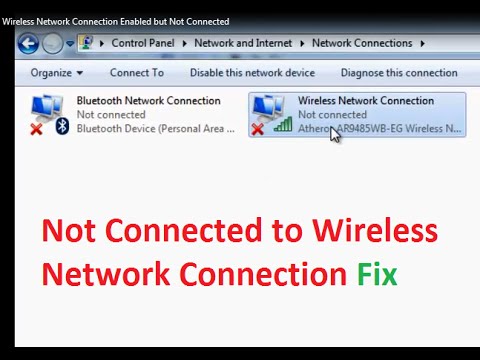
Title: Wireless Network Connection Enabled but Not connected Fix Windows 7
Channel: troubleshooterrors
Wireless Network Connection Enabled but Not connected Fix Windows 7 by troubleshooterrors
Wifi On Laptop Phone
Windows 7 WiFi Nightmare? This FIX Works EVERY Time!
Have you ever stared, frustrated, at your Windows 7 machine, the WiFi icon stubbornly refusing to cooperate? That blinking signal, or the dreaded "Limited Access" warning, can be enough to send anyone into a technology-induced spin. But fret no more. We've delved deep into the shadowy corners of Windows 7 networking, and emerged victorious, armed with a solution that consistently restores WiFi functionality. This isn't just a quick fix; it's a reliable remedy.
Understanding the Root of the Problem: Windows 7 and WiFi Incompatibilities
Before we jump into the solutions, let's explore the common culprits behind Windows 7 WiFi woes. While a seemingly outdated operating system, Windows 7, still handles a vast number of connections across the world. Many older WiFi cards and routers, as well as more modern hardware, can sometimes encounter issues. These issues are often compounded by driver conflicts, incorrect network settings, and even interference from other devices.
One prevalent issue relates to the WEP and WPA security protocols supported by legacy WiFi cards. While WPA2 is the preferred security standard, older devices might struggle with compatibility, leading to connection failures. The operating system and hardware must also be on the same page regarding frequency bands (2.4 GHz and 5 GHz) and channel selection. Misconfigurations here can result in intermittent connection drops or an inability to detect the WiFi network.
Another common problem is outdated or corrupted network adapter drivers. Microsoft frequently releases updates to address driver bugs and improve compatibility. If your drivers aren't up-to-date, your wireless adapter may struggle to communicate effectively with the network. Firewall settings can also inadvertently block network traffic, preventing you from connecting to the internet. We will cover all this in depth.
Troubleshooting and the Definitive Fix: A Step-by-Step Guide
Let's dive into solving the problem. We'll methodically address the major causes of WiFi issues in Windows 7. Prepare to reclaim your online freedom.
1. Driver Detective: Updating Your Network Adapter Drivers
The first step is ensuring your network adapter drivers are current. Outdated drivers are a primary cause of WiFi connectivity failures. Here's how to update them:
- Device Manager Access: Click the Start button, then type "Device Manager" in the search bar and press Enter. You can also right-click "Computer" on your desktop, select "Properties," and then click "Device Manager" in the left-hand panel.
- Locate the Network Adapters: In Device Manager, expand the "Network adapters" category. You should see a list of your network adapters, which can include both wired and wireless options.
- Driver Details: Right-click on your wireless network adapter (usually labeled something like "Wireless Network Adapter," "WiFi Adapter," or similar) and select "Update driver."
- Automatic vs. Manual: You'll be presented with two options: "Search automatically for updated driver software" and "Browse my computer for driver software." Select the first option, and Windows will search for and install the latest available driver.
- Manual Update (if necessary): If an automatic search fails, you can try a manual update. Visit the website of your network adapter manufacturer (e.g., Intel, Broadcom, Realtek), download the latest driver for your adapter, save it to your computer, then choose “Browse my computer for driver software” in the Device Manager and point it to the downloaded driver file. Be sure to select the correct software and operating system.
2. Network Adapter Settings Configuration: Ensuring Correctness
Even with updated drivers, incorrect network adapter settings can disrupt connectivity. We'll ensure the basic settings are optimal:
- Adapter Properties: In Device Manager (as detailed above), right-click your WiFi adapter and select “Properties."
- Configuration: In the "Properties" window, navigate to the "Advanced" tab. Here, you'll find various settings specific to your adapter.
- 802.11 Mode: Ensure this setting is set to the highest supported standard by your router, such as 802.11g, 802.11n, or 802.11ac (if supported by both the adapter and the router). A misconfiguration here can lead to compatibility issues.
- Wireless Mode: This setting could include the values of 802.11 a/b/g or 802.11 n/ac. Make sure the setting is set to the highest compatible version. This can include both 2.4 GHz and 5 GHz.
- Transmit Power: Set this to "Highest" or "Maximum." This will ensure the signal is transmitted powerfully.
- Reboot: After modifying these settings, restart your PC.
3. The Hidden Fix: Resetting the TCP/IP Stack
The TCP/IP stack manages internet traffic. Sometimes, a corrupt TCP/IP stack can lead to connectivity problems. Here’s how to reset it:
Command Prompt Access: Click the Start button, type "cmd" in the search bar, right-click "Command Prompt," and select "Run as administrator." It's critical to use administrator privileges.
Execute the Commands: In the Command Prompt window, type and execute the following commands, pressing Enter after each one:
netsh winsock resetnetsh int ip resetipconfig /releaseipconfig /renewipconfig /flushdns
Restart and Test: After executing these commands, restart your computer and test your WiFi connection. This often resolves underlying network connection issues.
4. Advanced Considerations: Addressing Persistent Problems
If the above steps haven't resolved the problem, it's time to delve into some more advanced troubleshooting. These steps are designed to address a wider range of persistent WiFi issues.
- Firewall Review: Sometimes, your firewall (Windows Firewall or third-party software) blocks the WiFi connection. It's simple to check. Ensure that your firewall allows network traffic for applications you trust. Check the firewall settings. Check settings for your security program.
- Network Profile Deletion: We often encounter issues if the original WiFi profile is corrupted. Delete the wireless network profile and reconnect to your WiFi network.
- Go to "Network and Sharing Center" via the Control Panel.
- Click "Manage wireless networks."
- Right-click on your WiFi network profile and select "Remove network."
- Reconnect to your WiFi network by entering your password.
- Router Reboot and Firmware Update: Restarting your router is a basic troubleshooting tip that often fixes connection problems. It clears its cache and resets its settings. Verify your router's firmware is up-to-date. Visit your router manufacturer's website for instructions.
- Channel Selection: If you're experiencing interference, try changing the wireless channel on your router. You can access your router's configuration page through its IP address (usually 192.168.1.1 or 192.168.0.1). Consult your router's documentation for instructions. Select a channel that is less congested.
- Check for Physical Obstructions: Walls, metal objects, and other electronic devices can interfere with WiFi signals. Move your computer closer to the router or reposition your router.
- Run Windows Network Troubleshooter: This built-in tool can automatically diagnose and fix common network problems. You can launch it from the Network and Sharing Center (Control Panel) by clicking "Troubleshoot problems."
5. Security Protocol Compatibility: Ensuring the Right Security Settings
One of the common causes of Windows 7 WiFi failures is incompatibility between the operating system and the security settings of your router. The security protocol used by your router directly affects your ability to connect to the internet. Older routers might use outdated protocols that are not compatible with Windows 7, such as WEP. This will lead to connection problems.
- Router Security Protocol: Access the administration settings of your router (usually through a web browser). Find the security settings. Make sure your router is set to use WPA2-PSK (AES) or WPA3. These are the most secure and compatible. Change the security protocol to match.
- Password Strength: Make sure your WiFi password is strong. A strong password will increase the security of your network and avoid unauthorized connections.
- Disable Obsolete Protocols: Disable or remove older protocols that are not secure, such as WEP or WPA. They can create vulnerabilities.
- Re-Enter Password: Sometimes, the issue is simply the incorrect password. Make sure to re-enter it again for the fix.
Conclusion: Reclaiming Your WiFi Freedom
We have explored this comprehensive approach. Restoring your WiFi functionality on Windows 7 doesn't have to be a source of endless frustration. By carefully following the steps, you can diagnose and resolve the majority of WiFi issues. Regularly updating your drivers, configuring your network settings correctly, and understanding basic troubleshooting steps will keep the signal strong and your connection stable. Remember to test each solution carefully and move on to the next step if the previous one doesn't work. With a little patience and persistence, you'll be back online and browsing without interruption. Enjoy your restored WiFi connection!
