how to connect laptop to brother mfc via wifi

Title: Brother MFC-L2730dw Wireless Setup With Windows Laptop, Printing & Scanning video.
Channel: Copy Print Scan
Brother MFC-L2730dw Wireless Setup With Windows Laptop, Printing & Scanning video. by Copy Print Scan
how to connect laptop to brother printer via wifi, how to connect my laptop to brother printer via wifi, connect laptop to brother printer wireless, how to connect brother printer to desktop via wifi, how to connect brother printer to computer using wifi
Laptop to Brother MFC WiFi: The SHOCKINGLY Easy Method!
Laptop to Brother MFC WiFi: Unveiling the Unexpectedly Simple Setup
It's a familiar frustration. You’ve finally upgraded to that sleek new laptop. Consequently, the printer, a trusty Brother MFC, remains stubbornly offline. The wireless connection? A tangled web of confusion. But fret not! The solution, believe it or not, is remarkably straightforward. I’m here to guide you through this surprisingly painless process. Therefore, let's banish those printer-related headaches once and for all.
Decoding the WiFi Enigma: A Primer
Before diving in, let's clarify a few basics. Your Brother MFC, like most modern printers, is designed to connect to your home WiFi network. This means your laptop can wirelessly communicate with it. Furthermore, this eliminates the need for clunky cables. In other words, this is all about convenience and efficiency. Your laptop, similarly, needs to be on the same network. The crucial term here is "network".
Step 1: Preparing Your Brother MFC Printer
First things first: power on your Brother MFC printer. Ensure it’s properly connected to a power outlet. Next, access the printer's control panel. You’ll likely find a menu option labeled “Network,” "Wireless," or something similar. Then select the "Setup" option or configuration setting. Now, initiate the WiFi setup wizard. You’ll be prompted to search for available WiFi networks. Hence, this is where the magic begins.
Step 2: Connecting to Your WiFi Network
Your printer will scan for nearby WiFi networks. You should see a list of available networks displayed. Carefully select your home WiFi network from the list. After that, you'll need to enter your WiFi password if prompted. This is crucial. Ensure accuracy! Furthermore, double-check the password for any typos. The printer will attempt to connect.
Step 3: Verifying the WiFi Connection
Once the printer tries to connect, it will display a status message. Hopefully, it will say “Connected” or similar. Alternatively, it may indicate "Connection Successful." If not, troubleshoot. Consult your printer’s user manual if you need assistance. Alternatively, you can restart both your printer and your router. After that, try the setup process again.
Step 4: Installing the Printer Driver on Your Laptop
Now, turn your attention to your laptop. You’ll need the correct printer driver installed. The driver is software that enables your laptop to communicate with the printer. You have several options. First, you can often find the driver on the Brother website. Search for your specific Brother MFC model number. Download and install the driver. Alternatively, you can use the installation disc (if you have one).
Step 5: Adding the Printer to Your Laptop
After installing the driver, you need to add the printer to your laptop. This process varies slightly depending on your operating system (Windows or macOS). If using Windows, go to “Settings” then “Devices” then “Printers & Scanners.” Click "Add a printer or scanner." Your laptop should search for available printers. Ideally, your Brother MFC will appear on the list. Select it. Then, follow the on-screen prompts to complete the setup.
Step 6: Printing a Test Page: The Moment of Truth
To confirm everything is working correctly, print a test page. Send a document to your printer. If the page prints, congratulations! The setup is successful! If not, don’t panic. Revisit the previous steps. Double-check everything. Ensure the printer and laptop are on the same WiFi network.
Troubleshooting Common WiFi Hiccups
Sometimes, things don't go perfectly. Here are a few common issues and their solutions. First, check your router. Ensure it is functioning correctly. Second, verify your WiFi password. Incorrect passwords are a frequent culprit. Third, restart both the printer and your laptop. A simple reboot can often solve minor glitches. Moreover, make sure the printer is not too far from your router. Signal strength issues can also cause problems. Furthermore, make sure your WiFi router and printer are within range of each other.
Embracing Wireless Printing: The Benefits
Once you master the setup, you'll enjoy the convenience of wireless printing. No more tangled cables! You can print from anywhere in your home. Moreover, you can print from various devices, including smartphones and tablets. Furthermore, it saves space on your desk. This is a significant advantage. The freedom is truly liberating.
Concluding Thoughts: Printing Peace of Mind
Setting up your Brother MFC on WiFi may seem daunting. However, it is likely easier than you think. The process should take less than an hour. Following these steps, you can achieve a seamless printing experience. Soon, you’ll be printing wirelessly with ease. Enjoy the simplicity and convenience of a connected printing solution. Now go forth and print!
Laptop's Wifi Dead? This SHOCKING Trick Will Fix It!Laptop to Brother MFC WiFi: The SHOCKINGLY Easy Method!
Hey there, tech enthusiasts! Remember that feeling when you're staring at your laptop, desperately needing to print something, and your Brother MFC printer just seems…unavailable? We've all been there. The blinking lights, the error messages, the sheer frustration! Well, fear not, because connecting your laptop to your Brother MFC printer via WiFi is, believe it or not, shockingly easy. Forget wrestling with complicated cables and digging through user manuals thicker than a dictionary. We're going to unravel this seemingly complex process and have you printing wirelessly in no time. Let's dive in!
1. The WiFi Printing Puzzle: Why It Seems So Tricky
Let's be honest; sometimes, technology has a knack for making things unnecessarily complex. Setting up WiFi printing can feel like navigating a labyrinth. It's like being handed a jigsaw puzzle without the picture on the box. But the good news is, the core concepts are pretty straightforward. The key is understanding that your laptop and printer need to "speak" the same language – specifically, they need to be on the same WiFi network. And once you establish that connection, the magic (or, you know, the printing) can begin.
2. Before We Begin: Gathering Your Supplies
Before we jump into the setup, let's make sure we have everything we need. Think of it like prepping a fantastic meal; having all the ingredients ready makes the cooking process a breeze.
- Your Laptop: Obviously, you'll need your trusty laptop. Make sure it's charged and running its operating system (Windows, macOS, etc.).
- Your Brother MFC Printer: Duh! Ensure it's turned on, connected to your electricity and ready to go.
- Your WiFi Network: You need your home's WiFi network credentials – the network name (SSID) and password. Write them down or have them readily available.
- Patience: This isn't a race, and taking your time will ensure a smooth process.
- (Optional) Your Brother MFC Printer's Manual: While we'll guide you step-by-step, your manual can be a fantastic resource for specific model instructions.
3. Connecting Your Brother MFC Printer to Your WiFi: The Printer’s Perspective
This is often the first step, and thankfully, it’s usually a breeze. The exact method will vary slightly depending on your Brother MFC model, but here's a general guide:
- Consult Your Printer's Display Panel: Most Brother MFC printers have a small control panel or touchscreen display. This is where you'll navigate the setup options.
- Select "Network" or "WiFi Settings": Look for an option in the menu that mentions "Network," "Wireless," or "WiFi Setup."
- Choose Your WiFi Network: The printer should scan for available WiFi networks. Select your home network from the list.
- Enter Your WiFi Password: Use the on-screen keyboard or the printer's keypad to enter your WiFi password.
- Confirm and Connect: The printer will then attempt to connect to your WiFi network. You'll likely see a "Connecting" or "Connected" message.
Once connected, the printer should display a status confirming it’s on the network.
4. Installing the Brother MFC Printer Drivers on Your Laptop: The Software Symphony
Now that the printer is connected to the WiFi, it’s time to get your laptop acquainted. This is where drivers come into play. Think of drivers as the translators that allow your laptop and printer to understand each other.
- Download the Drivers: The easiest way is to visit the Brother support website (https://www.brother-usa.com/) and search for your specific Brother MFC model. Download the latest drivers for your laptop's operating system (Windows or macOS).
- Run the Installer: Once downloaded, run the driver installer. Follow the on-screen prompts. It's usually a pretty straightforward process.
- During Installation, Choose "WiFi" or "Wireless Connection": The installer will likely ask how you want to connect the printer. Select the "WiFi" or "Wireless Connection" option.
- Find Your Printer: The installer should scan for your printer on the network. If it finds it, select it, and follow the remaining steps.
5. The Windows Approach: A Familiar Friend
If you're using Windows, the process is fairly simple. Here's a quick rundown:
- Open "Settings": Click the Windows Start button (the Windows logo) and then click the gear-shaped "Settings" icon.
- Go to "Devices" and then "Printers & scanners": In the Settings window, select "Devices," then "Printers & scanners."
- Add a Printer or Scanner: Click the "+ Add a printer or scanner" button.
- Let Windows Search: Windows should scan the network for printers. Your Brother MFC should appear in the list. Select it.
- Follow Onscreen Prompts: Windows will likely ask you to confirm the printer and may install any remaining drivers.
6. The macOS Maven: Apple’s Elegant Solution
For our macOS users (myself included!), the process is equally streamlined:
- Click the Apple Menu: Click the Apple logo in the top-left corner of your screen.
- Go to "System Preferences" / "System Settings": In the menu, select "System Preferences" (older macOS) or "System Settings" (newer macOS).
- Select "Printers & Scanners": In the System Preferences/Settings window, click "Printers & Scanners."
- Add a Printer: Click the "+" button below the list of printers.
- Find Your Printer: Your Brother MFC should appear in the list. Click on it.
- Select the Printer and Click "Add": Follow the on-screen instructions, and your printer should be added!
7. Troubleshooting Tango: When Things Get a Little Tricky
Sometimes, things don't go as planned. If you run into issues, don't panic! Here are some common troubleshooting tips:
- Double-Check Your WiFi Credentials: Ensure you've entered the correct WiFi network name and password.
- Restart Everything: Turn off your printer, your laptop, and your router, and then turn them back on in that order. This can often resolve minor connectivity issues.
- Check the Printer's IP Address: Your printer might have been assigned a specific IP address. You can usually find this in the printer's settings. Try entering this address in your laptop's printer settings.
- Firewall Frustrations: Your firewall might be blocking the printer. Check your firewall settings and make sure your printer is allowed to communicate.
- Update Your Drivers: Ensure you have the latest drivers installed for your printer.
8. Printing from Your Laptop: Finally, the Moment of Truth!
Once the setup is complete, printing should be a breeze! Open the document or image you want to print, select "File" > "Print", select your Brother MFC printer from the list, and hit "Print". You should see the printer spring into action, ready to deliver the results!
9. Scanning Made Simple: WiFi Scanning Magic
Besides printing, your Brother MFC likely has scanning capabilities. Many models provide a WiFi scanning option. To scan over WiFi, ensure you have the appropriate drivers installed and then generally you can:
- Open the Brother iPrint&Scan App: Download and install the "Brother iPrint&Scan" app or a similar Brother-provided app on your laptop/computer.
- Select Scan: Choose the “Scan” option.
- Select Your Brother MFC: Choose your MFC printer from the list of networked devices.
- Adjust Scan Settings (if desired): Tailor your settings to your preference.
- Scan!
10. Mobile Printing Marvel: Unleash the Power of Your Smartphone
Many Brother MFC printers, and likely yours, have mobile printing options. That means you can print from your phone or tablet! This is generally facilitated through:
- Brother iPrint&Scan App: Install the Brother iPrint&Scan app on your mobile device.
- Connect to Your WiFi: Ensure both your mobile device and printer are on the same WiFi network.
- Select Print: Now you can print your photos, documents, or any desired content.
11. The Joy of Wireless: Freedom From the Cord
Once everything is set up, the joy of wireless printing becomes apparent. You can now print from anywhere within your WiFi range, whether you're lounging on the couch or working at your desk. No more tripping over cables or being tethered to a specific location!
12. Maintaining the Connection: Keeping Things Running Smoothly
After the initial setup, occasionally, you'll need to maintain the connection. Here's how:
- Regular Driver Updates: Keep an eye out for driver updates on the Brother website.
- Network Stability: Ensure your WiFi is strong and secure. A weak signal can cause printing interruptions.
- Printer Status: Monitor your printer's status. Are the lights blinking? Does it have error messages?
13. The Cost-Effective Choice: Less Clutter!
WiFi printing contributes to a cleaner and
Laptop Linkup: The SHOCKINGLY Easy Way to Connect Two Laptops Wirelessly!HOW TO SETUP WI-FI DIRECT AND USING LAPTOP WIRELESS PRINTING - BROTHER DCP-T710W PRINTER.

By TECH-AID TV HOW TO SETUP WI-FI DIRECT AND USING LAPTOP WIRELESS PRINTING - BROTHER DCP-T710W PRINTER. by TECH-AID TV
Brother MFC-J1012dw Setup Using Windows Laptop, WiFi Setup.

By Copy Print Scan Brother MFC-J1012dw Setup Using Windows Laptop, WiFi Setup. by Copy Print Scan
How to Setup WiFi and print wirelessly using your PCLaptop Brother DCP-T420W
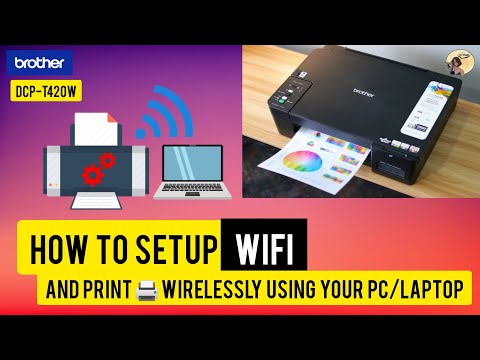
By Andrias Instructional Vlogs How to Setup WiFi and print wirelessly using your PCLaptop Brother DCP-T420W by Andrias Instructional Vlogs
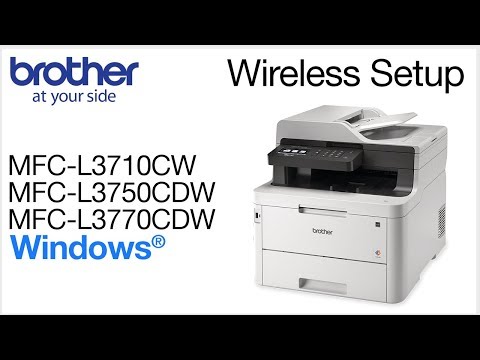
Title: Connect MFCL3770CDW to a wireless computer - Windows
Channel: Brother Office USA
Connect MFCL3770CDW to a wireless computer - Windows by Brother Office USA
Laptop Wifi Hotspot
Laptop to Brother MFC WiFi: A Seamless Connection Guide
We understand the frustration of tangled wires and the desire for a streamlined, wireless printing experience. Connecting your laptop to a Brother MFC (Multi-Function Center) printer via WiFi doesn't have to be a headache. We've crafted this detailed guide to ensure a smooth and successful setup, allowing you to print from anywhere in your home or office with ease. Follow our step-by-step instructions, and you'll be enjoying the freedom of wireless printing in no time.
Preparing for the Wireless Connection: Essential Checks and Hardware Requirements
Before diving into the setup process, let's ensure you have everything in place for a seamless connection. This section covers the preliminary steps crucial for a successful wireless configuration.
Verify Your Brother MFC Model: Not all Brother MFC printers support WiFi connectivity. Consult your printer's manual or the Brother website to confirm that your specific model has built-in WiFi functionality. This is the bedrock of our setup. The model number is typically located on either the front panel, the top, or the back of the printer. Knowing your exact model number is crucial because it allows you to download the correct drivers and firmware.
Confirm Your Network Compatibility: Your Brother MFC printer requires a wireless network that broadcasts on either the 2.4 GHz or 5 GHz frequency band. Most modern routers support both. However, verify that your router is active and broadcasting a signal. A stable, robust network is paramount. Check your router's documentation if you are unsure about the signal frequency.
Gather the Necessary Equipment: You'll need the following:
- Your Brother MFC printer.
- Your laptop or computer.
- Your wireless network password (SSID). This is the secret key to unlocking your wireless network and allowing your printer to join it.
- The printer's power cable.
- (Optional, but recommended): A USB cable for the initial setup. This can often simplify the initial configuration process, especially if you encounter challenges with the WiFi connection.
Positioning Your Devices: Place the Brother MFC printer and your laptop within range of your WiFi router. For the best signal strength, minimize obstructions like walls or metallic objects between the router and the devices. Keep the electronics away from microwaves and other sources of potential interference.
Initiating the Setup: Choosing the Right Method for Your Connection
Brother printers offer multiple methods to connect to a WiFi network. We will guide you through what we consider the easiest methods.
Method 1: Using the Brother Printer Control Panel
This method is the most straightforward and is typically the preferred approach.
- Power On and Access the Menu: Turn on your Brother MFC printer. Locate your printer's control panel, generally featuring a small screen and a set of buttons. Navigate to the "Network" or "Setup" menu. The exact wording may vary based on the model.
- Select "Wireless Setup" or "WLAN Setup": Within the "Network" or "Setup" menu, look for an option such as "Wireless Setup," "WLAN Setup," or a similar term related to WiFi configuration. The exact phrases vary among the different models, but this step is crucial.
- Choose Your Network: The printer will scan for available WiFi networks. Select your home network (SSID) from the list that appears on the printer's display.
- Input the Network Password: Enter your WiFi network's password using the printer's control panel. Be meticulous. Double-check to avoid any typos. Incorrect passwords are the most common cause of setup issues. If you are unsure of your password, refer to your router's documentation or contact your internet service provider.
- Confirm and Connect: Once you have entered your password, confirm your selection. The printer will now attempt to connect to your network. A successful connection is typically indicated by a message on the printer's display, such as "Connected" or a WiFi icon appearing.
- Test the Connection: After the printer indicates a successful connection, print a test page. This confirms that the connection is working as expected. Go to the printer's settings on your computer device to print a test page.
Method 2: Using the WPS (WiFi Protected Setup) Button (For Compatible Routers)
This method is even simpler if your router and Brother MFC support WPS.
- Locate the WPS Button: Find the WPS button on your router. It's usually a small button with the WPS logo, representing a security shield with a checkmark.
- Start WPS on the Printer: On your Brother MFC printer, access the network settings. Look for an option related to WPS setup (it may be labeled "WPS," "Push Button Mode," or something similar). Activate WPS mode on the printer. Consult your printer's manual since the exact steps vary. At this point, the printer will start searching for a WPS connection.
- Press the WPS Button on Your Router: Within two minutes of activating WPS mode on the printer, press and hold the WPS button on your router for a few seconds (the duration may vary depending on your router model – consult your router's manual). The WPS light on your router should start flashing.
- Wait for Connection: The printer and router will automatically establish a secure connection. This process typically takes a minute or two. The printer's display should confirm the connection.
- Test the Connection: After the connection is complete, print a test page to ensure that the connection is working.
Method 3: Using a USB Cable for Initial Setup (If the Above Methods Fail)
This method is a reliable fallback, especially if you encounter issues with the previous methods.
- Connect the Printer to Your Laptop with a USB Cable: Connect your Brother MFC printer to your laptop using a USB cable.
- Install the Printer Drivers: If you haven't already, install the drivers for your Brother MFC printer on your laptop. You can download the correct drivers from the Brother website. Search for your printer model and download the drivers specific to your operating system (Windows or macOS). Following the instructions carefully.
- Run the Setup Program: After installing the drivers, the setup program should prompt you to choose a connection type. Select "Wireless" or "WiFi" during the setup process.
- Follow the On-Screen Instructions: The setup program will guide you through the process of connecting your printer to your WiFi network. It will prompt you to enter your network password. The setup software often simplifies the configuration process and can troubleshoot common connectivity problems.
- Disconnect the USB Cable: Once the setup is complete, disconnect the USB cable and test the wireless connection by printing a test page.
Driver Installation and Configuration: Ensuring Compatibility and Optimal Performance
Drivers are the software that enable your laptop and printer to communicate effectively. Installing the correct drivers is crucial for seamless printing and scanning functionality.
Downloading the Correct Printer Drivers
- Visit the Brother Support Website: Go to the official Brother support website.
- Find the Support Section: Locate the "Support," "Downloads," or "Drivers" section.
- Enter Your Printer Model: Search for your specific Brother MFC printer model by entering the model number. This will take you to the support page for your printer model.
- Download the Drivers: Select your operating system (Windows or macOS) and download the latest drivers for your printer.
- Save the Driver File: Save the driver file to a location on your laptop where you can easily find it, such as your Downloads folder or your desktop.
Installing the Printer Drivers
- Run the Driver Installation File: Double-click the downloaded driver file to start the installation process.
- Follow the On-Screen Instructions: The installation wizard will guide you through the setup. Accept the license agreement and follow the prompts.
- Select the Connection Type: During the installation, when prompted, choose the "Wireless" or "WiFi" connection option.
- Select Your Printer: The program will then search for your printer on the network.
- Complete the Installation: Follow the remaining prompts to complete the driver installation. This might involve selecting a location, creating a printer shortcut, or finishing other settings.
Troubleshooting Common WiFi Connection Issues
Even with careful preparation, you might encounter issues. This section addresses the most frequent problems and provides solutions.
Printer Not Found: If your laptop can't find your printer, verify the following:
- Printer Power: Ensure the printer is turned on and powered on.
- Network Connection: Confirm the printer is connected to your WiFi network (check the printer's network status or configuration report).
- Router and Laptop Proximity: Make sure the printer and the laptop are close to the router and within the wireless signal range.
- Firewall Settings: Check your firewall settings (Windows or macOS) to ensure they're not blocking the printer's communication. Temporarily disabling the firewall can help isolate the issue.
- Driver Installation: Verify that the correct drivers are installed. Reinstall the drivers if necessary.
- Restart Your Devices: Restart the printer, the laptop, and the router.
Incorrect Network Password: Double-check that you've entered the correct WiFi password. This is the most common cause of connection failures. Re-enter the password on the
