laptop won't connect to specific wifi

Title: Fix Can't Connect to This Network Error On Windows 10 - WiFi & Internet
Channel: Sandeep Singh
Fix Can't Connect to This Network Error On Windows 10 - WiFi & Internet by Sandeep Singh
laptop won't connect to specific wifi, laptop will not connect to wifi, laptop can t connect to wifi, laptop can t connect to wifi network, laptop can t connect to wifi 5g, laptop can t connect to wifi fix, laptop won't connect to any wifi, laptop won't connect to public wifi
Laptop WiFi Nightmare? FIX This Specific Network Issue NOW!
Laptop WiFi Woes? Conquer That Connectivity Crisis!
Ever feel like your Wi-Fi is conspiring against you? You're not alone! Many of us have experienced that frustrating laptop WiFi nightmare. That buffering video, that sluggish download – it’s enough to drive anyone batty. But before you hurl your laptop across the room, take a deep breath. Let's tackle a common network issue head-on. We can banish those connectivity gremlins.
Is Your Network the Culprit? Unmasking the Problem
First, let's be honest. Is your Wi-Fi really the villain? Sometimes, it isn't. Before you start troubleshooting, consider the bigger picture. Is your internet service itself acting up? Try other devices. Test them on your network. See if they have the same sluggishness. If other devices are also experiencing problems, the issue may stem from your internet service provider. In that case, contacting them is your best course of action. However, if your laptop is the only culprit, then we can proceed.
The Usual Suspects: Common Wi-Fi Glitches
Alright, assuming your laptop is the problem child, let's look at some frequent network issues. First, check your physical connection. It sounds basic, but ensure your laptop's Wi-Fi switch is enabled. Often, it’s a simple oversight. Next, restart your laptop. This can solve many tech hiccups. A simple reboot often works wonders because it clears temporary files. It refreshes the system. If those two don't work, let's dive deeper.
Decoding the "Limited Connectivity" Conundrum
Do you see that dreaded "limited connectivity" warning? This is a common issue. It’s often the sign of a network configuration clash. Often, your laptop struggles to obtain an IP address. This often leads to this frustrating outcome. But, don't worry. There are multiple solutions.
Step 1: The IP Address Tango
Your laptop needs an IP address to talk to your network. It usually gets this automatically. However, sometimes, things go wrong. Go to your network settings and navigate down the list. Look at your network connection. Then, examine the network adapter properties. From there, select “Internet Protocol Version 4 (TCP/IPv4)”. Double-click it. Verify "Obtain an IP address automatically" is selected. Then, click "OK." Close all windows. Restart your laptop. Hopefully, you've got it fixed.
Step 2: The DNS Detective Work
Your laptop uses a DNS (Domain Name System) server to translate website names into IP addresses. Sometimes, your default DNS server can be slow or unreliable. As a result, websites will load slowly. You might even experience connection drops. You can change your DNS servers to more reliable ones. In the same TCP/IPv4 settings, select "Use the following DNS server addresses". Use well-known public DNS servers like Google's (8.8.8.8 and 8.8.4.4). You may also try Cloudflare’s (1.1.1.1 and 1.0.0.1). Remember to write down your old settings first, just in case. Save the new DNS settings. Then, reboot your machine.
Step 3: Resetting the Network Arsenal
If IP and DNS tweaks don't help, consider resetting your network settings. This is a bit like hitting the reset button on your entire network configuration. This process can often resolve deep-seated conflicts. In your Windows settings, go to "Network & Internet”. Select "Network reset." Windows will warn you it’s going to remove and then reinstall all network adapters. It will also reset other network components. This includes everything. Click "Reset now". Your computer will restart. This should eradicate any lingering configuration problems.
Step 4: Driver Dilemmas and Device Management
Outdated or corrupted network adapter drivers can wreak havoc. So, let's ensure your drivers are up to par. Open "Device Manager" (search for it in the Windows search bar). Expand "Network adapters". Right-click on your Wi-Fi adapter. Then, select "Update driver". Choose "Search automatically for drivers". Windows will find and install any updates. If that doesn't work, you can try uninstalling and then reinstalling your network adapter from the same spot. Restart your laptop after any driver updates.
Step 5: Router Rendezvous - A Necessary Evil?
Sometimes, the problem isn't your laptop, but your router. First, try restarting it. Unplug your router. Wait thirty seconds. Then, plug it back in. Give it a few minutes to boot up. If the problem persists, consider updating your router’s firmware. This is usually done through your router's configuration page. Refer to your router's manual. This process can improve stability.
Beyond the Basics: Advanced Troubleshooting
If you’ve exhausted basic steps, let’s explore some advanced options. Run the Windows Network Troubleshooter. It's often surprisingly useful. Search for “Network Troubleshooter” in the Windows search bar. Go through the steps. It will automatically diagnose and fix some problems. Next, check your laptop’s security software. Sometimes, firewalls may inadvertently block network traffic. Temporarily disable your firewall. Then, see if the problem is resolved.
Prevention is Key: Maintaining a Healthy Network
Once you've solved the problem, remember, prevention is better than a cure. Regularly update your drivers and firmware. Keep your antivirus software current. Protect your network with a strong password. Consider using a guest network. That way, you can separate your devices. It’s a good extra security layer. By following these steps, you can minimize future Wi-Fi headaches.
Conclusion: Your Laptop, Your Network, Your Freedom
So, there you have it. You've got a toolkit to fight back against that laptop Wi-Fi nightmare. You can now troubleshoot network issues effectively. You'll gain control over your connectivity. Don’t let Wi-Fi troubles hold you back! With a bit of patience and these steps, you can quickly restore your internet freedom. Get back to browsing, streaming, and working without interruption. Your laptop, your network, your freedom! Now go forth and conquer!
Laptop WiFi Direct: The Ultimate Guide (Unlock Hidden Speed!)Laptop WiFi Nightmare? FIX This Specific Network Issue NOW!
We've all been there. That soul-crushing moment when your laptop's WiFi decides to stage a revolt. One minute you're cruising the internet, the next, you’re staring blankly at a screen, the dreaded 'no internet' warning mocking you. It's like having your wings clipped mid-flight, isn't it? And let's be honest, it usually happens at the worst possible time – during a crucial work presentation, a Netflix binge, or when you're trying to video call your grandma. But fear not, fellow digital nomads! We're here to tackle that laptop WiFi nightmare head-on, peeling back the layers to uncover the root cause of a particularly persistent problem and, more importantly, fix it.
1. The WiFi Woes: A Universal Experience
First things first: you're not alone. Poor WiFi is a ubiquitous problem. It’s the bane of our modern existence, a constant source of frustration. Think of it as a leaky faucet in the digital world – a minor annoyance that can quickly escalate to a flooded basement of lost productivity and frayed nerves. Whether you're rocking a sleek new Ultrabook or a trusty older model, a flaky WiFi connection can bring your digital life to a screeching halt. We're talking buffering videos, dropped calls, and the sheer agony of waiting for a webpage to load. This specific issue we're addressing – a persistent but fixable problem – often gets overlooked, but trust me, it’s a game-changer when resolved.
2. Identifying the Culprit: The "Limited Connectivity" Conundrum
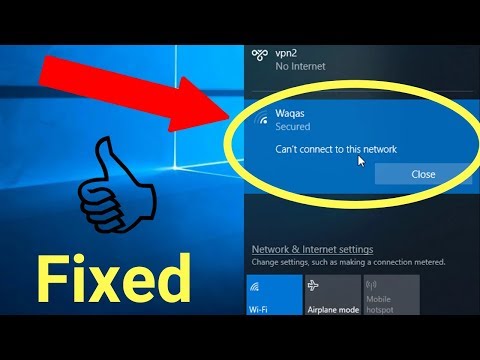
So, what exactly are we targeting? We're talking about that maddening Limited Connectivity message. It's the digital equivalent of a car refusing to start. Your laptop sees the WiFi network, it thinks it's connected, but it can't access the internet. You've entered the WiFi portal, but without the golden key. It's a common problem, often caused by a conflict in your network settings, specifically the IP address. Think of it like this: your laptop is trying to find the street address to deliver its digital mail, but it's somehow got the wrong number.
3. Decoding IP Addresses: The Digital Mailing System
Before we get to the fix, let's take a quick detour to understand what an IP address is. Imagine it as your laptop's unique postal address. Every device on your network needs one to communicate. Your router (your network's central post office) is responsible for assigning these addresses, often automatically. However, sometimes, this automatic assignment goes awry. This is where the issues arise!
4. The Static vs. Dynamic Dilemma: Understanding IP Conflicts
There are two main types of IP address assignment: static and dynamic. Dynamic IP addresses are automatically assigned by your router (DHCP), which is the standard setup. Static IP addresses are manually configured. The problem arises when two devices on the same network try to use the same IP address. It's like two neighbours having the same house number – utter chaos ensues! This is often the root of the "Limited Connectivity" issue, especially if you’ve been tinkering with network settings previously.
5. The Fix: Renewing Your IP Address – The Digital Reset
The good news? The fix is usually straightforward. We're going to "reset" your laptop's connection to the network by renewing its IP address. This forces your router to assign a new, unique address, resolving the conflict. It’s like rebooting your computer – a simple solution that often works wonders.
6. Step-by-Step Guide: Renewing Your IP Address on Windows
Here's how to do it on Windows (most common OS):
- Step 1: Open Command Prompt. Type "cmd" in the Windows search bar and open the "Command Prompt" application.
- Step 2: Release the Old IP Address. Type
ipconfig /releaseand press Enter. This tells your computer to relinquish the old IP address. - Step 3: Renew the IP Address. Type
ipconfig /renewand press Enter. This requests a new IP address from your router. - Step 4: Check the Results. Type
ipconfig /alland press Enter. Look for your IP address and gateway. If everything looks right, your connection should be restored!
7. Step-by-Step Guide: Renewing Your IP Address on macOS
Here's how to do it on macOS:
- Step 1: Open System Preferences. Click the Apple menu in the top-left corner and select "System Preferences".
- Step 2: Go to Network. Click on "Network".
- Step 3: Select Your Connection. Choose your WiFi connection from the left-hand panel.
- Step 4: Click Advanced. Click the "Advanced" button in the lower-right corner.
- Step 5: Renew DHCP Lease. Go to the "TCP/IP" tab and click "Renew DHCP Lease".
- Step 6: Apply Settings. Click "OK" and then "Apply".
8. Troubleshooting: What to Do if the Fix Doesn't Work
If renewing your IP address doesn't solve the problem, don't panic! We've got some additional troubleshooting tips:
- Restart Your Router: Sometimes a simple reboot of your router can clear up network issues. Unplug it for 30 seconds, then plug it back in.
- Check Your Router's DHCP Settings: Ensure DHCP (Dynamic Host Configuration Protocol) is enabled on your router. This setting allows your router to automatically assign IP addresses. If not, devices won't be able to connect.
- Check for Conflicting Devices: Make sure no other devices on your network are using the same IP address.
- Update Your Network Drivers: Outdated network drivers can cause connectivity problems. Update them through your laptop's device manager.
- Run the Windows Network Troubleshooter: Windows has a built-in troubleshooter that can often identify and fix network issues automatically.
9. Beyond the IP Address: Other Potential Causes of WiFi Issues
While the IP address renewal often does the trick, other factors can contribute to WiFi woes. Let's quickly touch on them:
- Router Placement: Is your router optimally positioned? Ideally, it should be centrally located and free from obstructions like walls and metal objects.
- Interference: Other electronic devices, such as microwaves and Bluetooth speakers, can interfere with your WiFi signal.
- Signal Strength: Ensure you have a strong WiFi signal. Check the signal strength indicator on your laptop.
- ISP Issues: Occasionally, the problem might be with your internet service provider (ISP). Contact them if you suspect an outage.
10. The Power of a Strong Password: Protecting Your Network
Never underestimate the importance of a strong WiFi password. Make sure your network is secured with a robust password to prevent unauthorized access. This protects your connection and your personal data. Think of it as the lock on your front door – essential for security.
11. Bandwidth Blues: Managing Network Congestion
Sometimes, the problem isn't a "no internet" connection, but a slow one. If multiple devices are using the network simultaneously, your bandwidth might be getting stretched thin. Consider limiting the number of devices using the network or upgrading your internet plan if necessary. It’s like rush hour on the highway; more cars (devices) mean slower traffic (internet speed).
12. Channel Surfing: Optimizing Your WiFi Channel
Your router broadcasts on a specific channel. In crowded environments, this channel can get congested, leading to slower speeds. Access your router's settings and experiment with different channels to find the least congested one, improving your connection speed. It can be similar to tuning a radio to minimize background noise through scanning for the right frequency.
13. The Magic of Rebooting: A Simple But Effective Trick
We already touched on this, but it bears repeating: restarting your laptop and your router is often the first, and sometimes only, step you need to take. It’s the digital equivalent of a mental reset – often the best way to clear up any minor glitches.
14. Keeping Your Software Updated: A Crucial Step for Stability
Outdated software, including your operating system and network drivers, can be a major source of connectivity problems. Make sure your system is up-to-date to ensure optimal performance and compatibility. Regular updates are essential for a smooth and stable experience.
15. Embracing the Future: WiFi 6 and Beyond
WiFi technology continues to evolve. The latest standard, WiFi 6 (and now WiFi 6E), offers faster speeds, improved efficiency, and better performance, especially in crowded environments. If you're serious about your WiFi, it's worth considering upgrading your router and devices to the latest standards. Staying updated makes a huge difference.
Closing Thoughts:
So there you have it! We've navigated the treacherous terrain of laptop WiFi woes and emerged victorious. By understanding the "Limited Connectivity" problem, particularly the IP address conflict, and employing the simple fix of renewing your IP address, we've armed you with the knowledge to banish those frustrating WiFi nightmares. Remember, technology is our friend, not our foe. With a little troubleshooting and a dash of know-how, you can conquer any connectivity challenge.
Laptop WiFi Nightmare? This SHOCKING Fix WORKS!Can't connect to this Network Windows 10 WiFi Wireless Internet Error
By Wisely Stream & Tech Can't connect to this Network Windows 10 WiFi Wireless Internet Error by Wisely Stream & Tech
7 Ways to Fix a Computer That Can't Find or Connect to Wifi Windows 10 Laptops & Desktops

By Ask A Computer Geek 7 Ways to Fix a Computer That Can't Find or Connect to Wifi Windows 10 Laptops & Desktops by Ask A Computer Geek
All But My WiFi Network Not Appeared Solved 2020

By Simplify All But My WiFi Network Not Appeared Solved 2020 by Simplify

Title: Can't connect to this network wifi windows10 network
Channel: Tech vek
Can't connect to this network wifi windows10 network by Tech vek
Working With Laptop
Laptop WiFi Nightmare? FIX This Specific Network Issue NOW!
Are you wrestling with the relentless frustration of a sluggish or unreliable Wi-Fi connection on your laptop? Do buffering videos, dropped connections, and glacial download speeds have you tearing your hair out? You're not alone. The world relies on seamless connectivity, and a broken Wi-Fi connection can grind productivity and entertainment to a halt. This article is your comprehensive guide to diagnosing and eradicating a common, yet often overlooked, root cause of laptop Wi-Fi woes: network profile corruption. We'll navigate the complexities of your Windows operating system, guiding you through a meticulous process of identification, repair, and optimization, leaving you with a blazing-fast, rock-solid Wi-Fi experience.
Unveiling the Culprit: Network Profile Corruption
Before we dive into solutions, let's understand the enemy. Your Windows laptop stores configuration settings for every Wi-Fi network you’ve ever connected to. These settings comprise a "network profile." This profile dictates how your laptop connects to, authenticates with, and interacts with a specific Wi-Fi network. Over time, these profiles can become corrupted due to various factors:
- Software Conflicts: Incompatibility between different network drivers, or third-party network management software.
- Driver Issues: Corrupted or outdated network adapter drivers.
- Malware or System Instability: Infections or system errors can introduce inconsistencies within the profile data.
- Abrupt Disconnections: Unplanned power outages or forced shutdowns during network activity.
When a network profile is corrupted, it can manifest as a range of symptoms, from intermittent connection drops to outright refusal to connect. It’s this specific issue that we intend to address.
Step-by-Step Diagnostic: Pinpointing Your Wi-Fi Problems
Before implementing any fixes, let’s confirm that a corrupted network profile is, in fact, the source of your issues. This involves a methodical approach:
The Basic Test: Other Devices: Connect other devices (smartphones, tablets, another laptop if available) to the problematic Wi-Fi network. If these devices experience the same issues, the problem lies with the router, the internet service provider (ISP), or the network itself, and not your laptop. This will help you narrow down where to focus your efforts.
The Specific Network Test: Try connecting your laptop to other Wi-Fi networks. Public hotspots, a friend’s network, or a Wi-Fi network on your phone will work. Does your laptop experience the same connection problems on these other networks? If the issue persists across multiple networks, it strongly suggests a problem with your laptop's network adapter drivers or a more general system issue, not the specific network profile. If the problem is isolated to only one Wi-Fi network, it's very likely a profile issue.
Network Adapter Check: This is crucial. Open the Device Manager (Windows Key + X, then select "Device Manager"). Expand "Network adapters." Look for your Wi-Fi adapter (e.g., "Intel Wi-Fi 6 AX200"). Right-click on the adapter and select "Properties." In the "General" tab, check for any error messages. Any yellow exclamation points or red X's indicate potential driver problems. We'll address driver issues later if needed.
By completing these steps, you'll have gathered enough information to build a path forward.
Solution 1: The Clean Slate – Deleting and Reconnecting
The simplest and often most effective solution is to delete the problematic network profile and reconnect to the Wi-Fi network. This forces Windows to rebuild the profile from scratch, eliminating any corrupted data.
Access Network Settings: Press the Windows key + I to open the Settings app. Navigate to "Network & Internet."
Manage Known Networks: Click on "Wi-Fi" (ensure Wi-Fi is enabled) and then on "Manage known networks."
Delete the Profile: Locate the Wi-Fi network causing the issues in the list and click on it. Then, select "Forget." This removes the corrupted profile.
Reconnect: Click the Wi-Fi icon in the system tray (bottom right corner of the screen), select the Wi-Fi network, and enter your password. Windows will now create a new, fresh network profile. Test your connection. If the issue is resolved, congratulations! You've successfully banished the Wi-Fi gremlins. If the problem persists, proceed to the next section.
Solution 2: Advanced Troubleshooting – Resetting Network Settings
If deleting and reconnecting to the network doesn't solve the problem, you might need a more aggressive approach. Windows offers a built-in network reset tool. This will revert all of your network adapters to their default settings, which can resolve more deeply rooted issues.
Access Network Reset: In Settings, navigate to "Network & Internet" -> "Advanced network settings."
Perform the Reset: Click on "Network reset." Read the warning carefully. This will reset your network adapters, remove and reinstall them, and reset related network settings. You will need to re-enter Wi-Fi passwords after the reset.
Confirm and Restart: Click "Reset now" and then confirm your decision. Your laptop will shut down and start again.
Reconnect and Test: After the restart, reconnect to your Wi-Fi networks and test the connection.
Solution 3: Driver Management – Updating and Reinstalling Network Drivers
Outdated or corrupted network drivers can also contribute to Wi-Fi problems. Here's how to manage them:
Update Drivers via Device Manager: Open Device Manager (as mentioned before). Expand "Network adapters." Right-click on your Wi-Fi adapter and select "Update driver." Choose "Search automatically for drivers." Windows will search for and install any available updates.
Manual Driver Download: If Windows can't find updated drivers, or if the update doesn't resolve the issue, visit your laptop manufacturer's support website (e.g., Dell, HP, Lenovo). Download the latest drivers for your specific laptop model and Wi-Fi adapter for your operating system. Install these drivers manually.
Driver Reinstallation: If updating doesn't work, try reinstalling the driver. Right-click on your Wi-Fi adapter in Device Manager and select "Uninstall device." In the confirmation prompt, check "Delete the driver software for this device" before uninstalling, if that option is available. Then, restart your laptop. Windows should automatically reinstall the driver. If it does not, install the driver that you downloaded in step number 2.
Solution 4: Optimize Your Wi-Fi Adapter Settings
Sometimes, fine-tuning your adapter's settings can yield a noticeable improvement.
Access Adapter Properties: Open Device Manager, right-click your Wi-Fi adapter, and select "Properties."
Advanced Settings: Go to the "Advanced" tab. Here, you'll find various settings that affect your network connection. The specific settings available will vary depending on your adapter. Here are a few to consider:
- 802.11n/ac/ax Mode (or similar): Ensure this is set to the most recent standard supported by your router (e.g., "802.11ac" or "802.11ax").
- Roaming Aggressiveness: Experiment with the settings. Increased aggressiveness can cause your laptop to change connection points quicker than necessary. Try setting the aggressiveness to "Medium" or "Low" for better stability.
- Transmit Power: Make sure this setting is at its maximum, to achieve the best signal strength
- Wireless Mode: Often, you will find similar settings to the 802.11n/ac options. select the fastest speed available to your router.
Important Note Adjust one setting at a time, testing your Wi-Fi connection after each change. This will help you isolate which setting is having the greatest impact.
Solution 5: Firewall and Antivirus Interference
Firewall rules and antivirus software can sometimes interfere with network connections. It's rare, but possible.
Temporarily Disable Firewall: Temporarily disable your Windows Firewall. To do this, type "Windows Defender Firewall" into the search bar on your desktop and select the appropriate result. Click on "Turn Windows Defender Firewall on or off" in the left-hand menu. Turn off both the "Private network settings" and "Public network settings" options. Test your Wi-Fi connection. Remember to re-enable your firewall immediately after testing.
Antivirus Interference: Some antivirus programs have network protection features. If the Wi-Fi issue is still present after disabling the Windows Firewall, try temporarily disabling your antivirus software. Test the connection. If that's the problem, it is helpful to whitelist your network adapter from your antivirus software. Refer to your antivirus software's documentation on how to do this.
Preventative Measures: Maintaining a Healthy Wi-Fi Environment
Once you've resolved your Wi-Fi problems, you can take proactive steps to prevent future issues:
- Keep Drivers Updated: Regularly check for driver updates for your Wi-Fi adapter. You can set up automatic driver updates through Windows Update, or manually check on your manufacturer's website.
- Maintain System Stability: Run regular system scans using your
