best free wifi hotspot software for windows 7 laptop
Title: 2024 Guide on 5 best Wi-Fi hotspot software for Windows
Channel: Windows Report
2024 Guide on 5 best Wi-Fi hotspot software for Windows by Windows Report
Unlock Blazing-Fast Free WiFi on Your Windows 7 – No More Lag!
Blast Off with Warp-Speed WiFi on Your Windows 7 – Lag Be Gone!
Ever felt like your internet connection was stuck in molasses? That buffering wheel spinning, mocking your every click? It's enough to make you want to chuck your computer out the window, right? Well, hold on to your hats! Today, we're going to journey into the realm of Windows 7 WiFi optimization, a place where lag is a distant memory. This isn’t just a tech tutorial; it's a quest for internet freedom.
Decoding the WiFi Maze: Understanding the Real Culprits
Before we begin our WiFi transformation, let’s briefly discuss the usual suspects. Often, the problem isn't your internet plan. Instead, it's the underperforming connection and the network settings. A slower connection can seriously affect download and upload speeds. Similarly, outdated drivers, network congestion, or even physical obstructions can all contribute to the dreaded lag. Therefore, finding and resolving these issues empowers us to unlock lightning-fast WiFi.
Driver Detective: Updating Your Wireless Adapter
Firstly, let us address the driver situation. Your wireless adapter is the unsung hero of your internet experience. Outdated drivers act like rusty pipes, slowing down the flow of data. Consequently, updating these drivers is a fundamental step. Find your computer's manufacturer (like Dell, HP, or Lenovo). Then, head to their support website. Next, locate the drivers section for your specific Windows 7 model. Download the latest wireless adapter driver and install it. After the installation, restart your computer. This simple act frequently yields remarkable improvements.
Channel Surfing: Optimizing Your Network's Frequency
WiFi signals, like radio stations, operate on different channels. Additionally, many networks compete for the same channels, causing interference. Imagine a crowded highway. To alleviate this, we must find the clearest traffic lane, or in this case, the optimal WiFi channel. Thankfully, there are apps that can help. They scan your surroundings, identifying the least congested channels. After identifying the cleanest channel, access your router's settings, which you can do by typing your router's IP address in your preferred web browser. Change the WiFi channel in the router's wireless settings. Finally, save your changes and reconnect your devices. You'll be ready to experience a smoother, clearer connection.
The Router Reboot: A Reboot to Remember
Sometimes, the simplest solution is the most effective. Thus, we need to talk about the tried-and-true router reboot. Think of your router as your nervous system; even the best ones can get sluggish over time. Power cycling can often clear it. To do this, unplug your router's power cord. Wait for about thirty seconds. Plug it back in. After it turns back on and stabilizes. Thus, make sure your devices reconnect automatically. The difference can be readily apparent.
Bandwidth Bonanza: Prioritizing Your Bandwidth
Next, consider how your bandwidth is used. Multiple devices sharing the same connection can slow things down. If you're downloading large files, streaming videos, or having video calls, your bandwidth usage is higher. You can prioritize certain applications or devices within your router's settings. Many routers offer Quality of Service (QoS) features. Setting up QoS allows you to dedicate more bandwidth to specific tasks. In doing so, it dramatically decreases any lag.
Boosting Your Range: The Power of Proper Placement
Your router's location makes a difference, even if you don't realize it. Walls, furniture, and other electronic devices can all obstruct your signal. Place your router in a central location, away from obstacles. Furthermore, elevatng your router can improve its broadcasting capabilities. This simple relocation tactic can improve signal strength.
Securing Your Signal: Preventing Unwanted Guests
An open WiFi network is an invitation for unauthorized users. Therefore, ensure your network is secure. Use a strong password. Enable WPA2 or WPA3 encryption. Regularly monitor your network devices. Preventing unwanted users helps maintain your bandwidth.
Troubleshooting Tips: Should Problems Persist
Should you continue to experience issues, don't despair. Check your internet speed with a speed test. Contact your ISP if you're not receiving the speeds you're paying for. Additionally, consider upgrading your equipment. Older routers may not support the latest WiFi standards. Upgrading can make a significant difference. However, with a few of these troubleshooting steps, you'll be set to go.
The Grand Finale: Speed Ahead!
With these steps, you're well on your way to enjoying blazing-fast WiFi on your Windows 7 device. Therefore, say goodbye to lag and hello to a smoother, more enjoyable online experience! After all, you deserve the internet freedom you've always wanted. Finally, embrace the new era of speed. Go forth and experience the internet as it was meant to be.
Laptop WiFi Nightmare? This One Weird Trick Fixes It FAST!Unlock Blazing-Fast Free WiFi on Your Windows 7 – No More Lag!
Welcome, fellow internet adventurers! Have you ever felt like your Windows 7 machine is slogging through molasses when you're trying to stream, browse, or even just check your email? That agonizing wait for a webpage to load, the buffering hell of a low-quality video, the sheer frustration of a lag-filled online game? We've all been there. And let's be honest, in this fast-paced digital world, slow WiFi is a form of torture. But fear not, because we're about to embark on a journey to banish those WiFi woes and resurrect your Windows 7's internet speed. We're talking about unlocking blazing-fast, totally pain-free, free WiFi. Prepare to say goodbye to lag and hello to seamless browsing!
1. The WiFi Wasteland: Why is My Windows 7 So Slow?
Before we dive into the solutions, let's understand the enemy. What's actually causing your Windows 7's WiFi to crawl? Several culprits are lurking in the shadows, ready to pounce on your precious bandwidth. Think of it like a crowded highway: too many cars (devices) using the same road (WiFi signal) leads to traffic jams (lag). Some common suspects include:
- Network Congestion: Too many devices connected to the same WiFi router at once, each vying for bandwidth like a desperate shopper on Black Friday.
- Router Issues: Your trusty router might be old, outdated, or simply overloaded. Think of it as the engine of your internet, and it might need a tune-up.
- Interference: WiFi signals, sadly, aren't immune to outside interference. Walls, appliances, and even your neighbor's WiFi can all play havoc.
- Outdated Drivers: Your computer's "traffic controllers" for the WiFi (the drivers) might be outdated, causing inefficient communication.
- Malware/Viruses: Nasty little digital gremlins could be hogging your bandwidth in the background, essentially turning your internet into a ghost town.
2. First Responder: Basic Troubleshooting Steps
Before we start wielding advanced tools, let's try some quick and easy fixes. Think of these as the first responders to a WiFi emergency. Often, these steps will be enough to clear the blockages and get your internet flowing again:
- Restart Everything: Turn off your computer, your router, and your modem. Wait a minute, then turn them back on in that order. This simple act can magically resolve many network glitches. It's like giving your device a digital reset.
- Move Closer to the Router: Physics, sadly, applies. The further you are from the router, the weaker the signal. Position yourself closer to the router to improve signal strength, and hence speed.
- Check Your Internet Speed: Use a speed test website (like Speedtest.net) to see if you're actually getting the speeds you're paying for. This helps identify the issue if it's an internet service provider (ISP) problem and not your computer's fault.
- Close Unnecessary Background Programs: Those programs you barely remember exist can secretly gobble up bandwidth. Close them down in Task Manager (Ctrl+Shift+Esc).
3. The Router's Role: Optimizing Your Wireless Connection
Your router is the conductor of your WiFi orchestra. And its health is crucial. Let's give your router a performance-enhancing boost:
- Router Placement: Place your router in a central location, elevated, and away from walls or metal objects. Think of it like a broadcasting tower; it needs a clear view.
- Router Firmware Updates: Just like your phone, your router needs updates, too! Check your router's manufacturer's website for the latest firmware and upgrade.
- Change Your WiFi Channel: WiFi routers broadcast on different channels. Sometimes, a channel is crowded. Log in to your router's settings (usually by typing 192.168.1.1 or 192.168.0.1 into your browser) and switch to a less congested channel.
4. Driver Deep Dive: Updating Your Network Adapter Drivers
Outdated network adapter drivers are like having a rusty pipeline. Let's get your drivers updated:
- Access Device Manager: Open the Start menu, type "Device Manager," and click on it.
- Locate Network Adapters: Expand the "Network adapters" section.
- Update Drivers: Right-click on your WiFi adapter and select "Update driver." Let Windows search for updated drivers automatically.
This is a vital step towards ensuring your Windows 7 machine can efficiently communicate with your wireless network.
5. Security Matters: Protecting Your Network from Bandwidth Bandits
A secure network is a fast network. If your WiFi is unprotected, anyone could be mooching off your bandwidth, slowing things down. Secure your wireless network with:
- Strong Password: Use a strong, unique password for your WiFi. Avoid easily guessable passwords like your name, date of birth, or "password."
- WPA2 or WPA3 Encryption: Ensure your router is using WPA2 or WPA3 encryption. This encrypts your data and prevents unauthorized access.
6. The Hidden Culprit: Malware and Background Processes
Malware and resource-hogging background processes can drain your bandwidth without you even realizing it.
- Run a Malware Scan: Use a reputable antivirus program to scan your system for malware.
- Close Unnecessary Processes: Open Task Manager (Ctrl+Shift+Esc). Find programs that are hogging CPU or memory and end their tasks.
7. Quality of Service (QoS): Prioritizing Your Traffic
QoS allows you to prioritize certain types of network traffic.
- Access Your Router Settings: Log in to your router's settings.
- Enable QoS and Prioritize: Look for QoS settings and enable them. Prioritize traffic such as gaming or video streaming.
8. Fine-Tuning: Advanced WiFi Configuration
If the basic steps don't fully resolve your problem, we can dive into some more advanced configurations.
- Change Wireless Mode: In your router settings, try experimenting with different wireless modes (like 802.11n or 802.11ac).
- MTU Settings: Sometimes, adjusting your MTU (Maximum Transmission Unit) size can help with speed. However, be careful here, as improper settings can disrupt connectivity.
9. External Antennas: Boosting Your Signal Strength
If your signal is weak, consider external antennas for your router.
- Research Compatible Antennas: Check your router's specifications to ensure that the antennas are compatible.
- Install and Orient: Attach the antennas according to the manufacturer's instructions. Position them for optimal signal coverage.
10. The Power of Ethernet: When WiFi Fails
Sometimes, WiFi just won't cut it. In this case, consider connecting to your router via Ethernet cable.
- Direct Connection: Connect an Ethernet cable from your computer to your router.
- Bypass WiFi: This removes WiFi as a source of problems and verifies if the issue is internal.
11. Is Your Hardware Holding You Back?
Sometimes, the issue isn't your WiFi or software, but your hardware.
- Check Your WiFi Adapter: Ensure your WiFi adapter supports the latest WiFi standards (802.11n or 802.11ac).
- Consider a Hardware Upgrade: If after using this guide to configure your machine and your wireless network, you still face issues, you could consider upgrading your network card.
12. The Ultimate Test: Speed Test and Real-World Performance
After all these steps, you need to check the performance.
- Run Another Speed Test: Use a speed test website (Speedtest.net is excellent) to measure your download and upload speeds.
- Test Real-World Applications: Browse the web, stream a video, play an online game, and see if you're experiencing any lag.
13. Maintaining the Momentum: Ongoing WiFi Optimization
Getting your WiFi fast is just the first step. Maintaining it is a long term necessity. Don't fall into the trap of letting everything go back to default.
- Regular Driver Checks: Periodically check for driver updates.
- Router Maintenance: Restart your router regularly.
14. Avoiding Common Pitfalls: WiFi Don'ts
Let's look at common mistakes to avoid.
- Don't Overload Your Network: Too many devices can slow down speeds.
- Avoid Interference: Keep your router away from electronic devices that create interference.
15. Beyond Windows 7: Future-Proofing Your Internet
While this guide has concentrated on Windows 7, many of the principles apply universally to any device using WiFi.
Key Takeaways:
- Faster WiFi is attainable on Windows 7 by addressing potential bottlenecks: congestion, outdated drivers, and router issues.
- Regular maintenance, strong security practices, and troubleshooting are key to ensuring a smooth internet experience.
- Your WiFi speed relies on several factors, including your hardware.
Conclusion: Unleash the Power of Swift WiFi!
There you have it! By
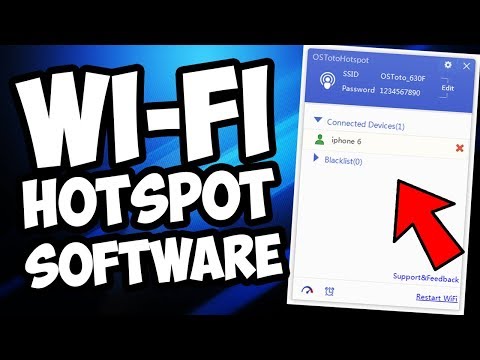
Unlock Your Laptop's WiFi: The Secret Guide!5 Best Wi Fi Hotspot Software For Windows

By Fix With Zubair 5 Best Wi Fi Hotspot Software For Windows by Fix With Zubair
Top 5 Free WiFi Hotspot Software For Windows Top Free WiFi Hotspot App to Create a Wi-Fi Hotspot

By TheRRRashid Top 5 Free WiFi Hotspot Software For Windows Top Free WiFi Hotspot App to Create a Wi-Fi Hotspot by TheRRRashid
Best FREE Wifi Hotspot Software Specially For WINDOWS 10

By kilObit Best FREE Wifi Hotspot Software Specially For WINDOWS 10 by kilObit

Title: Opinion 10 Best Free WiFi Hotspot Software for Windows 1110
Channel: HowtoFixDllExeErrors
Opinion 10 Best Free WiFi Hotspot Software for Windows 1110 by HowtoFixDllExeErrors
Laptop Wifi Hotspot
Unlock Blazing-Fast Free WiFi on Your Windows 7 – No More Lag!
Are you tired of the digital molasses that plagues your Windows 7 WiFi connection? Do you dream of streaming videos without buffering, downloading files at lightning speed, and browsing the web with the responsiveness you deserve? We understand your frustration. The constant lag, the dropped connections, and the agonizingly slow page load times can transform an otherwise productive day into a digital nightmare. But fret no more! We’ve compiled a comprehensive guide, packed with insider tips and proven techniques, to transform your Windows 7 WiFi experience from sluggish to sensational. Prepare to experience the internet as it was meant to be: fast, fluid, and utterly enjoyable.
Understanding the WiFi Challenges of Windows 7
Before we dive into the solutions, it's important to acknowledge the unique challenges Windows 7 users face. While the operating system remains remarkably resilient, its age can present compatibility issues, especially with newer WiFi standards and hardware. This can lead to slower speeds and intermittent connectivity problems. Furthermore, the default settings on your Windows 7 system might not be optimized for peak WiFi performance. We must consider how various factors can impact your WiFi connection, including the distance from your router, potential interference from other electronic devices, and the overall network congestion in your area. By identifying these potential roadblocks, we can create a tailored approach that effectively addresses your specific needs.
Step 1: Optimizing Your Wireless Network Adapter Settings
Your wireless network adapter is the unsung hero of your WiFi connection. Proper configuration is crucial for maximizing its performance. Let's delve into the settings that can make a tangible difference in your WiFi speed and reliability.
Accessing Adapter Properties: Begin by right-clicking the network icon in your system tray (usually located in the bottom right corner of your screen). Select "Open Network and Sharing Center," then click "Change adapter settings" on the left-hand side. Right-click your wireless network adapter (it will likely be labeled "Wireless Network Connection") and select "Properties."
Configuring Advanced Settings: Within the properties window, click the "Configure" button. This will open a new window with several tabs. Navigate to the "Advanced" tab. Here, you'll find a list of configurable options. These options vary depending on your specific network adapter, but we’ll cover the critical ones.
Setting the Wireless Mode: Look for an option labeled "Wireless Mode" or something similar. Ensure this is set to the highest standard supported by both your adapter and your router. This is typically 802.11n or 802.11ac for newer routers. If your router is older, 802.11g might be your best option. This setting dictates the communication protocol your device uses.
Adjusting Transmit Power: Locate the "Transmit Power" setting. We recommend setting this to "Highest." This increases the signal strength your adapter transmits, which can significantly improve your connection range and stability. However, beware of excessive power, which can interfere with other devices.
Enabling QoS (Quality of Service): Some adapters offer a QoS option. If available, enable QoS. This feature prioritizes network traffic, which can benefit applications like video streaming and online gaming.
Channel Selection: The "Wireless Mode" or "Operating Mode" option configures the operational band of your adapter. Check your router's settings. If your router supports dual-band (2.4 GHz and 5 GHz), choose the 5 GHz band as it's often less congested and offers higher speeds. If you choose 2.4 GHz band, experiment with different channels. Use a WiFi analyzer app (see the "Troubleshooting Tools" section below) to identify the least congested channel in your area.
Saving Changes and Restarting: After adjusting these settings, click "OK" to save your changes. You may need to restart your computer or at least disable and re-enable your wireless adapter by disabling and enabling it in the same windows as above.
Step 2: Fine-Tuning Your Router Configuration
Your router is the central hub of your home network, and its configuration has a direct impact on your WiFi performance. Let's explore the key settings that can unlock faster speeds and a more stable connection.
Accessing the Router Admin Panel: Open your web browser and type your router's IP address into the address bar. This is usually 192.168.1.1 or 192.168.0.1, but you can find the correct address by checking your router's manual or searching online for your router's model. You'll need your router's username and password to log in, which are typically found on the router itself or in the manual.
Optimizing Wireless Settings: Once logged in, navigate to the “Wireless” or “WiFi” settings section.
Choosing the Right Channel: The most common source of interference is the use of the same WiFi channel as your neighbors. Choose a channel that is less congested. Use a WiFi analyzer app (see troubleshooting tools below) to identify the least crowded channel.
Enabling WPA2/WPA3 Encryption: Ensure that your router is using a strong encryption method, such as WPA2 or WPA3. This protects your network from unauthorized access and potential speed degradation from unencrypted traffic. Avoid using older encryption methods, as they are less secure and can impact performance.
Setting Broadcast Frequency: Configure your broadcast frequency. We again recommend using the 5GHz band if possible. This offers less congestion and generally higher speeds compared to the 2.4 GHz band.
Adjusting Channel Width: Experiment with channel width settings. For the 2.4 GHz band, try 20 MHz. For the 5 GHz band, try 40 or 80 MHz for improved speeds.
Restarting Your Router: After making any changes to your router's settings, remember to restart it. This will ensure that the new configuration takes effect. Unplug your router from the power source, wait 30 seconds, and plug it back in.
Step 3: Minimizing Interference for a Clear Signal
WiFi signals are susceptible to interference from various sources, hindering their efficiency. By minimizing these, we can significantly improve your WiFi performance.
Identifying Potential Interferers: Microwave ovens, cordless phones, Bluetooth devices, and other electronic gadgets operating on the 2.4 GHz frequency can create interference.
Relocating Your Router: Place your router in a central, open location away from walls, metal objects, and electronic devices. Elevating the router can also improve signal propagation.
Managing Physical Obstacles: Solid objects, such as thick walls and metal appliances, can obstruct WiFi signals. Minimize these obstructions as much as possible. If necessary, consider moving your router to a location with fewer obstructions.
Ensuring Router Antenna is Upright: Ensure the antenna on your router is upright so that it can send the best possible signal.
Step 4: Cleaning Up Temporary Files and Optimizing Windows 7
A cluttered operating system can impact overall system performance, including WiFi speeds. Let's streamline your Windows 7 experience to ensure maximum efficiency.
Running Disk Cleanup: The built-in Disk Cleanup tool can remove temporary files, browser caches, and other junk files that consume disk space and slow down your system. To access Disk Cleanup, search for “Disk Cleanup” in the Start menu and run it.
Uninstalling Unnecessary Programs: Remove any programs you no longer use. These programs can compete for system resources and potentially interfere with network performance.
Updating Drivers: Ensure that your network adapter drivers are up to date. Outdated drivers can cause compatibility issues and performance bottlenecks. Go to your Windows 7 Device Manager (search for "Device Manager" in the Start menu), expand "Network adapters," right-click your wireless adapter, and select "Update driver software."
Checking for Malware: Viruses and malware can consume system resources and degrade network performance. Run a full system scan using your antivirus software.
Step 5: Troubleshooting Tools for Advanced Optimization
Sometimes, you need more information to diagnose and resolve WiFi issues. Here are several tools you can use to pinpoint problems and further optimize your connection.
WiFi Analyzer Apps: These apps (available on smartphones and tablets) can scan your local WiFi environment and identify the least congested channels. This knowledge allows you to optimize your router's channel selection. Popular examples include WiFi Analyzer (Android) and NetSpot (Windows and macOS).
Speed Test Websites: Websites like Speedtest.net and Fast.com allow you to measure your internet speed and identify potential bottlenecks. Run these tests regularly to monitor your connection performance.
Network Monitoring Tools: These sophisticated tools can track network traffic, identify bandwidth-hogging applications, and provide detailed performance metrics. Wireshark is a powerful, free option for advanced users.
Step 6: Hardware Upgrade (Optional)
If none of the above steps result in a significant improvement, hardware upgrades may be necessary. These include:
Upgrading Your Wireless Adapter: If your current adapter is outdated, consider upgrading to a more modern adapter that supports the latest WiFi standards (e.g., 802.11ac or 802.11ax).
Replacing Your Router: An older router may struggle to handle modern network demands. Replacing your router with a newer model, a mesh network, or a router from a reputable brand
