turn off wifi on lenovo laptop
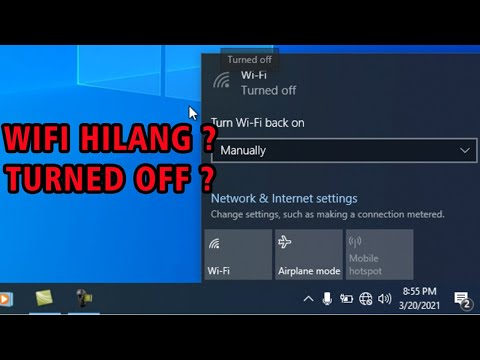
Title: Cara mengatasi wifi yang hilang atau turned of dengan mudah
Channel: Abdul Rohman
Cara mengatasi wifi yang hilang atau turned of dengan mudah by Abdul Rohman
turn off wifi on lenovo laptop, turn off wifi on lenovo thinkpad, how to turn off internet on lenovo laptop
Lenovo Laptop WiFi: The SHOCKING Fix You NEED!
Unleash Your Lenovo's Wi-Fi: The Unexpected Savior You've Been Missing!
Ever felt your Lenovo laptop's Wi-Fi felt more like a sluggish snail than a digital cheetah? Have you wrestled with dropped connections, agonizingly slow speeds, and sheer frustration? If so, you're definitely not alone. Many Lenovo users face similar wireless woes. But prepare yourself because what I'm about to reveal is… well, let's just say, it's been a game-changer for me.
Decoding the Wi-Fi Whispers: Understanding the Culprits
Before we dive in, let's acknowledge the usual suspects. Wi-Fi troubles? They’re often caused by something simple. Think of interference. Other electronic devices might be the problem. Also, your router's location could be a factor. And, naturally, there's software. Outdated drivers are a common culprit. Sometimes, the issue isn't even your Lenovo. Your internet provider could be the source of the problem. However, let's assume we've ruled those out. Let's assume your internet connection is solid.
The Revelation: A Hidden Power Saving Conspiracy
Now, here's the kicker. Are you ready for a potential paradigm shift? It turns out many Lenovo laptops have a built-in, yet often sneaky, power-saving feature. And believe it or not, this feature, intended to conserve battery life, can wreak havoc on your Wi-Fi performance. In other words, the fix is often simpler than you imagine.
Unveiling the Secret: The Power Management Solution
So, how do we find and tame this Wi-Fi performance saboteur? The good news is that it's a straightforward process. You don’t need to be a tech guru to make this work. You can easily navigate these settings. Here's how to unlock your laptop's full wireless potential:
Step 1: Embark on a Device Manager Expedition: First, click on the Windows search bar. Then simply type "Device Manager" into the search field. Select it from the results. This is your gateway to your laptop’s hidden secrets.
Step 2: The Network Adapter Navigation: Within the Device Manager's domain, look for "Network Adapters." Click the dropdown arrow to unveil the mysteries hidden within. You will see numerous network adapter options. Your Wi-Fi adapter will be listed here.
Step 3: Your Adapter's Properties: Right-click on your Wi-Fi adapter. (It will likely be something like "Intel Wireless-AC 9260" or similar). Select "Properties" from the menu. This opens a window full of settings.
Step 4: The Power Management Portal: Inside the Properties window, locate the "Power Management" tab. Click on it. This is where the magic happens.
Step 5: Uncheck the "Power Saver" Option: You'll find a checkbox labeled "Allow the computer to turn off this device to save power." Carefully uncheck this box. This single action can make an enormous difference.
Step 6: Apply and Restart: Click "OK" to save your changes. Then, restart your Lenovo laptop. This gives the changes a chance to take effect.
Beyond the Basic Fix: Further Wi-Fi Optimization
While the power management tweak often works wonders, there are other things to consider. For enhanced performance, consider these additional tips:
- Driver Diligence: Make sure your Wi-Fi drivers are up-to-date. Go to the Lenovo support website. Search for your laptop model. Download and install the latest drivers for your Wi-Fi adapter. Updated drivers often hold improvements.
- Router Relocation: Experiment with your router's position. Place it in a central location, free from obstructions. Walls and furniture can hinder Wi-Fi signals.
- Channel Adjustments: Your router broadcasts on a specific channel. In congested areas, try changing the Wi-Fi channel. Many routers allow you to automatically select the least crowded one.
- Router Upgrade: Consider upgrading your router if it's several years old. Newer routers support faster Wi-Fi standards. A better router provides better speeds.
- Firewall Fortifications: Ensure your firewall isn't blocking Wi-Fi traffic. Check your firewall settings. Make sure your Wi-Fi network is trusted.
The Transformative Results: A Wi-Fi Renaissance
After applying these fixes, you may experience a total transformation. No more frustrating slowdowns. You will enjoy faster downloads. Streaming services will work flawlessly. Your online experience will feel seamlessly fluid. Suddenly, your Lenovo will perform like it should.
Final Thoughts: Seize Your Wireless Freedom
Don’t let Wi-Fi woes hold you back. Take control of your internet experience. Apply these simple fixes, and reclaim your online freedom. With a few tweaks, your Lenovo can provide a smooth, reliable connection. Remember, your Wi-Fi shouldn't be a source of stress. It should be a source of fun and productivity. Go forth and conquer wireless challenges! You can unlock your laptop's full potential. You deserve a fast and reliable Wi-Fi experience!
Lenovo Laptop WiFi: The SHOCKING Fix You NEED!
Hey everyone, it's your tech-savvy friend here, and trust me, we've all been there. That moment of utter frustration when your Lenovo laptop decides to play hide-and-seek with your WiFi. You're staring at a blank screen, the internet light on your router mocking you, and all you want to do is binge-watch that new show everyone's raving about. Or, you know, actually get some work done. Today, we're diving headfirst into the often-turbulent waters of Lenovo laptop WiFi woes, and guess what? We're going to find the shocking fix you desperately need!
1. The WiFi Wasteland: Why Your Lenovo Is Acting Up
Let's be real, a flaky WiFi connection on your Lenovo is like having a sports car with a flat tire – useless! But why does this happen? The reasons are as varied as the types of coffee I drink (seriously, I'm a connoisseur!). It could be a driver issue, conflicting software, or even something as simple as being too far from your router. Think of your router as the sun, and your laptop as a plant reaching for the light. If you're hiding in a shadowy corner, well, you're not getting much juice.
2. Diagnose the Disaster: Quick Checks Before We Panic
Before we start ripping your laptop apart (figuratively, of course!), let's do some quick and easy checks. These are the tech equivalent of checking your pockets before leaving the house – avoid awkward situations later!
- Check the Basics: Is WiFi turned on? Sounds silly, I know, but double-check that WiFi is enabled on your laptop. The little airplane icon (airplane mode on/off) is a sneaky culprit.
- Router Reboot: This is the tech magic of the 21st century. Unplug your router and modem for about 30 seconds. Plug them back in, give them a few minutes to boot up, and see if that does the trick. Think of it as a digital reset button.
- Proximity Matters: Are you sitting in a dead zone? Move closer to your router. Walls, microwaves, and even certain materials can interfere with the signal.
- Other Devices Okay?: Are other devices (phones, other laptops) connecting okay? If they are, the problem likely lies with your Lenovo.
3. The Driver Debacle: Update or Rollback?
Drivers are, in a nutshell, the translators that allow your laptop to “speak” to your WiFi adapter. If the translation is off, well, you're out of luck. This is where things get a little more technical, but don't worry, I'll guide you through it.
- Updating Drivers: This is usually the first (and often the easiest) line of defense. Go to the Device Manager (search for it in your Windows search bar). Expand "Network adapters," find your WiFi adapter (it'll have a name like "Intel WiFi" or "Realtek Wireless LAN"). Right-click on it and choose "Update driver." Let Windows search for the latest drivers, or, even better, go to the Lenovo support website and download the latest drivers specifically for your laptop model.
- Rolling Back Drivers: If the problem started after you updated your drivers, you might need to roll back. In the Device Manager, right-click on your WiFi adapter, choose "Properties," go to the "Driver" tab, and see if the "Roll Back Driver" option is available. If it is, give it a shot! It might be your WiFi saving grace.
4. Power Management Perplexities: Don't Let Your Lenovo Sleep!
Sometimes, Windows, in its infinite wisdom, thinks it's being helpful by putting your WiFi adapter to sleep to save power. The downside? No internet!
- Power Settings Adjustment: In Device Manager, go to your WiFi adapter properties, and then the "Power Management" tab. Uncheck the box that says "Allow the computer to turn off this device to save power." Trust me, you want the juice flowing!
5. Conflict of the Codes: Troubleshoot Software Conflicts
Sometimes, other software on your laptop can interfere with your WiFi connection. Think of it as a party with too many cooks in the kitchen – things get messy.
- Clean Boot: Perform a "clean boot" to start Windows with only essential services. This can help identify if a specific application is the culprit. Search "msconfig" in your Windows search bar, go to the "Services" tab, check "Hide all Microsoft services," and then click "Disable all." In the "Startup" tab, click "Open Task Manager" and disable all startup programs. Restart your laptop and see if your WiFi is working. If it is, you know that a startup program was creating a problem. Re-enable the programs one by one (after restarting after each), until you find the culprit.
- Antivirus Antics: Some antivirus programs can sometimes block WiFi connections. Try temporarily disabling your antivirus software (make sure to re-enable it later!), and see if that helps.
6. Channel Chatter: Adjust Your Router's WiFi Channel
Your router broadcasts WiFi on a specific channel. Sometimes, these channels get crowded, especially in apartment buildings or dense urban areas. It’s like everyone is trying to shout over the same microphone.
- Channel Hopping: Log in to your router's configuration page (usually by typing your router's IP address into a web browser - look for the sticker on your router or check your router manual to find the IP address, username and password). Look for the WiFi settings and the “channel” option. Experiment with different channels (1, 6, and 11 are usually good starting points), noting how it affects your connection. Do a speed test before and after changing channels to measure the impact.
7. The Network Adapter's Nuisance: Resetting the Adapter
Sometimes, your network adapter just needs a good, old-fashioned reset. It's like giving it a pep talk.
- Network Reset: Go to Settings (search for it), then "Network & Internet," and then "Network reset." This will reset your network adapters and some other network settings to their default values. Be aware that you might need to re-enter your WiFi password afterward. This takes seconds to do.
8. The Hidden SSID Hustle: Making Your WiFi Visible
If your router is set to "hide SSID" (the name of your WiFi network), your Lenovo might not be finding it automatically.
- Manually Connecting: Go to your WiFi settings and try manually adding your network. You'll need to know your network name (SSID) and password.
9. Firewall Fiascos: Are You Blocking Yourself?
Your firewall is like a security guard for your laptop. Sometimes, it can be a little too enthusiastic and block your WiFi connection.
- Firewall Check: Check your Windows Firewall settings (search for it). Make sure your WiFi adapter is allowed to communicate. If the firewall is the problem, you can often temporarily disable the firewall to test this, but remember to re-enable it, for your security.
10. The DNS Dilemma: Addressing the Internet
DNS (Domain Name System) servers translate website names into IP addresses. Think of them as the phone book of the internet. If your DNS servers are having issues, you won’t be able to access websites.
- Change Your DNS Servers: Go to your WiFi adapter settings (in Network Connections). Open the properties of your WiFi adapter and look for "Internet Protocol Version 4 (TCP/IPv4)." Click "Properties" again. Select "Use the following DNS server addresses" and try using public DNS servers like Google's (8.8.8.8 and 8.8.4.4) or Cloudflare's (1.1.1.1 and 1.0.0.1).
11. The Router's Rant: Firmware Frustrations
Your router, like your laptop, needs occasional software updates. An outdated firmware can cause all sorts of problems.
- Firmware Update: Log into your router's configuration page and check for a firmware update. Update it if available.
12. Hardware Hiccups: The Last Resort
Let's be honest, sometimes, the problem is physical. Your WiFi adapter might be faulty.
- Hardware Testing: If you've tried everything else, consider taking your laptop to a reputable tech repair shop to have the hardware tested. It might need to be replaced.
13. The Lenovo Support System: Reaching Out
Lenovo has a dedicated support team that can help you. Take advantage of their resources!
- Lenovo Support: Visit the Lenovo support website and search for your laptop model. They have troubleshooting guides, FAQs, and contact options for technical support. Don't be afraid to call them – they are there to help!
14. Preventative Measures: Keeping the Connection Strong
Once you've solved your WiFi woes, let's take some steps to prevent them from happening again. Proactive thinking? Yes, please!
- Regular Driver Updates: Keep your drivers up-to-date. Set up automatic driver updates to make sure your Lenovo is getting the latest and greatest.
- Router Maintenance: Reboot your router regularly (once a month, at least). Keep your
How to fix wifi button not working in Lenovo laptop wifi showing turn wifi back on manually

By Multi Care Technical How to fix wifi button not working in Lenovo laptop wifi showing turn wifi back on manually by Multi Care Technical
how to turn on wifi on Windows 10 in laptop l wifi not Turning on problem solved l wifi turned off

By Rasik Khoradiya how to turn on wifi on Windows 10 in laptop l wifi not Turning on problem solved l wifi turned off by Rasik Khoradiya
Fix Lenovo Wi-Fi Not Working in Windows 1087 2025

By TechFixIT Fix Lenovo Wi-Fi Not Working in Windows 1087 2025 by TechFixIT

Title: How to stop WiFi from turning off automatically Windows 11
Channel: The Geek Page
How to stop WiFi from turning off automatically Windows 11 by The Geek Page
Lenovo Laptop WiFi: The SHOCKING Fix You NEED!
The world thrives on connectivity. In today's fast-paced digital landscape, a reliable WiFi connection is no longer a luxury; it's an absolute necessity. When your Lenovo laptop inexplicably refuses to connect to your home network, or worse, frequently drops the signal, it can induce frustration levels that rival a dial-up connection in the 21st century. We understand. We've been there, wrestled with cryptic error messages, and spent countless hours troubleshooting. But fear not, fellow Lenovo users! We've compiled a comprehensive guide, a digital lifeline, to navigate the often-turbulent waters of Lenovo WiFi woes. This isn’t a superficial sweep of the usual suspects; this is a deep dive into the heart of the matter, armed with actionable solutions to get you back online, and stay online.
Decoding the WiFi Enigma: Identifying the Root Cause
Before we can begin the process of mending your broken WiFi connection, we must first understand the why. The culprits can be as varied as the applications you run, ranging from simple software glitches to hardware failures. The process of elimination is key. Let's explore some common offenders:
- Driver Dilemmas: Outdated, corrupted, or incompatible network adapter drivers are often the primary cause of WiFi connectivity issues. These unsung heroes act as the intermediary between your laptop and the physical WiFi card. If they're malfunctioning, you're effectively marooned.
- Router Rendezvous: Sometimes the problem lies not within your laptop, but at the source. Router configurations, channel congestion, and outdated firmware can all contribute to intermittent or nonexistent WiFi signals. Consider your router a vital communication hub; if it's faulty, your laptop can't receive the necessary data packets.
- OS Obstacles: The operating system itself can sometimes introduce obstacles. Software conflicts, network settings gone awry, and even corrupted system files can hinder your WiFi connection.
- Hardware Hurdles: In a worst-case scenario, the WiFi card itself might be the culprit. Physical damage, overheating, or internal component failure can render your WiFi card useless.
- External Interference: The world is a noisy place, wirelessly speaking. Microwave ovens, Bluetooth devices, and even neighboring WiFi networks can interfere with your signal, causing dropouts or reduced speeds.
The Diagnostic Drill: Pinpointing the Precisise Problem
Now that we understand potential sources of the problem, the next step is to effectively diagnose the problem by using strategic methods and maneuvers. This process involves a combination of simple checks and more advanced troubleshooting techniques to pinpoint the specific issue.
- The Obvious Checklist: Before diving into the advanced techniques, start with the basics. Ensure your laptop's WiFi switch (often a physical switch on the side or front of the device, or a function key combination) is turned on. Verify that you are within range of your designated WiFi network. Restart both your laptop and your router to rule out temporary software glitches.
- Network Troubleshooter: Windows has a built-in network troubleshooter, a surprisingly effective tool. Access this by right-clicking the WiFi icon in your system tray (bottom-right corner of your screen) and selecting "Troubleshoot problems." Let the troubleshooter run, and follow any recommendations it provides.
- Driver Verification: Right-click the Windows Start menu and select "Device Manager." Expand "Network adapters." Look for your WiFi adapter (e.g., Intel Wireless-AC 9260). Right-click the adapter and select "Update driver." Choose "Search automatically for drivers." If updates are found, install them. If not, consider manually downloading the latest drivers from the Lenovo support website.
- Router Configuration Inspection: Access your router's configuration page (usually by typing its IP address, found in your router's documentation, into a web browser). Check the router's settings, primarily the SSID (network name), security type, and password. Ensure your laptop is using the correct credentials. Also, check for available firmware updates for your router.
- The Command Prompt Commando: Open the Command Prompt (search for "cmd" in the Windows search bar). Type
ipconfig /alland press Enter. This will display a wealth of network information, including your IP address, default gateway (your router), and DNS servers. Verify that the information is correct and that you're receiving an IP address from your router. If you're getting an APIPA address (169.254.x.x), it indicates a problem with your DHCP server (usually on your router).
The Arsenal of Solutions: Repairing Your WiFi Connection
Once you've determined the nature of the problem, it's time to execute the fixes. From here, you should have clarity about your issue and a solid direction for your efforts.
- Driver Deployment: If outdated or corrupted drivers are the issue, installing the most recent driver is often all that's needed. Visit Lenovo's support website, enter your laptop's model number, and download the latest network adapter driver for your specific operating system. Follow the installation instructions carefully, and restart your laptop after installation.
- Router Reboot & Reset: The simplest fix, often overlooked, is to reset your router. Unplug the router from its power source for at least 30 seconds, then plug it back in. This can clear up temporary software glitches. If that doesn't work, consider factory resetting your router. This will erase all your custom settings, so have your internet service provider's login information ready.
- Wireless Adaptations: Within both your laptop and your router, you can make further adjustments. Within your laptop's network adapter settings (Device Manager -> Network adapters -> Right-click WiFi adapter -> Properties), adjust the options to make sure power management is not interfering. Within your router's settings, check the wireless channels being used. Consider switching channels to a less congested one.
- Operating System Optimization: Sometimes, the issue lies in the operating system. Run the System File Checker (SFC) by opening Command Prompt as an administrator and typing
sfc /scannow. This can repair corrupted system files. Also, ensure your operating system is up to date. Windows updates often include network-related bug fixes. - Hardware Hustle: If you suspect a hardware issue, it's time to delve deeper. Consider opening your laptop's back panel (carefully, after consulting your laptop's user manual and taking necessary precautions to prevent static discharge) and inspecting the WiFi card. Look for any obvious signs of damage. If you're comfortable, you may try reseating the card. However, if you are not sure of how to proceed at this step, the best solution is to contact a professional with experience in these matters.
- External Interference Mitigation: If you suspect interference, try moving your laptop closer to the router. Identify and relocate any devices that might be causing interference, such as microwave ovens or Bluetooth devices. You might also try changing the channel your router is using (using the router’s configuration page).
- Last Resort: System Restore: If all else fails, consider using System Restore to revert your laptop to a previous state when your WiFi was working correctly. This can undo changes that might be causing the problem.
Prevention is Key: Maintaining Optimal WiFi Performance
Once you've resolved your WiFi issue, it’s time to adopt some practices to prevent future problems. A proactive approach keeps your connection stable and prevents future frustrations.
- Regular Driver Updates: Make it a habit to check for and install driver updates regularly. You can set up automatic driver updates through the Device Manager.
- Router Firmware Vigilance: Keep your router’s firmware updated. Check your router manufacturer's website for new updates regularly.
- Security Protocols: Ensure your WiFi network is secured with a strong password and the WPA2 or WPA3 security protocol.
- Placement Matters: Position your router in a central location in your home, away from obstructions and potential sources of interference, such as walls, metal objects, and other electronic devices.
- Monitor Network Activity: Monitor your network activity to identify potential bottlenecks or unusual behavior. Most routers have built-in monitoring tools to help you with this.
- Power Settings Optimization: In your laptop's power settings, make sure the WiFi adapter is set to remain active when on battery power.
Troubleshooting Tips & Tricks: Advanced Techniques
For those who are comfortable with more advanced troubleshooting, take your skills to the next level with the following steps:
- Network Reset: In Windows settings, go to "Network & Internet" -> "Status" -> "Network reset." This will reset all your network adapters and configurations to their default settings. This is a drastic measure, but it can often resolve stubborn problems.
- Advanced Command Prompt Commands: Experiment with more advanced commands in Command Prompt. For instance,
netsh winsock resetcan reset your Winsock catalog, which can resolve network-related issues. Also,netsh int ip resetcan reset your TCP/IP stack. - Wireless Adapter Settings Tweaking: In the Device Manager, under your WiFi adapter's properties, explore the "Advanced" tab. Experiment with settings like "802.11n/ac/ax Wireless Mode," "Transmit Power," and "Wireless Mode." Be cautious, and keep track of any changes you make, so you can easily revert them if necessary.
- Hardware Inspection: If you are comfortable with it, consider getting a professional to
