how to smart view to my laptop without wifi
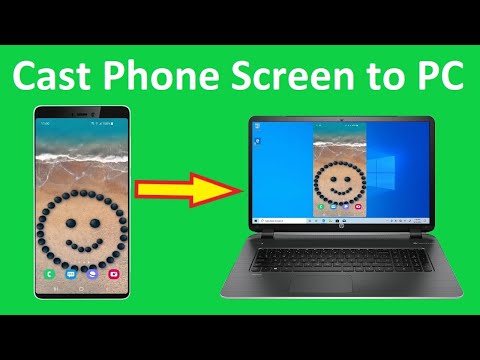
Title: How To CAST Android Mobile Phone Screen to PC Laptop for Free Connect Phone to PC Laptop
Channel: Howtosolveit
How To CAST Android Mobile Phone Screen to PC Laptop for Free Connect Phone to PC Laptop by Howtosolveit
Unlock Your Laptop's Secret Screen Mirroring Power (No WiFi Needed!)
Unleash Your Laptop's Hidden Screen-Sharing Wizardry (No Wi-Fi Required!)
Ever wished you could magically project your laptop screen onto a larger display without the hassle of a Wi-Fi connection? Well, prepare to be amazed! Because you can. This isn't some tech fairytale; it's a readily available feature often overlooked. We will unravel this secret power in simple steps.
The Magic of Direct Connection: A Different Kind of Wireless
Forget struggling with unreliable Wi-Fi signals. There's a more direct path to screen mirroring. Think of it like this: your laptop is already equipped with a secret portal. It allows it to talk directly to other devices. This method bypasses the need for a wireless network. Instead, it relies on a wired connection. Or, in some cases, a little bit of Bluetooth sorcery.
Decoding the HDMI Enigma: Your Gateway to Big-Screen Bliss
The most common pathway to screen mirroring without Wi-Fi involves HDMI cables. These are the trusty digital warriors of the connectivity world. Almost every modern laptop and TV supports HDMI. Therefore, it offers a reliable and high-quality connection.
First, grab your HDMI cable. Next, plug one end into your laptop’s HDMI port. Then, attach the other end to your TV or projector. Finally, select the correct HDMI input on your display. So easily, the content from your laptop will now appear on the big screen.
It seems simple, right? However, there are a few troubleshooting nuances. Indeed, you may face occasional audio problems. Also, your display settings might need tweaking. Don’t worry. We will address them.
Beyond HDMI: Exploring Alternative Mirroring Realms
HDMI isn't the only option. Because technology evolves. There are other avenues to explore. For example, some laptops and TVs support DisplayPort. This offers similar functionality, often with even better performance. Similarly, USB-C ports are becoming increasingly versatile. Many support video output through various protocols.
Furthermore, certain laptops provide their own proprietary screen-mirroring technologies. These might use a combination of Bluetooth and Wi-Fi Direct. However, be aware that these solutions often have limited compatibility.
Mastering the Settings: Fine-Tuning Your Visual Feast
Once you’ve established your connection, the real fun begins. You can begin optimizing your display settings. Most operating systems offer control over screen resolution, refresh rate, and display mode.
For instance, in Windows, right-click on your desktop. Now choose "Display settings." You'll find options to duplicate or extend your display. Duplicate mode mirrors your laptop screen. Extend mode lets you use your TV as a secondary screen. Hence, you can drag windows between them.
Moreover, explore your TV’s settings. You may find picture adjustments to enhance the image quality. You can also adjust audio output settings. This ensures a seamless viewing experience.
Troubleshooting Common Mirroring Roadblocks
Sometimes, things don’t go smoothly. Don't get discouraged. Several common issues might arise.
First, check your cables. Are they securely connected? Do they support the required resolution? Next, ensure your TV or projector has the correct input source selected. Consider a restart. A simple reboot can often resolve minor glitches. Furthermore, check your laptop's drivers. Outdated drivers often cause display problems. So, update them regularly.
Screen Mirroring Unleashed: Where to Apply This Knowledge
Imagine the possibilities! This screen-mirroring trick is immensely practical. Firstly, think about presentations. Ditch the clumsy projectors. Share your screen directly with your audience. Next, consider streaming movies and shows. Enjoy your favorite content on a larger screen. Additionally, it's ideal for sharing photos and videos with friends and family. No matter the occasion, this technique delivers great value.
The Future of Screen Sharing: Embracing a Wireless Future
Even though we're focusing on non-Wi-Fi solutions, wireless screen mirroring continues to evolve. Technologies like Miracast and Chromecast offer convenient wireless options. They require a Wi-Fi connection. However, they are constantly improving. They're becoming easier to set up and more reliable.
Final Thoughts: Embrace the Power in Your Hands
You've now unlocked a powerful secret. The ability to mirror your laptop screen without Wi-Fi. Embrace this knowledge. Explore the various connection methods. Master the settings. Then, begin enjoying your content on a larger screen. Your laptop has a hidden superpower. Use it. Share it. And have fun.
Connect Your Laptop to Your TV Wirelessly: The Easiest Trick EVER!Unlock Your Laptop's Secret Screen Mirroring Power (No WiFi Needed!)
Hey tech enthusiasts! Ever wished you could quickly beam your laptop screen onto a larger display, maybe for a presentation, a movie night, or even just to work on a bigger canvas? We've all been there, staring at that tiny laptop screen, wishing for a more immersive experience. The "official" way, with complicated setups and reliance on Wi-Fi, can feel like trying to navigate a maze. But what if I told you there's a hidden superpower within your laptop, a screen-mirroring ability that doesn't require a single bar of Wi-Fi? Buckle up, because we're about to unlock it!
1. Ditching the Wi-Fi Maze: Why Direct Connection is King
Let's face it, Wi-Fi can be a fickle friend. It's prone to dropouts, slow speeds, and sometimes, it's just plain unavailable. Relying on it for screen mirroring can lead to frustration and delay. Imagine trying to present an important document, and your connection decides to take a siesta. The beauty of the methods we're about to explore lies in their direct connection. Think of it like a direct line to your TV or projector, cutting out all the Wi-Fi middlemen. It’s like bypassing the long, winding road and taking a super-fast highway!
2. The HDMI Hero: Your Laptop's Silent Screen-Mirroring Partner
The first, and often the simplest, way to unlock your laptop's screen-mirroring power is the trusty HDMI cable. This is the workhorse of the connection world, and chances are, you already have one lying around. If you have a modern laptop, you'll almost certainly find an HDMI port. On the receiving end, your TV, monitor, or projector will also need an HDMI input.
- Easy Setup: Plug one end into your laptop’s HDMI port and the other into the corresponding port on your display.
- Instant Mirroring: Your screen should automatically mirror. If not, a simple setting adjustment (we’ll cover that shortly) will do the trick.
- High-Quality Audio and Video: HDMI provides both pristine video and audio transmission, guaranteeing a seamless experience.
I recently helped my parents set this up for their new Smart TV. The look of sheer delight on their faces when they could effortlessly watch their vacation photos on the big screen? Priceless.
3. Navigating Your Display Settings: The Quick-Fix Guide
So, you’ve plugged in your HDMI cable, but nothing’s happening? Don’t panic! Sometimes, your laptop needs a little nudge to recognize the external display. Here's how to get things working on both Windows and macOS:
- Windows: Press the Windows key + P. This will bring up the "Project" menu. Choose "Duplicate" (for screen mirroring), "Extend" (for using a second monitor as an extension), or "Second screen only" (to display only on the external display).
- macOS: Go to System Preferences > Displays. Your connected display should appear. You might need to click "Detect Displays" if it's not immediately recognized. You can then adjust the resolution and mirroring settings.
It's usually a quick fix, like a minor software adjustment, and then you're good to go!
4. VGA: The Veteran That Still Holds Its Ground
While HDMI is the preferred connection these days, VGA still exists. Many older projectors and monitors might only have a VGA port.
- Older Technology: VGA transmits video but usually requires a separate audio cable.
- Slightly Lower Quality: VGA can’t match the audio/video quality of HDMI, but it still gets the job done.
- Adapter Required: You might need a VGA adapter for your laptop if it doesn't have a native VGA port.
My old university laptop was kept alive by VGA for presentations, back in the day. It worked!
5. USB-C to the Rescue: A Versatile Powerhouse
USB-C is the future of connectivity, and your laptop might have it. USB-C ports can be used for various things, including screen mirroring! Many USB-C ports support DisplayPort, which means you can connect to a display using a USB-C to HDMI, VGA, or even DisplayPort adapter. This is a particularly useful option if your laptop lacks dedicated HDMI or VGA ports.
6. Adapters, Adapters Everywhere: Choosing the Right Ones
If your laptop doesn’t have the right ports, don’t worry. Adapters are your best friends! They bridge the gap between your laptop and your display.
- Variety is Key: You can find adapters for virtually any combination: USB-C to HDMI, USB-C to VGA, Mini DisplayPort to HDMI, and more.
- Quality Matters: Invest in quality adapters from reputable brands to ensure a stable connection and avoid signal loss. I’ve learned that lesson the hard way…cheap adapters can be unreliable.
7. The Practical Applications: Unleashing the Power
So, you've got your screen mirrored. Now what? The applications are endless!
- Presentations: Wow your audience with a sleek, professional presentation on a big screen.
- Movie Nights: Watch movies and shows on your TV, enjoying a cinematic experience.
- Gaming: Play your favorite games on a larger display for a more immersive experience.
- Productivity: Extend your screen for more workspace, boosting your productivity.
- Sharing Photos: Show off vacation photos or family videos to everyone in the room.
8. Troubleshooting Tips: When Things Go Wrong
Let's face it, sometimes things don't go perfectly. Here are some quick troubleshooting tips:
- Check the Cables: A loose or faulty cable is a common culprit. Try a different cable.
- Power Cycle: Turn off both your laptop and the display. Unplug both from the power source, wait 30 seconds, and then plug them back in.
- Update Drivers: Outdated display drivers can cause problems. Update them in your computer's device manager (Windows) or through the software updater (macOS).
- Restart Your Devices: A simple restart of the laptop and the external monitor can often solve connection issues.
9. Beyond Mirroring: Expanding Your Workspace
Screen mirroring is awesome, but you could also use your external monitor to extend your workspace. This is like having two screens, where you can move applications between them, boosting productivity.
10. Sounding Off: The Sound of Silence
Don’t forget about the sound! Many laptops will default to the external display's speakers.
- Adjusting Audio Settings: You might need to adjust your sound settings in your operating system (Windows or macOS) to ensure audio is outputting through your preferred speakers.
- External Speakers: For even better audio, connect external speakers to your laptop or the external display.
11. The Wireless Caveat: When Direct Isn’t an Option
While we're focusing on no-Wi-Fi options in this article, there's a place for wireless screen mirroring too, but it usually needs a dedicated network.
- Miracast and AirPlay: Technologies like Miracast (Windows) and AirPlay (Apple) allow wireless screen mirroring. However, they typically rely on a Wi-Fi connection.
- Consider Your Needs: If you must have wireless, and Wi-Fi is reliable, these are great options. But for consistent, no-Wi-Fi mirroring, the direct methods are best.
12. Preparing Your Presentation: Key Steps
If you plan to present, a little prep goes a long way.
- Organize Your Materials: Have your presentation slides, video clips, or documents ready to go.
- Test it Out: Always test your setup beforehand to avoid surprises.
- Adjust Resolution: Ensure the resolution on the external display is optimal for your presentation.
13. Gaming On the Big Screen: Level Up Your Experience
Gaming on a larger display is an entirely different experience!
- Controller Support: Most games support external controllers for a more immersive gaming experience.
- Graphics Settings: Adjust your game's graphics settings to ensure optimal performance on the external display.
14. Projectors vs. TVs: The Right Tool for the Job
Choose the right display for your needs:
- Projectors: Great for presentations and movie nights.
- TVs: Excellent for gaming and general media consumption.
15. The Future of Screen Mirroring: What's Next?
The world of connectivity is constantly evolving. USB-C is becoming the standard, promising even more versatile options. I’m excited for what the future holds!
Closing Thoughts: Embrace the Power
So there you have it! You now possess the knowledge to unlock your laptop's secret screen-mirroring power, even without a Wi-Fi connection. Whether it's for presentations, movie nights, or simply expanding your workspace, mastering these techniques will open a world of possibilities. Remember, the best solution depends on your specific needs and available equipment. Experiment, explore, and most importantly, have fun. Go forth and project!
FAQs
1. Q: Can I mirror my laptop screen to any TV or monitor?
A: Yes, as long
Unleash Your Laptop's WiFi Power: The Must-Have External Connector!SMART VIEW Quick and Easy Phone to laptop Screen Mirror

By Torogi Pro SMART VIEW Quick and Easy Phone to laptop Screen Mirror by Torogi Pro
How to Connect & Mirror Laptop Screen on Any Smart TV Wirelessly No App

By MJ Tube How to Connect & Mirror Laptop Screen on Any Smart TV Wirelessly No App by MJ Tube
Screen Mirroring Android to PC without Internet 3 Methods
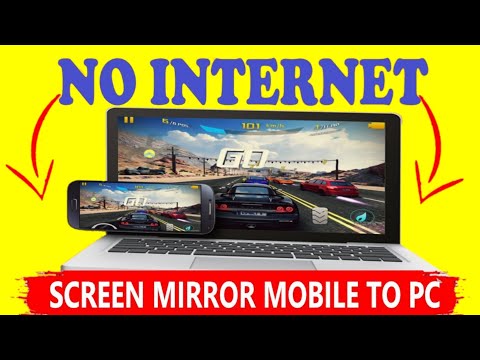
By TRIXTRA Screen Mirroring Android to PC without Internet 3 Methods by TRIXTRA

Title: How to Connect Laptop Screen to TV Wirelessly - Free 2024
Channel: rizisuper
How to Connect Laptop Screen to TV Wirelessly - Free 2024 by rizisuper
FiOS WiFi Vanished? Get Your Laptop Online NOW!
Unlock Your Laptop's Secret Screen Mirroring Power (No WiFi Needed!)
Ever wished you could effortlessly share your laptop's screen with a TV, projector, or another display, even when a Wi-Fi network seems miles away? Forget the frustration of tangled wires and unreliable wireless connections. We are here to unveil the hidden potential within your laptop, offering a seamless and surprisingly simple solution: screen mirroring, completely independent of Wi-Fi. This guide will empower you to project your content – presentations, movies, games, or anything else – with ease and precision. Get ready to ditch the dependence on internet connectivity and embrace a new level of screen-sharing freedom.
The Power of Direct Connection: Why Bypass WiFi?
While Wi-Fi screen mirroring is convenient, it's not always the ideal solution. Latency issues, network congestion, and the need for both devices to be on the same network can create frustrating hurdles. By focusing on direct connection methods, we're removing these potential problems and ensuring a smooth, reliable experience. Think of it as a dedicated pathway for your visual data, uncluttered by the complexities of wireless networks. This approach offers several key advantages:
- Uninterrupted Streaming: No more buffering. Direct connections ensure the highest possible data transfer rate, crucial for watching high-definition movies or playing demanding games.
- Enhanced Security: Eliminate the vulnerabilities that come with relying on a potentially unsecured Wi-Fi network.
- Universal Compatibility: Works across a wider range of devices, regardless of their Wi-Fi capabilities or network setup.
- Simplified Setup: Often, direct connections are faster and easier to establish than relying on Wi-Fi configuration.
Unveiling the HDMI Marvel: Your Gateway to Seamless Mirroring
The High-Definition Multimedia Interface (HDMI) is the unsung hero of screen mirroring. Chances are, your laptop and your target display (TV, projector, monitor) already have HDMI ports. This is by far the most reliable and high-quality connection method. Let’s explore how to leverage this powerful, yet often overlooked, interface.
The Essential Hardware: Your HDMI Cable. This is the cornerstone of your connection. Ensure you have a suitable HDMI cable. Consider the length based on your setup, but generally, a shorter cable is better to minimize signal degradation. HDMI cables are readily available in various lengths and are typically inexpensive. The specific type of HDMI cable (Standard, High Speed, etc.) typically doesn't make a noticeable difference for basic screen mirroring, but if you're working with 4K resolution or advanced features, consider a High-Speed HDMI cable.
Physical Connection: Plug and Play. Simply plug one end of the HDMI cable into the HDMI port on your laptop and the other end into the HDMI port on your TV, projector, or external monitor. It's virtually foolproof! The laptop usually detects the external display automatically.
Source Selection: The Key on Your Display. Your TV, projector, or monitor likely has multiple input sources (HDMI 1, HDMI 2, etc.). You'll need to use the remote control or on-screen menu to select the correct HDMI input that corresponds to the port you plugged your laptop into.
Laptop Settings: Mirroring the Magic. On your laptop, you'll need to configure the display settings. This is typically done through the Control Panel (Windows) or System Preferences (Mac).
- Windows: Right-click on the desktop and select "Display settings." In the "Multiple displays" section, you'll have several options:
- Duplicate these displays: This mirrors your laptop's screen exactly on the external display. Perfect for presentations or showing the same content to everyone.
- Extend these displays: This extends your desktop across both screens, providing more workspace. You can drag windows between them. This is useful for multitasking.
- Show only on 1/2: This disables the laptop's display and uses only the external display, or vice versa.
- macOS: Click the Apple menu (top left) and select "System Preferences." Then, click "Displays." In the "Arrangement" tab, you'll see a representation of your displays. To mirror, simply check the "Mirror Displays" box.
- Windows: Right-click on the desktop and select "Display settings." In the "Multiple displays" section, you'll have several options:
Audio Considerations: Often, HDMI carries both video and audio signals. Your TV or monitor should automatically play audio from your laptop. If not, check your audio settings in Control Panel (Windows) or System Preferences (Mac) to ensure the HDMI output is selected.
Adapters Unlock the Possibilities: Navigating Different Port Architectures
What if your laptop lacks an HDMI port? Don't worry. Adapters offer a flexible solution, enabling you to connect to a variety of displays using alternative ports. The most common scenarios involve:
- USB-C to HDMI: If your laptop has a USB-C port, this is an excellent option. USB-C is a versatile standard that can transmit video signals. Simply connect a USB-C to HDMI adapter to your laptop and plug the HDMI cable from the adapter into your display. This is a single-cable solution offering simplicity and excellent performance.
- Mini DisplayPort/Thunderbolt to HDMI: Many laptops, especially older models, feature a Mini DisplayPort or Thunderbolt port. Adapters are readily available to convert these ports to HDMI. The process is the same: connect the adapter to your laptop and then use an HDMI cable to connect to your display. These ports also provide reliable performance and are suitable for high-resolution mirroring.
- DVI to HDMI: While less common for modern laptops, some older models may use a DVI port. DVI adapters to HDMI exist but are generally less desirable than the previous options. DVI carries video only, so you will need a separate audio connection (e.g., a 3.5mm audio cable) to transmit sound.
- Considerations when using adapters: Choose reputable adapter brands to ensure optimal compatibility and signal quality. Check the adapter's specifications to confirm it supports the resolution and refresh rate of your display.
Beyond the Basics: Optimizing Your Screen Mirroring Experience
Once you've established a successful connection, there are several ways to fine-tune your screen mirroring experience for optimal performance:
- Resolution and Scaling: Verify that your display settings (both on your laptop and the external display) are set to the appropriate resolution. Consider the native resolution of your external display for the sharpest image. In the display settings, adjust the scaling (e.g., 100%, 125%, 150%) to ensure text and icons are easily readable on the external display.
- Refresh Rate: Experiment with the refresh rate options in your laptop's display settings. A higher refresh rate (e.g., 60Hz) often provides a smoother viewing experience, especially for video playback and gaming.
- Audio Output: Double-check that the correct audio output device (usually your TV or monitor) is selected in your laptop's sound settings. Adjust the volume using your laptop's controls or the volume controls on your external display.
- Presentation Mode: If you're giving a presentation, consider using presentation mode features in your presentation software (e.g., PowerPoint, Keynote). This allows you to see presenter notes on your laptop screen while displaying a cleaner view on the external display.
- Optimize Power Settings: When mirroring your screen, your laptop will likely be working harder. Adjust your power settings (battery settings if running on battery) to ensure adequate performance and prevent your laptop from overheating. Consider plugging your laptop into a power outlet during extended screen mirroring sessions.
Troubleshooting Common Issues
Sometimes, even with the ease of HDMI, things may not go as planned. Here’s how to troubleshoot common problems:
- No Signal:
- Check Connections: Ensure the HDMI cable is securely connected to both your laptop and the display.
- Input Selection: Verify that your TV or projector is set to the correct HDMI input source.
- Cable Issues: Test with a different HDMI cable. The cable may be faulty.
- Adapter Issues: If using an adapter, try a different adapter or a different port on your laptop.
- Restart: Restart your laptop and the external display.
- No Sound:
- Audio Settings: Check your laptop's sound settings to ensure the HDMI output is selected.
- Volume Levels: Make sure the volume is turned up on both your laptop and the external display.
- Source: Confirm the source of sound is not muted on the external device.
- Cable: Ensure you are using a cable that supports audio transfer.
- Poor Image Quality:
- Resolution: Check the resolution in your laptop's display settings and set it to the recommended resolution for your display.
- Cable: Try a different HDMI cable.
- Connections: Ensure the HDMI cable is properly connected.
- Laptop Display Not Working:
- Restart: Try restarting your laptop.
- Driver Issues: Update your graphics drivers.
- Display Settings: Check your display settings to make sure the correct displays are enabled.
Embrace the Freedom: Mirroring Without Wireless Reliance
By mastering these direct connection techniques, you gain complete control over your screen mirroring experience. You no longer need to be tethered to a Wi
