how to enable lenovo laptop wifi

Title: How to Fix Wi-Fi is Not Connecting to Lenovo Laptops Problem in Windows 1087 2025
Channel: FIXsage
How to Fix Wi-Fi is Not Connecting to Lenovo Laptops Problem in Windows 1087 2025 by FIXsage
how to turn on lenovo laptop wifi, how to turn on lenovo thinkpad wifi, how to enable wifi in lenovo laptop windows 10, how to enable wifi option in lenovo laptop, how to enable wifi direct on lenovo laptop, how to enable 5ghz wifi on lenovo laptop, how to enable wifi in lenovo laptop, how to turn on wifi on lenovo laptop windows 10, how to enable wifi in bios lenovo
Lenovo WiFi Dead? Fix It NOW! (Easy Steps)
Lenovo WiFi Woes? Conquer Your Connection Crisis Today!
Have you ever felt the frustration of a dead WiFi connection? It's a digital downpour on your day. Imagine staring blankly at your Lenovo laptop, yearning for the internet's embrace. Don't you worry; you're not alone. It happens to the best of us. So, let's revive that wireless spirit. This guide is your lifeline. We'll navigate the choppy waters of Lenovo WiFi troubles. It's designed to get you back online quickly. Prepare to reclaim your digital life.
Is Your Lenovo Truly WiFi-less? A Quick Diagnostic
Before we jump into solutions, let’s ascertain the issue. Is your Lenovo genuinely WiFi-less? Double-check the situation. First, examine the WiFi icon in your system tray. Is it showing a red "X" or a yellow exclamation point? Furthermore, try connecting to a different WiFi network. Use your smartphone as a hotspot, for instance. If other devices connect effortlessly, the problem likely lies with your Lenovo. If not, the fault might reside elsewhere. Then, test your device on another network. This helps pinpoint the origin of the issue. Make these preliminary investigations. They’re crucial for understanding the problem.
The Simplest Solutions First: Your WiFi Recovery Toolkit
Sometimes, the simplest fixes work miracles. Let's start with the basics. First, restart your Lenovo laptop. It sounds cliché, yet it frequently resolves problems. It's a digital "reset" button. Second, toggle your WiFi switch. Many Lenovo models have a physical WiFi switch. Ensure it's in the "on" position. It's often located on the side or front. Similarly, sometimes, airplane mode is activated. Verify that airplane mode is disabled. It silently disables all wireless connections. Then, restart your router and modem. Unplug them for about a minute. Plug them back in. This can often clear up network issues. Finally, check for driver updates. Outdated drivers can cause WiFi problems. Now, let’s move forward. These small steps might just save the day.
Delving Deeper: Troubleshooting Your Network Adapter
If the basics didn't fix it, we have to dig deeper. Let’s explore the network adapter. This component is vital for internet connectivity. First, open Device Manager. You can find it by searching in the Windows search bar. Next, expand the "Network adapters" section. Look for your WiFi adapter. It will likely have a name like "Intel Wireless-AC" or something similar. Right-click on your WiFi adapter. Select "Update driver." This will download the latest drivers. Follow the on-screen instructions. If updating doesn't work, try uninstalling and reinstalling the driver. Right-click the adapter and select "Uninstall device." Reboot your laptop. Windows should automatically reinstall the driver. The network adapter is the key to connectivity. The steps are straightforward.
Exploring Advanced Settings: When Things Get Tricky
Sometimes, the solutions aren’t so obvious. Now, let’s venture into more advanced settings. It might be time to tinker with network settings. Access your network connections. You can find this in the Control Panel or Settings app. Right-click on your WiFi connection. Choose "Properties." Check your settings. Ensure "Internet Protocol Version 4 (TCP/IPv4)" is enabled. Double-click on "TCP/IPv4." Make certain "Obtain an IP address automatically" and "Obtain DNS server address automatically" are selected. If not, adjust them. Also, investigate your router's settings. Your router can have blocking protocols. Access your router's configuration page. This is commonly done through a web browser. Check for any blocked devices or MAC address filtering. Ensure your Lenovo isn’t being blocked. These advanced checks are essential.
The Nuclear Option: Resetting Your Network Configuration
If all else fails, consider a network reset. This is a more drastic step. It's usually effective, though. Navigate to Settings > Network & Internet > Network reset. Windows will reset all network adapters. It will set network configurations back to their default settings. You’ll need to reconnect to your WiFi networks. Remember your passwords. Before you do this, back up essential data. It's a good practice. This is a last resort. But, often, the best.
Final Thoughts: Reconnecting and Moving Forward
Dealing with WiFi issues can be frustrating. But, remember, solutions exist. By following these steps, you've increased your chances of success. Don't give up. Patience is key. If you've tried everything listed above, it might be a hardware issue. Consider seeking professional help. Contact Lenovo support or a local computer repair shop. Otherwise, you are set. Now, get back online. Enjoy your Lenovo and a smooth, connected experience. Now, go forth and conquer those WiFi woes.
Unlock Your iPhone's WiFi Password on Your Laptop: The Easiest Trick EVER!Lenovo WiFi Dead? Fix It NOW! (Easy Steps)
Hey there, fellow tech traveler! Ever stared at your Lenovo laptop, that trusty companion of productivity and entertainment, and felt a cold dread creep in? The Wi-Fi icon is stubbornly gray, the internet is a distant memory, and you’re staring at a blank screen, the abyss of unread emails staring back. Yep, we’ve all been there. Feeling stranded in a disconnected world is no fun, especially when you're on a deadline or craving a streaming binge. But don't panic! We're going to tackle the dreaded "Lenovo WiFi dead" scenario head-on, and trust me, getting your connection back up and running might be easier than you think. Consider this your digital lifeline – a step-by-step guide to rescuing your laptop from the clutches of Wi-Fi woes.
1. The Initial Panic: Recognizing the Symptoms of a Wi-Fi Crisis
First things first, let's diagnose the situation. Is your Wi-Fi actually dead, or is it just playing hide-and-seek? Here are some telltale signs your Lenovo is suffering from a Wi-Fi outage:
- Missing Wi-Fi Icon: The classic culprit – a missing or grayed-out Wi-Fi icon in your system tray (the bottom-right corner of your screen). It's like your laptop's digital waving a white flag of surrender.
- No Available Networks: When you click the network icon, you see absolutely nothing. No list of available Wi-Fi networks, no welcoming signals from the internet. This is often a red flag, suggesting a deeper issue.
- Limited or No Internet Access: Even if you see a Wi-Fi signal, you might not be able to actually use it. Web pages won't load, emails won't send, and your favorite streaming service is mocking you with a spinning loading wheel.
- Error Messages: Sometimes, your Lenovo will be kind enough to provide error messages like "No internet access" or "Limited connectivity." These are breadcrumbs to lead you on the right path.
If you're experiencing any of these symptoms, it's time to roll up your sleeves and get ready to troubleshoot. Think of it like a detective story. We're going to unravel the mystery of the missing Wi-Fi!
2. Rebooting the Beast: Your First Line of Defense
This might sound cliché but trust me, it works surprisingly often! Restarting your Lenovo is the digital equivalent of hitting the reset button. It's like shaking the Etch-A-Sketch and starting fresh.
- Restart Your Laptop: Simply click the Windows Start menu, select the power icon, and choose "Restart." Give it a few minutes to boot back up.
- Restart Your Router/Modem: While your laptop is rebooting, unplug your router and modem (the box that connects to your internet service provider) from their power source. Wait about 30 seconds, then plug them back in. This can often clear up minor network glitches. Think of it as giving your internet a deep breath.
Once everything is back online, check for your Wi-Fi connection. Did it magically reappear? Fingers crossed! If not, on to the next step.
3. The Airplane Mode Fumble: A Simple Check
Airplane Mode is a sneaky little feature that can accidentally sabotage your Wi-Fi. It’s designed to shut off all wireless connections, so it’s a perfect choice for avoiding distractions on a flight. But it's also a common cause of Wi-Fi frustration.
- Check the Airplane Mode Status: Look at the system tray (bottom right). If the airplane icon is highlighted, it means Airplane Mode is on.
- Turn Airplane Mode Off: Click on the Airplane Mode icon to turn it off. You should see the Wi-Fi icon spring back to life.
It's a silly mistake, but we've all been there! It’s like forgetting to take the cap off the pen.
4. Driver Dilemma: Ensuring the Correct Software
Imagine your Wi-Fi adapter as the translator that lets your laptop speak the language of the internet. If the translator (the driver) is missing, outdated, or corrupted, your laptop can't understand what the internet is saying. Let's make sure that translator is functioning properly.
- Access Device Manager: Press the Windows key + X and select "Device Manager" from the menu. Think of it as mission control for all your hardware.
- Locate the Network Adapters: Expand the "Network adapters" section.
- Check for Errors: Look for any devices with a yellow exclamation mark or a red "X" next to them. These indicate driver issues.
- Update or Reinstall Drivers: Right-click on your Wi-Fi adapter (likely something like "Wi-Fi" or "Wireless Network Adapter") and select "Update driver." You can choose to search automatically or install the driver manually if you have a downloaded file of drivers. If updating doesn't work, try uninstalling and reinstalling the driver. Go to the Lenovo support website, search for your laptop model, and find the latest Wi-Fi drivers.
This step is like performing a software tune-up on your car. It can solve the trickiest of Wi-Fi troubles.
5. The Physical Switch: A Hidden Hardware Check
Some Lenovo laptops have a physical switch, often located on the side or front, that controls Wi-Fi. It’s easy to overlook, but essential to your wireless connection.
- Locate the Wi-Fi Switch: Check the sides, front, and top of your laptop for a physical Wi-Fi switch. It might be a small toggle or a button.
- Ensure the Switch is "On": Make sure the switch is in the "On" position. It sounds simple, but you’d be surprised!
It's like flicking the light switch. Sometimes, the solution is right at your fingertips (literally!).
6. Network Troubleshooter: Windows' Built-In Mechanic
Windows includes a handy tool called the Network Troubleshooter. It's like having an auto-mechanic built right into your operating system and can automatically identify and fix many common Wi-Fi problems.
- Run the Troubleshooter: Right-click on the Wi-Fi icon in the system tray and select "Troubleshoot problems." Windows will then scan for issues and attempt to resolve them.
- Follow the Instructions: The troubleshooter will guide you through the process, offering suggestions and solutions as it goes.
Sometimes, the easiest solution is the one hidden in plain sight. Let the troubleshooter do its work.
7. Forget and Reconnect: A Fresh Start for Your Connection
Sometimes, your laptop's memory of your Wi-Fi network gets corrupted. It's like your laptop has a bad memory of a connection and is unable to reconnect. Time to clear the slate.
- Open Network Settings: Right-click the Wi-Fi icon in the system tray and select "Open Network & Internet settings."
- Manage Known Networks: Click "Manage known networks," and then select your Wi-Fi network from the list.
- Forget the Network: Click the "Forget" button.
- Reconnect to the Network: Click the Wi-Fi icon, select your network from the list, and enter your password.
It's like deleting a corrupted file and starting fresh.
8. Router Interference: Environmental Factors
Your router is broadcasting your internet signal, but it has its share of enemies. Microwave ovens, baby monitors, and even other Wi-Fi devices can interfere with the signal.
- Check for Interference: Make sure your router isn't near devices that emit radio waves.
- Restart Your Router: Try restarting your router if it is not working properly.
Sometimes, the environment around us is the problem. It is useful to determine what kind of outside factors are affecting the performance of your network.
9. Check Internet Connectivity: Are You Actually Connected?
Sometimes, the issue isn't your laptop; it's the internet connection itself. It's like your car can function but the roads are closed.
- Test Other Devices: Try connecting other devices (phones, tablets, other laptops) to your Wi-Fi network. If they also can't connect, the problem is likely with your internet connection, not your Lenovo.
- Contact Your Internet Service Provider (ISP): If other devices are also unable to connect, contact your ISP (e.g., Comcast, Verizon, etc.) to report an outage or troubleshoot the issue.
This is like double-checking the source of the problem. It will help you to understand what could be at fault.
10. Wireless Network Adapter Settings: Fine-Tuning Your Adapter
Your wireless adapter has its own settings, similar to the car's engine settings. Sometimes, those settings are causing issues.
- Access Adapter Properties: In Device Manager, right-click on your Wi-Fi adapter and select "Properties."
- Check Power Management: Go to the "Power Management" tab and make sure that the box which allows the computer to turn off this device to save power is unchecked.
- Update Driver: Again, make sure the correct driver is installed.
It is important to check if there is something that could interrupt your Wi-Fi capabilities.
11. Restore System
Laptop WiFi Nightmare? Solved! (Guaranteed!)Fix Lenovo Wi-Fi Not Working in Windows 1087 2025

By TechFixIT Fix Lenovo Wi-Fi Not Working in Windows 1087 2025 by TechFixIT
How turn on WiFi of Lenovo Laptop

By Prince Srivastava How turn on WiFi of Lenovo Laptop by Prince Srivastava
Lenovo thinkpad laptop turn wifi and bluetooth on and off

By cagmito76 Lenovo thinkpad laptop turn wifi and bluetooth on and off by cagmito76
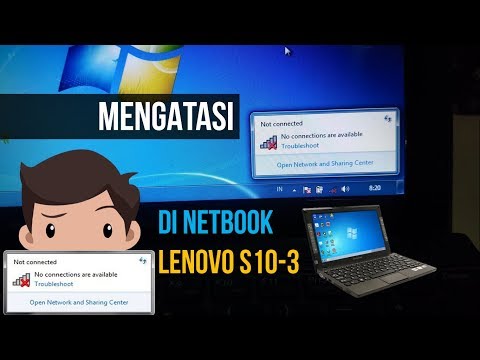
Title: Mengaktifkan Wifi yang No connection are available di Netbook Lenovo S10-3
Channel: IF Repair
Mengaktifkan Wifi yang No connection are available di Netbook Lenovo S10-3 by IF Repair
Laptop Working
Lenovo WiFi Dead? Fix It NOW! (Easy Steps)
Is your Lenovo laptop refusing to connect to the internet? The dreaded "no internet connection" message can be incredibly frustrating, especially when you need to work, browse, or stream. But before you panic, know that in many cases, the solution is within reach. Here’s a comprehensive guide to troubleshooting and resolving WiFi connectivity issues on your Lenovo, offering practical solutions to get you back online quickly.
Identifying the Problem: Is it Truly a Lenovo Issue?
Before diving into laptop-specific solutions, it's crucial to ascertain if the problem originates with your Lenovo or elsewhere. The fault could lie with your router, your internet service provider (ISP), or even a widespread network outage.
- Check Other Devices: Attempt to connect other devices (phones, tablets, other laptops) to your WiFi network. If they also cannot connect, the problem most likely isn't your Lenovo but rather your router or ISP.
- Router Reboot: Often, a simple router reboot works wonders. Unplug your router and modem (if they're separate) from their power sources. Wait for at least 60 seconds, then plug the modem back in first, followed by the router. Give them a few minutes to fully power up and reconnect.
- Contact Your ISP: If other devices also can't connect, and a router reboot doesn’t resolve the issue, contact your ISP to inquire about potential outages or service disruptions in your area.
If other devices connect flawlessly, the issue is likely specific to your Lenovo. Proceed with the troubleshooting steps below.
Verifying the Basics: The Simple Solutions First
Sometimes, the simplest explanations are the correct ones. Before delving into more complex troubleshooting steps, ensure you’ve covered these fundamental checks.
- Physical Wireless Switch: Some Lenovo laptops have a physical switch (often on the side or front edge) that disables the WiFi adapter. Make sure this switch is flipped to the "on" position.
- Function Keys: Many Lenovo models utilize function keys (Fn + a specific key, usually with a WiFi icon) to toggle the wireless adapter on and off. Experiment with this key combination to ensure WiFi is enabled. This key combination may vary based on your model. Consult your user guide for the specific combination.
- Airplane Mode: Confirm that Airplane Mode is disabled. Airplane Mode disables all wireless capabilities. You can typically find this setting in the quick action center (accessed via the notification icon in the system tray) or through the Windows settings.
- Password Verification: Double-check that you’re entering the correct WiFi password when connecting to your network. Case sensitivity matters.
Diagnosing the WiFi Adapter: Is It Enabled and Working Correctly?
Once you’ve confirmed the basics, the next step is to investigate the status of your Lenovo's WiFi adapter.
Device Manager Check: This is your first stop for diagnosing hardware issues.
- Access Device Manager: Right-click on the Start button and select "Device Manager." Alternatively, search for "Device Manager" in the Windows search bar.
- Locate the Network Adapters: Expand the "Network adapters" section. You should see your WiFi adapter listed (it might be named something like "Intel Wireless," "Realtek Wireless LAN," or similar).
- Check for Warnings: Look for any warning icons (yellow exclamation marks or red crosses) next to the WiFi adapter name. These icons indicate a problem.
- Enable a Disabled Adapter: If the adapter has a down arrow icon, it is disabled. Right-click on the adapter and select "Enable device."
- Update Driver: Right-click on the WiFi adapter and select "Update driver." Choose "Search automatically for drivers." Windows will attempt to find and install the latest driver.
Check Adapter Properties: Within Device Manager, right-click on your WiFi adapter and select "Properties."
- Driver Status: Under the "Driver" tab, ensure the driver status message indicates that the device is working correctly.
- Roll Back Driver (if necessary): If you recently updated the driver and problems started afterward, the "Roll Back Driver" button may be available. This will revert to the previous driver version.
Troubleshooting WiFi Connectivity Issues: Deeper Dive
If the basic checks and adapter status seem fine, it's time to explore more advanced troubleshooting methods.
- Network Reset: Windows offers a network reset feature that can resolve various connectivity problems.
- Access Network Settings: Go to Settings > Network & Internet > Status.
- Network Reset Option: Scroll down and click on "Network reset."
- Confirm Reset: Follow the prompts to reset your network settings. This will remove and reinstall all network adapters. You’ll need to re-enter your WiFi password after the reset.
- Command Prompt Diagnostics: Command Prompt can be a powerful diagnostic tool.
- Open Command Prompt as Administrator: Search for "cmd" in the Windows search bar. Right-click on "Command Prompt" and select "Run as administrator."
- Use the
ipconfigcommand: Typeipconfig /alland press Enter. This displays detailed network configuration information. Look for any anomalies, such as an invalid IP address or missing information regarding the connection. - Use the
pingcommand: Typeping 8.8.8.8and press Enter. This pings Google's public DNS server. Successful pings indicate that you can access the internet, even if your web browser is malfunctioning. If you do not receive a reply, you may have a connection problem. - Use the
netsh winsock resetcommand: Typenetsh winsock resetand press Enter. This resets the Winsock catalog, potentially resolving connectivity issues. You will need to restart your computer after running this command.
Addressing Wireless Driver Conflicts and Updates
Outdated, corrupted, or incompatible wireless drivers are a common cause of WiFi problems.
- Uninstall and Reinstall the Driver: In Device Manager, right-click on your WiFi adapter and select "Uninstall device." Check the box that says "Delete the driver software for this device," if available. Restart your Lenovo. Windows will automatically attempt to reinstall the driver upon restart.
- Download Drivers from Lenovo's Support Website: The most reliable way to obtain updated drivers is directly from Lenovo.
- Visit the Lenovo Support Website: Go to the official Lenovo support website (support.lenovo.com).
- Enter Your Laptop's Model Number: Enter your laptop's model number in the search bar. You can find this number on the bottom of your laptop or in the BIOS.
- Navigate to the Driver Download Section: Look for the "Drivers & Software" section.
- Download the Wireless Driver: Download the latest wireless driver specifically for your operating system (e.g., Windows 10 or Windows 11).
- Install the Driver: Run the downloaded file and follow the on-screen instructions to install the driver.
Investigating Router-Specific Issues
While the problem might be with your Lenovo, occasionally, the router settings could interfere with the connection.
- Router Firmware Update: Outdated router firmware can cause compatibility issues. Check your router's documentation for instructions on updating the firmware. Typically, you access the router's configuration interface via a web browser (by typing the router’s IP address into the address bar) and navigate to an update section.
- Channel Congestion: WiFi routers operate on different channels. If your router is using a crowded channel, it could lead to slow speeds or connection dropouts. You can use a WiFi analyzer app on your phone to identify less congested channels and manually change the channel setting in your router's configuration.
- Router Security Settings: Some router security settings, such as MAC address filtering, could be preventing your Lenovo from connecting. Consult your router's documentation for information regarding the settings. Make sure MAC address filtering is either disabled or that your Lenovo's MAC address is whitelisted.
- Router Placement: The physical location of your router influences the strength and reach of the WiFi signal. Make sure your router is in a central location, away from obstructions (walls, metal objects, and other electronic devices).
Advanced Troubleshooting: When All Else Fails
If the above steps do not resolve the issue, you might need to investigate further.
- BIOS Update: The BIOS (Basic Input/Output System) is the firmware that initializes your laptop's hardware. An outdated BIOS could potentially cause compatibility problems.
- Check Lenovo Support: Visit the Lenovo support website (as described above) and check for BIOS updates for your specific laptop model.
- Careful Installation: Follow the Lenovo's instructions carefully when updating the BIOS. A failed BIOS update can render your laptop unusable. It is better to let a professional do this.
- System Restore: If you suspect a recent software change or update is the culprit, consider using System Restore to revert your system to a previous configuration.
- Access System Restore: Search for "Create a restore point" in the Windows search bar. Click on "System Restore."
- Choose a Restore Point: Select a restore point from before the WiFi issue started.
- Follow the prompts: Follow the on-screen instructions to restore your system.
