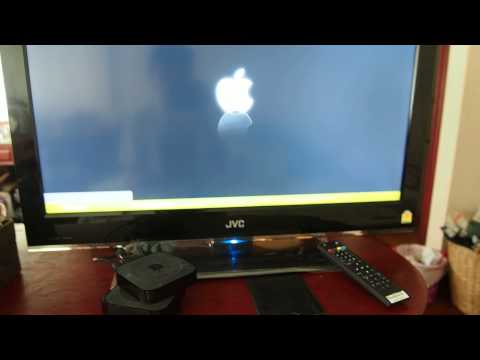
connect apple tv to laptop wifi

Title: All Apple TVs How to Connect to Wifi Network Step by Step
Channel: WorldofTech
All Apple TVs How to Connect to Wifi Network Step by Step by WorldofTech
connect apple tv to laptop wirelessly, can you connect apple tv to laptop
Apple TV to Laptop WiFi: The SHOCKINGLY Easy Trick You NEED!
Unleash Your Apple TV’s Hidden Power: The Wi-Fi Secret You Didn't Know!
Ever feel like your Apple TV is underutilized? You're not alone. It holds incredible potential. But, are you truly maximizing its capabilities? This simple trick will change everything.
The Frustration: Limited Entertainment Options?
We've all been there. You're craving a specific movie or show. Unfortunately, it’s not available on your streaming apps. Or, perhaps you want to share content from your laptop. However, you face frustrating limitations. Wired connections feel clunky. Meanwhile, spotty Wi-Fi can make it worse. You're left switching between devices. That’s a hassle no one wants.
The Aha! Moment: Bridging the Gap with Wi-Fi
Fortunately, there’s a remarkably easy solution. It unlocks a whole new world of possibilities. You can seamlessly stream content from your laptop. Essentially, you're creating a direct bridge to your Apple TV. It's cleaner and simpler than you think!
How to Connect Apple TV to Laptop Wi-Fi: The Simple Steps
This isn't some complicated tech-wizardry. The process is remarkably straightforward. Follow these easy steps, and you're ready.
- Step 1: Check for Compatibility. Ensure your Apple TV is up-to-date. Also, verify your MacBook or other laptop’s Wi-Fi card. Most modern devices are compatible.
- Step 2: Verify Your Network Connectivity. Ensure your laptop and Apple TV are on the same network. If not, then fix it.
- Step 3: Mirror Your Laptop's Display. This is the core of the magic. Locate the AirPlay icon on your laptop. It's usually in the menu bar. Click on it, then select your Apple TV. Now, your laptop's display appears on your TV screen.
- Step 4: Unleash the Content. Voila! Now you can stream anything. From movies to presentations, the possibilities are endless.
The Power of AirPlay: More Than Just Streaming!
AirPlay is the secret weapon. It’s not merely for streaming. It's a versatile tool. First, consider presentations. It's perfect for sharing slideshows. Also, share vacation photos with family. Moreover, it’s perfect for business meetings. You'll immediately elevate your presentation.
Maximize Your Viewing Experience
Furthermore, think about your viewing setup. Position yourself in a comfortable spot. Next, optimize your lighting. Make sure there’s no glare on the screen. Dim the lights for a better movie night. Now, grab some snacks and enjoy. Your movie night just got better.
Troubleshooting Tips: Smooth Sailing Ahead
Sometimes, you might encounter minor hiccups. Don't worry! Usually, they are easily fixed. Firstly, restart your Apple TV. Next, restart your laptop. Then, make sure both devices are connected. Also, check your Wi-Fi signal strength. A weak signal might cause delays. Also, ensure both devices are running the latest software. After all, updates often fix bugs. If problems persist, consult Apple's support resources.
Beyond the Basics: Advanced Applications
Ready to level up? Explore more advanced features. Use AirPlay to cast specific apps. Not just your entire desktop. Many apps support this feature. Consider using it for gaming. It’s a fantastic way to share content. It's seamless, simple, and fun!
Why This Trick Matters: Enhancing Your Lifestyle
This isn't just a tech tip. It is a lifestyle upgrade. It’s about convenience. It's about expanding your access to entertainment. It also simplifies sharing with family and friends. Ultimately, it creates a better viewing experience. It’s an effortless way to elevate daily life.
Final Thoughts: Your Apple TV Transformation Starts Now!
Now, you're equipped with a game-changing trick. Take action. Employ these steps. Start enjoying the full potential of your Apple TV. Then, prepare to be amazed. You'll wonder how you ever lived without it. This is your gateway to seamless entertainment. Go forth and make it happen!
Turn Your Windows 8 Laptop into a WiFi Hotspot in 60 Seconds!Apple TV to Laptop WiFi: The SHOCKINGLY Easy Trick You NEED!
Hey there, tech enthusiasts and streaming fanatics! Ever been in that frustrating situation where you want to watch your Apple TV content on your laptop, but the Wi-Fi connection is acting up? Or maybe you're traveling and the hotel Wi-Fi is about as reliable as a politician’s promise? Well, buckle up buttercups, because we’re about to unveil a shockingly easy trick that'll let you stream your Apple TV directly to your laptop, bypassing those pesky Wi-Fi woes. Prepare to have your minds blown – or at least, mildly entertained!
1. The Frustration: Wi-Fi Woes and the Streaming Struggle
Let's be honest, we've all been there. You're curled up on the couch, ready for a movie night, but the Wi-Fi connection decides to stage a dramatic performance of its own, buffering like it's being paid by the second. Or perhaps you are on a business trip, stuck in a hotel room with Wi-Fi weaker than a baby’s sneeze. You long to watch your favorite shows, but the lag is unbearable. This lack of freedom can ruin your entertainment experience. It’s like trying to enjoy a gourmet meal through a straw – frustrating and not nearly as satisfying.
2. The Solution: Direct Apple TV to Laptop Magic!
Here’s the good news: You don't need to be a tech guru or spend a fortune on fancy gadgets to solve this problem. The solution lies in a remarkably simple trick that involves connecting your Apple TV directly to your laptop using an approach that doesn't rely entirely on your internet. Think of it like a secret handshake, allowing your devices to communicate directly, like two old friends catching up over a cup of coffee, without the need for a middleman.
3. The Hardware You'll Need (Spoiler Alert: It's Minimal!)
The beauty of this trick is its simplicity. You won't need to empty your bank account. In fact, all you'll need is:
- An Ethernet Cable: This trusty old cable is your lifeline. Think of it as the superhighway for data. Ensure you have one long enough to reach from your Apple TV to your laptop.
- Your Apple TV: (Duh!) Make sure it’s powered on and ready to stream. This is the star of the show.
- Your Laptop: The viewing screen. Make sure it has an Ethernet port (most modern laptops do), or a USB-to-Ethernet adapter (more on that later).
4. Step-by-Step Guide: Your Path to Streaming Bliss
Okay, here’s the magic formula. Follow these steps, and you'll be streaming in no time:
- Connect the Cable: Plug one end of the Ethernet cable into your Apple TV and the other end into your laptop’s Ethernet port. It’s like giving your devices a high-five!
- Laptop Settings – The Secret Sauce:
- Go to your laptop’s System Preferences (on a Mac) or Settings (on Windows).
- Find Network settings (usually under Internet & Wireless).
- You might need to adjust an IP address (more on that later).
- Mirroring Time! Now you need to mirror your Apple TV on your laptop. This depends on the type of laptop you have.
- Mac: You can use AirPlay -- click on the AirPlay icon in the menu bar, and then select your Apple TV.
- Windows: You may need to use an app -- install AirPlay receiver software. Once installed, you should see your Apple TV as an option.
- Start Streaming: Launch your favorite streaming app on your Apple TV (Netflix, Hulu, etc.) and enjoy the show!
5. Dealing with the "No Ethernet Port" Blues
Ah, the bane of modern laptops: the lack of an Ethernet port. This is where a USB-to-Ethernet adapter comes to the rescue. These little lifesavers plug into your USB port, giving you a virtual Ethernet port. Think of it as a clever workaround, a digital prosthetic that grants your laptop the ability to connect to the wired world. You can find these adapters relatively cheaply online.
6. The IP Address Adventure (Don't Panic!)
Sometimes, your laptop might not automatically recognize the Ethernet connection. You might need to manually configure an IP address. Don’t worry; it’s easier than it sounds:
- On your laptop's network settings, find the Ethernet connection.
- Look for “Configure IPv4”.
- If set to "Using DHCP," try changing it to "Manually."
- Enter an IP address like “192.168.1.100” (or any number that does not conflict with any other device on the network).
- Enter a Subnet Mask of “255.255.255.0.”
- For the Router, you can try “192.168.1.1” (If This Doesn't Work, Try Changing the Values).
7. The Beauty of Bypassing the Wi-Fi Bottleneck
By connecting directly, you bypass the Wi-Fi bottleneck. Your streaming experience becomes smoother, faster, and more reliable. It's like upgrading from a dirt road to a superhighway for your data. No more buffering, no more interruptions, just pure, unadulterated streaming bliss. It's a game-changer, especially for those with spotty Wi-Fi or limited data.
8. What About Internet Access? The Curious Case of Limited Connectivity
Here's the thing: while this trick circumvents the need for a strong Wi-Fi connection for the primary streaming, it does require your Apple TV to have some internet access – at least initially – to verify your subscriptions and load its interface. But once it is working, the streaming of the content bypasses the internet connection. Imagine the data travelling directly through your devices.
9. Beyond Streaming: Other Uses for this Trick
This direct connection isn’t just for streaming. It can be incredibly useful for:
- Troubleshooting Wi-Fi issues: A direct connection can help pinpoint whether the problem lies with your Apple TV or your Wi-Fi network.
- Boosting Performance: If your existing Internet is slow, plugging directly into it can boost the speed for content and updates.
10. The Benefits: Speed, Reliability, and Peace of Mind
The advantages are clear:
- Faster Loading: Content starts playing almost instantly.
- Fewer Interruptions: No more buffering wheels of doom.
- Reliable Streaming: Enjoy uninterrupted viewing pleasure.
- Peace of Mind: Knowing you have a reliable backup plan when Wi-Fi fails.
11. Setting up your Apple TV
Make sure your Apple TV is ready for streaming:
- Software Updates: Ensure that your Apple TV is running on the latest software. Go to Settings > System > Software Update.
- Account Sign-in: Log in to your streaming services on your Apple TV – Netflix, Hulu, Disney+, and so on.
- Test the Connection: Try some streaming services before you move to the laptop.
12. Troubleshooting Common Issues
Sometimes, things don't go perfectly, and that’s okay. Here are a few common issues and how to address them:
- No connection: Double-check all cable connections; make sure you have the Ethernet port on your laptop enabled and that your laptop is set to use Ethernet.
- Video quality issues: If the video looks choppy, try connecting to a different Ethernet port or testing the cable.
- Sound problems: Check your laptop's output settings or the sound output settings on your Apple TV.
13. Advanced Tweaks: Fine-Tuning for Perfection
Once you've mastered the basics, you can make some advanced tweaks:
- Prioritize Ethernet: In your laptop’s network settings, make sure Ethernet is prioritized over Wi-Fi. This ensures your laptop uses the wired connection first.
- Check your Ethernet cable speed: Buy a cable that supports high speed.
14. Real-World Scenarios Where This Trick Shines
- Camping Trips: Enjoy your favorite movies even when away from home.
- Hotel Stays: Say goodbye to buffering in hotel rooms with unreliable Wi-Fi.
- Streaming Parties: Create a reliable and lag-free streaming experience for your friends.
15. The Ultimate Takeaway: Stream Smarter, Not Harder!
So, there you have it! The shockingly easy trick that transforms how you stream your Apple TV content. It's about empowerment. This technique puts you in control, allowing you to enjoy your favorite movies and shows anytime, anywhere, without being at the mercy of a shaky Wi-Fi connection.
Closing Thoughts:
We hope this article has equipped you with the knowledge and inspiration to take control of your streaming experience. It’s time to ditch those buffering woes and embrace the simple yet powerful solution of directly connecting your Apple TV to your laptop. Now go forth and stream on!
FAQs:
- Will this method work with any Apple TV model?
Why I travel with an Apple TV carterpcs tech techtok techfacts iphone android appletv

By CarterPCs Why I travel with an Apple TV carterpcs tech techtok techfacts iphone android appletv by CarterPCs
How to Set Up an Apple TV

By Noah Thomas How to Set Up an Apple TV by Noah Thomas
Apple TV 4K with Wi-Fi and Ethernet

By Hellhound Engineering Solutions Apple TV 4K with Wi-Fi and Ethernet by Hellhound Engineering Solutions
Title: Apple TV Gen 3 Cannot Detect Wifi
Channel: Parnrong N
Apple TV Gen 3 Cannot Detect Wifi by Parnrong N
Laptop Working
Apple TV to Laptop WiFi: The Astonishingly Simple Path You Crave
The digital landscape hums with a constant quest for seamless connectivity. We, as consumers of technology, yearn for a streamlined lifestyle, a world where devices effortlessly communicate, and information flows freely. In this pursuit of effortless streaming and screen sharing, a common hurdle arises: connecting your Apple TV to your laptop via Wi-Fi. It seems, at first glance, a complex dance of protocols and settings, a puzzle of ports and permissions. However, we're here to unveil a strategy, a streamlined approach, that dramatically simplifies this process, transforming a potential headache into an exercise in efficiency. Forget the technical minutiae. We'll cut straight to the heart of the matter, allowing you to unlock the power of your Apple TV on your laptop with surprising ease.
Understanding the Foundation: Your Home Network Architecture
Before we delve into the "how," let's briefly address the "why." The core of this process hinges on understanding your home network configuration. Your Apple TV, designed to connect to the internet and stream content, relies on a stable Wi-Fi connection. Similarly, your laptop, by its very nature, is also equipped to connect to a Wi-Fi network. The key is ensuring both devices are on the same Wi-Fi network or have a compatible connection to communicate with each other. This isn't about creating a complex mesh network. Typically in the context of a home network, your Wi-Fi router serves as the central hub, distributing the internet connection to all connected devices. This fundamental concept is crucial. We want to ensure that both your Apple TV and your laptop are connected to this central distribution point, enabling them to “see” each other and share data.
Method 1: The Direct Connection: When Simplicity Reigns Supreme
Let’s begin with the most straightforward approach. This is the method that shines when you lack the complex network configuration. Here is a step-by-step guide to mirroring your Apple TV to your laptop:
- Ensure Device Compatibility: Confirm that your laptop and Apple TV are in close physical proximity. This simple verification will help rule out unnecessary troubleshooting later on.
- Activate Screen Mirroring: On your Apple TV, navigate to Settings > AirPlay. Ensure AirPlay is enabled. This setting activates the functionality that enables your Apple TV to receive streams from other devices within the same network.
- Laptop Initialization: On your laptop, and assuming you have a Mac, locate the AirPlay icon in your menu bar. This icon, usually an outline of a screen with a small triangle at the bottom, indicates the AirPlay’s availability. If you can't see it, go to System Preferences > Displays and make sure "Show mirroring options in the menu bar when available" is checked.
- Initiate the Mirroring Session: Click on the AirPlay icon. A list of available devices should appear, including your Apple TV, provided both devices are on the same network. Select your Apple TV from this list.
- The Connection is Established: After a brief moment, your laptop screen should appear on your TV. Any content you play on your laptop, from movies and photos to presentations and games, will be mirrored on your television.
- Optional: Extend Display: While mirroring is the default setting, you might also have options for managing your display. You often also have a setting for "Use As Separate Display" letting you utilise it as an extended desktop. This can be useful for multitasking, but it can impact network performance.
Method 2: Leveraging Third-Party Apps: Expanding Capabilities
While Apple’s built-in AirPlay is excellent, it’s not the only option. There exist a plethora of third-party applications designed to enhance the connection between your Apple TV and laptop, providing added functionality and flexibility. These apps are available on both macOS and Windows platforms, often offering features beyond the capabilities of native AirPlay.
Identify Suitable Applications: Several reputable applications on the market are designed specifically for screen mirroring and media streaming. Research and compare options, considering factors such as pricing, user reviews, and supported features. Some examples include AirServer, Reflector, and 5KPlayer.
Download and Installation: Download the app from a verified source. Be wary of sources that seem less than official. Follow the on-screen instructions to install the app on your laptop.
The Application Interface: Open the installed application. The interface will differ, but most such software will provide a simplified step-by-step screen-mirroring process.
Device Detection and Connection: Within the application, it will likely scan your network for available Apple TVs. Select your Apple TV. The app will establish the connection and begin mirroring your laptop screen to your television.
Exploring App-Specific Features: Pay attention to the features the application offers. This can include:
- Improved Streaming Quality: Some apps are optimized for higher resolution and smoother streaming, delivering a superior viewing experience.
- Video Recording: Many have built-in screen-recording capabilities, allowing you to capture and save your screen activity for later viewing or sharing.
- Additional Audio Support: Some may support advanced audio options, providing enhanced sound quality.
- Cross-Platform Compatibility: Many of these applications support mirroring from Android and Windows devices, expanding your device compatibility.
Troubleshooting Common Obstacles: Navigating Potential Hiccups
Even with the most straightforward processes, things can sometimes go awry. Let's address the common issues that might hinder a successful connection.
- Network Connectivity Issues: This is the most prevalent culprit. Ensure both your Apple TV and laptop are connected to the same Wi-Fi network. Check your router's status lights to verify your internet connection. If a device is struggling to connect, rebooting the router and your devices can often resolve the issue.
- AirPlay Configuration Check: On your Apple TV, verify AirPlay is enabled in the settings menu. Ensure your Apple TV is discoverable.
- Firewall Interference: Firewalls, whether software or hardware, can sometimes block the communication between devices. On your laptop, check your firewall settings to allow AirPlay traffic to pass through. You may need to temporarily disable your firewall for testing purposes.
- Software Updates: Outdated software on your Apple TV or laptop can cause compatibility issues. Regularly check for software updates on both devices to ensure you're running the latest versions.
- Distance and Obstructions: Physical distance and obstructions can weaken your Wi-Fi signal. If your devices are far apart, move them closer to the router. Walls and other physical barriers can also interfere with the signal.
- Network Congestion: A congested network can slow down streaming. If multiple devices are using the network simultaneously, it can affect the performance of your Apple TV and laptop connection. Try to limit network usage during your streaming session.
- Restarting Devices: This is a simple yet often effective solution. Restart your Apple TV, laptop, and router. This can help clear temporary glitches.
Maximizing Your Viewing Experience: Refinement and Optimization
Once you've established a stable connection, consider these tips for optimizing the streaming experience.
- Choose the Right Content: Opt for content that is optimized for the screen size and resolution of your Apple TV. High-definition videos and movies will provide the best visual quality.
- Adjust Screen Settings: Ensure your television's picture settings are configured for optimal viewing. Experiment with brightness, contrast, and color settings to achieve the best possible picture.
- Select the Appropriate Audio Output: If you have an external audio system connected to your Apple TV, ensure that the audio output is correctly configured. This will provide a more immersive sound experience.
- Close Unnecessary Applications: Close all unnecessary apps and programs on your laptop to free up system resources and improve performance.
- Utilize a Wired Connection (If Possible): If your Apple TV supports an Ethernet connection, consider using a wired connection instead of Wi-Fi. This will provide a more stable and reliable connection.
- Experiment with Display Settings: On your laptop, experiment with mirroring settings. You can choose mirror mode to show the exact same content on your laptop and TV or extend your display to use your TV as a second display.
- Use a High-Quality HDMI Cable: If you're using an HDMI cable, ensure that it is a high-quality cable to ensure that your display is sharp and clear.
Embracing the Future of Connectivity: The Power in Your Hands
Connecting your Apple TV to your laptop via Wi-Fi is a valuable skill in today's interconnected world. We hope the strategies provided empower you to seamlessly stream content and enjoy a truly immersive experience. The path from your laptop to your television shouldn't be a maze of technical jargon but a direct route to enjoyment. Armed with this knowledge, you can confidently navigate the digital realm, unlock the full potential of your devices, and transform your viewing habits.
