cara memancarkan wifi dari laptop dengan cmd

Title: Tutorial Cara TetheringShare Wifi Laptop dengan CMD atau Command Prompt
Channel: Reaf
Tutorial Cara TetheringShare Wifi Laptop dengan CMD atau Command Prompt by Reaf
Unlock Your Laptop's Hidden WiFi Hotspot: The CMD Secret!
Unleash Your Laptop's Inner WiFi Wizard: A Command Prompt Adventure!
Ever wished your laptop could share its internet connection like a portable magic box? Then, prepare to be thrilled! You see, your trusty machine possesses a hidden superpower. It’s a WiFi hotspot generator, secretly dwelling within. And, with a little command prompt know-how, you can unleash it! Let's transform your laptop into a wireless connectivity powerhouse.
The Forbidden Door: Entering the Command Prompt Realm
First, you must understand that you'll need to access the command prompt. This is the gateway to your laptop's secret world. Don’t worry; it's not as daunting as it sounds. In fact, it's simple. Just search for "cmd" in your Windows’ search bar. Alternatively, you can press the Windows key + R. Then, type "cmd" and hit Enter. Immediately, a black window will appear. This is where the magic happens.
Crafting Your WiFi Decree: The First Command
Now, let's get down to business. You're about to write a 'decree'. This decree will command your laptop to set up a WiFi hotspot. Type the following command carefully and precisely: netsh wlan set hostednetwork mode=allow ssid="YourHotspotName" key="YourPassword". Make sure to replace "YourHotspotName" with your desired hotspot name. Also, replace "YourPassword" with a secure password. So, you'll customize this to match your preference. However, ensure the password is at least eight characters long. After entering the command, hit Enter.
Activation Protocol: Bringing Your Hotspot to Life
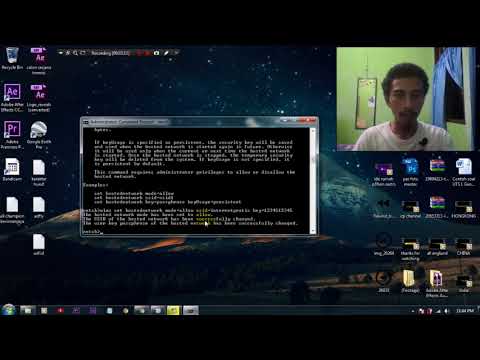
You've set the stage. Now, you must activate your newly created network. In fact, think of this as flipping the switch. This is another command. This command activates the hosted network. Type this command into the same command prompt window: netsh wlan start hostednetwork. Then, press Enter. You should receive a confirmation message. Your hotspot is now active.
Sharing the Digital River: Internet Connection Sharing
Your hotspot is running. Still, it will not automatically provide internet access. You need to share your existing connection. Go to your Network Connections settings. You can find it in the Control Panel. Or, you can simply search for "network connections" in the search bar. Now, you should see a list of your network adapters. Identify your active internet connection. It's usually connected by an Ethernet cable. Or, it's your primary WiFi connection.
Navigating the Network Settings:
Right-click on your active internet connection. Then, select "Properties". After that, there will be a "Sharing" tab. Click this tab. Check the box that says "Allow other network users to connect through this computer's internet connection." In the "Home networking connection" dropdown, select your hosted network adapter. It's usually labeled "Microsoft Hosted Network Virtual Adapter". Click "OK" to save the changes.
Troubleshooting the Technicalities:
Sometimes, things do not go smoothly. Because of this, some common problems can arise. For instance, your hotspot might not appear. Or, it might fail to share your internet. First, ensure your drivers are up to date. Next, double-check your commands for typos. Then, make sure your internet connection is active and stable. If problems persist, a quick restart of your laptop can often resolve them. Furthermore, consider temporarily disabling your firewall. This troubleshooting step can help you identify potential interference.
The SSID and Security Realm:
You’ve chosen a network name. You've also chosen a password. However, it's important to remember security. Because of this, strong passwords are critical. They are very important to protecting your network. Avoid using easily guessable passwords. Also, regularly change your password. This is crucial to maintaining a secure connection.
Extending the Wireless Range:
Your laptop's hotspot may not have the greatest range. Consider using a wireless repeater. This can effectively amplify your signal. You could also use a portable router. In that case, connect it to your laptop's hotspot. This will provide extended coverage.
Monitoring Your Connection:
You can always monitor your connection activity. The command prompt provides basic information. You can also try a third-party network monitoring tool. This helps to track data usage. It also identifies connected devices.
The Shutdown Sequence: Disabling Your Hotspot
When you no longer need your hotspot, you can easily disable it. Open the command prompt again. Then, type this command: netsh wlan stop hostednetwork. Press Enter. This will turn off your hotspot. It will also prevent further connections. However, don't worry, you can always reactivate it later!
Conclusion: WiFi Freedom Awaits!
You now possess the knowledge to awaken your laptop's hidden hotspot. You can share your internet connection with ease. It's a powerful tool for travelers. It's also incredibly helpful for those who need a temporary WiFi solution. You are now ready. So, go forth and experience the freedom of wireless connectivity. Now you can enjoy the internet wherever you are. Enjoy your newfound command-prompt prowess!
Laptop WiFi Booster: Insane Range, Blazing Speed!Alright, buckle up, tech adventurers! We're about to embark on a journey to uncover a secret – a super-easy way to transform your laptop into a WiFi hotspot using a tool you probably already have: the Command Prompt! Forget complicated software downloads and subscription fees. We're talking about unlocking a hidden superpower built right into your operating system. Let's dive in!
Unlock Your Laptop's Hidden WiFi Hotspot: The CMD Secret!
Getting Started: Why This CMD Trick Matters
Think about it: you're at a friend's house, the WiFi's on the fritz, and you need to get online. Or maybe you're traveling, and you're stuck without a reliable internet connection for your other devices. What if I told you that your laptop – that trusty workhorse – could become your personal, on-demand WiFi access point? That’s exactly what we’re doing today. This isn't just about convenience; it's about empowering you to stay connected on your terms, anywhere and anytime. This CMD trick is like having a personal WiFi genie in a bottle, ready to grant your internet wishes.
The CMD: Your Secret Weapon Explained
First things first: What exactly is the Command Prompt (CMD)? It's that black screen with the blinking cursor that looks a bit intimidating, but trust me, it's your friend! Think of it as a direct line to your computer's core operating system. You use it to give your computer precise, text-based instructions. We'll use it to configure and activate the hidden WiFi hotspot functionality built right into your laptop's operating system. It's like giving your laptop a secret handshake. Once you do it, it'll know what to do.
Step-by-Step Guide: Creating Your WiFi Hotspot
Ready to crack the code? Follow these simple steps, and you'll be surfing the web from your other devices in no time:
1. Opening the Command Prompt (The Portal to the Secret World!)
- Windows: Type "cmd" into the Windows search bar (usually found at the bottom left of your screen) and select "Command Prompt" from the results. Alternatively, you can right-click the Start button and select "Command Prompt" or "Windows Terminal" (if you have it).
- Run as Administrator: Crucially, Right-click on "Command Prompt" and select "Run as administrator." This gives the CMD the necessary permissions to make changes to your network settings. Think of it as getting the VIP pass to the secret party!
2. Unleashing the Magic: The CMD Code
Now for the fun part! We're going to enter a few lines of code (don't worry, it's simpler than it sounds). Type the following commands, pressing Enter after each one:
netsh wlan set hostednetwork mode=allow ssid="YourHotspotName" key="YourPassword"- Replace "YourHotspotName" with the name you want your hotspot to have (e.g., "MyLaptopWiFi"). Keep it simple and memorable.
- Replace "YourPassword" with a strong password (at least 8 characters) to secure your network. This is crucial to prevent unauthorized access.
3. Activating the Hotspot
netsh wlan start hostednetworkThis command actually starts the hotspot. That's it! The command has opened the gates to your network.
Troubleshooting Tip: If you receive an error, double-check your spelling and that you’ve run the Command Prompt as an administrator.
4. Sharing Your Internet Connection (The Final Piece of the Puzzle!)
We're almost there! Now, we need to share your laptop's internet connection:
- Open Network Connections: Type "network connections" into the Windows search bar and open the matching result.
- Find Your Internet Connection: Locate the connection you're currently using to access the internet (Wi-Fi or Ethernet). It will be the connection with the working speed indication.
- Share the Connection: Right-click on your internet connection and select "Properties." Go to the "Sharing" tab.
- Enable Sharing: Check the box next to "Allow other network users to connect through this computer's internet connection."
- Select Your Hosted Network: In the dropdown menu under "Home networking connection," select the network adapter labeled with your hotspot name. Then, click "OK."
And there you have it! Your laptop is now broadcasting its own WiFi signal.
Troubleshooting Common Hiccups: Bumps in the Road
Not everything always goes perfectly, right? Here are some common issues and how to fix them:
- "The hosted network couldn't be started.": This usually means there's a problem with your network adapter or the permissions. Double-check that your drivers are up-to-date. Restarting your computer also helps.
- "Can't connect to the hotspot.": Verify that you entered the correct password. Also, make sure your laptop's WiFi is enabled.
- No Internet Access on Connected Devices: Sometimes, you still need to share your internet, as explained in step 4. Ensure, that's done correctly.
Maintaining Your Hotspot: Keeping The Stream Flowing!
Keeping your hotspot running smoothly is easy. Remember these tips:
- Stop the Hotspot: To stop the hotspot, type
netsh wlan stop hostednetworkin the Command Prompt. - Restarting the Hotspot: To start the hotspot again, type
netsh wlan start hostednetwork - Battery life: Running a hotspot drains your battery faster. Plug in your laptop or adjust your power settings to optimize battery usage.
Security First: Protecting Your Hotspot
Security is paramount, so make sure you:
- Use a strong password: At least 8 characters, mixing letters, numbers, and symbols.
- Change your password periodically: Like changing the oil in your car, it’s good practice.
- Monitor connected devices: Ensure you only have devices that you recognize connected to your hotspot.
Advanced Tweaks: Fine-tuning the Experience
Feeling adventurous? Here are a few advanced options:
- View Information: Type
netsh wlan show hostednetworkto view the state of your hotspot, including the number of connected devices. - Configure Bandwidth: This gets more technical, but some Wi-Fi adapters allow you to set bandwidth limits. Google it if you are tech savvy.
Why This Works: The Underlying Technology
The "CMD secret" taps into the built-in hosted network functionality in Windows. Your laptop's Wi-Fi adapter (or your network adapter in general) has the capacity to act as both a receiver (connecting to a Wi-Fi network) and a transmitter (creating its own WiFi signal or hotspot). The Command Prompt simply activates and configures this capability.
Comparing Options: Why Choose the CMD Method?
While there are other ways to create a hotspot (using third-party software or the built-in settings on newer Windows versions), the CMD method offers several advantages:
- No extra software: You don’t need to download anything, saving storage space and time.
- Compatibility: It works across several Windows versions, which increases its appeal.
- Control: It's a straightforward, elegant solution that gives you direct control over your hotspot settings.
The Real-World Applications: Where This Trick Shines!
Think of the convenience! Here are a few scenarios where this "CMD secret" is a lifesaver:
- Traveling: A hotel's Wi-Fi isn’t working? Boom, instant solution.
- Sharing with Friends: Need to give a friend internet access quickly? Done.
- Limited Data Plans: Extend your data plan by sharing it with other devices.
The Beauty of Simplicity: The Magic of the CMD
The simplicity of the Command Prompt method is what makes it so appealing. It's like having a universal remote control for your laptop's Wi-Fi. It's direct, effective, and doesn't require any complicated setup.
Beyond Basics: Level Up Your Tech Skills
This "CMD secret" is more than just a trick; it's a gateway to learning more about how your computer works. Exploring the Command Prompt can lead you to discover other hidden functionalities and ultimately empower you.
A Recap: The Power in Your Hands!
We've covered the essentials: How to unlock the hosted network, set up the hotspot, share your internet connection, troubleshoot common problems, and maintain the lifeline. This simple approach makes you a digital hero!
The Next Steps: From Novice to Tech Pro
Now that you know how to create a WiFi hotspot with the Command Prompt, experiment! Change the hotspot name, create a new password, and explore the advanced settings. The more you use it, the more comfortable you'll become.
Wrapping It Up: You’re Now a WiFi Wizard!
Congratulations! You’ve successfully unlocked your laptop’s hidden WiFi hotspot using the CMD. You've gone from a basic user to a tech-savvy individual. Embrace your newfound superpower. Now go forth and connect!
Frequently Asked Questions (FAQs)
1. Is using the Command Prompt safe?
Yes, as long as you're careful with the commands you enter. Stick to the steps outlined in this
Unlock Your Windows 8.1 Hotspot: The Secret Trick They Don't Want You to Know!Cara Membuat HotspotWiFi Sendiri di Windows pake CMD aja'

By JuliKoding Cara Membuat HotspotWiFi Sendiri di Windows pake CMD aja' by JuliKoding
Cara Membuat WiFi Hotspot Menggunakan CMD Windows Tanpa Aplikasi

By WinTekno Studio Cara Membuat WiFi Hotspot Menggunakan CMD Windows Tanpa Aplikasi by WinTekno Studio
Cara Sharing Internet di Laptop dengan CMD
By Ide Rumah Pohon Cara Sharing Internet di Laptop dengan CMD by Ide Rumah Pohon

Title: Cara Mudah Menyalakan Hotspot dari Laptop ke HP Tanpa Software dengan CMD
Channel: Tutorial ID
Cara Mudah Menyalakan Hotspot dari Laptop ke HP Tanpa Software dengan CMD by Tutorial ID
Wifi On Laptop Phone
Unlock Your Laptop's Hidden WiFi Hotspot: The CMD Secret!
Navigating the digital landscape requires adaptability, and sometimes, that means turning your trusty laptop into a mobile WiFi hotspot. While many solutions exist, from third-party software to built-in operating system features, there’s a powerful, often overlooked method: leveraging the Command Prompt (CMD). This approach offers a level of control and customization rarely found elsewhere, allowing you to broadcast your internet connection with remarkable efficiency and precision. We're going to decode the secrets of the CMD and transform your laptop into the ultimate connectivity powerhouse.
Why Choose the CMD Method? A Superior Solution
Why opt for the CMD when other methods are available? Simple. The CMD offers a clean, lightweight, and often more stable solution. It bypasses the bloat and potential vulnerabilities of third-party applications. Furthermore, it provides granular control over your hotspot, allowing for customized configurations that cater to your specific needs. The CMD's core function utilizes the built-in Windows feature, eliminating the need for external software that may consume system resources and potentially compromise your device's security. Compared to the GUI methods, CMD provides a deeper understanding of the underlying processes and allows for advanced troubleshooting and configuration.
Pre-requisites: Setting the Stage for Success
Before diving into the commands, ensure your laptop meets the following prerequisites:
- A Working Internet Connection: This is the obvious starting point. Whether it’s via Ethernet, another WiFi network, or a cellular data connection, your laptop must have an active internet connection to share.
- Administrator Privileges: The CMD commands we'll be using require administrator rights. Ensure you are logged into an account with the necessary privileges. (Right-click the Command Prompt icon or search result and select "Run as administrator.")
- WiFi Adapter: Your laptop must have a functional WiFi adapter to broadcast the signal. Double-check that it is enabled in your device manager.
- Sufficient Knowledge: Familiarize yourself with the following commands.
Crafting Your WiFi Hotspot: The CMD Command Arsenal
With the stage set, let’s unleash the power of the CMD. The process involves a few key commands. These need to be entered sequentially; each command plays a specific role in setting up and managing your wireless hotspot.
Step 1: Launching Command Prompt as Administrator
The first and arguably most crucial step is to launch the Command Prompt with administrator privileges. This is non-negotiable. Here's how:
- Search: Type "CMD" into the Windows search bar.
- Right-Click: Right-click the "Command Prompt" result.
- Run as Administrator: Select "Run as administrator."
This ensures that the commands we execute have the necessary permissions to modify network settings.
Step 2: Setting Up the Hosted Network
The first command you must enter is the core of the operation. This command activates the "hosted network" functionality within your WiFi adapter, allowing you to broadcast a wireless signal. Type the following command and press Enter:
netsh wlan set hostednetwork mode=allow ssid="YourHotspotName" key="YourPassword"
Replace "YourHotspotName" with the desired name (SSID) for your WiFi hotspot. The name should preferably be no longer than 32 characters. Replace "YourPassword" with a strong, secure password. Aim for a password which is at least 8 characters long, and contains a combination of letters, numbers, and symbols.
Step 3: Starting the Hosted Network
Now that we've configured the hosted network, it's time to start it. Type the following command and press Enter:
netsh wlan start hostednetwork
This command activates the WiFi broadcast, making your hotspot visible to other devices.
Step 4: Enabling Internet Connection Sharing (ICS)
This is arguably the most important part. We need to share your active internet connection with the newly created hotspot. Here's how:
- Open Network Connections: Press
Win + R, and typencpa.cpl, then click "OK." This opens the "Network Connections" window. - Identify Your Internet Connection: Identify the network adapter that currently has an active internet connection (e.g., Ethernet, WiFi).
- Open Properties: Right-click on this network adapter and select "Properties."
- Sharing Tab: Click on the "Sharing" tab.
- Allow Other Network Users: Check the box labeled "Allow other network users to connect through this computer's Internet connection."
- Choose the Hosted Network: In the "Home networking connection" dropdown menu, select the name of the network connection that was created by the CMD command (Microsoft Hosted Network Virtual Adapter).
- Apply and OK: Click "OK" to save the settings.
This crucial step enables devices connected to your hotspot to access the internet.
Step 5: Troubleshooting and Advanced Settings
While these core steps cover the basics, you might encounter scenarios that require further adjustments.
- Troubleshooting Connection Issues: If devices can connect but not access the internet, revisit Step 4, ensuring the correct network adapter is selected for sharing. Also, make sure your firewall isn't blocking traffic. Temporarily disable your firewall to check if it is the cause of the problem.
- Checking Hotspot Status: To check the status of your hosted network (whether it's running, connected clients, etc. ), use the following command in the CMD:
netsh wlan show hostednetwork - Changing Your Password: You can change your password by repeating Step 2 with a new key. Note that you must first stop the hosted network, then set the changes and finally start the network again.
- Troubleshooting connection problems: If you are experiencing connection drops, try updating your WiFi adapter drivers via Device Manager. Right-click on your WiFi adapter, select "Update driver", and search for updated drivers automatically.
- Stopping the Hosted Network: To stop the hosted network, use the command:
netsh wlan stop hostednetwork - Disabling the Hosted Network Permanently: If you wish to disable the hosted network entirely (e.g., to free up resources), use the following command in the CMD:
netsh wlan set hostednetwork mode=disallow
Optimizing Your Hotspot for Performance
To get the most from your laptop hotspot, consider these optimization tips:
- Channel Selection: By default, the CMD method uses the default WiFi channel for your network adapter. However, advanced users can modify the channel to reduce interference in a crowded WiFi environment. To change the channel, access your router’s configuration interface (usually through a web browser) and choose a less congested channel.
- Bandwidth Allocation: Be mindful of bandwidth-intensive activities on your hotspot. Streaming video, large downloads, and online gaming can significantly slow down the internet connection for all connected devices.
- Security Best Practices: Always use a strong password for your hotspot. Consider enabling WPA2 or WPA3 encryption for enhanced security.
- Wireless Interference: Minimize potential sources of interference, such as microwave ovens, cordless phones, and other wireless devices.
The CMD Advantage: Tailored Control
The CMD method is not just about setting up a hotspot; it’s about empowering you with unparalleled control. You can customize numerous settings to precisely tailor the hotspot to your needs. It offers capabilities that many GUI tools lack, fostering a deeper understanding of your network configuration and allowing for targeted troubleshooting when issues arise.
Conclusion: Unleashing Your Laptop's Potential
The CMD secret unlocks a powerful, efficient, and highly customizable way to transform your laptop into a WiFi hotspot. By mastering the core commands and understanding the nuances of network configuration, you can create a secure and reliable mobile internet access point. The CMD method is more than just a workaround; it's a testament to the power of the command line and a reliable tool in your digital arsenal. Embrace the CMD, unlock the potential of your laptop, and elevate your mobile connectivity experience.
