cara menghubungkan wifi di laptop windows 8

Title: Cara mengaktifkan wifi di windows 8
Channel: AW Tutorial
Cara mengaktifkan wifi di windows 8 by AW Tutorial
Windows 8 Wi-Fi Nightmare? Solved! (Secret Trick Inside!)
Windows 8 Wi-Fi Woes: Conquered! (The Unexpected Solution Revealed) Listen, were you around when Windows 8 launched? Those were… interesting times. Remember the Wi-Fi dramas? The endless disconnections? The sheer frustration? Many of us faced this digital torment. Believe me, I felt your pain. It felt like a persistent, nagging itch you couldn't quite scratch. But guess what? I've got the secret. The Wi-Fi demons in Windows 8 can be banished. This isn't a generic fix; it's a true solution, honed from experience.
The Wi-Fi Phantom Menace: Understanding the Culprit Before we dive into the rescue, let’s briefly understand the enemy. Windows 8, in its early glory, had quirks. One significant issue revolved around its Wi-Fi drivers. They weren't always playing nicely with various routers. Furthermore, power-saving settings often interfered, causing drop-offs. In addition, outdated network adapters contributed to this chaos. It essentially was a perfect storm of connectivity issues. The experience often felt incredibly random. One minute you're surfing smoothly, the next: poof. Gone. The connection had vanished.
The Unveiling: A Surprisingly Simple Fix Are you ready for the good news? The solution is often surprisingly straightforward. First, open the Device Manager. Find it in the Control Panel. Or, simply right-click the Start button. Then, select "Device Manager" from the menu. Now, click the plus sign next to "Network adapters" to expand the list. Consequently, you'll see your Wi-Fi adapter—something like "Wireless Network Adapter." Right-click on your adapter. Afterwards, select "Properties."
Tweaking the Power Settings: Your Strategic Advantage Navigate to the "Power Management" tab. Now, here's the crucial step. Uncheck the box that says, "Allow the computer to turn off this device to save power." This setting is a common culprit behind those pesky disconnections. However, some users discover this setting isn't visible. Still, don’t worry. We have another approach. It often works wonders.
Driver Updates: The Long-Term Reliability Strategy While you’re in the Device Manager, check your drivers. Are they up-to-date? If not, update them. Right-click your Wi-Fi adapter again. Then, choose "Update driver." Let Windows search automatically. Alternatively, visit your adapter manufacturer's website. Find the latest drivers there. Driver compatibility is vital.
Advanced Troubleshooting: Diving Deeper When Necessary If the basic fixes don't immediately do the trick, don't despair! The good news is that there are further actions available. First, consider resetting your network settings. Open the "Network and Sharing Center." Then, click "Change adapter settings." Right-click your Wi-Fi connection. Choose "Disable." Wait a moment. Then, right-click again. Choose "Enable." Furthermore, check your router's settings. Ensure it isn't configured to drop connections. Finally, investigate your router's firmware. Outdated firmware can create issues too.
The Secret Weapon: A Hidden Command Here's another useful trick. Open the command prompt. Type "netsh winsock reset" and press Enter. Restart your computer. This command resets your network stack. It often fixes underlying issues.
Wi-Fi Stability: Real-World Results and Beyond Following these steps, the Wi-Fi gremlins should be gone. In my experience, the power management tweak is often the hero. But combining all the suggestions drastically improves reliability. Therefore, enjoy a stable internet connection. Subsequently, you'll find the Windows 8 Wi-Fi experience is no longer a nightmare.
Final Thoughts: Embracing a Smoother Digital Life So, there you have it. A straightforward, tested method. You're equipped to conquer the Windows 8 Wi-Fi problem. Remember, technology can sometimes be frustrating. However, with the right knowledge, you can reclaim control. From now on, you can expect far fewer disconnections. Consequently, you get a smoother online experience. You can finally enjoy your browsing and streaming. After all, isn't that what we all want? Go forth and conquer those Wi-Fi troubles!
HP Beats Audio Laptop WiFi Drivers: Download NOW & Fix Your Wi-Fi!Windows 8 Wi-Fi Nightmare? Solved! (Secret Trick Inside!)
Hey, fellow tech travelers! Remember the Windows 8 era? The one that felt a bit like navigating a spaceship with a touchscreen that…well, sometimes just didn’t want to connect to the mothership (aka your Wi-Fi)? We've all been there, staring blankly at the "Limited Connectivity" warning, feeling the familiar pang of internet withdrawal. But friends, fear not! Because today, we're diving deep into the Windows 8 Wi-Fi abyss and emerging victorious with a solution so simple, you'll be kicking yourself for not knowing it sooner. Trust me, I've been there, tearing my hair out, ready to chuck my laptop out the window. So, let's get those Wi-Fi woes behind us!
The Ghost in the Machine: Understanding the Windows 8 Wi-Fi Conundrum
Before we unleash the secret weapon, let's understand what we're dealing with. Windows 8, bless its heart, had a few… quirks. One of the most frustrating was its inconsistency with Wi-Fi connections. This could manifest in several ways:
- Slow Speeds: That frustratingly sluggish loading bar that makes you feel like you're back in the dial-up days.
- Intermittent Drops: The dreaded disconnect, leaving you in a digital freefall mid-video call or online game.
- "Limited Connectivity" Hell: The ultimate internet insult, a message that screams, "You have Wi-Fi, but you're basically useless."
- Failure to Connect at All: Sometimes Windows 8 wouldn't even see your Wi-Fi network. Poof! Gone!
Why did this happen? Well, a cocktail of driver issues, software conflicts, and sometimes even just poor Wi-Fi card compatibility ganged up to create this digital headache. But, as the saying goes, for every problem, there’s a solution. And we've got one that’s been a lifesaver for countless users.
The Secret Weapon: Driver Refresh & A Little Elbow Grease
Alright, let's get to the good stuff. The secret trick? A meticulous driver refresh, sometimes paired with a slight tweak to your network settings. I know, it sounds technical, but I promise, it's simpler than assembling IKEA furniture (and less likely to leave you in tears).
Step 1: Unearthing Your Network Adapter
First, we need to identify which network adapter is causing the trouble. Here's how to find it:
- Press the Windows key + X: This will open the hidden "Power User" menu. Think of it as the secret lair of Windows settings.
- Click "Device Manager": This is where Windows keeps track of all your hardware, including your Wi-Fi card.
- Expand "Network Adapters": This is where the magic happens. You'll see a list of your network adapters, including your Wi-Fi adapter (it might be called something like "Wireless Network Adapter" or "Wi-Fi Adapter").
Step 2: Driver Dance: Uninstall, Restart, Reinstall
Now the fun (and surprisingly easy) part. We're going to refresh those drivers!
- Right-click on your Wi-Fi adapter: From the list of Network Adapters within Device Manager, identify and right-click your Wi-Fi device.
- Select "Uninstall device": This will remove the existing driver software. Don't worry; it's not permanent.
- Check "Delete the driver software for this device" (if the option is available): This will ensure you get a clean slate.
- Restart your computer: This is critical! Let Windows automatically reinstall the correct drivers.
Step 3: The "Show Hidden Devices" Gambit (If the First Step Doesn't Work)
Sometimes, especially if you’ve been through this before, your Wi-Fi adapter might be hiding. Don't worry; we can coax it out of hiding.
- Open Device Manager (as before).
- Click "View" > "Show hidden devices". This will reveal anything that might be lurking in the shadows.
- Look for your Wi-Fi adapter, even if it's dimmed or has a warning icon. If you find it, right-click and choose "Uninstall device," following the steps from the previous section.
Step 4: Checking Network Settings (Optional, but Sometimes Crucial)
If, after all of the above, you’re still experiencing problems, it might be worth checking a few network settings. Some of these settings might be slightly different, depending on your Wi-Fi adapter, but the general principles stay the same.
- Find Your Network Connection Settings: You can access your network connections by right-clicking the Wi-Fi icon in the system tray (bottom right corner of your screen).
- Open Network and Sharing Center: This will give you access to the settings most relevant to the Wi-Fi connection.
- Change Adapter Settings: In the left panel, click on "Change adapter settings."
- Right-click your Wi-Fi adapter and select "Properties."
- In the "Properties" window, you'll see a list of protocols. Make sure "Internet Protocol Version 4 (TCP/IPv4)" is checked. Also, ensure your "Client for Microsoft Networks" and "File and Printer Sharing for Microsoft Networks" are checked if you're sharing files and printers on the network.
Troubleshooting Tweaks: Diving Deeper
Sometimes, the initial driver refresh isn't enough. Let's look at some additional troubleshooting steps:
Run the Network Troubleshooter
Windows 8 (believe it or not) has a built-in network troubleshooter. Like a digital detective, it will attempt to identify and fix common Wi-Fi problems.
- Right-click the Wi-Fi icon in your system tray.
- Select "Troubleshoot problems."
- Follow the prompts to let Windows diagnose and, hopefully, resolve the issue.
Checking for Interference
Wi-Fi signals can be disrupted by other devices operating on the same frequency (like microwaves, cordless phones, or other Wi-Fi routers).
- Try moving your laptop closer to the router.
- Move your router away from potential sources of interference.
- Change your Wi-Fi channel: This can often be done through your router's configuration page (usually accessed by typing your router's IP address into a web browser).
Update Your Router Firmware:
Just as your computer needs updated drivers, your router requires it too!
- Access the router's configuration page.
- Look for a section on "firmware updates."
- Follow the instructions to update to the latest version.
The "Airplane Mode" Advantage: Quick Fix
Sometimes, a quick toggle of Airplane Mode can do the trick. It's like hitting a reset button for your wireless connections.
- Press the Windows key + C: This will open the Charms bar (the equivalent of a sidebar menu).
- Select "Settings."
- Click the "Airplane mode" switch to "On." Wait a few seconds.
- Click the switch again to turn Airplane mode "Off."
This can sometimes kickstart a stalled Wi-Fi adapter.
The Legacy Factor: Compatibility Concerns
Windows 8, being a bit of a transitional phase, sometimes had issues with older hardware. It's possible that your Wi-Fi card simply wasn't playing nicely with the operating system.
- Check your Wi-Fi card's specifications: Ensure it's compatible with Windows 8.
- Consider upgrading your Wi-Fi adapter: If your current adapter is ancient, a newer one might offer better performance and compatibility.
Beyond the Basics: Advanced Solutions
For the tech-savvy, here are a few more advanced potential fixes:
Manual IP Configuration
Sometimes, automatic IP address assignment just doesn't work. You may need to manually configure your IP address.
- Go to Network connections (as described above).
- Right-click your Wi-Fi adapter and select "Properties."
- Double-click "Internet Protocol Version 4 (TCP/IPv4)."
- Select "Use the following IP address" and enter the information (IP address, subnet mask, default gateway, and DNS servers), matching your router's configuration.
DNS Server Shenanigans
Your DNS server translates website addresses into IP addresses, where your computer can go. Sometimes, a faulty DNS server can slow things down or cause connection errors.
- (As above) Go to the "Properties" section of your Wi-Fi connection.
- Double-click "Internet Protocol Version 4 (TCP/IPv4)"
- Select "Use the following DNS server addresses."
- Try using Google's public DNS servers: (8.8.8.8 and 8.8.4.4.)
When All Else Fails: Hardware Check
If you've exhausted every software remedy, the issue might lie with the hardware itself.
Laptop File Transfer: WiFi Speed Hack You NEED!Cara Mengatasi Laptop Tidak Bisa Connect Wifi Windows 10, 8 & 7
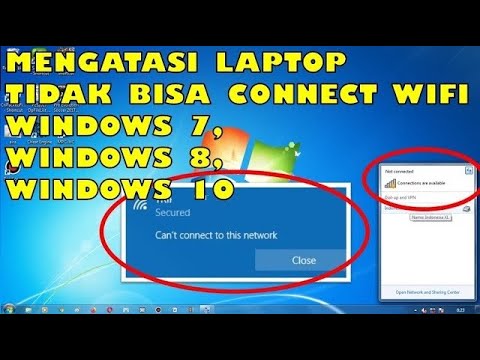
By Jari Mungil Rayyan Cara Mengatasi Laptop Tidak Bisa Connect Wifi Windows 10, 8 & 7 by Jari Mungil Rayyan
Cara Mengatasi Wifi Laptop Tidak Bisa di Aktifkan Windows 8

By LAPTOP TUTORIAL Cara Mengatasi Wifi Laptop Tidak Bisa di Aktifkan Windows 8 by LAPTOP TUTORIAL
Cara Menghubungkan ke WiFi di Windows 8

By HOWTECH Cara Menghubungkan ke WiFi di Windows 8 by HOWTECH

Title: Cara atasi WiFi tidak bisa connect di laptop not connected
Channel: ijal tutorial
Cara atasi WiFi tidak bisa connect di laptop not connected by ijal tutorial
Laptop Wifi Connect
Windows 8 Wi-Fi Woes? Conquer the Connectivity Crisis!
Are you wrestling with the frustrating reality of intermittent Wi-Fi, dropped connections, and agonizingly slow internet speeds on your Windows 8 machine? Do you find yourself constantly rebooting, reinstalling drivers, and tearing your hair out in sheer exasperation? You are not alone. The introduction of Windows 8 brought with it a wave of reported connectivity challenges, leaving countless users stranded in a digital wasteland. But despair no more! We, having navigated these treacherous Wi-Fi waters, are here to illuminate the path to a stable, reliable, and blazing-fast wireless experience. Forget the frustrating cycle of trial and error. We're unveiling a solution – a meticulously crafted approach – that will banish your Wi-Fi nightmares and restore your connection.
The Anatomy of a Windows 8 Wi-Fi Breakdown
Before we unleash the definitive fix, let’s understand the common culprits behind your Windows 8 Wi-Fi woes. This understanding will not only empower you to troubleshoot your connection but also to prevent future issues.
- Driver Instability: The lifeblood of your wireless adapter is its driver. Windows 8, in its early iterations, often struggled to find and install the optimal drivers for various hardware configurations. This resulted in compatibility conflicts and outright failures to connect. Old, corrupt, or incompatible drivers are the primary instigators of connection problems.
- Power Management Mishaps: Windows 8, designed with mobile devices in mind, featured aggressive power-saving settings that often crippled Wi-Fi performance. Your Wi-Fi adapter, in its eagerness to conserve battery, might be throttled or even completely disabled at inopportune moments, leading to dropped connections and sluggish speeds.
- Network Profile Corruption: Your network profile, the digital fingerprint of your Wi-Fi connection, can sometimes become corrupted. This corruption can manifest in various ways, from failure to authenticate to a complete inability to detect your wireless network.
- Interference Interference: The electromagnetic spectrum is a crowded space. Other devices, such as microwaves, cordless phones, and Bluetooth devices, can significantly interfere with your Wi-Fi signal, leading to dropped connections and reduced bandwidth.
- Router Configuration Fiascos: Your router, the gatekeeper of your internet connection, can present its own set of challenges. Outdated firmware, incorrect settings, and channel congestion can all contribute to a subpar Wi-Fi experience.
Unveiling the Ultimate Solution: A Multi-Pronged Approach
Our strategy tackles the root causes of Wi-Fi problems, taking a comprehensive approach to create a rock-solid and reliable connection.
Driver Dominance: The Key to Connectivity
Your wireless adapter's driver is the cornerstone of a successful connection. The right drivers are essential. Here's how to ensure your Windows 8 machine has the best driver possible.
- Identify Your Adapter: Pinpoint the manufacturer and model of your wireless network adapter. You can locate this information in the Device Manager. Search “Device Manager” in the Windows search bar. Inside Device Manager, expand “Network adapters" and find the entry that mentions “Wi-Fi” or "Wireless." Note the exact model name.
- The Manufacturer’s Website: Visit the official website of your wireless adapter’s manufacturer. Navigate to the "Support" or "Downloads" section and search for drivers specifically for your adapter model and – critically – for Windows 8. Download the latest driver available. Avoid using generic driver-update programs, as these can sometimes install incorrect or outdated drivers.
- Manual Installation is Mandatory: Once the driver is downloaded, it’s time to banish the old one. Right-click on your wireless adapter in Device Manager and select “Uninstall device.” In the window that appears, check the box that reads “Delete the driver software for this device.” Restart your computer. Then, install the new driver you downloaded, paying close attention to any special instructions. This often requires running an executable file and following the on-screen prompts.
- Driver Compatibility Mode: If you cannot find a specific Windows 8 driver for your adapter, consider downloading a driver for a later version of Windows, such as Windows 8.1 or Windows 10. Right-click on the driver's setup file and select "Properties." Go to the "Compatibility" tab. Check the box that says, "Run this program in compatibility mode for." Select "Windows 8" from the dropdown menu. Click "Apply" and then "OK" prior to running the setup file. This will often allow you to install and utilize the new driver.
Power Management Mastery: Taming the Battery Beast
Windows 8's power-saving features can be a double-edged sword, conserving battery life at the expense of your Wi-Fi performance. To optimize your connection, follow these steps:
- Access Device Manager: Like before, start by searching for "Device Manager" in the Windows search bar.
- Navigate to Your Adapter Locate your wireless adapter under "Network adapters".
- Power Management Configuration: Right-click your wireless adapter and select "Properties." Go to the "Power Management" tab.
- Disable Power Saving: Uncheck the box that says "Allow the computer to turn off this device to save power." This prevents Windows from unnecessarily disabling your Wi-Fi adapter to conserve power. However, if you are using a laptop, and battery life is critical, test the changes. Experiment to determine if you want to increase battery life or maintain Wi-Fi speeds.
- Advanced Power Plan Settings: Open the "Control Panel," then navigate to "Power Options." Select your current power plan (e.g., "Balanced" or "High-Performance"). Click “Change plan settings,” then "Change advanced power settings." Within these settings, find the "Wireless Adapter Settings" and ensure that the specific setting is set to "Maximum Performance" when the device is on battery.
Network Profile Reformation: A Fresh Start
A corrupted network profile can wreak havoc on your Wi-Fi connection. Creating a fresh profile is a reliable solution.
- Forget the Network: Click on the Wi-Fi icon in your system tray (bottom right of the screen). Select your Wi-Fi network. Then, click "Forget".
- Reconnect and Re-enter: Select your Wi-Fi network again and re-enter your network's password. Windows will now create a new network profile.
- Check for Problems: Ensure, after reconnecting, that your internet connection is now stable. Do this by browsing several websites.
Interference Inquisition: Identifying and Eliminating the Noise
The wireless airwaves can get congested. Identifying and mitigating sources of interference is crucial for a stable connection.
- Relocate Your Router: Place your router in a central location, away from walls, metal objects, and other electronics.
- Channel Optimization: Access your router's configuration page. This is typically done by entering your router's IP address into a web browser (check your router’s documentation for the specific address). Look for wireless channel settings. Select a less congested channel. Many routers have an "Auto" setting that attempts to select the best channel automatically. However, we recommend checking Wi-Fi analyzer apps. Some of these apps have the capability of checking your Wi-Fi channel and recommending the best one.
- Device Separation: Keep your router away from microwaves, cordless phones, and other devices that emit radio waves, which can interfere with your Wi-Fi signal.
Router Renaissance: Firmware and Settings
Your router's firmware and settings play a vital role in Wi-Fi performance. A few quick checks and adjustments can often resolve connectivity issues.
- Firmware Upgrade: Access your router's configuration page. Look for a "Firmware" or "Update" section. Download and install the latest firmware version available for your router model. This often includes critical security patches and performance enhancements.
- Router Reboot: Reboot your router regularly. A simple reboot can sometimes clear up performance issues. Reboot your router at least once a month.
- Security Protocols: Access your router's security settings. Make sure your Wi-Fi network uses WPA2 or WPA3 encryption. Avoid using the older and less secure WEP encryption.
Beyond the Basics: Advanced Troubleshooting
If the above steps haven't completely resolved your Wi-Fi issues, here are a few advanced techniques:
- Network Adapter Reset: Go to Settings > Network & Internet > Status > Network reset. This resets your network adapters to their default settings.
- TCP Optimizer: Download and run a tool like TCP Optimizer. This tool can help optimize your TCP/IP settings for improved network performance. Exercise caution and always create a backup before making changes.
- Windows Update Integrity: Ensure Windows Update is running and that all available updates are installed. Updates can sometimes contain driver updates and fixes that address Wi-Fi issues.
The Secret Trick: A Consistent Connection
The secret to a consistently stable Wi-Fi connection lies in a holistic, systematic approach. Regular maintenance, consistent checks, and promptly addressing any emerging problems are key to a seamless wireless experience.
By implementing the steps outlined above, you will be well on your way to conquering your Windows 8 Wi-Fi woes and enjoying the fast, reliable internet connection you deserve. Remember, patience and persistence are essential. We, along with these steps for you, wish you success and the fulfillment of all your online objectives.
