can i run wifi from laptop to desktop via ethernet

Title: Share Internet from PC to PC via EthernetLAN cable
Channel: Techy Druid
Share Internet from PC to PC via EthernetLAN cable by Techy Druid
Laptop WiFi to Desktop Ethernet: The SHOCKINGLY Easy Trick!
Unleash Blazing Speeds: Bridging Your Laptop's WiFi to Your Desktop's Ethernet!
You've got a desktop, yearning for the raw power of a wired Ethernet connection. However, your router isn't exactly conveniently placed. And, let's face it, running a physical cable across the house feels…well, antiquated. What if you could sidestep that frustration entirely, tapping into the glory of Ethernet speeds using nothing but your trusty laptop?
The Unexpected Shortcut: A Surprisingly Simple Solution
The idea might seem a tad peculiar at first blush, but it is remarkably doable. Prepare to be amazed! We're not talking about some complicated network configuration. We're talking about a neat little trick, essentially transforming your laptop into a wireless bridge. So, your desktop can then bask in the glory of a hardwired connection.
Essential Gear: The Bare Minimum You'll Need
Before we dive into the how-to, gather your supplies. Thankfully, the required equipment is minimal. First, you'll need your desktop computer, the one craving the Ethernet goodness. Next, your laptop, the unsung hero of this operation. And, of course, you’ll need an Ethernet cable – you know, the one that usually gets ignored in favor of Wi-Fi. Finally, make sure both your laptop and desktop have working Ethernet ports.
Setting Up the Magic: The Step-by-Step Guide
Now, the moment we’ve all been waiting for: the setup! Follow these steps, and soon you will be enjoying amazing speeds. First, connect the Ethernet cable. Plug it into your laptop's Ethernet port. After that, plug the other end into your desktop's Ethernet port.
Sharing That Sweet, Sweet Internet Connection
Now, let’s focus on the laptop’s role as a conduit. You’ll need to share your Wi-Fi connection. Search for "Network Connections" in your laptop's Windows search bar. Select "View network connections" from the results. You will see a window displaying your network connections.
Navigating the Settings: A Quick Configuration Shift
Locate the Wi-Fi connection. Right-click on the Wi-Fi connection and choose "Properties." A new window unfolds, revealing a plethora of options, right? Click on the “Sharing” tab. Then, check the box next to "Allow other network users to connect through this computer's Internet connection."
Bridging the Gap: The Final Touches
Beneath that checkbox, you'll find a drop-down menu. From this menu, select the Ethernet connection. Now, click "Ok" to save your settings. At this point, you're almost there!
Desktop Configuration: A Little Tweaking Required
Once the sharing settings are set up on your laptop, you can move to your desktop. Often, the settings will work automatically. However, to be absolutely sure, you might need to configure your desktop's network settings. Right-click on the network icon in your system tray. Then, from the context menu, select “Open Network & Internet settings.”
Pinpointing Your Network: Ensuring Seamless Connectivity
In the settings, select "Change adapter options." Right-click on your Ethernet connection and select “Properties.” Ensure these settings are in place for your Ethernet connection. Verify that both “Client for Microsoft Networks” and “File and Printer Sharing for Microsoft Networks” are checked.
Testing the Waters: Confirming a Successful Connection
Once you have configured both your laptop and desktop, it's time for a test. Open your favorite web browser on your desktop. Browse your favorite websites to see if it's working. If everything is configured correctly, you should now be experiencing the superior speed of a wired connection. Enjoy!
Troubleshooting Tips: When Things Don't Go Smoothly
Sometimes, things don’t go according to plan. Don't fret! If you encounter issues, here are a few troubleshooting tips. First, double-check all cable connections. Ensure the Ethernet cable is firmly plugged into both devices. Next, restart both your laptop and desktop. This simple step often resolves minor glitches. Additionally, verify your laptop's Wi-Fi connection.
Benefits Galore: Why Embrace This Method
So, why bother going through this process? The advantages are compelling. First, you’ll experience noticeably faster and more stable internet speeds. Also, you're bypassing the limitations of Wi-Fi. Furthermore, it’s a fantastic solution for temporary situations. Perhaps, you are traveling and need an Ethernet connection.
Beyond the Basics: Further Exploration and Customization
This method offers a solid foundation. However, you can take your setup even further. You also could explore advanced network settings or adjust security protocols. Consider using a dedicated wireless bridge for optimal performance. But, for most people, this method offers the best of both worlds.
Conclusion: A Surprisingly Convenient Solution
There you have it! You've successfully bridged the gap. Your desktop is now enjoying the benefits of a wired Ethernet connection. You achieve this without the hassle of running cables. This method highlights the adaptability of your laptop. So, embrace faster speeds and unwavering connectivity. Now, you can experience a whole new level of internet enjoyment!
Dell Laptop Wifi Nightmare? FIX IT NOW!Laptop WiFi to Desktop Ethernet: The SHOCKINGLY Easy Trick!
Alright, tech adventurers! Let's be honest, we've all been there. Your desktop PC, a powerhouse of processing and gaming glory, sitting there, tethered to the digital world by the fickle embrace of Wi-Fi. Buffering videos, lagging in online games, and the general feeling that the internet gods are actively conspiring against you. Sound familiar? Well, buckle up, because we're about to blow your mind with a ridiculously simple trick that can transform your desktop's internet speed and stability from a dial-up nightmare to a fiber-optic dream. We're talking about using your laptop's Wi-Fi as a bridge to your desktop's Ethernet port!
1. The Wi-Fi Woes: Why Your Desktop Needs a Hardline
Let's set the stage. Wi-Fi, bless its wireless heart, is a bit like a gossipy neighbor. It can be convenient, but it's also prone to interference, distance issues, and the dreaded "slow internet" blues. Walls, microwaves, other wireless devices – they're all enemies of a strong Wi-Fi signal. A desktop, positioned where the signal might be weakest, is particularly susceptible to these issues. Ethernet, on the other hand, is like a direct line to the internet, a superhighway delivering data with speed and consistency. Think of it like this: Wi-Fi is a crowded bus, Ethernet is a private jet. Which would you rather have for a smooth, lag-free ride?
2. Enter the Laptop: Your Wi-Fi Savior
Your laptop, on the other hand, is probably rocking a much stronger Wi-Fi antenna. It's closer to your router, it's designed for mobility, and it's likely experiencing a more stable connection. This is where the magic happens. We're going to turn your laptop into a Wi-Fi repeater, using its solid Wi-Fi connection to feed a wired connection to your desktop. Think of your laptop as a digital messenger, ferrying internet data from your router to your desktop.
3. Prerequisites: What You'll Need Before We Begin
Before we dive in, let's gather our supplies:
- A Laptop: Running Windows (sorry, Mac users, the process is similar but with slightly different steps – we'll cover that later).
- An Ethernet Cable: This is the crucial cable that will connect your laptop to your desktop.
- A Desktop Computer: That's the prize we're trying to connect!
- A Wi-Fi Network: Obviously, you need a Wi-Fi network for your laptop to connect to.
Got them? Excellent! We're ready to roll.
4. The Windows Bridge: Setting Up the Connection
Here comes the easy part. Get yourself comfy; this is easier than ordering a pizza online.
Step 1: Network and Sharing Center: On your laptop, go to the search bar (the one with the magnifying glass, usually at the bottom left), type "Network and Sharing Center," and click on the result.
Step 2: Change Adapter Settings: In the Network and Sharing Center, look to the left and click "Change adapter settings." This opens a window with your network adapters.
Step 3: The Magic Bridge: You'll see your Wi-Fi adapter and your Ethernet adapter (if you have an Ethernet cable connected to your laptop). Right-click on your Wi-Fi adapter and select "Properties."
Step 4: Sharing Tab: In the Wi-Fi adapter properties window, click on the "Sharing" tab.
Step 5: Allow Other Network Users: Check the box that says "Allow other network users to connect through this computer's Internet connection."
Step 6: Select Your Ethernet Connection: In the "Home network connection" dropdown menu, select your Ethernet adapter. This tells Windows to share the Wi-Fi connection through the Ethernet port.
Step 7: Apply and Okay: Click "OK" and then "Close."
5. Connecting the Dots: Hardware Hookup
Now, grab your Ethernet cable. Plug one end into the Ethernet port on your laptop and the other end into the Ethernet port on your desktop. Make sure both devices are switched on during this process.
6. Desktop Settings Check: Potential Solutions
After connecting the cable, your desktop should automatically recognize the connection. However, if it doesn't:
Restart Your Desktop: Sometimes, a simple restart is all it takes to get things moving.
Troubleshoot: Right-click on the network icon in your desktop's system tray (bottom right corner) and select "Troubleshoot problems." Windows will try to diagnose and fix any issues.
IP Configuration (Advanced): If all else fails, you might need to manually configure your desktop's IP settings. This is a bit more advanced, but the internet is full of excellent guides if you get stuck.
7. The Payoff: Speed Test Time!
Once your desktop is connected, run a speed test (like speedtest.net) and compare the results to your previous Wi-Fi connection. Prepare to be amazed! The difference in speed and stability is often night and day. We're talking no more lag spikes when gaming, seamless video streaming, and faster downloads. The kind of speed that makes you feel like you have bionic internet!
8. Mac Users: Similar Steps, Different Flavors
For our Mac enthusiasts: the process is similar, but instead of "Network and Sharing Center," you'll be navigating through "System Preferences" and "Sharing." The key is to enable "Internet Sharing" and select your Wi-Fi connection to share via the Ethernet port. A quick Google search for "Mac internet sharing" will provide you with step-by-step instructions.
9. Troubleshooting: When Things Go Sideways
Even with the simplest of tricks, things can sometimes go wrong. Here are a few common issues and solutions:
No Internet Connection on Desktop: Double-check all cable connections. Make sure both your laptop and desktop are connected to their respective ports. Restart both devices. Confirm that Wi-Fi is working on your laptop.
Slow Speeds: Ensure your laptop's Wi-Fi connection is strong. Check for interference. Try restarting your router. Sometimes, a simple reboot is all it takes.
Connectivity Issues: Check your Windows Firewall settings to see if it's blocking the connection.
10. Security Considerations: Protecting Your Network
While this trick is generally safe, be aware of network security. Make sure your Wi-Fi network is protected with a strong password. Consider running a firewall on both your laptop and desktop.
11. The Benefits Beyond Speed: Why You Should Switch
Beyond the obvious speed benefits, using your laptop to bridge the connection offers:
Enhanced Stability: Ethernet connections are far less susceptible to dropouts than Wi-Fi.
Reduced Lag: Crucial for online gaming and video conferencing.
Consistent Performance: You'll experience a more reliable internet experience overall.
12. Alternative Methods: Exploring Other Options
There are other ways to connect your desktop to the internet, if the laptop bridge isn't for you. The alternatives are:
Powerline Adapters: These use your home's electrical wiring to transmit an internet signal.
Wireless Adapters: These are small USB devices that enable Wi-Fi on your desktop.
Mesh Wi-Fi Systems: These create a network of routers to enhance Wi-Fi coverage throughout your home.
13. When to Consider a Direct Ethernet Connection
While this trick is fantastic, there are times when a direct Ethernet connection from your router to your desktop is ideal. If you want maximal internet speeds, hardwiring into your router ensures the best performance.
14. The Future of Connectivity: Where Are We Headed?
The internet is constantly evolving. Faster speeds, more reliable connections, and ever-increasing demands will shape the future. Fiber optic cables, 5G/6G technology, and even satellite internet are all pushing the boundaries of what's possible.
15. The Bottom Line: Embrace the Easy Win
So, there you have it – a simple, effective, and surprisingly easy trick to boost your desktop's internet speed and stability. No more buffering, no more lag. Just pure, unadulterated internet bliss. Go forth and conquer the digital realm!
Closing Section:
Well, folks, there you have it! We've walked through the shockingly simple trick of leveraging your laptop's Wi-Fi to give your desktop a much-needed Ethernet boost. It's like giving your desktop a performance upgrade without spending a dime! I hope this guide has been helpful, informative, and, most importantly, easy to follow. Now, go forth and enjoy a faster, more reliable internet experience! Happy surfing!
FAQs
1. Will this work with any laptop and desktop?
Yes, in most cases! As long as your laptop has Wi-Fi and Ethernet ports, and your desktop has an Ethernet port, you should be good to go. The operating system on the laptop is crucial for setting up the bridge.
2. Does this method consume extra data from my internet plan?
No, it uses the same internet bandwidth as if your desktop were connected
Unleash Gigabit WiFi Speed: The BEST Laptop WiFi 6e Adapter!How to share internet from laptop to desktop using ethernet cable

By IT Magics How to share internet from laptop to desktop using ethernet cable by IT Magics
How to share the Internet from one PC to another using an ethernet Cable or LAN Cable

By Loxyo Tech How to share the Internet from one PC to another using an ethernet Cable or LAN Cable by Loxyo Tech
Help Desktop connect Wi-Fi via Laptop NETVN

By NETVN82 Help Desktop connect Wi-Fi via Laptop NETVN by NETVN82
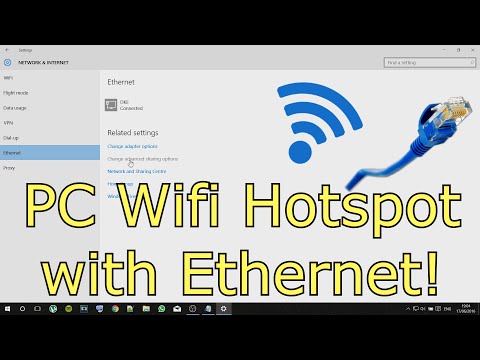
Title: Use PC as WiFi Hotspot with Ethernet
Channel: Tech4Time
Use PC as WiFi Hotspot with Ethernet by Tech4Time
Working With Laptop
Laptop WiFi to Desktop Ethernet: The Surprisingly Simple Conversion
We've all been there – staring at the frustratingly slow speeds of Wi-Fi, yearning for the raw power and unflinching reliability of a wired Ethernet connection. The good news is, bridging the gap between your laptop's Wi-Fi and your desktop's Ethernet port is not only possible, but it's also surprisingly simple. Forget the convoluted setup guides and technical jargon. We're going to walk you through a straightforward, step-by-step process that unlocks the full potential of your desktop's wired connection, using your laptop as the crucial link. Prepare to experience the internet the way it was meant to be: fast, stable, and unwavering.
Understanding the Need: Why Ethernet Still Reigns Supreme
Before we dive into the "how," let's briefly explore the "why." Wireless technology has undoubtedly improved, and Wi-Fi provides unmatched convenience. However, for applications where performance and stability top the list, a wired Ethernet connection remains the champion. Consider these crucial advantages:
- Unparalleled Speed and Consistency: Ethernet cables deliver significantly faster speeds than Wi-Fi, often by a factor of several times. This is especially noticeable when transferring large files, streaming high-definition content, or engaging in online gaming. The consistent, low latency of Ethernet provides a seamless experience free from frustrating lag spikes.
- Reduced Interference: Wi-Fi signals are vulnerable to interference from various sources, including other wireless devices, microwaves, and physical obstructions. Ethernet cables, on the other hand, are immune to these disruptions, guaranteeing a stable and reliable connection, no matter the environment.
- Enhanced Security: Ethernet connections are inherently more secure than Wi-Fi. They eliminate the risks associated with wireless networks, such as unauthorized access and data breaches. For sensitive data or critical applications, Ethernet offers a fortified shield against potential threats.
- Maximized Bandwidth: Ethernet provides dedicated bandwidth to your desktop. Each device gets its own dedicated lane on the data highway, eliminating congestion and ensuring each device receives its fair share.
The Magic Ingredient: Internet Connection Sharing (ICS)
The technique we'll be using to transform your laptop's Wi-Fi into a desktop Ethernet connection relies on a hidden gem within Windows: Internet Connection Sharing (ICS). ICS allows you to share your laptop's internet connection with other devices on your network. In this scenario, your laptop acts as a bridge, forwarding the Wi-Fi signal it receives to your desktop via the Ethernet cable. It's like a digital relay race, but instead of a baton, we're passing packets of data.
Step-by-Step Guide: From Laptop Wi-Fi to Desktop Ethernet Mastery
Now, let's get down to the practical steps. Follow these instructions precisely, and you'll be enjoying a blazing-fast Ethernet connection in no time.
Step 1: The Preparations - Hardware and Software Prerequisites
Before we can start, ensure you have the following essentials:
- A Laptop with Wi-Fi: This is your primary connection to the internet.
- A Desktop with an Ethernet Port: Your desktop is the final destination for the shared internet connection.
- An Ethernet Cable (Cat5e or Cat6 Recommended): This cable is the physical connection between your laptop and desktop. Ensure it's long enough to comfortably reach between the two devices.
- Windows Operating System (Both Laptop and Desktop): ICS is a feature of Windows.
Step 2: Configuring the Internet Connection Sharing - The Laptop's Role
This is where you'll configure your laptop to share its internet connection.
- Open Network Connections: On your laptop, press the Windows key, type "Network Connections," and select "View network connections" from the search results.
- Identify Your Wi-Fi Adapter: In the Network Connections window, locate the icon representing your Wi-Fi connection. It's usually labeled as "Wi-Fi" followed by your network name.
- Access Properties: Right-click on the Wi-Fi adapter icon and select "Properties."
- Sharing Tab: In the properties window, click on the "Sharing" tab.
- Enable Sharing: Check the box that says, "Allow other network users to connect through this computer's Internet connection."
- Select the Ethernet Connection: In the "Home networking connection" dropdown menu, choose the Ethernet adapter that's connected to your desktop. It will likely be labeled as "Ethernet" or "Local Area Connection." If you do not find "Ethernet" options, select "Allow users to connect to other network connections" and reboot to see the Ethernet option.
- Confirm and Apply: Click "OK" to save the changes and close the properties window.
Step 3: Connecting the Dots - The Physical Connection
Now, it's time for the physical link.
- Plug in the Ethernet Cable: Connect one end of the Ethernet cable to your laptop's Ethernet port.
- Connect the Other End: Plug the other end of the Ethernet cable into the Ethernet port on your desktop.
Step 4: Configuring the Desktop - Ensuring Automatic IP Addressing
Your desktop needs to be configured to automatically obtain an IP address from your laptop.
- Open Network Connections: On your desktop, press the Windows key, type "Network Connections," and select "View network connections" from the search results.
- Locate the Ethernet Adapter: Find the icon that represents your Ethernet connection. It should be labeled as "Ethernet" or "Local Area Connection."
- Access Properties: Right-click on the Ethernet adapter icon and select "Properties."
- Select TCP/IP v4: In the properties window, double-click "Internet Protocol Version 4 (TCP/IPv4)."
- Obtain IP Address Automatically: Ensure that "Obtain an IP address automatically" and "Obtain DNS server address automatically" are selected.
- Confirm and Apply: Click "OK" to save the settings and close all windows.
Step 5: Testing the Connection - Verifying Success
The moment of truth! Let's verify that your desktop now has internet access.
- Open a Web Browser: Launch your preferred web browser on your desktop.
- Visit a Website: Type a website address (such as google.com) into the address bar and press Enter.
- Test for Speed: If the page loads successfully, you've successfully shared your laptop's Wi-Fi connection! Perform a speed test (e.g., speedtest.net) on your desktop to verify that the speeds are at par with your laptop's WIFI.
Troubleshooting: Common Roadblocks and Their Solutions
While the process is generally straightforward, you may encounter a few common issues. Here are some troubleshooting tips:
- No Internet Access on the Desktop: Double-check all the steps, ensuring that you've configured both the laptop and desktop correctly. Verify the Ethernet cable is properly connected at both ends. Also, reboot the laptop to see if it solves the problem.
- Slow Speeds: If the speeds are still slow, try restarting both your laptop and your desktop. Ensure there is no interference from surrounding devices.
- Limited Connectivity: Check if your computer's firewall is blocking the connection. You may need to configure your firewall rules to allow internet connection sharing.
- "Ethernet Doesn't Have a Valid IP Configuration": This indicates the desktop is not receiving an IP address from the laptop. Ensure the IP address settings on your desktop are set to "Obtain an IP address automatically" as mentioned in Step 4.
The Benefits Beyond Speed: Unleashing the Power of a Wired Connection
The ability to convert your laptop's Wi-Fi into a desktop Ethernet connection provides benefits that extend far beyond mere speed.
- Enhanced Streaming and Gaming: Faster and more stable connections guarantee seamless streaming and reduces lag in online gaming.
- Optimized File Transfers: Eliminate the frustration of slow file transfers and experience the speed of your Ethernet connection.
- Improved Reliability: Ethernet connections are far more reliable than Wi-Fi, minimizing the chance of dropped connections.
- Cost-Effective Solution: With no need to purchase new hardware, this method utilizes existing technology with maximum efficiency.
- Future-Proof Your Setup: As the demands of your online activities grow, Ethernet ensures you're ready to handle them.
Conclusion: Embrace the Enhanced Internet Experience
By following this simple guide, you can unlock the full potential of your desktop's wired connection and experience the internet at its fastest and most reliable. The process is a testament to the power and adaptability of modern technology. Say goodbye to Wi-Fi frustrations and embrace the speed, stability, and security of a dedicated Ethernet connection. This seemingly simple trick allows you to optimize your online experience, and ensures the best performance for all your online activities. So, what are you waiting for? Transform your desktop's internet experience today!
