laptop unable to connect to wifi windows 7

Title: Windows was unable to connect wifi windows 7 Laptop and Desktop
Channel: IT Magics
Windows was unable to connect wifi windows 7 Laptop and Desktop by IT Magics
laptop can t connect to wifi windows 7, laptop cannot connect to wifi windows 7, unable to connect to wifi on laptop windows 7, unable to connect to wifi windows 7 hp laptop, hp laptop cannot connect to wifi windows 7, why is my windows 7 laptop not connecting to wifi
Windows 7 WiFi Nightmare? Fix Your Laptop Connection NOW!
Windows 7 WiFi Woes? Breathe Easy, Connection Savior is Here!
Remember those frustrating days of battling a flaky Wi-Fi on your trusty Windows 7 laptop? It's a feeling many of us know. The swirling connection icon, the buffering videos, the sheer digital isolation. But fear not, fellow travelers! A solution awaits, ready to banish those wireless worries and restore your online freedom.
Decoding the Digital Drama: What Could be Wrong?
First, let's delve into the potential culprits behind your Wi-Fi woes. A myriad of factors can disrupt your wireless connection. It's sometimes like a digital detective story, each clue leading towards the solution. The problem may stem from outdated drivers, leading to incompatibility. Alternatively, your router's settings might be playing tricks. These issues can cause communication breakdowns.
Driver Dilemmas: Your Laptop's Communication Breakdown
Think of your Wi-Fi adapter drivers as the translators between your laptop and your router. These software components facilitate communication. However, these vital tools sometimes become outdated. Consequently, this can lead to serious connectivity problems. Outdated drivers act like muffled speakers. It is difficult for your laptop to properly interpret radio signals. Updating these drivers is often a cornerstone of a good fix.
The Router's Role: Is Your Gatekeeper Gating You?
Your router serves as the gateway for your network traffic. So, it plays a crucial role. But what happens if your gateway is clogged or misconfigured? The answers are often frustrating. Sometimes, the router itself isn't set up correctly. Other times, it's experiencing technical difficulties. This can block your laptop's access to the internet. Checking router settings can offer huge fixes.
Troubleshooting Tactics: Your Arsenal of Solutions
Now, let's arm you with the weapons you need to combat Wi-Fi woes. We'll explore several effective strategies to get you back online. Let's troubleshoot to restore your connection!
Step 1: The Simple Reboot – Your First Line of Defense
Before diving into complex solutions, try the simplest one. Reboot both your laptop and your router. It is similar to applying the reset button. Sometimes, a quick restart resolves glitches. This simple act refreshes both devices. So, your connection can return to normalcy.
Step 2: Driver Updates: The Digital Tune-Up
Next, let's ensure your drivers are up-to-date. This is akin to giving your laptop a digital tune-up. Here's how:
- Click the Windows "Start" button.
- Type "Device Manager" in the search bar and open it.
- Expand "Network adapters" and locate your Wi-Fi adapter.
- Right-click on the adapter and select "Update driver."
- Choose "Search automatically for drivers."
- Follow the prompts.
- Restart your computer.
Step 3: Router Reset and Reconfiguration
If a simple reboot doesn't help, you may need to tweak your router. To do this, you can:
- Unplug your router from the power outlet.
- Wait about 30 seconds.
- Plug it back in.
- Allow the router to re-establish its connection.
- In the router's configuration settings, you can access them through your web browser.
- Verify that your network is set up right.
- Check that your Wi-Fi password is correct.
Step 4: Consider your Wi-Fi Channel
Wireless networks broadcast on channels. However, some channels are more crowded than others. This is important to consider. You can mitigate interference by changing your channel. Many routers can automatically select the best channel. If that's not the case, check your router's manual on how to configure it manually to reduce interferences.
Step 5: Investigate for Interference
Wi-Fi signals are easily disrupted. This is due to signals. Consider the objects surrounding your router. Microwave ovens and other electronics can contribute to signal interference. Try adjusting the router position. You may also need to move your laptop away from anything that's causing signal issues.
The Victory Lap: Enjoying a Seamless Connection
If you have followed these troubleshooting steps, your Wi-Fi should be back up and running. So, relax and surf the web. You can watch videos, play games or work. You are now well-equipped to troubleshoot Wi-Fi difficulties. It's a testament to your digital tenacity. If your connection remains a problem, consider calling a professional for help. Keep these solutions readily available. They might save you future frustrations. Now, enjoy your restored online freedom!
Okay, buckle up, buttercups! If you’re still clinging to Windows 7 (hey, no judgment here – I loved it too!), and your Wi-Fi connection is acting like a moody teenager, you've stumbled upon the right place. We’re talking about the dreaded "Windows 7 WiFi Nightmare," and trust me, we’re going to vanquish it! Let's get your laptop connected and back online, pronto.
Windows 7 WiFi Nightmare? Fix Your Laptop Connection NOW!
We’ve all been there, right? You settle down with your laptop, ready to binge-watch your favorite show, catch up on emails, or simply browse the web, only to be greeted by the dreaded "no internet connection" error. It's a digital heartbreak, a first-world problem that can make your blood boil. Windows 7, being a bit long in the tooth now, can sometimes throw up these WiFi roadblocks. But fear not! We're going to troubleshoot this together, brick by brick, and get you back on the digital superhighway.
1. Is It REALLY Your Laptop? A Quick Reality Check
Before we start fiddling with settings, let’s do a reality check. Is the problem actually your laptop, or is it something else entirely? Think of it like this: before calling the mechanic, make sure your car has gas!
- Other Devices: Are other devices in your home (your phone, tablet, another laptop) connecting to the Wi-Fi without issue? If yes, the problem is likely your laptop. If no, you might have a router or internet service provider (ISP) issue.
- Router Reboot: Have you tried the classic "turn it off and on again" trick with your router? Seriously, it works more often than you’d think. Unplug your router and modem (if they’re separate) for about 30 seconds, then plug them back in. Wait for them to fully boot up.
- Physical Proximity: Are you close enough to your router? Walls, especially thick ones, can weaken the signal. Try moving your laptop closer to the router as a simple test.
2. The Network Adapter Blues: Checking Your Hardware
Your network adapter is the gatekeeper to your Wi-Fi. If it's not working correctly, you're going nowhere. Think of it as the engine of your Wi-Fi.
- Device Manager: Click the Start menu, type "Device Manager," and open it. This is where you can peek under the hood of your laptop’s hardware.
- Network Adapters Section: Expand the "Network adapters" category. Look for your Wi-Fi adapter (it might say something like "Wireless Network Adapter" or "Wi-Fi Adapter").
- Status Check:
- No Adapter Listed: If you don't see your Wi-Fi adapter at all, it might be disabled or have a hardware problem. This is rarer, and we'll address it later.
- Yellow Exclamation Mark or Red 'X': These are warning signs indicating driver issues or a disabled adapter. We'll tackle these in the next section.
- No Issues? Great! Let's move on.
3. Driver Drama: Updating and Reinstalling Drivers
Drivers are the software that allows your computer to "talk" to your hardware. Outdated or corrupted drivers are a common culprit in Wi-Fi woes. They are like the translators that need to be kept up to date.
- Updating Drivers:
- Right-click on your Wi-Fi adapter in Device Manager.
- Select "Update driver."
- Choose "Search automatically for updated driver software." Windows will try to find and install the latest drivers.
- Reinstalling Drivers:
- If updating doesn’t work, try reinstalling.
- Right-click on your Wi-Fi adapter and select "Uninstall device."
- Restart your laptop. Windows should automatically try to reinstall the drivers when it restarts. If it doesn't, you might need to visit the manufacturer's website (e.g., Intel, Dell, HP) and download the drivers for your specific laptop model. This is akin to getting the most up-to-date software for your hardware.
4. The Wireless Network Service Stopper: Making Sure It's Running
Windows has a service dedicated to managing your wireless connections. If this service isn't running, you won't be connecting to anything. This is the operator who manages the station.
- Accessing Services: Press the Windows key + R, and type "services.msc" and press Enter. This opens the Services window.
- Finding the "WLAN AutoConfig" Service: Scroll down the list until you find "WLAN AutoConfig."
- Checking the Status:
- Stopped: If the "Status" column says "Stopped," double-click on the service.
- Startup Type: In the properties window, change the "Startup type" to "Automatic." Click "Start" to start the service, then click "Apply" and "OK."
- Running: If it says "Running," the service is already working, but you might want to refresh it. Right-click on the service, and select "Restart."
5. Resetting TCP/IP and Winsock: A Network Reset
Sometimes the underlying network configuration gets jumbled. Resetting TCP/IP and Winsock can often fix these headaches.
Open Command Prompt as Administrator: Click the Start menu, type "cmd," right-click on "Command Prompt," and select "Run as administrator."
Run the Commands: Type the following commands, pressing Enter after each one:
netsh winsock resetnetsh int ip resetipconfig /flushdns
Restart Your Laptop: This is crucial! After running these commands, restart your laptop for the changes to take effect.
6. Firewall Fumbles: Checking Your Windows Firewall Settings
Your firewall is there to protect you, but sometimes it can be a little too protective, blocking your Wi-Fi connection. It's like a friendly guard dog, but sometimes it barks at the postman (your Wi-Fi signal).
- Open Windows Firewall: Go to the Control Panel (search for it in the Start menu), and click on "System and Security" then "Windows Firewall."
- Allowing Programs: Click on "Allow an app or feature through Windows Firewall."
- Check for Wireless Network Adapters: Ensure that your "Wireless Network Connection" (or whatever your Wi-Fi adapter is called) is allowed to communicate through the firewall, both for "Private" and "Public" networks. If it's not, check the boxes next to it.
- Restart Your Laptop: Again, a restart is often necessary for these changes to take hold.
7. Power Saving Problems: Disable Power Management for Your Wireless Adapter
Windows can sometimes put your Wi-Fi adapter to sleep to save power, which can cause connection issues. This is like a baby monitor going to sleep, leading you to believe your child is not moving.
- Access Device Manager: (Repeat Steps from section 2)
- Expand "Network Adapters."
- Right-click on your Wi-Fi adapter.
- Select "Properties."
- Go to "Power Management" tab.
- Uncheck the box that says "Allow the computer to turn off this device to save power."
- Click "OK."
8. Forget and Reconnect: A Fresh Start
Sometimes, your laptop might be holding onto outdated or corrupted network settings. Forgetting the network and reconnecting is like starting anew in a relationship.
- Access Network and Sharing Center: Click the Start menu, and type "Network and Sharing Center."
- Manage Wireless Networks: Click on "Manage wireless networks" (on the left).
- Remove the Network: Right-click on the name of your Wi-Fi network and select "Remove network."
- Reconnect: Click on the Wi-Fi icon in your system tray (bottom right), select your network, and enter the password.
9. Static IP vs. Dynamic IP: A Network Address Tango
Your router automatically assigns your laptop an IP address (Dynamic IP). Sometimes, using a static IP can help resolve conflicts.
- Access Network and Sharing Center: (Repeat steps from section 8)
- Change Adapter Settings: Click on "Change adapter settings" (on the left).
- Right-click on your Wi-Fi adapter and select "Properties."
- Select "Internet Protocol Version 4 (TCP/IPv4)" and click "Properties."
- Obtain an IP address automatically (Dynamic IP): Usually, this is how it's set and should work.
- Use the following IP address (Static IP): If you want to try a static IP, you could change that.
- Contact your ISP to find the proper address to use.
- Input that address, subnet mask, default gateway.
- Put the DNS address in as well.
10. Run the Windows
Not connected no connections are available windows 7 laptop

By IT Magics Not connected no connections are available windows 7 laptop by IT Magics
Cara Mengatasi Wifi Leptop Tulisan Windows Was Unable To Connect To Wifi

By Fajrul On Tube Cara Mengatasi Wifi Leptop Tulisan Windows Was Unable To Connect To Wifi by Fajrul On Tube
Windows was unable to connect to wifi windows 7 laptop and dekstop

By Ani Saja Windows was unable to connect to wifi windows 7 laptop and dekstop by Ani Saja
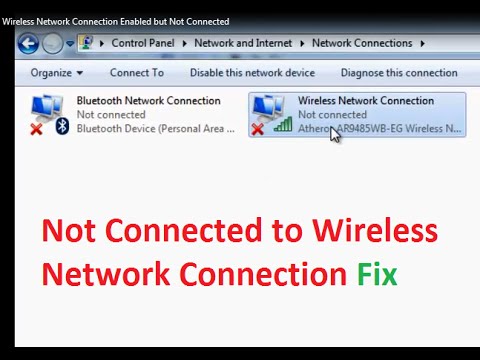
Title: Wireless Network Connection Enabled but Not connected Fix Windows 7
Channel: troubleshooterrors
Wireless Network Connection Enabled but Not connected Fix Windows 7 by troubleshooterrors
Windows 7 WiFi Nightmare? Conquer Connectivity Challenges Today!
Are you wrestling with a recalcitrant WiFi connection on your Windows 7 laptop? Is the wireless signal strength a flickering ghost of its former glory, leaving you stranded in digital purgatory? Fear not! We understand the frustration of battling a network that seems determined to elude you. This comprehensive guide arms you with the knowledge and actionable steps to banish those WiFi woes and reestablish a stable, reliable connection. We'll delve into the common culprits and equip you with the tools to reclaim your online experience. Let's embark on this journey to wireless freedom!
Decoding the Mystery: Identifying the Root Cause of Your WiFi Woes
Before we begin to diagnose the specific issues plaguing your Windows 7 WiFi, let's take a step back and evaluate the situation. Is the problem intermittent, a consistent barrage of lost signals, or a complete cessation of WiFi functionality? Understanding the nature of the disruption is critical to pinpointing the origin of the difficulty. Start by asking yourself a series of questions:
- When did the problems begin? Was it after a software update, a hardware change, or a change in your router configuration?
- Does the problem affect all devices on your network, or is it unique to your Windows 7 laptop? Testing other devices can help isolate the issue.
- Can you connect to other WiFi networks? Attempting to connect to a public hotspot or a neighbor's network can determine if the problem is with your laptop's WiFi adapter or your home network.
- What error messages, if any, are you seeing? Pay close attention to any on-screen prompts, as they can provide valuable clues.
Armed with these insights, we can begin to explore potential solutions.
The Driver Dilemma: Ensuring Your Wireless Adapter is Up-to-Date
Outdated or corrupted drivers are a frequent source of WiFi connection problems. The drivers act as the intermediary between your laptop's hardware and the operating system. When these drivers are not current, communication breaks down, resulting in connection errors or complete failure. To address this, follow these steps:
- Access Device Manager: Click the Start button, type "Device Manager" in the search box, and press Enter.
- Locate Your Wireless Adapter: In Device Manager, expand the "Network adapters" section. Look for your wireless adapter, which might be labeled something like "Wireless Network Adapter" or "Intel WiFi Adapter."
- Update the Driver: Right-click on your wireless adapter and select "Update driver."
- Choose How to Update: Select "Search automatically for updated driver software" and let Windows search online for the latest drivers. If Windows finds an updated driver and installs it, restart your laptop.
- Manual Driver Update (If Necessary): If Windows can't find updated drivers, or if the problem persists, you may need to manually download drivers from your laptop manufacturer's website (e.g., Dell, HP, Lenovo). Visit the website, enter your laptop's model number, and download the latest WiFi driver compatible with Windows 7. Install the downloaded driver.
Network Reset: A Fresh Start for Your WiFi Configuration
Sometimes, the problem lies within your network settings. A network reset can clear any conflicting configurations and restore your settings to defaults, particularly useful after recent system changes or installations. Here is how to reset your network settings:
- Open Network and Sharing Center: Click the Start button, then click Control Panel. In the Control Panel, click Network and Internet, and then click Network and Sharing Center.
- Change Adapter Settings: In the left pane, click "Change adapter settings".
- Disable and Re-Enable Your Wireless Adapter: In the "Network Connections" window, right-click on your wireless network adapter and select Disable. Wait a few seconds, then right-click your wireless adapter again and select Enable. This simple action can often resolve minor glitches.
Router Reboot: The Digital Panacea For Overloaded Networks
Your router is the gatekeeper of your home network, constantly juggling data traffic. Over time, routers can become overloaded, leading to connection issues. A simple reboot can often resolve this. Unplug your router from the power outlet, wait about 30 seconds, and then plug it back in. Allow the router a couple of minutes to fully boot up before attempting to reconnect your laptop. Ensure that you also restart your modem, which is the piece of equipment that connects to the internet service provider.
Channel Congestion: Navigating the Wireless Wilderness
WiFi networks operate on specific channels. When multiple networks in your area use the same channel, it can lead to interference and a weakened signal. The solution involves changing the channel your router uses.
- Access Your Router's Configuration: Open your web browser and type your router's IP address in the address bar (typically 192.168.1.1 or 192.168.0.1; check your router's documentation if you're not sure). The default login credentials (username and password) will be accessible in your router's documentation or through an internet search.
- Find the Wireless Settings: Locate the section of your router's settings related to its wireless configuration. The specific labeling of this section can vary depending on the make and model of your router but will often reference
Wireless SettingsorWireless Network. - Identify the Channel: Within the wireless settings, you should find an option to change the channel. Your router may also automatically select the best channel.
- Experiment with Different Channels: Try changing the channel to a different one. For example, if your router is using channel 6, try channels 1, 11, or others.
- Test the Connection: After changing the channel, save the changes and restart your router. Then, reconnect your laptop to your WiFi network and test the connection.
Security Protocol Selection: A Matter of Compatibility and Security
The security protocol your router uses for encryption also influences the reliability of your connection. Older routers may not support the latest security protocols. If your laptop cannot establish a secure connection, it will be unable to join your WiFi network.
- Access Your Router's Configuration: Repeat steps 1 and 2 from the "Channel Congestion" section above.
- Locate Wireless Security Settings: Within your wireless settings, find the section on security or encryption.
- WPA2-PSK (AES) is the recommended setting. This protocol offers a good balance of security and compatibility.
- Avoid WEP: This is an outdated and insecure protocol.
- Make the adjustment to your security settings and then restart your router.
- Reconnect to your WiFi Network: Ensure the correct password is used, and your network should connect successfully.
Power Management Tweaks: Optimize Your Laptop's WiFi Performance
Windows 7 includes power management features that can unintentionally throttle your WiFi adapter to conserve battery life. These settings can sometimes disrupt the connection. Try the following:
- Access Device Manager: Click the Start button, type "Device Manager" in the search box, and press Enter.
- Locate Your Wireless Adapter: Expand "Network adapters" in Device Manager and find your wireless adapter.
- Access Properties: Right-click on your wireless adapter and select "Properties."
- Navigate to Power Management: In the properties window, click on the "Power Management" tab.
- Disable Power Saving: Uncheck the box labeled "Allow the computer to turn off this device to save power."
- Apply the changes, restart your laptop and test your WiFi connection.
Physical Obstacles: Overcoming Signal Interference
Physical objects such as walls, doors, and other electronic devices that emit radio signals interfere with WiFi signals.
- Proximity to the Router: Ensure your laptop is within a reasonable range of the router. Walls and other obstructions can diminish the signal strength.
- Relocate the Router: Position your router in a central, open location, away from walls, mirrors, and metal objects.
- Reduce Interference: Move other electronic devices (microwaves, cordless phones, Bluetooth devices) away from the router.
Troubleshooting with Command Prompt: Advanced Diagnostics
The Command Prompt offers powerful tools to diagnose network issues. These commands can provide valuable information about your connection.
- Open Command Prompt: Click the Start button, type "cmd" in the search box, right-click "cmd" from the search results, and select "Run as administrator."
- Ping Your Router: Type
ping [your router's IP address](e.g.,ping 192.168.1.1) and press Enter. This tests your connection to your router. Look for "Reply from…" messages, which indicate a successful connection. High latency may indicate network congestion or other problems. - Ping a Public DNS Server: Type
ping 8.8.8.8(Google's public DNS server), and press Enter. This tests your internet connection. If you receive replies, your internet connection is working. A loss of packets or high latency suggests a problem with your internet connection. - Perform Network Statistics with
ipconfigTypeipconfig /alland press Enter to display detailed network configuration information
