how to make your laptop a wifi connection stronger

Title: Make Your Laptop's Wifi Signal Faster On Windows 1087 Tutorial
Channel: MDTechVideos
Make Your Laptop's Wifi Signal Faster On Windows 1087 Tutorial by MDTechVideos
how to make my laptop wifi signal stronger, how to make my laptop wifi connection faster, how to make your laptop internet connection faster, how to make your laptop's wifi signal faster on windows 10, how to make your laptop's wifi signal faster on windows 11, how to make your wifi connection faster on laptop, how to make your laptop wifi faster, how to make wifi stronger on laptop, how to make laptop receive wifi better
Laptop WiFi Weak? This SHOCKING Trick Makes It INSANELY Faster!
Boost Your Wi-Fi: The Astonishing Secret to Lightning-Fast Speeds!
Have you ever felt the frustration of a sluggish Wi-Fi connection? It feels like wading through molasses, preventing you from doing what you need. Streaming buffers, downloads crawl, and even basic browsing becomes a test of patience. Therefore, you are not alone in this digital battle. Many struggle with weak Wi-Fi signals. Luckily, there’s a simple, surprisingly effective solution. It can dramatically improve your laptop’s wireless performance.
The Invisible Culprit: Why Your Wi-Fi Fails You
Before we dive into the amazing solution, let us address the underlying issue. Wireless signals are fickle things. They are subject to interference from lots of sources. Think about walls, microwaves, and even other electronic devices. All these things contribute to weaker signals. Also, your laptop’s built-in antenna may not be the best. Often, it is a design compromise to keep your laptop thin and light. This can severely impact your Wi-Fi range and signal strength.
Introducing the Unbelievable "Trick": Unleash Your Wi-Fi's Potential!
Ready for the mind-blowing secret? It's so easy, you may just laugh. In fact, it's a change in your laptop’s configuration. This tip can often result in a significant speed boost. It's a game-changer. However, it's not some magical hardware. It's a simple software tweak.
Step-by-Step Guide: Supercharge Your Wi-Fi
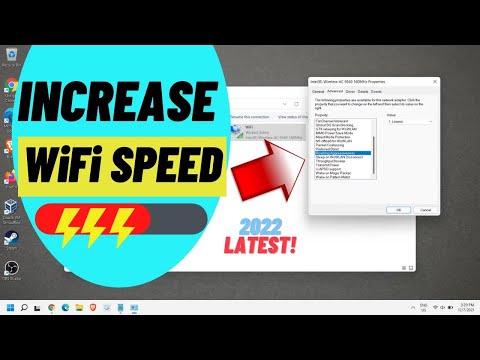
Here's how you unleash the true potential of your Wi-Fi. Let's begin! First, locate your network adapter settings. You can do that by searching in your operating system. Then, open the "Network Connections" or "Network Adapters" menu. Locate your Wi-Fi adapter in that list. Right-click on it. Choose "Properties." Now, a new window will appear. This window shows various options.
Inside the properties window, find the "Advanced" tab. This tab reveals hidden settings. You may see a list of settings specific to your adapter. Now, we move to the specific setting this method uses. However, it depends on your Wi-Fi adapter.
The Critical Setting: Exploring Your Options
Within the "Advanced" tab, look for settings related to "Wireless Mode" or "802.11 mode." Different adapters have different names. You may find "802.11a/b/g/n/ac" or similar options. The goal is to pick the best available mode. Older modes can hold back modern devices.
Generally, selecting the newest standard is the best. For instance, if you have a modern router, opt for "802.11ac" or "802.11ax" (Wi-Fi 6). In fact, this will enable the fastest speeds. Conversely, if you have an older router, pick an earlier standard.
Optimizing for Performance: A Crucial Consideration
Once you select the correct mode, apply the changes. Restart your laptop, as well. Your laptop will re-connect to your network. The connection should be noticeably faster. Therefore, it’s important to explore other settings. Some adapters also offer "Transmit Power" settings. Increasing transmit power can improve the signal, but it also uses more power. You should experiment with these settings.
Beyond the Tweak: Additional Wi-Fi Boosting Tips
Besides the configuration tweak, other things affect your Wi-Fi. Positioning matters. Make sure your laptop is located near your router. Obstacles, like walls, can hinder your signal. So, minimize them whenever possible. Also, check for interference. Other electronics can battle for bandwidth. So, try switching off other devices. Finally, update your router's firmware. Firmware updates often include performance improvements.
Troubleshooting Time: What If It's Still Slow?
If your Wi-Fi is still slow, don’t fret! First, test your internet speed with online tools. That helps determine if the problem is with your internet service. Next, check your router. Restarting your router is often the simplest solution. Additionally, consider upgrading your router. As technology advances, older routers can become bottlenecks. A new router may offer superior performance.
The Bottom Line: Enjoying a Lightning-Fast Experience!
In conclusion, weak Wi-Fi doesn’t have to be a way of life! Implement this simple trick, and you will notice a difference. Furthermore, combine it with basic troubleshooting techniques. Then, you will be on your way to a blazing-fast internet experience. Enjoy streaming, downloading, and browsing without lag! So, try this method now. You'll be amazed.
HP WiFi Button DEAD? Fix Your Laptop's Wireless NOW!Laptop WiFi Weak? This SHOCKING Trick Makes It INSANELY Faster!
Hey everyone, Sarah here, and let's be real – we’ve ALL been there. That agonizing wait for a webpage to load. The buffering symbol mocking you while trying to stream a movie. That crippling lag during your online games. A weak Wi-Fi signal – it’s the bane of modern existence, a digital gremlin that loves to ruin our day. But what if I told you there's a simple trick, a shockingly effective method to supercharge your laptop's Wi-Fi speed? Forget expensive upgrades, and complex router settings. We're talking about a lightning-fast solution that might just blow your mind. Let's dive in!
1. The Wi-Fi Woes: Why Is Your Laptop So Slow?
Before we unleash the secret weapon, let’s understand the problem. If your laptop's Wi-Fi is sluggish, it's likely because of a few culprits. Think of your Wi-Fi signal like a radio broadcast, and your laptop is the receiver. The stronger the broadcast, the clearer the signal, and the faster your internet connection. But what interferes with this broadcast? Well, several things:
- Distance from the Router: This is a biggie. The farther you are, the weaker the signal becomes. It’s like shouting across a crowded room; the message gets muffled.
- Obstacles: Walls, furniture, and even appliances can block or weaken the signal. Imagine a dense forest hindering the sunlight's path.
- Interference: Other electronic devices, like microwaves, Bluetooth speakers, and even your neighbors' Wi-Fi networks, can interfere with the signal, causing congestion. It’s like everyone’s trying to talk at once, making it hard to hear anything clearly.
- Outdated Drivers: Your laptop's Wi-Fi adapter relies on drivers to communicate with the network. Outdated drivers can lead to performance bottlenecks and sluggish speeds. It’s like having an out-of-date map; you might get lost or take a longer route.
- Router Glitches: Sometimes, the problem lies not with your laptop, but with your router. It could be overloaded, outdated, or simply in need of a reset. Think of it as the command center - if it's not functioning properly, everything suffers.
2. Unveiling the Shocking Trick: The Almighty Antenna Hack
Alright, the moment of truth! Drumroll, please… the shocking trick is to strategically position your laptop's antenna. I know, perhaps it sounds almost too simple, but trust me, it works! Let’s explore why this seemingly simple act is so game-changing.
3. Understanding Your Laptop's Antenna: Where Is It Hiding?
Before we start tweaking, let's identify your laptop's antenna. It's usually hidden within the laptop’s frame, often near the screen hinge or around the edges of the screen. Modern laptops usually have multiple internal antennas for better performance, but understanding their positioning is key. Check your laptop's manual or search online using your model number to pinpoint the antenna location. This will give you a head start in optimizing its signal.
4. Posture Power: Maximizing Antenna Performance
Here's where the fun begins. Think of your laptop's screen like a giant antenna.
- Angle is Everything: Experiment with the angle of your laptop's screen. The screen is often a crucial part of the antenna system. Tilting the screen slightly may provide a better signal.
- Screen Direction: Try angling your laptop towards your router or the main access point in your home. The key is to experiment.
5. The Desktop Advantage: Elevating Your Laptop
- Raising the Stakes: If you commonly work at a desk, consider raising your laptop. Placing it on a stand or a stack of books can help clear those signal-blocking obstacles (like a desk or your legs) and improve the Wi-Fi connection. Think of it as a superhero getting a booster for flight.
- Avoid Shielding: Don't place your laptop directly against metal surfaces or close to large appliances. These can act as barriers, weakening the signal.
6. The Router's Role: Optimizing Your Wireless Broadcast
The router is the other half of the equation.
- Placement is Key: Position your router in a central, elevated location, away from obstructions. Think of it as the sun, radiating its signal evenly.
- Channel Surfing: Routers operate on different channels. Sometimes a channel can be overcrowded. Check your router's settings (usually accessible through a web browser) and try a different channel to avoid interference.
- Firmware Upgrade: Keep it Updated: Make sure your router's firmware is updated. Router manufacturers routinely release updates to improve performance and security.
7. Eliminating Interference: Environmental Cleanup
- Declutter Your Digital Space: Minimize the number of devices operating on the 2.4 GHz frequency, as it’s the most commonly used and often congested. Move microwave ovens, Bluetooth devices, and wireless phones away from your router and laptop.
- Network Zoning: If possible, use the 5 GHz band for your laptop. It’s generally less prone to interference and offers faster speeds.
8. Driver Check: Keeping Your WiFi Up To Date
- Windows: Go to Device Manager (search for it in the Windows search bar), expand "Network adapters," right-click on your Wi-Fi adapter, and choose "Update driver." Select "Search automatically for drivers."
- Mac: Apple typically handles driver updates automatically through system updates. However, you can still find updated drivers through the manufacturer's website.
9. The Reboot Remedy: Give Your Devices a Fresh Start
Sometimes, a simple restart is all it takes. Reboot your router and your laptop. It’s like hitting the reset button on your entire network.
10 Evaluating Results: Seeing is Believing
After implementing these steps, do a quick speed test. Sites like Speedtest.net are excellent. Compare your new speeds with your old speeds. You should see a noticeable improvement.
11. The Ultimate WiFi Test: Real-World Applications
- Streaming Showdown: Try streaming a movie on Netflix or YouTube. Is it smooth, or is it still buffering?
- Gaming Gauntlet: Load up your favorite online game. Notice any lag or delays?
- File Transfer Race: Try sending a large file (like a video) between your laptop and another device on your network. Faster speeds are a good sign.
12. Beyond the Basics: Advanced Troubleshooting
If the basic tricks aren't working, you can try:
- Network Adapter Settings: Within the Network adapters settings in your device management tool, you might be able to tweak settings like the transmission power.
- Wired Alternative: If possible, connect your laptop directly to your router with an Ethernet cable for the most stable and fastest connection.
13. The Power of Patience and Experimentation
Finding the perfect Wi-Fi setup is often a process of trial and error. Don't be discouraged if your initial attempts don't yield immediate results. Experiment with different placements, angles, and channel settings until you find what works best for your environment.
14. The Hidden Benefits: Enhanced Productivity and Enjoyment
A faster, more reliable Wi-Fi connection translates to increased productivity. Fewer delays, smoother streaming, and lag-free gaming. You’ll be able to focus on what matters most without the frustration of a slow internet connection.
15. The Future of Wi-Fi: What's Next?
Wi-Fi technology continues to evolve. The arrival of Wi-Fi 6 and Wi-Fi 6E promises even faster speeds and better performance in crowded environments. Keep an eye on your router's capabilities and consider upgrading if you want to stay ahead of the curve.
Conclusion: Unleash Your Laptop's Wi-Fi Potential
So there you have it! The shocking trick to blasting your laptop’s Wi-Fi speeds is all about strategic positioning, a little bit of experimentation, and some basic troubleshooting. Give these tips a try, and I’m confident you’ll experience a noticeable difference. Say goodbye to buffering and hello to a world of seamless connectivity. You now have the power to reclaim your digital life!
Frequently Asked Questions (FAQs)
Q1: Will this trick work on all laptops?
A: Yes, the antenna optimization method is generally effective for all laptops with built-in Wi-Fi. However, the specific results may vary depending on your laptop model, router, and environment.
Q2: Is this trick safe for my laptop?
A: Absolutely! Adjusting your laptop's angle and positioning is perfectly safe and won’t damage your device.
Q3: What if I still have slow Wi-Fi after trying these steps?
A: First, double-check the other factors mentioned and address any interference, or update drivers. If those solutions don't help, you might consider upgrading your router, or checking your internet service provider (ISP).
Q4: What's the best angle for my laptop screen?
A: There's no single "best" angle. Experiment with different angles until you find the one that gives you the strongest Wi-Fi signal. This might involve tilting the screen, rotating the laptop, or angling it toward your
Laptop WiFi Nightmare? This ONE Trick Fixes It INSTANTLY!How To Increase WiFi Speed On Windows 11 - Full Guide

By GuideRealm How To Increase WiFi Speed On Windows 11 - Full Guide by GuideRealm
How To Speed Up Any Internet Connection On Windows 1110 PC REALLY EASY

By EasyTechGeek How To Speed Up Any Internet Connection On Windows 1110 PC REALLY EASY by EasyTechGeek
Best Way To Improve Wi-Fi Connection On PCLaptop 2022
By EasyTechGeek Best Way To Improve Wi-Fi Connection On PCLaptop 2022 by EasyTechGeek

Title: How to Improve Wi-Fi Signals in Windows Laptop Speedup Wi-Fi
Channel: MJ Tube
How to Improve Wi-Fi Signals in Windows Laptop Speedup Wi-Fi by MJ Tube
My Laptop Work
Laptop WiFi Weak? This SHOCKING Trick Makes It INSANELY Faster!
We’ve all been there, haven't we? You're in the middle of something important – perhaps a video call with a vital client, a heated online gaming session, or simply trying to stream your favorite show – only to be besieged by the dreaded spinning wheel of buffering, the frustrating lag, or the agonizingly slow download speeds. Your laptop's WiFi, once a source of freedom and connectivity, has become a major source of frustration. Before you resign yourself to outdated technology or blame your service provider (though, let's be honest, sometimes that's the issue), consider that the culprit might be something far more readily addressed, a trick that can dramatically improve your laptop's WiFi performance.
Understanding the WiFi Weakness: A Silent Killer
The initial step towards rectifying a problem is understanding its roots. The weakness of your laptop's WiFi can be attributed to several unseen forces. Unlike a wired connection, WiFi operates over radio waves. These waves can be easily disrupted, weakened, or outright blocked by a seemingly innocuous array of household items and environmental factors. Metallic objects, such as filing cabinets, refrigerators, and even the metal chassis of many laptops, can absorb or deflect these signals. Thick concrete walls, common in older buildings, represent formidable barriers, effectively strangling the WiFi signal's reach. Interference from other devices, such as microwave ovens, Bluetooth devices, and even neighboring WiFi routers, can create a chaotic environment, rendering your laptop's ability to pick up a strong WiFi signal significantly less effective. Thus, before we unveil the "shocking trick," it’s crucial to recognize the potential for these underlying factors to weaken your wireless signal.
The Shocking Trick: Unveiling the Power of Channel Optimization
The "shocking trick" isn't some complex hardware upgrade or a secret handshake with your ISP. Instead, we're going to dive deep into your router's settings and optimize the channel your WiFi network operates on. Think of it like this: your WiFi is a radio station, transmitting its signal on a specific frequency, or channel. By default, many routers are set to "auto," meaning they automatically select a channel. However, this automatic selection frequently leads to congestion. Imagine numerous radio stations transmitting on the same frequency in a crowded city—the resulting cacophony would be unbearable. The same principle applies to WiFi. This is where we come in to apply the "shocking trick" to optimize your WiFi channel
Unlocking Router Settings: A Step-by-Step Guide
To begin, you'll need to access your router's configuration page.
- Identify Your Router's IP Address: This is usually found on a sticker on the router itself. Common addresses include 192.168.1.1, 192.168.0.1, or 10.0.0.1.
- Open Your Web Browser: Type the IP address into your browser's address bar and press Enter.
- Log In: You'll be prompted for a username and password. These are also typically found on the router's sticker or in the original documentation. Common default credentials are "admin" for both username and password, or no username and a password of "admin."
- Locate the Wireless Settings: The location varies depending on your router's make and model, but look for tabs labeled "Wireless," "WiFi," "Advanced Settings," or something similar.
- Find the Channel Selection: Under the wireless settings, you should find an option to select the WiFi channel. The default setting is often "Auto."
Channel Scanning: Identifying the Least Congested Path
Now, we need to determine which channel offers the least interference. Do not worry; there are many different tools and apps to get this done. We’ll cover two options, the use of a tool and a quick overview.
1. Using a WiFi Analyzer App (Recommended):
- Download a WiFi Analyzer App: There are many free and user-friendly apps available for both smartphones (Android and iOS) and laptops. Search your app store for "WiFi Analyzer."
- Scan for Networks: Open the app and allow it to scan the surrounding WiFi networks. The app will display a graph or chart showing the signal strength of each network and the channel they are using.
- Identify the Least Used Channel: Look for channels that show minimal activity and are not overlapping with other networks. In the 2.4 GHz range, channels 1, 6, and 11 are generally recommended as non-overlapping. For 5 GHz, the channels are much more numerous and less prone to interference.
2. A Quick Overview (Not Recommended):
- Manual Observation: While less precise than a WiFi analyzer app, you can manually observe the channel list in your router's settings. Check which channels are listed as "In Use" by other networks.
- Avoid Overlapping Channels: Avoid selecting a channel that overlaps with those of your neighbors' networks. Overlap leads to interference, reducing your WiFi's speed and reliability.
The Implementation: Setting Your Router to the Optimized Channel
Once you've identified the optimal channel, it's time to put the "shocking trick" into action.
- Select the Recommended Channel: In your router's wireless settings, change the channel from "Auto" to the channel you've identified as being the least congested. For instance, if your analysis revealed that channel 11 had the least network traffic, you should select channel 11.
- Save Your Settings: Locate the "Save," "Apply," or "OK" button and click it to save the changes.
- Restart Your Router: This step is vital. Restarting your router ensures that the new settings are fully implemented. Allow a few minutes for the router to reboot.
Verifying the Results: Instantaneous and Observable Improvements
After implementing this "shocking trick" and restarting your router, you should immediately notice significant improvements in your laptop's WiFi performance. Try these tests:
- Speed Test: Run a speed test on your laptop to measure your download and upload speeds. Sites like Speedtest.net or Fast.com are excellent resources. Compare your results before and after changing the channel.
- Website Loading: Browse the web and monitor the speed at which websites load. You should experience faster page loading times.
- Video Streaming: Start streaming videos on streaming platforms. The elimination of buffering and lags will confirm the improvements in your WiFi.
- Online Gaming: If you're a gamer, test the ping of your games.
- File Downloads: Download a large file and measure the download speed.
Troubleshooting WiFi Weakness: Refining Your Setup
Even after channel optimization, you might still encounter some WiFi issues. Here are a few troubleshooting steps:
- Re-scan Channels Over Time: WiFi interference can fluctuate. Periodically re-scan the channels to ensure you're on the optimal one.
- Router Placement: Experiment with different router locations in your home. Place the router in a central, elevated location, away from obstructions, and metallic objects.
- Router Firmware Updates: Make sure that you have the latest firmware installed on your router. Firmware updates often include performance enhancements and bug fixes.
- External Antennas: If your router has external antennas, try adjusting their position. Experiment with pointing them horizontally, vertically, or at different angles to optimize signal strength.
- Consider Upgrading Your Router: If your router is several years old, it might not support the latest WiFi standards (like WiFi 6 or WiFi 6E). Upgrading to a newer router can provide improved speed, range, and overall performance.
- Check for Interference: Identify and eliminate any potential sources of interference. Move your router away from microwaves, Bluetooth devices, and other electronic appliances.
- Limit the Number of Connected Devices: The more devices actively using your WiFi, the more the bandwidth will be split. Consider limiting the number of concurrent devices and/or prioritizing device traffic using Quality of Service (QoS) settings in your router (if available).
The Power of Proactive WiFi Management: Sustaining Performance
The "shocking trick" of channel optimization is not a one-time fix. To maintain peak WiFi performance, you should adopt a proactive approach to WiFi management. Regularly evaluate your WiFi environment, make adjustments as needed, and always keep your router's settings up to date. Remember that the environment around your WiFi constantly changes, so being proactive is the key to ensure that your laptop's WiFi always provides the speed and reliable signal you need. Now, experience the improved WiFi performance that you have been waiting for!
