laptop không tìm thấy wifi nhà mình win 7
Title: Khc phc Laptop Win 7 khng kt ni c WIFI 5 Cch khc phc Biu tng Wifi Win 7 c du X
Channel: Bug Tech
Khc phc Laptop Win 7 khng kt ni c WIFI 5 Cch khc phc Biu tng Wifi Win 7 c du X by Bug Tech
My Win 7 Laptop Can't Find My WiFi! (Solved!)
My Windows 7 Laptop Lost Its WiFi? Don't Panic! (Here's the Fix!)
We've all been there, right? That heart-stopping moment when your trusty Windows 7 laptop stares blankly back at you, utterly oblivious to the presence of your beloved WiFi network. Suddenly, the internet seems a million miles away! Instead of tossing your laptop out the window, take a deep breath. Let's get you back online.
The Mysterious Disappearance of Your WiFi: A Common Problem
First off, it's important to understand you're not alone. Many Windows 7 users have encountered this infuriating WiFi vanishing act. Fortunately, resolving this is often surprisingly straightforward. The issue usually stems from one of a few common culprits, which we'll explore. After this, you’ll be connected again.
1. The Simple Check: Physical Connections and the Wireless Switch
Before we dive into technical mumbo jumbo, let's perform some basic sanity checks. It might seem obvious, but sometimes the simplest solutions get overlooked. Therefore, let’s begin there.
- Is WiFi turned on? Many laptops have a physical switch. It can be on the side or the front. Ensure it's flipped to the "on" position. Sometimes, the switch is a keyboard shortcut, often involving the "Fn" key and a WiFi icon.
- Are you near your router? It sounds silly, but distance matters. To clarify, make sure you're within a reasonable range. Walls and other obstructions can weaken the signal.
- Check the Ethernet cable. Occasionally, a faulty Ethernet cable will also disconnect your WiFi. Remove the cable and restart the system.
If those checks don't resolve things, don't worry. We have other solutions ready.
2. Driver Dilemma: The Unsung Hero of Connectivity
Your wireless network adapter relies on drivers. These act as the translators between your hardware and your operating system. Sometimes, these drivers become corrupted, outdated, or simply misbehave. This can create WiFi issues. Consequently, updating or reinstalling your network adapter drivers is often the key.
Here's how to do it:
- Open Device Manager: Click the Start menu. Type "Device Manager" into the search bar. Click on the icon.
- Locate Network Adapters: In the Device Manager window, find "Network adapters". Click the arrow to expand it.
- Find Your Wireless Adapter: Your WiFi adapter will have a name. It might include terms like "Wireless Network Adapter" or "Wi-Fi Adapter."
- Update or Reinstall the Driver: Right-click on your wireless adapter. Select "Update driver." Choose "Search automatically for drivers" to let Windows find the latest. If it can’t find anything, try "Uninstall device". After you uninstall it, restart your computer. Windows will automatically try to reinstall the driver during startup.
3. The Router Reset: A Digital Reboot for Your Network
Sometimes, the problem isn’t with your laptop. The problem might be with your router. Routers, like any other piece of technology, can get stuck. Restarting your router can often resolve connectivity problems.
- Unplug Your Router: Locate the power adapter for your router. Unplug it from the wall outlet.
- Wait a Moment: Let the router sit unplugged for at least 30 seconds.
- Plug It Back In: Plug the router back in. Wait a few minutes for it to restart completely.
- Try Connecting Again: Once the router has fully restarted, try connecting your laptop to WiFi. The network should show up.
4. Troubleshooting Network Settings: Hidden Conflicts
Windows 7 has built-in tools to troubleshoot network problems. You might discover some hidden settings that affect your connectivity. Let's check them out.
- Open the Network and Sharing Center: Click the Start menu. Click on "Control Panel". Here, select "Network and Internet". Then, click "Network and Sharing Center".
- Troubleshoot Problems: In the Network and Sharing Center, click on "Troubleshoot problems". Windows will then attempt to diagnose and fix any issues.
- Check network settings: Double-check your network settings. Make sure everything configured correctly. Verify that your network is set to "private."
- Firewall Settings: Your firewall might be blocking the internet. Look into your firewall settings. Make sure your network adapter is allowed to connect.
5. A Last Resort: System Restore - Turning Back Time
If all other steps fail, a system restore might be the answer. It undoes recent changes. This can revert your system to a previous state. This might fix the issue.
- Open System Restore: Click the Start menu. Type "System Restore" and click the icon.
- Choose a Restore Point: Select a restore point from before the WiFi issue occurred.
- Follow the Prompts: Follow the on-screen instructions. Your computer will restart during the process.
The Takeaway: Persistence Pays Off!
Losing your WiFi is frustrating. However, staying calm and following these steps is the key. In most cases, one of these solutions will get you back online. Moreover, these methods are easy to follow. Moreover, be patient! It might take a few tries to find the right fix. Keep trying, and your Windows 7 laptop will, without a doubt, reconnect to your WiFi. Now, go forth and conquer the digital world!
WiFi Vanished?! Find Your Laptop's Hidden Network NOW!"My Win 7 Laptop Can't Find My WiFi! (Solved!)" - A Guide to Getting Back Online
Hey there, fellow internet wanderer! Ever felt a pang of panic when your trusty Windows 7 laptop flatly refuses to see your precious WiFi network? That sinking feeling in your stomach, the frustration bubbling up – yeah, we’ve all been there. It's like your digital lifeline has been severed, leaving you stranded in a sea of information deprivation. But fear not, because we're going to delve into the mysterious realm of WiFi woes and, ultimately, get your Win 7 machine back in the online game. Think of this as your ultimate survival guide – a map to navigate the treacherous terrain of connectivity issues.
1. The WiFi Witch Hunt: Understanding the Culprit
Before we start wielding digital tools, let’s get a handle on what might be going on. Imagine your WiFi as a radio station, and your laptop's WiFi adapter as a radio receiver. If the radio isn't tuned correctly, or the station's signal is weak, well, you get static, or in our case, no WiFi. Sometimes, the problem is as straightforward as a loose connection; other times, it’s a more complex interplay of drivers, settings, or even physical obstructions. We'll uncover these culprits, one by one.
2. Is It Really Your Laptop, or Does the Problem Lurk Elsewhere?
Before you tear your hair out blaming your Windows 7 device, let's play detective. The first step is to isolate the problem.
- Check Other Devices: Grab your phone, tablet, or another laptop and see if they can connect to your WiFi. If they can, then the issue likely resides within your Win 7 laptop. If they can't connect, the problem is broader – your router might be down, or your internet service provider (ISP) could be experiencing an outage. Think of it like this: if all the cars are stuck at the same intersection, it's probably the traffic light that's broken, not your individual vehicle.
- Router Reboot Ritual: This age-old tactic often works miracles. Unplug your router and modem (if separate) from the power outlet, wait about 30 seconds (yes, the full thirty!), and then plug them back in. Give them a few minutes to boot back up. It's like hitting the reset button on your entire internet ecosystem.
- Internet Service Provider Check: Still no luck? Give your ISP a call and make sure there aren’t any known issues in your area.
3. The "Enable Wireless" Tango: Is Your WiFi Adapter Even On?
Okay, assuming the problem is indeed with your Win 7 laptop, the first place to look is the most obvious: is your WiFi adapter enabled? It sounds rudimentary, but it's a common pitfall.
- The Hardware Switch: Some laptops have a physical switch (often on the side or front) that disables WiFi. Make sure it’s in the "on" position. Think of it like turning on a faucet; without that initial action, nothing flows.
- The Function Keys: On most laptops, you can toggle WiFi on/off using a function key (usually F2, F3, or something similar) combined with the "Fn" key. Look for a little antenna icon on the function key.
4. Driver Dilemmas: The Silent Saboteurs
Drivers are essentially the software that allows your laptop to "talk" to its hardware components, including your WiFi adapter. Outdated, corrupted, or missing drivers are a frequent cause of connectivity headaches.
- Accessing the Device Manager: Click the Start button, type "Device Manager" in the search box, and press Enter. The Device Manager is your window into the heart of your laptop's hardware.
- Locating Your Network Adapter: Look for "Network adapters" in the Device Manager list. Expand it, and you should see your WiFi adapter listed (e.g., "Wireless Network Adapter," "WiFi Adapter").
- Driver Status Check: If there’s a yellow exclamation mark next to your WiFi adapter, you’ve got a driver problem. Right-click the adapter, select "Update driver software," and follow the prompts. Windows will usually try to find and install the correct drivers automatically.
- Manual Driver Hunt (if needed): If the automatic update fails, you might need to manually download drivers from your laptop manufacturer's website (e.g., Dell, HP, Acer) using another device. You’ll need to know your laptop model number.
5. The Wireless Troubleshooting Wizard: Your Built-in Savior
Windows 7 actually has a built-in troubleshooter that can often detect and fix common WiFi problems. It's like having a digital handyman on call.
- Accessing the Troubleshooter: Right-click on the WiFi icon in your system tray (usually near the clock). Select "Troubleshoot problems."
- Follow the Prompts: The troubleshooter will scan for issues and offer solutions. It might reset your network adapter, refresh your IP configuration, or perform other magic tricks.
6. Network Settings: Getting Cozy with Your WiFi Profile
Sometimes, the issue isn't hardware or drivers, but rather your WiFi profile itself. Perhaps settings have been accidentally altered or become corrupted.
- Accessing Network and Sharing Center: Go to "Control Panel," then "Network and Internet," and finally "Network and Sharing Center."
- Managing Wireless Networks: Click "Manage wireless networks" on the left-hand side.
- Checking Your Profile: Ensure your network's profile is listed here. If it's not, you may need to reconnect to your WiFi and save the profile. If you see your network and it says "Not Connected", right click on it and choose "Properties"
- Verifying Security Settings: Make sure the security settings (e.g., WPA2-PSK) are correct. Incorrect settings are like using the wrong key to open a lock.
7. The IP Address Imbroglio: Static vs. Dynamic
Your IP address is like the address of your laptop on the internet. If it's not configured correctly, you won’t get connected.
- Check Your IP Settings: In the Network and Sharing Center, click on the name of your WiFi connection. Click on "Wireless Properties".
- Verify IP Configuration: In the "Networking" tab, double-click on "Internet Protocol Version 4 (TCP/IPv4)" and make sure "Obtain an IP address automatically" is selected. This is usually the best setting for most home networks.
- Consider Static IP (If Necessary): If you've been assigned a static IP address, make sure it’s correct, and your DNS settings are accurate. This is usually reserved for advanced users.
8. The Channel Conundrum: WiFi Interference
Just like radio stations can interfere with each other, so too can WiFi networks. Your router and your neighbors' routers all operate on different channels. If the channels are overlapping, it can cause problems.
- Router Configuration: Log into your router's configuration page (usually by typing your router's IP address into your web browser). Look for the "Wireless Settings" or "Channel" settings.
- Channel Selection: Try changing the WiFi channel to one that's less congested. There are apps and websites that can help you find the least crowded channels in your area.
9. Firewall Frenzy: Checking for Blockages
Your firewall is a digital barrier, and it might be blocking your laptop's access to the internet.
- Windows Firewall Check: Go to the Control Panel, and then "Windows Firewall." Make sure it isn’t blocking your network connection. You can often do this by allowing the connection to be "trusted."
- Third-Party Firewalls: If you have third-party firewall software installed (e.g., McAfee, Norton), make sure it's not interfering with your WiFi connection.
10. Antivirus Interference: The Security Blanket Gone Wrong
Similar to firewalls, antivirus software can sometimes interfere with your network connection.
- Temporary Disable: As a troubleshooting step, temporarily disable your antivirus software (but remember to re-enable it afterward!). See if your WiFi connection works now. If it does, you may need to adjust the antivirus settings to allow your network traffic to pass through.
11. Resetting Your TCP/IP Stack: A Digital Reboot
This is a more advanced step to resolve network configuration issues.
- Open a Command Prompt: Type "cmd" in the Start Menu search and press Enter.
- Run These Commands: Type the following commands one by one, pressing Enter after each:
netsh winsock resetnetsh int ip resetipconfig /flushdns
- Restart Your Computer: This will reset your network settings to a default state.
12. Checking for Physical Damage: The Unseen Problems
Sometimes, the problem isn't software-related.
- Internal Hardware: If you've tried everything else, there’s a chance your WiFi adapter itself has some internal damage. This may be a challenge but can be addressed by a professional.
13. The Router's Reach: Range Limitations & Obstructions
Is your laptop too far from your router, or are there physical
Windows 8 Wi-Fi Nightmare? Solved! (Easy Laptop Connection)Khc Phc Li Laptop Khng Bt c wifi trn Win 7 vi tnh 1166 kha vn cn

By My Tnh 1166 Kha Vn Cn Khc Phc Li Laptop Khng Bt c wifi trn Win 7 vi tnh 1166 kha vn cn by My Tnh 1166 Kha Vn Cn
Khc phc li khng bt c wifi nh mnh ch bt c wifi nh hng xm

By ng Vn Li - OBS Khc phc li khng bt c wifi nh mnh ch bt c wifi nh hng xm by ng Vn Li - OBS
Cch sa li my tnh mt biu tng wifi trn win 7 Laptop khng hin th wifi trn laptop

By ViHo Cch sa li my tnh mt biu tng wifi trn win 7 Laptop khng hin th wifi trn laptop by ViHo

Title: Cch sa laptop khng tm thy wifi nh mnh
Channel: ViHo
Cch sa laptop khng tm thy wifi nh mnh by ViHo
Wifi On Laptop
My Win 7 Laptop Can't Find My WiFi! (Solved!)
Running into WiFi connectivity issues on a Windows 7 laptop can feel like a frustrating setback, especially when you rely on a stable internet connection for work, communication, or entertainment. The good news is that these problems are often resolvable with a systematic approach to troubleshooting. We will explore the most common reasons why your Windows 7 laptop might be struggling to detect your WiFi network and provide you with detailed, step-by-step solutions to get you back online quickly.
Understanding the Root Causes: Why Your WiFi is Elusive
Several core factors can prevent your Windows 7 laptop from seeing available WiFi networks. These range from simple software glitches to more complex hardware conflicts. Identifying the underlying cause is crucial to implementing the proper fix. We will delve into the likely culprits, equipping you with the knowledge to diagnose the situation. We will investigate the most common reasons behind this issue.
- Wireless Adapter Issues: The heart of your WiFi connection lies in your wireless network adapter. If this adapter is disabled, malfunctioning, or encountering driver problems, your laptop won't be able to scan for and connect to WiFi networks. This is the most frequent issue.
- Incorrect Network Settings: Misconfigured network settings, like an incorrect Service Set Identifier (SSID) or security key, will prevent a successful connection. It's essential to double-check these preferences.
- Router Problems: Sometimes, the issue isn't with your laptop but with your router. Router malfunctions, signal interference, or outdated firmware can all disrupt the wireless signal and make your network undetectable.
- Outdated or Corrupted Drivers: Drivers act as the communication bridge between your hardware and the operating system. If your wireless adapter drivers are outdated, corrupted, or incompatible, they will fail.
- Physical Obstructions & Interference: Thick walls, metal objects, other electronic devices, and signal interference can weaken the WiFi signal, reducing its range and preventing your laptop from detecting the network.
Step-by-Step Troubleshooting: Reclaiming Your WiFi Connection
We will now proceed through a comprehensive set of troubleshooting steps. This systematic approach will help diagnose and resolve the WiFi issue.
1. Verify the Wireless Adapter Status: Ensuring It's Enabled
The first step is to confirm that your wireless network adapter is enabled. Sometimes, the adapter is inadvertently turned off.
- Access the Network and Sharing Center: Click the Start button, then select "Control Panel." In the Control Panel, navigate to "Network and Internet," and then click on "Network and Sharing Center."
- Check Adapter Settings: In the Network and Sharing Center, click on "Change adapter settings" on the left-hand side. This will display all of your network connections. Your wireless network adapter will be listed here, typically with a name like "Wireless Network Connection."
- Enable the Adapter: If your wireless adapter is disabled (represented by a grayed-out icon), right-click on it and select "Enable." Once enabled, the icon should turn color, indicating that it’s active.
2. Diagnose and Troubleshoot: Automatic Network Diagnosis
Windows 7 includes a built-in troubleshooter that can automatically diagnose and often resolve common network connectivity problems.
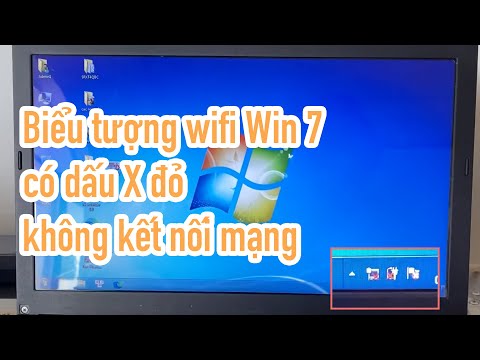
- Run the Troubleshooter: Right-click on your wireless network icon in the system tray (usually found in the bottom right corner of the screen). If you see a red "X" on the icon, this indicates a connectivity issue. Select "Troubleshoot problems." Windows will then attempt to identify and fix the problem.
- Follow the Prompts: The troubleshooter will guide you through a series of steps. Follow the on-screen instructions, which might involve restarting the adapter, resetting network settings, or checking for other potential issues.
3. Inspect Network Adapter Drivers: Ensuring They're Up-to-Date
Outdated or faulty drivers are a very common cause of network connectivity problems. It is really important that your drivers are kept up to date.
- Access the Device Manager: Click the Start button, type "Device Manager" in the search box, and press Enter. This will open a window showing all the hardware components installed on your laptop.
- Locate the Network Adapters: In the Device Manager, expand the "Network adapters" category. You should see your wireless network adapter listed here (for example, "Intel(R) Wireless-N 7260").
- Update the Driver: Right-click on your wireless network adapter and select "Update Driver Software." Choose "Search automatically for updated driver software." Windows will then search online for the latest driver and install it if found.
- Manually Install a Driver (If Needed): If the automatic update doesn’t find a newer driver, you might need to download the driver directly from the manufacturer's website (e.g., Intel, Broadcom, Realtek). Download the driver from the website and then, in the Device Manager, select "Update Driver Software," and then choose "Browse my computer for driver software" and point it to the location of the downloaded driver file.
4. Examine Your Router: The Gateway to the Internet
Your router plays a critical role in providing your WiFi signal. If there's a problem with the router itself, your laptop will not be able to connect.
- Restart Your Router: The simplest solution is often the most effective. Unplug your router from the power outlet, wait about 30 seconds, and then plug it back in. Allow a few minutes for the router to fully restart.
- Check Router's SSID and Security Key: Ensure that the SSID (network name) and security key (password) you are entering on your laptop match exactly what is configured on your router. Check for typos. These settings are usually found on a sticker on the router or in its web interface.
- Access Router's Web Interface: Open a web browser and enter your router’s IP address (usually 192.168.1.1 or 192.168.0.1) in the address bar. You might need your router's username and password to log in. Once logged in, you can check your router's settings, update its firmware, or troubleshoot connection issues.
5. Confirm Network Settings: Verifying Internet Protocol Configuration
Incorrect network settings can make it impossible to connect to your WiFi network.
- Access Network Adapter Properties: Go to the Network and Sharing Center (as described in step 1), then click on "Change adapter settings." Right-click on your wireless network adapter, and select "Properties."
- Check Internet Protocol Version 4 (TCP/IPv4): In the properties window, look for "Internet Protocol Version 4 (TCP/IPv4)" and double-click on it.
- Configure IP Address and DNS Settings:
- Obtain an IP address automatically: This is the recommended setting for most home networks. Make sure the "Obtain an IP address automatically" option is selected.
- Obtain DNS server address automatically: Also recommended for most home networks. Ensure that “Obtain DNS server address automatically” is selected.
- Manually Configure IP and DNS (If Necessary): If you have specific network requirements or are using a static IP address, ensure that your IP address, subnet mask, default gateway, and DNS server addresses are correctly configured. If you are unsure of these settings, contact your internet service provider.
6. Investigate Potential Interference: Eliminating Obstacles
Physical obstructions and signal interference can weaken your WiFi signal, making it difficult for your laptop to detect the network.
- Check Physical Obstructions: Make sure that your laptop and router are not blocked by walls, metal objects, or other obstructions. Move the laptop closer to the router and see if the signal improves.
- Assess Interference from Other Devices: Other electronic devices emitting radio waves can interfere with your WiFi signal. These devices include microwaves, cordless phones, Bluetooth devices, and baby monitors. Try to keep your laptop away from these devices or move them away from the router.
- Change the Router Channel: Some routers allow you to change the wireless channel they use to transmit data. Wireless signals can experience interference if other WiFi networks use the same channel. By changing the channel on your router, you can reduce the chance of interference. Consult your router's manual to find out how to change the channel. You can use a WiFi analyzer app on your smartphone to check what the least crowded channel is.
7. Consider System Restore: Reverting to a Previous State
If the problem started recently, system restore is an option that can revert your system to a previous state where the WiFi was working correctly.
- Open System Restore: Click the Start button, type "System Restore" in the search box, and press Enter.
- Choose a Restore Point: This opens the System Restore wizard. Select a restore point from before the WiFi issue started. You can select the "Show more restore points" option to see older restore points.
- Follow the Wizard: Follow the on-screen instructions to complete the system restore process. Your computer will restart during the restoration. Note that any changes made after the selected restore point will be lost.
8. Reinstall Your Wireless Adapter: When All Else Fails
If you've tried all the other solutions, and your WiFi problems are still present, reinstalling the wireless adapter may be the last resort.
- Uninstall the Adapter: Open the Device Manager (as described in step
