how to inprove your wifi conection on your laptop computer
Title: Best Way To Improve Wi-Fi Connection On PCLaptop 2022
Channel: EasyTechGeek
Best Way To Improve Wi-Fi Connection On PCLaptop 2022 by EasyTechGeek
Laptop WiFi Nightmare? This ONE Trick Fixes It INSTANTLY!
Conquering WiFi Chaos: The Unexpected Solution to Your Laptop's Connection Conundrums
Ever felt like your laptop's WiFi is a capricious, digital tease? One minute, beaming bars of signal strength promise seamless streaming, and the next… poof… you're staring at a dreaded "no internet" message. It's beyond frustrating, isn't it? You need to get that document uploaded, attend that video call, or simply unwind with your favorite show, but the buffering wheel just mocks your intentions. Consider this article your digital rescue beacon. We'll navigate the murky waters of WiFi woes and discover a surprisingly straightforward solution that can often banish your connection headaches.
The Silent Culprit: Understanding the WiFi Landscape
Before we unveil the secret weapon, let's briefly acknowledge the battlefield. Your laptop’s WiFi lives and breathes in a complex ecosystem. Radio waves, interference, and the ever-changing demands of your bandwidth conspire to create a volatile connection. Think of it this way: your laptop is trying to shout across a crowded party. Sometimes, the noise level is acceptable. Other times, the entire room is a cacophony of competing voices, hindering communication. In these instances, you need to be prepared.
Unveiling the Unexpected Hero: The Power of a Simple Reset
Now, brace yourselves. The "one trick" we’re about to reveal isn't some arcane incantation or a complex software installation. It's something many overlook, yet it consistently delivers results: a thorough network reset. Yes, that's right. It’s the digital equivalent of a good night's sleep for your laptop. This action clears the decks, refresh data, and often re-establishes a stable connection.
Step-by-Step: Implementing Your Connection Cure
So, how do you execute this simple yet effective maneuver? Follow these easy steps.
- Disconnect the Network: Disable your WiFi. Click the WiFi icon in your taskbar (Windows) or menu bar (Mac). Then, turn it off.
- Power Cycle Your Devices: Unplug your modem and your router. Wait for at least 60 seconds. This pause allows them to fully reset. This is crucial because it provides a clean start.
- Reboot the Modem and Router: Plug your modem back in. Allow it to fully power up and stabilize. Then, plug in your router. Wait for it to completely restart.
- Reconnect the WiFi: Once both devices are back online, enable your laptop’s WiFi. Select your network and enter your password if prompted.
- Test the Connection: Then and only then test your internet speed and functionality.
Beyond the Reset: Proactive Strategies for Stronger Signals
While the reset is a powerful tool, a few preventative measures can bolster your WiFi's resilience.
- Optimize Router Placement: Place your router in a central, elevated location. Avoid obstructions like walls or metal objects.
- Update Router Firmware: Check your router's manufacturer website for firmware updates. These updates often improve performance and security.
- Minimize Interference: Keep your router away from other electronic devices. These can cause interference.
- Change the Channel: Routers often default to the same channel. Access your configuration settings to change the channel for your device. This can reduce congestion.
- Consider a WiFi Extender: If your home has dead zones, a WiFi extender can help. It will extend your network's reach.
Troubleshooting Tango: When the Reset Isn't Enough
Sometimes, despite your best efforts, the reset doesn't fully resolve the issue. Not to worry. Further troubleshooting is available.
- Check for Service Outages: Before you go any further, determine if your internet service provider (ISP) is experiencing an outage in your area.
- Run a Network Troubleshooter: Windows and macOS both have built-in network troubleshooters. They can often diagnose and fix common problems.
- Update Your Network Adapter Drivers: Outdated drivers can cause compatibility issues. Make sure that device is up to date.
- Contact Your ISP: If all else fails, contact your service provider. They can provide further assistance.
The Takeaway: Reclaiming Your Digital Freedom
So there you have it. The solution to your laptop's WiFi woes isn't always complex. It's often as simple as a network reset. And, by adopting a few preventative measures and troubleshooting smarts, you can maintain a strong, stable connection. Hence, take control of your digital destiny. Embrace your renewed WiFi freedom, and enjoy a smoother, more connected online experience. Because, ultimately, a reliable connection is the key to everything we do.
5G Wifi Vanished? Laptop's Hidden 5G Secret REVEALED!Laptop WiFi Nightmare? This ONE Trick Fixes It INSTANTLY!
Ever been stuck in a WiFi wasteland? You know, that frustrating experience where your laptop’s WiFi signal decides to take an unscheduled vacation, leaving you stranded in digital darkness? We've all been there. I remember one time, trying to video call my family from a café, only to have the connection repeatedly die, leaving me feeling like a castaway on a desert island – except instead of sand, there was a buffering symbol taunting me. But what if I told you there's a one trick, a secret weapon, a digital defibrillator that can revive your WiFi signal and banish those connectivity blues? That's what we’re diving into today.
1. The WiFi Woe: Why Is My Laptop Being So Difficult?
Let's face it; our laptops are practically extensions of ourselves. We rely on them for work, entertainment, staying connected, and everything in between. So, when the WiFi acts up, it's like having a vital limb paralyzed. But why does this happen? The reasons are as varied as the types of cat videos people watch. It could be interference from other electronics, the router’s location, outdated drivers, or even the sheer number of devices vying for bandwidth. Think of your WiFi signal like a crowded highway; the more cars (devices) on the road, the slower the traffic (internet speed).
2. Decoding the Digital Dilemma: Common WiFi Problems
Before we unleash the magic fix, let's diagnose the patient. Common WiFi ailments include:
- Weak Signal Strength: The bars on your WiFi icon are looking more like a half-eaten sandwich.
- Slow Internet Speeds: Downloads crawl at a snail's pace, and video streaming is a choppy nightmare.
- Frequent Disconnections: Your laptop's connection drops like a hot potato.
- Can't Connect at All: The dreaded "no internet" message stares back at you.
These issues can make you want to throw your laptop out the window (don't do it, though!).
3. Forget Rebooting! The Power of the Wireless Adapter Reset
This is the secret weapon. This is the one trick. Forget the standard reboot. Forget the router reset. The method we are about to reveal bypasses them both. Instead of messing with your router, let's go straight for the heart of the problem: your laptop's wireless adapter.
What to Do?
- Find & Open Device Manager: This is your laptop's control center. Search for "Device Manager" in your Windows search bar (or equivalent on a Mac).
- Unleash the Network Adapters: Expand the "Network adapters" section. Here, you'll find a list of all your network devices.
- Locate Your Wireless Adapter: Usually named something like "Wi-Fi" or "Wireless Network Adapter."
- Disable, Then Enable: Right-click on your wireless adapter and select "Disable device." Wait a few seconds. Then, right-click again and select "Enable device."
That's it. Simple, right?
4. Why This Works: A Digital Reboot for Your Adapter
Think of your wireless adapter as the translator between your laptop and the WiFi router. Sometimes, this translator gets its wires crossed, leading to communication breakdowns. Disabling and then enabling it is like giving it a jolt, a fresh start. It clears the cobwebs, resets the connection, and often resolves those pesky WiFi issues. It's like a digital brain reset for your device.
5. Beyond the One Trick: Additional Troubleshooting Tips
While the wireless adapter reset often works wonders, sometimes you need a bit more…patience.
- Move Closer to the Router: Sometimes the simplest solutions are the best. Walls and obstacles can weaken the signal.
- Check Your Router: Ensure your router is powered on and working correctly. Sometimes, a simple restart does the trick.
- Update Your Drivers: Outdated drivers can cause compatibility problems. Go to Device Manager again, right-click on your wireless adapter, and select "Update driver."
- Reduce Interference: Keep your laptop away from other electronic devices that could be interfering with the signal.
6. The Router's Role: Understanding the Signal Source
Your router is the WiFi's fountain of youth. It transmits the signal that allows your devices to connect to the internet. So, where should you place it?
- Centrally Located: Place your router in a central spot in your home or office to maximize coverage.
- Elevated Position: Place it on a shelf or table, away from the floor.
- Away from Obstacles: Avoid placing it near walls, metal objects, or other devices that may interfere.
7. Optimizing Your Connection: Channel Selection and Interference
Routers operate on different channels. If many devices are using the same channel in your area, it could cause congestion.
- Channel Selection: Access your router's settings (usually through a web browser) and experiment with different channels to identify the one with the least interference.
- Interference Mitigation: Eliminate potential sources of interference, such as microwaves, Bluetooth devices, and cordless phones.
8. The Great Bandwidth Battle: Managing Multiple Devices
The more devices connected to your WiFi, the more bandwidth is consumed.
- Prioritize Devices: If possible, prioritize devices that require the most bandwidth.
- Limit Simultaneous Usage: Try to limit the number of devices using the internet simultaneously.
- Consider Upgrading Your Internet Plan: If you have many devices and heavy internet usage, you might benefit from a faster internet plan.
9. Security Matters: Protecting Your WiFi Network
Securing your WiFi network is crucial.
- Strong Password: Use a strong, unique password for your WiFi.
- Encryption: Enable WPA2 or WPA3 encryption.
- Guest Network: Set up a guest network to provide internet access to visitors without giving them access to your main network.
10. Diagnosing the Problem: When to Call for Backup
If the one trick and these additional tips don't work, it might be time to seek professional help.
- Internet Service Provider (ISP): Contact your ISP to troubleshoot potential issues with your internet service.
- Computer Technician: A computer technician can diagnose more complex hardware or software problems.
11. The Mac Gyver Approach: Troubleshooting on a Mac
Macs work a little differently, but the core principles remain the same. The wireless adapter reset works on Macs too, but the steps are slightly different.
- Restart Your Mac: Sometimes, a simple restart can fix the problem.
- Network Preferences: Open System Preferences > Network and cycle the Wi-Fi off and then back on.
- Wireless Diagnostics: Utilize the built-in Wireless Diagnostics tool (hold down the Option key and click on the WiFi icon in the menu bar).
12. The Windows Way: Specific Solutions for Windows Users
Windows users might encounter specific issues that require tailored solutions:
- Network Troubleshooter: Windows has a built-in network troubleshooter (Settings > Network & Internet > Troubleshoot).
- Command Prompt: Use the Command Prompt to reset your network settings (search for "Command Prompt" and run it as an administrator). Use commands like
ipconfig /flushdnsandnetsh winsock reset.
13. The Router's Secret Life: Exploring Advanced Settings
Going beyond the basics, you can delve into advanced router settings:
- Quality of Service (QoS): QoS allows you to prioritize certain types of traffic, such as video streaming or online gaming.
- Firmware Updates: Regularly update your router's firmware to improve performance and security.
14. Avoiding the WiFi Wasteland: Proactive Measures
Preventing WiFi problems is like building a digital fortress:
- Regular Driver Updates: Keep your wireless adapter drivers up-to-date.
- Router Maintenance: Restart your router periodically and keep the firmware updated.
- Signal Testing: Use WiFi analyzer apps to monitor signal strength and identify potential interference.
15. Conquering Connectivity: The WiFi Future
The digital world is constantly evolving.
- WiFi 6 and Beyond: New WiFi standards, like WiFi 6 and WiFi 6E, offer improved performance and efficiency.
- Mesh Networks: Mesh networks distribute the WiFi signal throughout your home, eliminating dead zones.
Closing Thoughts
So, there you have it. The secrets to conquering the laptop WiFi nightmare, revealed! Remember that one-trick solution, the wireless adapter reset, is your first line of defense. Combined with these additional troubleshooting tips, you'll be back online in a flash. Say goodbye to buffering woes and hello to seamless streaming and effortless browsing. Now go forth and conquer your connectivity struggles!
FAQs
1. Will this trick work on all laptops?
Yes, the wireless adapter reset should work on most laptops running Windows or macOS. However, the exact steps may vary slightly depending on your specific operating system.
2. Is this trick a guaranteed fix?
While this trick resolves many WiFi issues, it's not a guaranteed solution for every problem. Other factors, like router issues or internet service outages, could still be at play.
**3. How
Steal Your Laptop's Wi-Fi: The Secret Trick They Don't Want You to Know!Make Your Laptop's Wifi Signal Faster On Windows 1087 Tutorial

By MDTechVideos Make Your Laptop's Wifi Signal Faster On Windows 1087 Tutorial by MDTechVideos
How to Improve Wi-Fi Signals in Windows Laptop Speedup Wi-Fi

By MJ Tube How to Improve Wi-Fi Signals in Windows Laptop Speedup Wi-Fi by MJ Tube
Help Desktop connect Wi-Fi via Laptop NETVN

By NETVN82 Help Desktop connect Wi-Fi via Laptop NETVN by NETVN82

Title: laptop hangs when connected to wifi or internet let's increase the speed of laptop & wifi
Channel: Programology
laptop hangs when connected to wifi or internet let's increase the speed of laptop & wifi by Programology
Laptop Wifi Hotspot
Laptop WiFi Nightmare? This ONE Trick Fixes It INSTANTLY!
We’ve all been there. That frustrating moment when your laptop's WiFi refuses to cooperate, leaving you staring at a buffering wheel instead of streaming your favorite show, or preventing you from finishing that crucial work presentation. It’s a modern-day digital headache, a WiFi nightmare. But before you throw your laptop out the window, take a deep breath. There's a surprisingly simple solution lurking within your own device. This article unveils the often-overlooked "one trick" that can instantly revitalize your laptop's wireless connection and banish those infuriating connectivity woes. We will discover, together, precisely how to implement this game-changing tweak.
Understanding the Culprit: The Congested WiFi Channel
The root of many WiFi problems isn’t necessarily your internet service itself, your router, or even your laptop. Often, the issue stems from the invisible battlefield of wireless radio frequencies. Your WiFi router broadcasts its signal on a specific channel, just as your local radio station broadcasts on a particular frequency. The problem? Over time, these channels become congested, especially in densely populated areas. Neighbors, nearby businesses, and even other devices in your own home, all are vying for the same airwaves. This congestion leads to interference, slowing down your connection and causing those dreaded dropouts. Hence, this congestion is the primary cause of the WiFi nightmare.
The "One Trick": Switching to a Less Crowded WiFi Channel
The "one trick" we highlight here? It involves manually switching your router to a less congested WiFi channel. While it might sound daunting, this is a straightforward process that can be applied in a matter of minutes. By doing this you can often dramatically improve your laptop's WiFi performance, turning your WiFi nightmare into a distant memory. Think of it like switching lanes on a highway during rush hour—you’re simply avoiding the traffic jam.
Step-by-Step Guide: Unlocking Blazing-Fast WiFi
Let's dive into the practical steps involved. This guide will walk you through the process of identifying the best WiFi channel and then changing your router's settings.
1. Identifying the Crowded Channels (and the Uncrowded Ones):
Before changing anything, we need to see what’s happening in your wireless environment. We need to identify which channels are most congested. Thankfully, a variety of tools are available to help you analyze the airwaves:
For Windows: Using a WiFi analyzer is paramount. Numerous free programs, like "WiFi Analyzer" (available from the Microsoft Store) or similar software, can scan the surrounding WiFi networks and display which channels are being used and how crowded they are. These tools often provide a visual representation of the channel activity, highlighting the channels with the most interference.
For macOS: macOS has a built-in tool called "Wireless Diagnostics," which you can access by holding down the Option key while clicking its WiFi icon in the menu bar. This utility includes a "Scan" feature that will identify the channels in use and display their signal strength. Alternatively, you can download and install a free WiFi analyzer app from the App Store.
For Smartphones/Tablets: Download a WiFi analyzer app from your device's app store. Several free and user-friendly apps, like "WiFi Analyzer" (Android) or "WiFi Explorer Lite" (iOS), are available. These apps provide similar channel analysis capabilities as their desktop counterparts.
2. Accessing Your Router's Configuration Page:
Once you've identified the least crowded channels, you must access your router's configuration page. This is where you'll change the WiFi channel settings. The procedure varies depending on your router's manufacturer, but the general steps remain consistent:
Find Your Router's IP Address: The router’s IP address is usually located on a sticker on the router itself. If you can't find it there, you can often find it through your operating system. On Windows systems, open the Command Prompt (search for "cmd" in the Start menu) and type "ipconfig." Look for "Default Gateway"; the number listed there is your router's IP address. On macOS, go to System Preferences -> Network -> Advanced, and the router's address is listed under TCP/IP.
Open a Web Browser: Type your router's IP address into the address bar of your web browser (Chrome, Firefox, Safari, etc.) and press Enter.
Enter Your Router Login Credentials: Most routers require a username and password to access the configuration page. The default login credentials are usually listed on the router or in its documentation. Common defaults are "admin" for both the username and password, or "admin" for the username and a blank password. If you've changed your password, enter your customized credentials.
3. Changing the WiFi Channel in Your Router Settings:
Now, the moment of truth – actually changing the WiFi channel:
Locate the Wireless Settings: Within the router's configuration interface, look for a section labeled "Wireless," "WiFi," "Wireless Settings," or something similar. The exact location of these settings varies by router model.
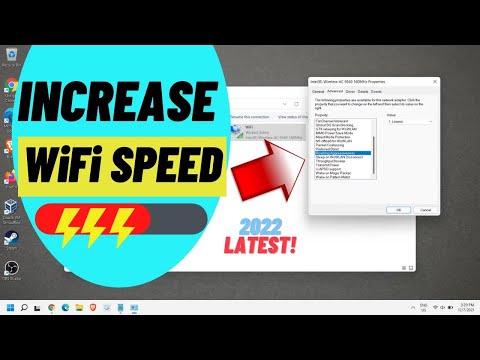
Find the Channel Setting: Within the wireless settings section, you'll find an option to select the WiFi channel. This is the setting you need to change. It’s often presented as a dropdown menu with a list of available channels (usually 1 through 11 for 2.4 GHz networks, and a wider range for 5 GHz networks).
Select the Optimal Channel: Based on your analysis from step one, select the least congested channel. If the WiFi analyzer showed that channels 1, 6, and 11 are relatively clear, choose one of them. It's often recommended to avoid channels that overlap significantly with others in your area.
Save Your Changes: After selecting the new channel, save your changes. The process for saving the settings varies by router. You might have a dedicated "Save" button, or changes might be saved automatically when you navigate away from the settings page.
Restart Your Router: In most cases, you'll need to restart your router for the changes to take effect. There may be a "Restart" button within the router's interface. If not, you can simply unplug the router from its power source, wait about 30 seconds, and plug it back in.
4. Verify the Improved WiFi Performance:
After the router restarts, connect your laptop to the WiFi network and test the connection. Run a speed test, browse the internet, and stream a video. You should notice a significant improvement in speed and reliability. Should you still find issues, consider experimenting with different channels or revisiting the analysis to ensure you've chosen the most optimal one.
Dealing with Dual-Band Routers and 5 GHz Networks
If your router supports both 2.4 GHz and 5 GHz bands (dual-band router), we strongly recommend connecting your laptop to the 5 GHz network whenever possible. The 5 GHz band generally has less congestion, since it has wider channels, and greater speeds. However, the 5 GHz band has a shorter range. You may need to be closer to the router to ensure proper coverage. The same channel-switching process as described above applies to the 5 GHz band, but you have a wider range of channels to choose from. Use your WiFi analyzer to identify the least congested channel on your 5 GHz network.
Troubleshooting Common WiFi Problems
While changing your WiFi channel will likely resolve many connectivity issues, other factors can also contribute to WiFi problems. Here are a few troubleshooting tips:
Router Placement: Ensure your router is centrally located in your home or office and that it’s not obstructed by walls, metal objects, or other electronics.
Router Firmware Updates: Regularly update your router's firmware. Firmware updates often include performance improvements and bug fixes.
Check Your Internet Service: If you are still experiencing problems, contact your internet service provider to verify the strength of your connection.
Interference: Bluetooth devices, microwaves, and other electronics can cause interference with your WiFi signal. Try moving those around and see if performance improves.
Laptop Drivers: Ensure that your laptop's wireless drivers are up to date. Outdated drivers can cause connectivity issues. Visit your laptop manufacturer’s website to find the latest drivers for your model.
Beyond the "One Trick": Proactive WiFi Management
Changing your WiFi channel is the first step in resolving WiFi issues. This isn’t a one-and-done fix. Periodic checking of your WiFi channels will prevent future problems. With consistent maintenance, you can prevent the WiFi nightmare from returning. You can perform a new scan every few months, particularly if you've moved to a new location or if your neighbors' WiFi setups change.
Conclusion: Reclaiming Your Wireless Freedom
The WiFi nightmare is not the end of the world, and it is often self-inflicted. By changing your WiFi channel, you can often instantly solve the frustrating connectivity problems that plague so many laptop users. This simple yet powerful technique is the “one trick” to banish the buffering wheel and reclaim your wireless freedom. Follow the steps outlined in this guide, and you'll be back to enjoying your laptop’s full potential in no time.
