how to reset wifi network on laptop

Title: Fix any Internet and Network Issues with this simple trick
Channel: HowtoInsider
Fix any Internet and Network Issues with this simple trick by HowtoInsider
how to reset wifi network on laptop, how to change wifi network on laptop, how to change wifi settings on laptop, how to restart wifi connection on laptop, how to reset wifi settings on hp laptop, how to change wifi network password on laptop, how to reset wifi connection on hp laptop, how to change wifi network on dell laptop, how to change internet connection on laptop, how to change internet settings on laptop
WiFi Nightmare? Reset Your Laptop's Network in 60 Seconds!
Battling Bad WiFi? Reboot Your Laptop's Network (Quick & Easy!)
Are you staring at that spinning wheel of doom? The dreaded buffering symbol mocking your every click? WiFi woes have plagued us all. It stops streaming, and it makes your productivity plummet. But take heart! Don't throw your laptop out the window just yet.
The Modern Digital Headache: WiFi Failures
We rely on WiFi for everything. Consider the seamless connection we crave. The lack of a solid connection can be frustrating. Online meetings freeze. That crucial download stalls. Websites load at a glacial pace. It’s like the internet itself is moving in slow motion. This digital frustration becomes a common experience. The constant disconnect is a true headache. Frustration builds with each failed attempt to connect.
Why Your WiFi Acts Up (and How to Fix It Fast)
Several culprits could be behind your WiFi struggles. Often, simple fixes do the trick. Maybe your laptop's network settings have gone haywire. Perhaps, the router is having a momentary lapse. However, don't panic. Thankfully, a quick network reset usually does the trick. It's like giving your computer a digital kickstart. Before you call tech support, give this a try.
The Speedy Solution: Resetting Your Network
Here's how to get your laptop's network back on track in about a minute. It's quicker than brewing a cup of coffee. Thus, it is worth the time. These steps will help you troubleshoot. Ready? Let's go!
Step 1: The Airplane Mode Tango
First, find the airplane mode icon. It usually sits in your system tray. Alternatively, check your Windows settings. Click on the network & internet settings. Turn airplane mode ON for about 15 seconds. This temporarily disables all wireless connections. Then, turn it OFF again. This simple act often resets your WiFi adapter. It's a quick digital reset. Consequently, this might be all you need.
Step 2: Unleashing the Command Prompt Power (Windows)
If airplane mode didn't do the trick, try this. Open the command prompt. Usually you can type “cmd” into the Windows search bar. Then, right-click the command prompt and “Run as administrator”. This grants you the necessary permissions. Consequently, this is essential. Now, type these commands, one by one, pressing Enter after each:
ipconfig /flushdns(Clears DNS cache)ipconfig /registerdns(Registers your DNS)ipconfig /release(Releases your IP address)ipconfig /renew(Renews your IP address)netsh winsock reset(Resets Winsock)
After each command executes, you'll get a confirmation. This sequence forces your laptop to refresh its network configuration. Further, these commands often resolve connectivity problems. Finally, restart your computer.
Step 3: macOS Magic (Network Reset)
Mac users, we haven't forgotten you! Navigate to System Preferences. Then, click on "Network". Select your WiFi connection on the left side. Click advanced. Under the TCP/IP tab, click "Renew DHCP Lease". This refreshes your IP address assignment. Additionally, navigate to the DNS tab. Look for any strange DNS servers. Then, ensure you are using your ISP's preferred DNS. Finally, restart your Mac. This process is quick.
Step 4: Reboot Your Router (The Last Resort)
If all else fails, this is crucial. Your router might be the problem. Unplug your router from the power source. Wait for about 30 seconds. Plug it back in. This resets the router’s internal settings. Give it a few minutes to fully boot up. Then, test your WiFi again. This method can resolve numerous connectivity issues.
Troubleshooting Beyond the Reset
Occasionally, the problem lies deeper. Consider these tips for continued support.
- Driver Update: Check for updated network adapter drivers. Old drivers can create problems.
- Interference Check: Ensure there's no significant interference. Avoid other electronics near your laptop.
- Router Placement: Place your router in a central location. This provides the best signal strength.
- Password Protection: Always secure your WiFi with a strong password. This protects your network.
When to Seek Expert Help
If none of these steps work, it's time to call in reinforcements. Contact your internet service provider (ISP). They can identify issues on their end. They can also provide more solutions. They may need to send a technician.
Conclusion: Back to Browsing Bliss!
WiFi issues are annoying, that is for sure. However, getting everything back up and running is possible. You can now swiftly troubleshoot your laptop’s network. You have the power to fix your WiFi in less than a minute. Enjoy your connection. Now, go forth and browse!
School WiFi So Slow? This Trick Gets You Blazing-Fast Speeds!WiFi Nightmare? Reset Your Laptop's Network in 60 Seconds!
Alright, tech warriors, wave your hands if you've ever stared down the abyss of a blinking Wi-Fi icon, a buffering wheel of doom, or the dreaded "no internet connection" error. Raises hand enthusiastically We've all been there. That frustrating, soul-crushing moment when your laptop throws a digital tantrum, and all you want to do is binge-watch your favorite show, finish that crucial work assignment, or just, you know, exist on the internet. Then, you remember the password to your network for the millionth time, and sigh. Maybe you've tried turning it off and on again, and then you ask the eternal question - why is the WiFi always a pain?
Let's ditch the drama and get real: dealing with Wi-Fi woes is a rite of passage in the digital age. But what if I told you there was a quick, easy fix that could banish those Wi-Fi nightmares into the digital ether? Get ready because we're about to unlock the secret to a lightning-fast network reset, all in under a minute. Think of it as giving your laptop's network a digital reboot, a fresh start, like a breath of fresh air for your online life.
1. The Internet Apocalypse: Recognizing the Signs of a Network Crash
Before we dive into the magical reset, let's identify the enemy. What exactly is a Wi-Fi nightmare? Well, it manifests in several ways, all equally annoying:
- The "Limited" Connection: You're connected to the Wi-Fi, but the internet isn't cooperating. It's like having a car with a full tank but no engine.
- The Buffering Blues: Endless spinning wheels of doom while you try to watch videos or stream music. It's like waiting for a never-ending elevator.
- Slow as Molasses: Web pages take an eternity to load, and downloads crawl at a glacial pace.
- The Sudden Drop: The internet just disappears altogether, leaving you stranded in a digital desert.
- The "Can't Connect" Curse: Your laptop flat-out refuses to connect to your Wi-Fi network.
If any of these sound familiar, welcome to the club. But don't despair; we've got a solution.
2. Why Your Laptop's Network Goes Haywire (And How To Fix It)
So, what causes these network hiccups? Think of your laptop's network settings as a complex, intricate map. Sometimes, that map gets messed up due to:
- Corrupted Settings: Old, conflicting, or simply incorrect network configurations can cause problems.
- Driver Issues: Outdated or faulty network adapter drivers can be the culprit. It's like having a bad mechanic working on your car engine.
- IP Address Conflicts: Two or more devices on your network try to use the same IP address. It's like two people trying to occupy the same seat.
- Interference: Other devices or even physical objects can disrupt your Wi-Fi signal (microwaves, baby monitors, even walls).
But here's the good news: a network reset can often clear up these issues, giving your laptop a fresh start.
3. Introducing the 60-Second Network Reset: Your Digital Savior
This is where the magic happens. Forget complex troubleshooting guides or hours spent on forums. We're going for a rapid, effective solution. The method may vary slightly depending on your laptop's operating system (Windows, macOS, etc.), but the core concept is the same. Let's focus on Windows, as a vast majority use it:
- Windows 10/11 Method:
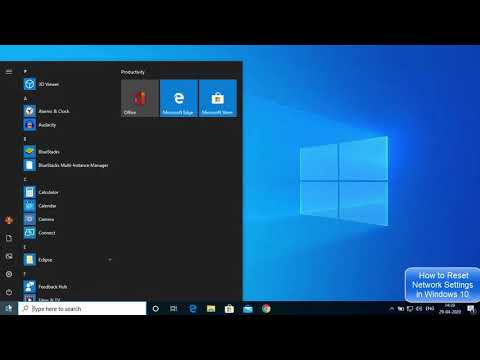
- Click the Start Menu.
- Type "Network Reset" in the search bar.
- Select "Network reset" from the search results (it will be a Control Panel option).
- Click "Reset now".
- Your laptop will prompt you to confirm the reset. Click "Yes" or "Reset now".
- Your computer will restart automatically.
- After the restart, you'll need to reconnect to your Wi-Fi network. Enter your password if required!
This process wipes away old network settings and reinstalls your network adapters, which often clear up the issues. It's like a digital defrag for your Wi-Fi connectivity.
4. The macOS Way: Simplifying Network Troubleshooting
For you Mac users, the process is just as manageable:
- macOS Method:
- Click the Apple Menu (top left corner).
- Go to System Preferences (or System Settings in newer macOS versions).
- Select Network.
- Choose your Wi-Fi connection from the list.
- Click the Advanced button (usually located at the bottom).
- Under the "TCP/IP" tab, you will want to either renew the DHCP lease or renew the IP address.
- Restart your computer.
5. Before You Reset: Quick Pre-Flight Checks
Before you hit the reset button, take a few seconds to do some quick checks:
- Is Your Router On? Seriously, it happens.
- Are Other Devices Connected? Does your phone, tablet, or other devices have Wi-Fi access? If not, the problem might be with your router.
- Restart Your Router: Sometimes, the router itself is the problem. Unplug it for 30 seconds and plug it back in. It's like a digital restart for your entire network.
- Check Airplane Mode: Make sure you haven't accidentally enabled airplane mode on your laptop.
These pre-flight checks can save you from a potentially unnecessary reset.
6. Reconnecting to Your Network: The Final Step
Once your laptop restarts after the reset, you'll likely need to reconnect to your Wi-Fi network. The process is simple:
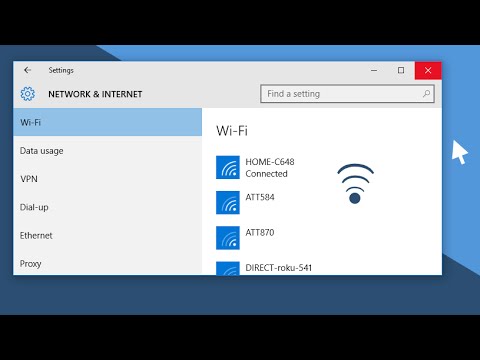
- Click the Wi-Fi icon in your system tray (usually in the bottom right corner of your screen).
- Select your Wi-Fi network from the list.
- Enter your network password if prompted.
- Boom! You should be connected.
If you've forgotten your password, don't panic. It’s usually printed on the router or accessible through its configuration settings.
7. Troubleshooting After the Reset: What to Do If Things Still Aren't Right
If the reset doesn't magically solve your Wi-Fi woes, don't give up hope! There are a few other things you can try:
- Update Your Network Adapter Driver: Outdated drivers can cause problems, so make sure they’re up-to-date.
- Run the Network Troubleshooter: Windows and macOS offer built-in troubleshooters that can often identify and fix network issues.
- Check for Interference: Move your laptop closer to your router or away from potential sources of interference.
- Contact Your Internet Service Provider (ISP): If all else fails, the problem might be on their end.
8. Beyond the Reset: Optimizing Your Wi-Fi Performance
Beyond a quick reset, here are some tips to optimize your Wi-Fi performance and prevent future headaches:
- Keep Your Router Updated: Router firmware updates often include performance improvements and security patches.
- Position Your Router Strategically: Place your router in a central location, away from walls and obstructions.
- Secure Your Network: Use a strong password and encryption to prevent unauthorized access.
- Limit the Number of Connected Devices: Too many devices can overload your network.
- Consider a Wi-Fi Extender: If you have a large house or weak signal in certain areas, a Wi-Fi extender can boost your coverage.
9. The Power of a Strong Password: Securing Your Network
A strong password is the first line of defense against network security threats. Make sure your password is:
- Long and Complex: Use at least 12 characters, including a mix of uppercase and lowercase letters, numbers, and symbols.
- Unique: Don't use passwords you use for other accounts.
- Regularly Changed: Change your Wi-Fi password every few months.
10. The Art of Router Placement: Maximizing Your Wi-Fi Range
Where you place your router can significantly impact your Wi-Fi signal strength and range:
- Central Location: Place your router in a central location in your home or office.
- Elevated Position: Put the router on a shelf or table, away from the floor.
- Avoid Obstructions: Keep the router away from walls, metal objects, and other sources of interference.
- Open Space: Avoid placing the router in a closet or enclosed space.
11. Understanding Your Router's Channels: Clearing the Airwaves
Wi-Fi routers broadcast on different channels. If multiple routers in your area are using the same channel, it can cause interference. You can optimize your Wi-Fi by:
- Accessing Your Router's Settings: Log in to your router's configuration page (usually by typing its IP address in your web browser).
- **Changing the Wi
Forget or Remove a Wireless Network on Windows 10 How-To
By Windows Explained Forget or Remove a Wireless Network on Windows 10 How-To by Windows Explained
Cara Reset Pengaturan Wifi di Laptop

By LAPTOP TUTORIAL Cara Reset Pengaturan Wifi di Laptop by LAPTOP TUTORIAL
How to Reset Network Settings in Windows 10 to Fix Internet Connection
By ProgrammingKnowledge2 How to Reset Network Settings in Windows 10 to Fix Internet Connection by ProgrammingKnowledge2

Title: Fix WiFi Not Showing in Settings On Windows 10 Fix Missing WiFi 2025
Channel: Sandeep Singh
Fix WiFi Not Showing in Settings On Windows 10 Fix Missing WiFi 2025 by Sandeep Singh
Wifi Not Found
WiFi Nightmare? Reset Your Laptop's Network in 60 Seconds!
Are you wrestling with a laptop that stubbornly refuses to connect to your WiFi? Is the internet a frustrating realm of dropped connections, sluggish speeds, and endless buffering? You’re not alone. We, the digital navigators of countless connectivity crises, have witnessed firsthand the exasperation caused by network hiccups. We have developed a swift, sure-fire solution to reignite your laptop's relationship with the digital world: a comprehensive, step-by-step guide to resetting your network settings in approximately 60 seconds. Forget hours of troubleshooting; we'll show you how to reclaim your online experience.
Understanding the Culprits: Decoding Network Connection Woes
Before we dive into the fix, let's briefly examine the underlying mechanisms of these WiFi woes. A corrupted cache, outdated drivers, or conflicting IP addresses can often disrupt the smooth flow of data between your laptop and your wireless network. These issues manifest in various ways, from intermittent connection drops to the dreaded "no internet access" message. Resolving these problems typically involves a reset of the network configuration, which clears out the clutter and allows your laptop to refresh its connection parameters.
The 60-Second Network Reset: A Step-by-Step Guide for Windows Users
We’ll now outline the precise steps required to accomplish a network reset on your Windows-based laptop. Follow these instructions meticulously, and you'll be back online in no time.
Accessing the Network Settings: Begin by clicking the Windows Start button, located in the bottom left corner of your screen. In the search bar, type "Network Settings." A list of options will appear. Click on "Network settings". Alternatively, you can right-click the network icon (typically a WiFi symbol) in your system tray (bottom right corner) and select "Open Network & Internet settings."
Navigating to the Advanced Settings: In the "Network & Internet" settings window, locate and click on the "Status" tab on the left side. Within the Status section, find and click on "Network Reset". This option, typically situated toward the bottom of the Status page, will trigger the powerful reset function we need.
Confirming the Reset: A new window titled "Network reset" will appear. Carefully read the description provided. This screen explains the impact of the reset, namely, your network settings will be restored to their default configuration, and any network adapters you have installed will be uninstalled and then reinstalled. Before you proceed, ensure you have your WiFi password readily available, as you will need to re-enter it to connect to your network. Click the ‘Reset now’ button.
Observing the Reboot: Windows will prompt you to confirm the action. Click "Yes." Your laptop will now begin the reset process. This will close all running programs. It is essential to save important work and close any applications before proceeding, to avoid losing unsaved data. The laptop will reboot automatically. Allow the system to restart fully.
Reconnecting to Your Network: Once your laptop has restarted, it should have cleared the previous configuration issues. You should be able to reconnect to your WiFi. Click on the WiFi icon in the system tray. Select your network from the list of available networks. Enter your WiFi password when prompted. Your laptop should now successfully connect to the internet.
Driver Updates: The Final Frontier: It’s prudent to ensure your network drivers are up-to-date. Windows often handles this automatically, but it doesn't hurt to double-check. Go back into "Network Settings," then click on "Change adapter options." Right-click on your WiFi adapter (e.g., "WiFi" or "Wireless Network Connection") and select "Update Driver" if necessary. Follow the on-screen prompts to install the latest drivers.
The 60-Second Network Reset: A Step-by-Step Guide for Mac Users (macOS)
If you are a macOS user, don't worry. We have included a method to solve your connectivity issues too.
Locating Network Preferences Click the Apple menu in the top-left corner of your screen. Select "System Preferences…" or "System Settings…" depending on your macOS version.
Entering Network Preferences In the System Preferences/Settings window, click on "Network." This will open the network configuration panel.
The TCP/IP Solution Select your WiFi connection (the one you are using) on the left-hand side. Then, click on the "Advanced…" button located at the bottom right. In the Advanced window, select the "TCP/IP" tab. Click 'Renew DHCP Lease'. Wait for your information to update. Then click 'OK'.
Eliminating Saved WiFi Networks: Under the "Network" preference pane, select your Wi-Fi connection, then click the minus button (-) to remove the network. Re-add the network by clicking the plus (+) button, and choose Wi-Fi from the drop-down menu.
Reconnecting to your Wireless Network. You will be asked to connect to your wifi as if you had never connected to it. Select your WiFi network from the list. Enter your WiFi password when prompted.
Restart Your Device. A great troubleshooting tool, your device should work now. If not, you can also restart your device.
Advanced Troubleshooting: Refining Your Network Resuscitation
While the 60-second reset is often the cure-all, some network challenges may require a deeper dive. Let's explore these more advanced troubleshooting strategies.
Router Reboot: Alongside the network reset on your laptop, rebooting your router is a powerful weapon. Turn off your router and modem (if separate) for at least 30 seconds. Then, turn them back on, starting with the modem and then the router. Allow them to fully power up before testing your connection.
Firewall Interference Assessment: Your built-in Windows or macOS firewall (or any third-party firewall software) can sometimes impede network functionality. Temporarily disabling your firewall to see if it resolves connectivity issues can help identify if the firewall is the culprit. If the problem disappears, you can then adjust your firewall settings.
DNS Server Dynamics: Your Domain Name System (DNS) server translates website addresses into IP addresses. Sometimes, DNS issues can cause browsing problems. You can manually change your DNS server settings. In your network settings (as described above for Windows and macOS), you can specify a public DNS server, like Google's (8.8.8.8 and 8.8.4.4).
Hardware Conflicts: While rare, hardware conflicts between your laptop's network adapter and other devices can arise. Temporarily disconnecting unnecessary peripherals (printers, external hard drives) can sometimes resolve these conflicts.
Beyond the Immediate Fix: Proactive Network Health
Taking a few proactive steps can help prevent future network headaches.
- Regular Driver Updates: Keeping your network drivers current is crucial. Enable automatic driver updates through Windows or macOS settings.
- Secure Your Network: Ensure your WiFi network is protected with a strong password. This prevents unauthorized access and potential network interference.
- Router Firmware Maintenance: Regularly update your router's firmware. The updates improve network security and performance.
- Consider Network Planning If you are experiencing issues, one consideration is the placement of your router. Placing your router in the center of your home, with a view of as much of the space as possible, will help in coverage.
The Takeaway: Reclaiming Your Digital Freedom
The ability to effortlessly connect to the internet is a fundamental expectation in today's world. When your laptop’s network stumbles, it can grind work, communication, and entertainment to a frustrating halt. By mastering the 60-second network reset, you equip yourself with a powerful tool to swiftly resolve many common connectivity issues. Pair this quick fix with the advanced troubleshooting techniques and proactive network health practices, and you'll be well-prepared to navigate the digital landscape, free from the shackles of buffering and dropped connections. Embrace the power of a swift digital resolution and say goodbye to WiFi woes.
