my mac laptop won't connect to wifi
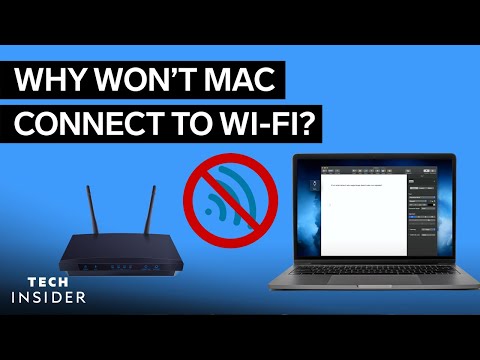
Title: Why Won't My Mac Connect To Wi-Fi
Channel: Insider Tech
Why Won't My Mac Connect To Wi-Fi by Insider Tech
my mac laptop won't connect to wifi, why won't my mac laptop connect to wifi, my macbook wont connect to wifi, my apple laptop will not connect to the internet, apple laptop cannot connect to wifi, apple laptop does not connect to wifi, can't connect wifi to macbook
Mac WiFi Nightmare? This ONE Trick Fixes It!
Mac WiFi Woes? Unraveling the Mystery and Claiming Victory!
Let's be honest. That swirling WiFi symbol on your Mac can trigger frustration. It can disrupt your workflow. It definitely kills the vibe when you're trying to stream your favorite show. We've all been there. Therefore, you're not alone in this digital dance of desperation. The good news is you probably are already closer to a solution than you think.
The Invisible Culprit: Identifying Common WiFi Assassins
First, let's explore the usual suspects. Your Mac's WiFi struggles often stem from a collection of sneaky culprits. Consider your network setup. The distance between your Mac and the router directly impacts signal strength. Obstructions like walls, microwaves, and even fish tanks can be disruptive. Furthermore, outdated router firmware sometimes becomes a problem. It’s crucial to remember that these seemingly small factors can create a significant WiFi impact.
Decoding the Digital Jargon: Channels, Frequencies, and Interference
Now, let's dive into some slightly more technical waters. Your router broadcasts on specific “channels.” Think of them like lanes on a highway. Ideally, you want a clear lane. But, neighboring WiFi networks can cause congestion. This leads to slow speeds and intermittent connections. Similarly, your router operates on different frequencies: 2.4 GHz and 5 GHz. The 2.4 GHz frequency offers wider range. However, it’s also more prone to interference. The 5 GHz frequency is usually faster. Moreover, it's less congested. Understanding these aspects is essential.
The One Trick: Optimizing Your WiFi's Performance
Are you ready for the magic bullet? The "one trick" isn't actually one single thing. Instead, it’s a systematic approach. It requires careful observation and strategic adaptation. It boils down to fine-tuning your WiFi setup. So, let's get into the nitty-gritty.
Step 1: Router Reset – The Foundation
Before you get too complex, a simple reboot often works wonders. Unplug your router and modem. Wait for a full minute. Then, plug the modem back in first. Give it time to power up completely. After that, plug your router back in. Wait for it to fully cycle. Consequently, this step clears temporary glitches. It also refreshes your network's connection.
Step 2: Channel Surfing – Finding the Sweet Spot
Access your router's settings. You can usually do this by typing its IP address into your web browser. The address is often found on the router itself. Look for a “wireless” or “WiFi” section. Search for the channel settings. Many routers can automatically select the best channel. Nevertheless, you may need to manually experiment. Try different channels. Then, observe your Mac's performance. Finally, use a WiFi analyzer app on your phone to help identify the least congested channels.
Step 3: Frequency Fiesta: Choosing the Right Band
As we know, you can choose between the 2.4 GHz and 5 GHz bands. If you're close to your router, the 5 GHz band is usually the superior option. It offers faster speeds. If you need more range, the 2.4 GHz band may be better. Test both bands. Next, see which one provides the best experience.
Step 4: Firmware Fortification – Keeping Things Up-to-Date
Outdated router firmware causes performance issues. Check for firmware updates on your router's management page. The update process varies, but it is critical for security. It also enhances performance. Follow the manufacturer's instructions. Then, install any available updates.
Step 5: Location, Location, Location – Strategic Router Placement
Your router's physical location matters. Place it in a central spot in your home. Keep it elevated. Avoid obstructing it with objects. Reduce the distance between your Mac and the router. Furthermore, consider eliminating possible interference sources close to the router.
Beyond the Basics: Advanced Troubleshooting Techniques
Sometimes, the problem is more complex. Therefore, consider more advanced troubleshooting. Firstly, renew your Mac's DHCP lease. Then, go to System Preferences, then Network. Select your WiFi connection. Click "Advanced." Under the TCP/IP tab, click "Renew DHCP Lease." Secondly, check for software conflicts. They sometimes interfere with your WiFi. Start your Mac in Safe Mode to check for conflicts. Lastly, reset your NVRAM or PRAM. Shut down your Mac. Power it on. Immediately hold down Option+Command+P+R. Release the keys after the startup chime sounds a second time.
Embracing a Faster, More Reliable WiFi Future
Having a stable Mac WiFi connection is attainable. By implementing these "one trick" strategies, you'll see improvement. You may enjoy seamless streaming. You certainly will achieve enhanced productivity. Therefore, take action. Troubleshoot. Optimize. So, banish those annoying WiFi woes. Then, embrace a faster, more reliable online experience. In conclusion, you should have a WiFi connection worthy of your Mac's potential.
Sony Vaio WiFi Nightmare? Solved! (Guaranteed Connection!)Mac WiFi Nightmare? This ONE Trick Fixes It!
We've all been there. That moment when the little WiFi symbol on your Mac betrays you, becoming a constant companion of the spinning beach ball of death. Researching, I'm talking about the dreaded "no internet connection" message flashing up, leaving you staring blankly at your screen, like a deer caught in headlights. Trust me, I feel your digital pain! As someone who relies on a stable WiFi connection for work, personal projects, and, let's be honest, streaming the latest binge-worthy shows, a flaky connection is a complete mood killer. It transforms you from a productive, internet-savvy individual into a frustrated, caffeine-fueled monster. But before you throw your Mac out the window in sheer frustration (or even consider switching to that other operating system… shudder), let's talk about a remarkably simple solution that might just save your sanity.
1. The WiFi Woes: Understanding the Mac WiFi Struggle
First, let's acknowledge the elephant in the room: Mac WiFi, at times, can be… temperamental. It’s like a diva – demanding, unpredictable, and prone to disappearing at the most inconvenient moments. This often manifests in slow download speeds, constant disconnections, or intermittent connectivity. There are a myriad of reasons for this, from overcrowded WiFi channels to interference from other electronic devices. Think of your home network as a busy city street. Your router is the main highway, and each device is a car trying to get to its destination. Sometimes, the traffic is smooth; other times, it's a gridlock.
2. Diagnosing the Digital Demons: Identifying the Culprits Behind Your WiFi Woes
Before we jump into the fix, let’s briefly explore the possible culprits. Is the problem your Mac, your router, or something else entirely? Here are some common suspects:
- Router Issues: Your router could be outdated, experiencing bandwidth bottlenecks, or simply having a temporary glitch. Think of it as the heart of your network, and often restarting it can solve the issue. This is usually the first thing you try.
- Interference: Other electronic devices, such as microwaves, Bluetooth speakers, and even baby monitors, can interfere with your WiFi signal. Imagine your WiFi signal trying to talk amidst a cacophony of other radio waves.
- Channel Congestion: Your router and other home routers often use the same channels. This can lead to signal interference. Imagine every device talking at once.
- Mac Software Glitches: Sometimes, a simple software hiccup on your Mac can be the root of the problem.
- Distance & Obstacles: Physical barriers like thick walls or furniture can also weaken your WiFi signal.
- ISP (Internet Service Provider) Issues: Let’s not forget the possibility that the problem isn’t even on your end. Sometimes, your ISP is experiencing a service outage or other technical difficulties.
3. The ONE Trick: Resetting Your Mac's Network Settings
Now, for the moment we’ve all been waiting for – the magic bullet! The one, simple trick that can often banish those WiFi woes. It involves resetting your Mac's network settings. Think of it as giving your Mac's network the digital equivalent of a good night's sleep – a fresh start. Here’s how you do it, step-by-step:
- Step 1: Open System Preferences: Click the Apple icon in the top-left corner of your screen and select “System Preferences.” Or, you can reach it from the Dock.
- Step 2: Navigate to Network: Click on the "Network" icon. You'll find it in the System Preferences panel.
- Step 3: Choose Your WiFi Connection: Select “Wi-Fi” from the sidebar.
- Step 4: Remove Your Known Networks: In the Wi-Fi settings, click on “Advanced…” in the bottom right corner. In the Preferred Networks tab, select each known network and click the "remove" (-) icon. This clears out saved settings which might be interfering.
- Step 5: Apply Now / OK: Click "Apply" to save changes.
- Step 6: Restart and Reconnect: Restart your Mac. Once it restarts, reconnect to your WiFi network by selecting it from the Wi-Fi menu in the menu bar and entering your password.
4. Why This ONE Trick Works: Decoding the Digital Magic
Why does this seemingly simple reset actually work? The reason is quite elegant. Your Mac stores settings related to all the WiFi networks you've connected to, including passwords, channel preferences, and other configuration details. Over time, these settings can become corrupted, outdated, or conflicting with other devices on your network. Resetting these settings is like hitting the “reset” button on a malfunctioning gadget. It clears out the clutter and allows your Mac to re-establish a fresh, clean connection. It’s akin to rebooting a computer – the equivalent of clearing a clogged digital drain on your Mac.
5. Beyond the Basics: Further Troubleshooting Tips
While the “one trick” is often effective, some situations might require a bit more detective work. Here are some additional troubleshooting tips you can try:
- Router Reboot: A simple reboot of your router is often the first and easiest step. Unplug it for about 30 seconds and then plug it back in.
- Channel Optimization: Access your router's settings (usually via a web browser by typing in your router's IP address – often 192.168.1.1 or something similar) and try changing the WiFi channel. Experiment with channels 1, 6, and 11, as they are typically less congested.
- Firmware Updates: Make sure your router's firmware is up-to-date. This can often improve performance and security.
- Move Your Mac or Router: Try moving your Mac closer to the router or relocating the router to a more central location, away from obstacles.
- Check for Interference: Minimize the use of other electronic devices that could be causing radio interference.
- Network Diagnostic Tool: Use the built-in "Wireless Diagnostics" tool on your Mac. You can find it by holding down the Option key and clicking the WiFi icon in the menu bar.
6. Securing Your Signal: The Importance of WiFi Security
While we are on the subject of WiFi, let’s quickly touch on security. Ensure your WiFi network is secured with a strong password (WPA2 or WPA3 encryption is recommended) to prevent unauthorized access. Think of your WiFi like your home – you want to lock the doors and windows.
7. The Power of Patience: Understanding Digital Timeouts
Sometimes, WiFi issues are temporary. Before you start frantically clicking and fiddling, give your Mac and your network a few minutes to sort themselves out. Digital hiccups can happen, and often, a little patience is all it takes. It’s akin to giving a grumpy teenager some space before having a conversation.
8. When to Call in the Cavalry: Knowing When to Seek Professional Help
If the "one trick" and the additional troubleshooting tips don't work, it might be time to call in the professionals. A local computer repair shop or your ISP can often diagnose and fix more complex network issues. Don't be afraid to ask for help. It's easy to get frustrated, but the experts know exactly what to do.
9. The Router's Role: Understanding Your Hardware's Impact
The quality of your router plays a significant role in your WiFi experience. An outdated or low-quality router can be a major bottleneck. Consider upgrading to a newer model if you frequently experience slow speeds or disconnections. Think of it like upgrading to a fast car instead of a slow one.
10. Beyond the Mac: Considering Other Devices
If you're experiencing connectivity issues on multiple devices, the problem is likely with your router or internet connection rather than your Mac. Try testing other devices, such as your phone or another computer, to narrow down the source of the problem.
11. The Myth of the WiFi Booster: Separating Fact from Fiction
You've probably seen ads for WiFi boosters or extenders. While they can sometimes improve coverage, they aren't always the magic bullet. Make sure you properly research and consider your specific needs before investing in one. Sometimes, simply repositioning your router might be more effective. Do your homework before buying.
12. Regular Maintenance: Keeping Your Network Healthy
Just like your car, your network needs regular maintenance. Periodically reboot your router, check for firmware updates, and review your WiFi settings to ensure optimal performance. Treat your network with the care it deserves.
13. The Future of WiFi: Exploring Emerging Technologies
The world of WiFi is constantly evolving. Technologies like Wi-Fi 6 (802.11ax) offer improved speed, efficiency, and capacity. Keep an eye on these advancements to stay ahead of the curve. The digital world is advancing incredibly.
14. Personal Anecdotes: My Own WiFi Wars
I remember one time when I was trying to finish an important online project, and my WiFi decided to take a vacation. The frustration was palpable! After trying countless troubleshooting methods, the "one trick" mentioned above finally did the trick. It saved the day and my sanity. I'm sure you have your own frustrating story too.
15. Keeping Calm and Connecting: Staying Sane in the Digital Age
Remember, WiFi issues are frustrating
Canon WiFi Printing: Laptop to Printer in 60 Seconds!How To Fix MacBook Not Connecting to Wi-Fi or Wi-Fi Not WorkingSOLVED

By Tricknology How To Fix MacBook Not Connecting to Wi-Fi or Wi-Fi Not WorkingSOLVED by Tricknology
how to fix wifi & network problems macbook

By My iphone support how to fix wifi & network problems macbook by My iphone support
How to Fix WiFi Not Working on MacBook ProAir macOS Sequoia WiFi Not Working.

By My iphone support How to Fix WiFi Not Working on MacBook ProAir macOS Sequoia WiFi Not Working. by My iphone support

Title: My is Mac is Connected to wifi but No internet How to Fix Wifi and Network Not Connecting MacBook
Channel: UnlockSource 18
My is Mac is Connected to wifi but No internet How to Fix Wifi and Network Not Connecting MacBook by UnlockSource 18
Laptop Wifi Hotspot
Mac WiFi Nightmare? This ONE Trick Fixes It!
Are you locked, yet again, in a digital dance with your Mac’s unreliable WiFi connection? Is the spinning beach ball your unwelcome co-host, constantly buffering your workflows and sapping your precious time? It's a frustrating reality for many, the promise of seamless wireless connectivity often crumbling under the weight of dropped signals, sluggish speeds, and outright disconnections. But before you resign yourself to ethernet cables or the perceived limitations of your hardware, know that a powerful, often overlooked solution awaits. This isn't about rebooting your router for the umpteenth time or endlessly fiddling with network settings. This is about unlocking the hidden potential within your Mac and crafting a WiFi experience that's as dependable as it is swift.
Decoding the Mac WiFi Conundrum: Why Your Connection Suffers
Before we dive into the fix, let's briefly understand the common culprits behind Mac WiFi woes. Several factors can conspire to sabotage your wireless connection:
Channel Congestion: Your home's WiFi network, like a crowded highway, can suffer from traffic jams. Neighboring WiFi routers operating on the same or overlapping channels create interference, slowing down your connection and leading to dropouts.
Radio Interference: Microwaves, Bluetooth devices, cordless phones, and even certain building materials can interfere with your WiFi signal, weakening its reach and stability.
Router Firmware and Hardware Limitations: Outdated router firmware or inadequate hardware can struggle to support modern WiFi standards, resulting in performance bottlenecks and connectivity issues.
Mac System Conflicts: Occasionally, software conflicts, corrupted system files, or outdated network drivers within your Mac itself can impede WiFi performance.
Distance and Obstructions: Physical barriers like walls, floors, and furniture can diminish the effective range of your WiFi signal, leading to weaker connections in certain areas of your home or office.
While each of these factors warrants consideration, the solution we're about to explore addresses a fundamental, often overlooked aspect of your Mac's WiFi performance, offering a potent remedy that goes beyond the standard troubleshooting steps.
The Secret Weapon: Optimizing Your Mac's Network Configuration
The "one trick" that frequently solves the Mac WiFi nightmare lies not in a hardware upgrade or a complex network overhaul, but in a simple, yet profoundly effective, configuration adjustment: prioritizing your Mac's preferred network settings.
Your Mac, by default, often prioritizes network connections in a less-than-optimal manner. It may latch onto a weaker signal, or prioritize the first network it sees, even if a better, more stable option is available. By strategically adjusting your Mac's preferred network order, you can direct it to seek out and connect to the strongest, most reliable WiFi signal in your area. This is the key to unlocking a consistently better WiFi experience.
Step-by-Step Guide: Mastering the Network Preference Order
Here's how to implement this game-changing adjustment:
Access the Network Preferences: Click the Apple menu in the top-left corner of your screen, and select "System Preferences." In macOS Ventura or later, this is labeled "System Settings." Then, click "Network."
Unlock the Settings (if needed): If the lock icon is locked in the bottom-left of the Network pane, click it. Enter your administrator password when prompted to allow changes.
Identify Your WiFi Connections: On the left side of the Network window, you will see a list of all your network interfaces. Ensure that "Wi-Fi" is selected.
Access the Advanced Settings: Click the "Advanced…" button located at the bottom-right of the Network pane.
Navigate to the "Preferred Networks" Tab: Within the "Advanced" window, click the "Wi-Fi" tab. This section lists all the WiFi networks your Mac has previously connected to, in the order they are preferred.
Prioritize Your Primary Network: Locate your primary WiFi network (the one you want to use most frequently). If it's not at the top of the list, click and drag it to the top. This ensures your Mac prioritizes this connection.
Order Other Networks Strategically: You can further improve your WiFi stability by strategically ordering other networks. For example, if you often connect to guest networks, place them below your primary network. This prevents your Mac from accidentally prioritizing a less reliable connection. If you have multiple networks at home, test by putting the one with the fastest speeds at the top.
Click "OK" and Apply Changes: Once you've adjusted the order of your preferred networks, click "OK" to save your settings. Then, click "Apply" at the bottom of the Network window, taking care that your settings are saved.
Test the Connection: Close the Network window and test your WiFi connection by browsing the web, streaming a video, or downloading a file. Observe whether your connection is now quicker, more stable, and less prone to dropping.
Advanced Tuning: Fine-Tuning for Optimal Performance
Optimizing your network preference order is a crucial first step, but you can further fine-tune your settings for optimal performance:
- Remove Obsolete Networks: Over time, your Mac will accumulate a list of remembered networks. Remove any networks you no longer use, as these can sometimes interfere with the prioritization of your preferred networks. Select the network in the "Preferred Networks" list and click the minus (-) button below the list.
- Re-evaluate Passwords: Ensure that your Wi-Fi network passwords are saved and accurate for all your preferred networks, as this can affect how quickly your Mac connects.
- Optimize DNS Settings: While not directly related to network preference order, optimizing your Domain Name System (DNS) settings can improve browsing speed. Consider using a public DNS server like Google DNS (8.8.8.8 and 8.8.4.4) or Cloudflare DNS (1.1.1.1 and 1.0.0.1), or your ISP's DNS, for faster and more reliable name resolution. In the "Advanced" window, select the "DNS" tab and add your preferred DNS server addresses.
Troubleshooting Common Issues
Even after implementing this "one trick," occasional issues may arise. Here’s how to address some common problems:
- Mac Still Connecting to the Wrong Network: Double-check the network preference order to ensure your primary network is at the top of the list. Try deleting and re-adding your primary network to see if it resolves the issue.
- Slow Speeds: If your connection is slow, even after prioritizing your network, the problem might lie in a different area. Test your internet speed using online tools. Your router could be positioned poorly. Upgrade your router if the speeds are not up to par.
- Intermittent Disconnections: If you experience frequent disconnects, investigate potential sources of interference, such as other electronic devices. Try changing your router's WiFi channel in its settings.
Beyond the Single Trick: Best Practices for a Seamless WiFi Experience
While prioritizing network connections is a powerful fix, it's part of a broader approach to optimizing your Mac's WiFi performance. Consider these best practices:
- Keep Your macOS Updated: Apple regularly releases software updates that include performance improvements and bug fixes that may enhance WiFi stability.
- Update Your Router Firmware: Router manufacturers frequently release firmware updates that address security vulnerabilities and enhance performance. Check the manufacturer's website for the latest updates.
- Position Your Router Strategically: Place your router in a central location in your home, away from physical obstructions and sources of interference.
- Use the 5 GHz Band (If Possible): The 5 GHz band on your router often provides faster speeds and less interference than the 2.4 GHz band.
- Monitor Your Network: Use network monitoring tools to identify potential bottlenecks and track your network performance over time.
The Ultimate Goal: A Hassle-Free Digital Life
By implementing these simple yet effective strategies, you can banish the frustration of a sluggish or unreliable WiFi connection. Prioritizing your network preferences is the key, the one trick that can finally unlock the full potential of your Mac's wireless capabilities. Embrace this solution, and watch as your digital life flows more smoothly, with seamless streaming, faster downloads, and more reliable work experiences. This one adjustment can transform your relationship with your Mac, turning the WiFi nightmare into a dream come true.
