how to fix wifi problem on laptop windows 8
Title: Windows 8.1 - No Internet Connection Available
Channel: MDTechVideos
Windows 8.1 - No Internet Connection Available by MDTechVideos
how to fix wifi connection on laptop windows 8.1, how to fix wifi connection on laptop windows 8, how to fix wifi problem in laptop, how to fix wifi problem in laptop windows 10
**Windows 8 WiFi Nightmare? FIX IT NOW! (Guaranteed)**
Here's the requested article:
Windows 8 WiFi Woes: Conquer the Connectivity Chaos!
Have you ever stared into the abyss of a flickering WiFi signal on your Windows 8 machine? The frustrating reality of spotty internet is a universal digital headache. It's a modern plague. It can cripple productivity and derail entertainment plans. So, let's face it head-on. Prepare to banish those connection gremlins that haunt your digital life. Let's get your WiFi functioning flawlessly once again!
The Initial WiFi Assessment: Spotting the Culprit
Firstly, take a deep breath. Don’t panic! Before you start ripping your hair out, perform a careful inspection. Is your wireless adapter even on? That seems obvious, but you’d be surprised. Check the physical switch on your laptop (if there is one). However, that’s step one. Then, scrutinize your system tray. Do you see the familiar WiFi icon? Often, a quick restart of your computer will magically solve minor glitches. Moreover, consider the possibility of an outdated driver. Outdated drivers are notorious for causing network problems.
Driver Dilemmas: Updating for Optimal Performance
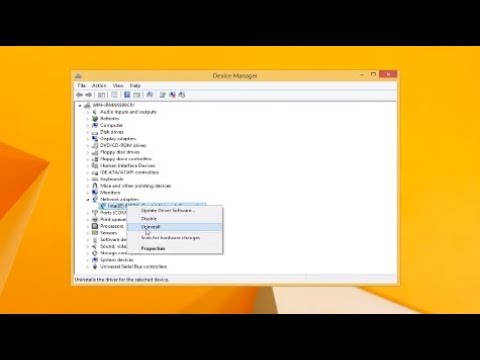
Indeed, outdated drivers are a common source of WiFi woes. The good news? Updating them is usually a straightforward process. Begin by right-clicking the "Start" button. Then, select "Device Manager." Within Device Manager, locate your network adapter. It's usually listed under "Network adapters." Right-click on your wireless adapter. Select "Update driver." Windows will then search for updates. Another option involves manually downloading drivers from the manufacturer's website. Remember to download the correct drivers for your specific hardware. After the driver installation, restart your computer. Hopefully, this should solve the problem instantly!
Power Saving Pitfalls: Unleashing Network Potential
Next, delve into your power management settings. Sometimes, Windows 8's energy-saving features can inadvertently cripple your WiFi. Go to Device Manager again. Find your network adapter. Double-click it to open its properties. Click on the "Power Management" tab. Uncheck the box that allows the computer to turn off the adapter to save power. Consequently, this step can significantly improve WiFi stability. This also prevents unexpected disconnections, specifically when you're in the middle of important tasks.
Troubleshooting Tips: Your Troubleshooting Arsenal
Now, you've tried the basic steps. If the problems persist, the diagnosis requires deeper investigation. Here are a few additional tips:
- Network Reset: Windows 8 offers a network reset function. It will reset all network settings to their defaults. Go to "Settings," then "Network & Internet," followed by "Status." Select "Network reset." Keep in mind that you will need to re-enter your WiFi password afterward.
- IP Address Conflicts: An IP address conflict can also cause connectivity issues. Open the command prompt as an administrator. Type
ipconfig /releasefollowed byipconfig /renew. This should resolve many address conflicts. - Antivirus Interference: Sometimes, overzealous antivirus software can interfere with your network connection. Temporarily disable your antivirus program. Test your WiFi again. If the problem disappears, you know the issue! You may need to adjust your antivirus settings.
- Router Reboot: Don't underestimate the power of a good, old-fashioned router reboot. Unplug your router, wait 30 seconds, and then plug it back in.
- Check for Obstructions: Ensure there are no physical obstructions blocking the signal between your computer and the router.
- Router Firmware: Make sure that your router's firmware is up-to-date.
Beyond the Basics: Advanced Troubleshooting Strategies
Still struggling? You may need more advanced troubleshooting techniques. Here are some options:
- Network Adapter Troubleshooter: Windows 8's built-in network troubleshooter can often identify and fix common problems. Find it under "Network & Internet" settings.
- Manual Wireless Configuration: Consider configuring your wireless network settings manually. It is a better approach for resolving complex problems.
- Contact Support: Sometimes, you must seek professional help. Contacting your internet service provider or computer manufacturer's support services may be necessary.
Ensuring a Seamless WiFi Experience
Finally, after you implement these solutions, you should have a stable WiFi connection. Remember, the troubleshooting process takes persistence. Keep trying different solutions until you find the optimal combination. Ultimately, flawless WiFi connectivity is achievable. Embrace the troubleshooting process, and enjoy a worry-free online experience. You deserve it!
Laptop WiFi Nightmare? This ONE Trick Fixes It FAST!Windows 8 WiFi Nightmare? FIX IT NOW! (Guaranteed)
Alright, fellow tech travelers! Let's be honest, Windows 8… well, it was a bit of a rollercoaster, wasn't it? And one of the biggest bumps in that ride for many of us? The Wi-Fi. Oh, the Wi-Fi! It could be as temperamental as a toddler deprived of their nap. Dropouts, slow speeds, the dreaded “Limited Connectivity” message… sound familiar? We've all been there, haven't we? We're going to dive headfirst into fixing that Windows 8 Wi-Fi nightmare, and I'm going to hold your hand (virtually, of course) every step of the way. Consider this your digital toolkit for Wi-Fi peace.
1. The Windows 8 Wi-Fi Woes: What Went Wrong?
Before we start throwing around solutions, let’s understand the enemy. Windows 8, bless its heart, had a different approach to networking. Part of the problem lay in its streamlined interface and under-the-hood changes. Driver compatibility was a common culprit. Think of your Wi-Fi adapter as the messenger delivering the internet. If the messenger is speaking gibberish (i.e., the driver is outdated or incompatible), the message (the internet) gets lost in translation. Also, some hardware just wasn't optimized for the new operating system. It was like trying to put a square peg (your old router) into a round hole (Windows 8).
2. Driver Dilemmas: Your First Line of Defense
This is where we start our troubleshooting journey. Think of drivers as the language translators between your computer and its hardware. Outdated or corrupted driver? Uh oh. Let's fix it.
- Method 1: Device Manager to the Rescue: Click the Windows key + X. Select "Device Manager." Expand "Network adapters." Right-click your Wi-Fi adapter. Select "Update driver." Choose "Search automatically for updated driver software." Cross your fingers!
- Method 2: Manufacturer's Website: If the automatic search fails, head to your computer or Wi-Fi adapter manufacturer’s website. Download the latest driver version specifically for Windows 8. This is often the most reliable method, giving you the freshest, most compatible version.
- Method 3: Roll Back, If Necessary: If a recent driver update caused the problems, right-click the adapter in Device Manager again, select "Properties," and go to the "Driver" tab. You should see an option to "Roll Back Driver." Give it a shot!
3. Reboot Ritual: The Simplest Solution (Often the Best)
Okay, I know it sounds simple, maybe too simple, but have you actually tried restarting your computer? Sometimes, a clean reboot clears out all the cobwebs and resets those pesky network connections. Think of it as hitting the "reset" button on your Wi-Fi life. Don't judge until you've tried it!
4. Power Plan Predicament: Optimize Your Power Settings
Windows 8, like its brethren, has power-saving options. These settings, designed to prolong battery life, can sometimes interfere with Wi-Fi performance, especially on laptops.
- Step 1: Access Power Options: Search for "Power Options" in the Windows search bar and open the application.
- Step 2: Edit Your Plan: Select your current power plan (likely "Balanced" or "Power saver") and click "Change plan settings." Then, click "Change advanced power settings."
- Step 3: Wireless Adapter Settings: Find "Wireless Adapter Settings" and expand it. Set "On battery" and "Plugged in" to "Maximum Performance." This ensures your Wi-Fi adapter gets the power it needs.
5. Network Troubleshooter: Automated Assistance
Microsoft built a network troubleshooter right into Windows 8. It's like having a tech support guru on speed dial.
- How to find this magic: Search for "Network troubleshooter" in the Windows search bar. Follow the prompts, and let it diagnose and attempt to fix your Wi-Fi woes. It can often spot simple problems and offer solutions.
6. Router Rendezvous: Checking Your Router's Settings
Your router, the gatekeeper of your internet connection, might be the source of your troubles.
- Restart Your Router: Just like your computer, a simple reboot can sometimes do the trick. Unplug your router and modem for about 30 seconds, then plug them back in. Wait for everything to boot up (all the lights to stabilize) before trying to connect again.
- Router Firmware: Check your router's manual to see how to access and update the firmware. Outdated firmware can lead to compatibility issues.
7. Channel Changes: Finding the Sweet Spot
Wi-Fi routers broadcast on different channels. Sometimes, interference from neighboring networks (like your neighbor's router) can cause problems.
- Access Your Router's Settings: You'll need to log in to your router's configuration page (usually by typing its IP address, like 192.168.1.1, into your web browser). Check your router's manual for the exact address and login credentials.
- Change the Channel: Look for the "Wireless" or "Wi-Fi" settings section. Select a channel other than the one currently in use. Experiment with different channels (1, 6, or 11 are often recommended) to see if it improves your connection speed.
8. Firewall Fallout: Ensuring Unblocked Access
Your firewall, like a digital security guard, can sometimes block your Wi-Fi connection.
- Check Your Firewall: In Windows, search for "Windows Firewall." Make sure your Wi-Fi network is allowed access. There usually isn't much to do here except to ensure no specific rules are blocking your connection.
- Third-Party Firewalls: If you have a third-party firewall installed, check its settings as well. Ensure your Wi-Fi adapter is allowed to communicate with the internet.
9. Resetting TCP/IP: Clearing the Network Cache
Think of your computer's network settings as a temporary filing system. If this system gets corrupted, it can mess up your internet connectivity. Resetting TCP/IP is like cleaning out those files and starting fresh.
- Open Command Prompt as Administrator: Search for "cmd" in the Windows search bar, right-click on "Command Prompt," and select "Run as administrator."
- Type these commands (Press Enter after each):
netsh winsock resetnetsh int ip resetipconfig /flushdns
- Restart your computer.
10. Check Antenna Connections (For Desktop PCs)
If you’re using a desktop PC, make sure your Wi-Fi antenna is securely connected to your Wi-Fi adapter. It seems simple, but sometimes a loose connection is all it takes!
11. Wireless Mode Matters: Compatibility Concerns
Modern Wi-Fi routers and adaptors support a variety of wireless modes (802.11b/g/n/ac). Windows 8 has compatibility problems with some modes.
- Access Router Settings: Log in to your router's configuration page.
- Wireless Settings: Look for the "Wireless Mode" or "Network Mode" settings.
- Consider Compatibility: Try changing the mode to "802.11g/n" rather than "802.11n" or "802.11ac" if you're having issues. This will limit the maximum speed, but it can often improve stability.
12. Malware Mayhem: Could Security Threats Be the Culprit?
Malware can wreak havoc on your system, including disrupting your Wi-Fi connection.
- Run a Scan: Perform a full scan with your antivirus software or use a reputable anti-malware program to ensure your system is clean.
13. Hardware Hardware, Everywhere: Considering an Adapter Upgrade
If all else fails, your Wi-Fi adapter itself might be the problem.
- Consider a Replacement: A new, more modern USB Wi-Fi adapter can be a simple and effective solution. It will often be more compatible and offer better performance.
14. System Restore: Rewinding to a Happier Time
If you recently made changes to your system, like installing new drivers or software, you could restore your system to a previous working state.
- Access System Restore: Search for "System Restore" in the Windows search bar.
- Choose a Restore Point: Select a restore point from before your Wi-Fi problems started. This process will revert your system to that state.
15. Seek Professional Help: When All Else Fails
If you’ve exhausted all these steps, and your Wi-Fi still refuses to cooperate, it might be time to call in the pros. A local computer repair shop or IT professional can diagnose more complex issues.
Closing Thoughts: Your Wi-Fi Victory Awaits
We've journeyed through the twists and turns of Windows 8 Wi-Fi troubleshooting together. Remember, fixing these issues often takes patience. Don't be discouraged if the first solution doesn’t work; keep trying! We've equipped you with a comprehensive toolkit to tackle those
Laptop WiFi Nightmare? USB Fix Inside!How to Connect to WiFi on Windows 8

By HOWTECH How to Connect to WiFi on Windows 8 by HOWTECH
how to fix wifi problem on windows 8-how to fix wifi problem on windows 8.1

By Theta Box how to fix wifi problem on windows 8-how to fix wifi problem on windows 8.1 by Theta Box
how to fix limited wifi connection on windows 8-how to fix limited wifi connection on windows 8.1

By Theta Box how to fix limited wifi connection on windows 8-how to fix limited wifi connection on windows 8.1 by Theta Box

Title: How to fix limited WIFI connection on Windows 8 and 8.1 by simple way
Channel: Exam Ready Current
How to fix limited WIFI connection on Windows 8 and 8.1 by simple way by Exam Ready Current
Laptop Wifi Hotspot
Windows 8 WiFi Woes: A Definitive Guide to Reclaiming Your Connection (No Jargon!)
Are you wrestling with erratic WiFi on your Windows 8 machine? Is your internet connection dropping out at the worst possible moments, or are you struggling to even see your network? We understand. It's a frustrating experience that can derail your productivity, disrupt your entertainment, and generally leave you feeling disconnected from the digital world. But before you throw your laptop out the window, take a deep breath. We’re here to guide you through a comprehensive, step-by-step process to diagnose and annihilate those infuriating WiFi problems, ensuring you regain a stable and reliable connection. Consider this your personal WiFi rescue mission.
The Symptoms: Decoding Your WiFi Distress Signals
Before launching into solutions, let's clarify the specific problems you might be facing. Properly identifying your symptoms is the crucial first step. Are you experiencing:
- Frequent Disconnections: Your WiFi signal comes and goes unpredictably, interrupting your browsing, streaming, or online gaming.
- Slow Connection Speeds: Pages load sluggishly, downloads crawl, and video buffering is a constant annoyance, even when your internet should be fast.
- Limited or No Network Visibility: Your computer simply doesn't detect your home WiFi network or other available networks.
- Intermittent Connectivity: Connections initially work, then inexplicably cut out after a period of use.
- Error Messages: Specific error codes or messages related to network connectivity are displayed.
Pinpointing these specific symptoms will help streamline our troubleshooting process. Now, let's dive into the solutions.
Step 1: The Basics – Rebooting Your Digital Life
Often, the simplest solutions are the most effective. Before proceeding with more advanced steps, let's ensure we've covered the fundamental groundwork. This includes power-cycling both your computer and your router/modem.
Restart Your Windows 8 Computer: A simple restart can clear temporary glitches and refresh system processes that might be interfering with your WiFi. Click the Start button, select the power icon, and choose "Restart."
Reboot Your Router and Modem: This is just as crucial. Unplug your modem and router from their power sources. Wait for a full 60 seconds. Plug the modem back in and allow it to power on and stabilize. Then, plug in the router. Give the router a few minutes to boot up completely. This process clears temporary memory and resets internal configurations, often resolving connectivity issues.
Step 2: Driver Dilemmas – Ensuring Your Wireless Adapter Is Up-to-Date
Outdated or corrupted wireless network adapter drivers are a common culprit behind WiFi problems. We need to ensure your drivers are updated to the latest version.
Access the Device Manager: Right-click on the Start button in the lower-left corner (or press the Windows key + X), and select "Device Manager." This opens a window displaying a list of all the hardware connected to your computer.
Locate Your Network Adapter: In the Device Manager, expand the "Network adapters" category. Look for the entry related to your wireless adapter. It will usually be named something like "Wireless Network Adapter," "WiFi Adapter," or something similar, potentially including the manufacturer's name (e.g., "Intel Wireless-AC 7260").
Update the Driver: Right-click on your wireless adapter and select "Update driver." You'll be presented with two options: "Search automatically for updated driver software" (recommended) and "Browse my computer for driver software." Choose the first option. Windows will then search for and install the latest drivers if they are available. If Windows says the drivers are up-to-date, you can try the second option, "Browse my computer for driver software", and select the option to manually install drivers for your adapter to see if that resolves the issue.
Restart Your Computer: After installing the new driver, restart your computer to apply the changes.
Step 3: Troubleshoot the Troubleshooter – Windows Built-In Diagnostic Tool
Windows 8 has a built-in network troubleshooter specifically designed to identify and fix common connectivity problems.
Access the Network Troubleshooter: Right-click on the WiFi icon in your system tray (lower-right corner of the screen). Select "Troubleshoot problems."
Follow the On-Screen Prompts: The troubleshooter will automatically detect and try to resolve any issues. It will guide you through the process, asking questions and suggesting potential solutions. Be sure to follow its recommendations carefully.
Review the Results: After the troubleshooter has finished, it will provide a report of what it did and whether it resolved the problem. Pay close attention to any suggestions or specific error messages.
Step 4: Network Reset – A Fresh Start for Your Network Configuration
If the previous steps haven't resolved your WiFi woes, consider a network reset. This powerful function essentially resets your network settings to their default configuration.
Access the Network Reset Function: Go to the Charms Bar, then click on Settings, then click Change PC Settings, then click Network, and finally Connections. The Network reset usually can be found in the Connections or the Network Settings.
Initiate the Reset: Click on the "Reset" button. You will be prompted to confirm your action. Note that this will remove and then reset your network adapters.
Restart Your Computer: After the reset is complete, your computer will likely restart automatically. If not, restart it manually.
Reconnect to Your WiFi: After the restart, you'll need to reconnect to your WiFi network. Find your network in the list of available networks and enter your WiFi password.
Step 5: Wireless Adapter Power Management – Optimizing Performance, Not Suffering It
Windows 8 sometimes conserves power by disabling your wireless adapter. This feature is often the source of intermittent WiFi problems.
Return to Device Manager: Open the Device Manager, as described previously.
Locate Your Wireless Adapter: Find your wireless network adapter in the "Network adapters" section.
Access the Properties: Right-click on your wireless adapter and select "Properties."
Navigate to the Power Management Tab: In the Properties window, click on the "Power Management" tab.
Disable Power Saving: Uncheck the box labeled "Allow the computer to turn off this device to save power." Click "OK" to save the settings.
Restart Your Computer: Restart your computer to ensure the changes take effect.
Step 6: Channel Surfing – Finding the Optimal WiFi Channel
WiFi routers broadcast on specific channels. Interference from other devices, including neighboring WiFi networks, can cause performance issues.
Access Your Router's Configuration: You'll need to access your router's configuration interface to change the channel. This usually involves typing your router's IP address into your web browser's address bar. The default IP address is often 192.168.1.1 or 192.168.0.1. Consult your router's manual or the manufacturer's website if you don't know your router's IP address or login credentials.
Log In to Your Router's Admin Interface: Enter your username and password (usually found on the router itself or in its documentation).
Locate the Wireless Settings: Look for settings related to "Wireless," "WiFi," or "802.11." The exact location varies depending on your router's model.
Change the Channel: Find the channel setting. Most routers support channels 1-11. If your router offers it, consider using a channel scanner app on a smartphone or tablet to find out which channel is least congested in your area. Select a channel that appears relatively free from interference. Channels 1, 6, and 11 are often recommended as they don't overlap.
Save the Changes and Restart Your Router: Apply the changes and restart your router. Allow the router to fully reboot.
Step 7: Firewall Interference – Ensuring Your Firewall Isn't the Culprit
Your firewall might be inadvertently blocking your wireless connection. This is less common, but worth checking.
Access Windows Firewall: Search for "Windows Firewall" in the Windows 8 search bar (accessed by swiping in from the right edge of the screen or by clicking the search icon).
Check Firewall Settings: Click on "Allow an app or feature through Windows Firewall."
Verify Wireless Network Permissions: Scroll through the list of allowed apps and features. Ensure that the boxes are checked for "Network discovery" and "File and Printer Sharing" if applicable. If these are not allowed, then you should select "Change Settings" at the top and check these boxes.
Restart Your Computer: Restart your computer to apply the changes.
Step 8: Distance, Obstructions, and Interference – Optimizing Your Physical Setup
WiFi signals are susceptible to physical obstructions, such as walls, furniture, and other electronic devices. Optimizing and positioning your router can significantly improve your WiFi signal strength and reliability.
Router Placement: Position your router in a central location in your home, away from walls and objects that might block the signal. Ensure that the router is elevated and that the antennas are properly positioned.
Reduce Obstructions: Minimize the number of walls, appliances, and electronic devices between your computer and the router. Relocate appliances that operate on the
