how to use laptop net as wifi hotspot

Title: how to connect a laptop with mobile hotspot
Channel: Prity shots
how to connect a laptop with mobile hotspot by Prity shots
how to use laptop net as wifi hotspot, how to use laptop internet a s hotspot, can i use my laptop as a wifi hotspot, use laptop as wifi hotspot
Laptop to WiFi Hotspot: The SHOCKINGLY Easy Trick!
Unlocking the Wireless Freedom: Your Laptop as a WiFi Hotspot Revealed!
Have you ever been stranded? Picture this: you're desperately needing a stable internet connection, yet public WiFi is nowhere to be found. Perhaps you are in a rural area, or maybe a local network is down. Frustration boils. But wait! There’s a secret weapon hidden in your laptop. It’s a shockingly easy trick to turn your portable computer into a personal WiFi hotspot. You can share your internet connection with other devices around you. This seemingly magical feat is far simpler than you think.
The Invisible Network: Demystifying the Laptop Hotspot
Your laptop is much more than just a machine for work! It's a versatile communication hub. It has incredible capabilities. Most laptops are equipped with the right technology to become WiFi hotspots. Think of it like this: Your laptop acts as a miniature router. Consequently, it retransmits your existing internet connection. This could be from your phone's mobile data, or even your wired Ethernet connection. The other devices can then connect to your laptop’s newly created WiFi network. This is how you get internet access.
Setting the Stage: What You'll Need Before Launching
Before we dive in, let’s make sure you’re prepared. Primarily, you'll need a laptop, obviously. Next, you’ll need an internet connection. This could be through your mobile data. Alternatively, you might have an Ethernet cable plugged in. In some situations, you might tether via your smartphone. Ensure that your laptop's WiFi adapter is enabled. You also will need a secure method to connect. With these basics covered, you're ready to transform your laptop.
Windows Warriors: Effortless Hotspot Creation on Windows
If you're a Windows user, prepare for simplicity. The process is remarkably straightforward. First, navigate to your Settings menu. Next, select Network & Internet. You should then click on Mobile Hotspot. The settings are generally very user-friendly. There, you'll enable the "Share my Internet connection with other devices" toggle. Now, you can choose your internet connection to share. Moreover, you can customize your network name and password. Make sure your password is strong. Now, save your settings. Your laptop is now broadcasting a WiFi signal! You can easily connect your devices.
Mac Mavericks: Sharing Your Connection on macOS
Mac users, fear not! The process is just as easy. Begin by opening System Preferences. Then select the Sharing option. In the left sidebar, find the Internet Sharing option. Now, choose your internet connection to share. From the "Share your connection from" dropdown. Select the connection option. Choose Wi-Fi from the "To computers using" checkboxes. Click Wi-Fi Options… to name your network. You also will set a password. Finally, click Start to turn on Internet Sharing. Your Mac is now a WiFi hotspot. It is ready to connect your other devices.
Troubleshooting Tango: Addressing Common Hiccups
Sometimes, things don't go as planned. What if you encounter some issues? For instance, you might not see the hotspot network on other devices. First, check your laptop’s settings. Ensure the hotspot is truly enabled. Double-check your credentials, like the network name and password. Also, consider restarting your laptop. This can often resolve temporary glitches. If you are using an Ethernet connection, make sure the cable is securely plugged in. If you are using a mobile connection, ensure it has active data. It is important to maintain your laptop’s drivers correctly. You may need to update them occasionally. Finally, if problems persist, seek online help.
Beyond the Basics: Advanced Hotspot Applications
The use of a laptop hotspot extends beyond basic internet sharing. Consider it as a temporary solution and tool. It's also great for creating a private network. Are you working on sensitive files? Use your hotspot to avoid public networks. You can also share files between different devices. The hotspot functionality is really useful. It's perfect for connecting gaming consoles or smart TVs when away from home. It's a versatile feature that offers significant utility.
Security Savvy: Protecting Your Wireless Fortress
Security is paramount in this digital age. Always use a strong password for your WiFi hotspot. This helps protect your network from unauthorized access. Remember, anyone connected to your hotspot will be using your data allowance. Ensure you are aware of your data limits. You should also enable a firewall on your laptop. This adds an extra layer of security. Consequently, it protects your devices from potential threats. Therefore, be cautious and secure when you provide access.
The Road Ahead: Embracing the Power of Your Laptop
Now you know the secret. Your laptop holds the power to create a WiFi hotspot. That is truly amazing. By understanding the simple steps outlined earlier, you can unlock this valuable functionality. Therefore, be prepared for unexpected situations. You can empower yourself with connectivity anywhere. Embrace the freedom and flexibility this technology offers. Take charge of your digital life. The ease and convenience is remarkable. Go forth and connect!
Laptop's SINGLE Wi-Fi Antenna? The SHOCKING Truth!Laptop to WiFi Hotspot: The SHOCKINGLY Easy Trick!
Hey there, fellow tech travelers! Ever been stranded without Wi-Fi, staring at your laptop with the desperate look of a castaway eyeing a coconut? We've all been there. That’s when you need your laptop to become a Wi-Fi hotspot, your own personal wireless oasis. And guess what? It's not rocket science! Actually, it's way easier than assembling that IKEA furniture you swore you'd never buy again. Prepare to be amazed (and a little bit smug) because we're about to reveal the shockingly simple trick to turning your laptop into a WiFi hotspot.
1. The Wi-Fi Wilderness: Why You Need This Skill
Think about it: you're on a train, in a coffee shop with terrible Wi-Fi, or maybe you just have a slow internet connection at home. Maybe your phone data plan is getting hammered, and you are thinking, "I need to figure out how to share my laptop's internet." The reasons for needing a Wi-Fi hotspot are as varied as the apps on your phone. From sharing internet with your tablet or another device to simply having a backup plan for when the Wi-Fi gremlins strike, this skill is a digital superpower. It's like having a portable internet router, ready to deploy whenever and wherever you need it. It is so cool you did not know it.
2. The Tech Wizard's Toolkit: What You'll Need
Before we dive into the magic, let's gather our tools. Thankfully, you probably already have them.
- A Laptop: This is, of course, the star of the show. Windows or macOS, both can pull off this trick.
- An Active Internet Connection: This is the fuel that feeds your hotspot. Whether it's through Ethernet, or a cellular connection, your laptop needs internet access to share.
- A Little Patience: Sometimes technology can be finicky, but trust us, this is a pretty simple process. More than a few minutes? You might be overthinking it.
3. Windows Warriors: Creating a Hotspot on Windows
Let's start with our Windows users. It's like conjuring a charm in a Harry Potter movie, but way less complicated. We'll walk through the steps with you.
- Step 1: Heading to Settings: Click on the Windows icon (usually in the bottom left) and then click the gear icon (Settings). Think of it as the portal to your digital destiny.
- Step 2: Network & Internet: In Settings, find "Network & Internet" and click onto it. Here is the gateway to everything network-related.
- Step 3: Mobile Hotspot: On the left-hand side, you'll see "Mobile hotspot." Click it. This is where the magic truly begins.
- Step 4: Choose Your Connection: Select the internet connection you want to share (Wi-Fi or Ethernet).
- Step 5: Edit Your Hotspot (Optional but Recommended): You can change your Hotspot's name (SSID) and password. This is important for security and for making it easy to identify your Hotspot when you're connecting devices. This is your personal WiFi kingdom.
- Step 6: Turn It On: Toggle the "Share my internet connection with other devices" switch to "On." Boom! Your laptop is now broadcasting Wi-Fi.
4. MacOS Mavericks: Creating a Hotspot on a Mac
Mac users, don't feel left out! You have your own elegant way of creating a hotspot. It is easy to do it on your Mac. Let's take a look.
- Step 1: Access System Preferences: Click the Apple menu (top left corner) and select "System Preferences" (or "System Settings," depending on your macOS version).
- Step 2: Sharing: Click on "Sharing." This is the section where you control what your Mac shares with the world.
- Step 3: Internet Sharing: In the left sidebar, select "Internet Sharing."
- Step 4: Choose Connection to Share From: In the dropdown menu, select the internet connection you want to share.
- Step 5: Select the Connection to Use: Check the box next to "Wi-Fi" to specify that you want to share the connection over Wi-Fi. Click "Wi-Fi Options" to set a network name and password. This is your WiFi portal.
- Step 6: Start Sharing: Click the "Start" button. Your Mac is now a Wi-Fi hotspot.
5. The Device Disco: Connecting Your Other Devices
Now that your hotspot is up and running, it's time to connect other devices. Phones, tablets, other laptops – anything that can connect to Wi-Fi.
- Scanning for Networks: On your device, go to your Wi-Fi settings.
- Finding Your Hotspot: Look for the network name (SSID) you set up earlier.
- Entering the Password: Input the password you created.
- Connected! After a brief moment, your device should be connected to the internet through your laptop's hotspot. And you are good to go.
6. Security Check: Protecting Your Digital Castle
Sharing your internet connection is awesome, but don't forget about security. You don't want anyone else using your internet or, worse, snooping on your online activity.
- Strong Passwords: Use a robust, unique password for your hotspot. Avoid using easily guessable information (birthdays, names, etc.).
- Encryption: Ensure that your hotspot uses WPA2 or WPA3 encryption. This encrypts the data that is being transmitted.
- Monitor Connections: Occasionally check which devices are connected to your hotspot to ensure that only authorized devices have access.
7. Bandwidth Blues: Managing Your Data Usage
Using your laptop as a hotspot can drain your data.
- Monitor Data Usage: Keep an eye on the data your hotspot is using. Most operating systems let you do this.
- Limit Background Usage: Turn off automatic updates and background apps on connected devices to conserve data.
- Consider Data Caps: If you have a data cap, be mindful of how much you're using with your hotspot. Data is precious.
- Turn Off When Not In Use: Simple. When you no longer need the hotspot, shut it down to protect your data and save battery life.
8. Troubleshooting Titans: When Things Go Wrong
Even the best tech can sometimes misbehave. Don't panic! Here are some common issues and how to fix them:
- Can't See the Hotspot: Double-check that you've enabled the hotspot correctly and that your laptop is broadcasting. Try restarting your laptop.
- Can't Connect: Ensure you've entered the correct password. Also, try turning the hotspot off and on again.
- Slow Speeds: This could be due to a slow original internet connection or too many devices connected to your hotspot. Try disconnecting some devices.
- Limited Connectivity: This might mean the connected device isn't getting a proper IP address. Restart the connected device.
9. Battery Life Boost: Conserving Power While Hotspotting
Running a hotspot can drain your laptop's battery quickly. Here are ways to extend your battery life.
- Plug In: When possible, keep your laptop plugged in while using it as a hotspot. This is the best way to conserve power.
- Reduce Screen Brightness: Lowering your screen's brightness can help save energy.
- Close Unnecessary Applications: Any program not needed to do your work should be closed to save power.
- Enable Power-Saving Mode: Most laptops have power-saving settings. Activate these.
10. The Versatility Voyage: Uses Beyond the Obvious
Sure, you can connect your phone, but the uses of a laptop hotspot extend beyond that. Think of it like a Swiss Army knife for your digital life.
- Smart Home Control: You can control smart home devices, even if your home Wi-Fi is down.
- Boosting Wi-Fi Range: When your router's range is lacking, your laptop can act as an extender.
- Temporary Network for Guests: Create a temporary Wi-Fi network for visitors without giving them access to your main network.
- Debugging Network Issues: Quickly test and troubleshoot connectivity issues on other devices.
11. The Fine Art of Fine-Tuning: Optimizing Performance
To make your hotspot shine, a little extra care goes a long way.
- Update Drivers: Ensure your Wi-Fi drivers are up to date. Old drivers could cause problems.
- Choose the Right Channel: Sometimes, your hotspot might work better on a different Wi-Fi channel. Research the best settings for your area.
- Positioning Matters: Place your laptop in a central location for the best coverage. Keep it away from physical obstructions.
12. Future-Proofing Your Hotspot: The Next Level
The world of technology is always changing.
- Consider 5 GHz: New laptops often have dual-band Wi-Fi cards. Set your hotspot to 5 GHz for faster speeds.
- Explore Advanced Settings: Research
Gunakan PC sebagai Hotspot WiFi dengan Ethernet
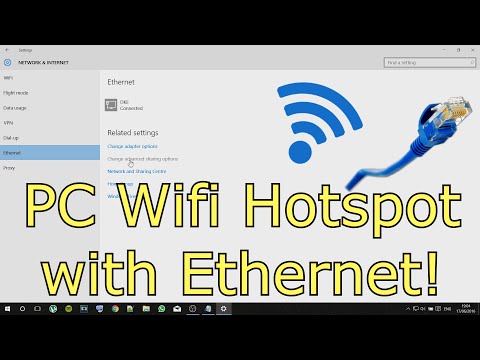
By Tech4Time Gunakan PC sebagai Hotspot WiFi dengan Ethernet by Tech4Time
Cara Membuat Hotspot WiFi dengan Windows 7

By 1stepatatime Cara Membuat Hotspot WiFi dengan Windows 7 by 1stepatatime
Cara menggunakan Laptop Anda sebagai Hotspot WiFi

By Ricardo Gardener Cara menggunakan Laptop Anda sebagai Hotspot WiFi by Ricardo Gardener

Title: How to share Internet from Ethernet to WiFi Share internet from Laptop to Mobile
Channel: TECH NETWORXX
How to share Internet from Ethernet to WiFi Share internet from Laptop to Mobile by TECH NETWORXX
Laptop Working
Laptop to WiFi Hotspot: The Surprisingly Simple Solution You Need Now
In the bustling digital age, the ability to connect to the internet is no longer a luxury; it's a necessity. Whether you're navigating a busy airport, working remotely from a scenic overlook, or simply experiencing an internet outage at home, the power to transform your laptop into a WiFi hotspot, sharing its internet connection with other devices, is invaluable. Forget scrambling for public WiFi that's often unreliable or riddled with security risks. With a few straightforward steps, your laptop can become your personal, secure internet hub.
Understanding the Core Concept: The Magic of Internet Sharing
The fundamental principle behind turning your laptop into a WiFi hotspot boils down to internet sharing. This nifty feature allows your laptop, connected to the internet via Ethernet cable or its own WiFi (like from a home network), to act as a wireless router. It broadcasts its internet connection as a new WiFi network, which other devices, like smartphones, tablets, and even other laptops, can then join. This is an elegant, on-the-go solution for providing a consistent internet connection to multiple devices without needing a dedicated router or constantly searching for a public WiFi connection.
The Windows Wizard: Creating Your WiFi Haven (Step-by-Step)
For Windows users, the process offers a remarkably streamlined experience. Windows, designed with accessibility in mind, makes setting up your laptop as a WiFi hotspot almost effortless. This is the journey to becoming your own internet provider.
Navigating the Settings: Begin by clicking on the Windows Start button, represented by the iconic Windows logo, typically located in the bottom-left corner of your screen. From the Start menu, select the "Settings" gear icon. This opens the Settings application, your central control panel for customizing your Windows experience.
The Mobile Hotspot Journey: Within the Settings app, locate and click on "Network & Internet." This section encompasses all of your network-related settings, including your current network connections and, importantly, the Mobile Hotspot feature.
Unlocking the Hotspot: On the Network & Internet screen, select "Mobile Hotspot" from the left-hand menu. This opens the Mobile Hotspot control panel, the heart of your internet-sharing endeavors.
Sharing Your Internet Connection: Here, the first task is to turn on the "Share my internet connection from" setting. This lets you choose how your laptop is currently obtaining internet. If you are connected via Ethernet, it should automatically detect that. If you are connected to a WiFi network, that will be its default option.
Crafting Your Network Identity: The next step is to set the credentials for your new hotspot. Click on "Edit" next to the network name and password. A new window pops open, allowing you to determine your hotspot's network name (SSID) and password. Choose a unique and memorable name for your hotspot, such as "MyPersonalWiFi." Then specify a strong, secure password with a mix of uppercase and lowercase letters, numbers, and symbols. This is paramount for protecting your private network from unauthorized access.
Activating the Hotspot: Once you have configured your network name and password, click the "Save" button, and toggle the "Share my internet connection with other devices" switch to the "On" position. Your laptop is now broadcasting its internet connection as a WiFi hotspot.
The Apple Ecosystem: Seamless WiFi Hotspot Creation
Apple, known for its user-friendly interfaces, renders creating a WiFi hotspot on a MacBook equally straightforward. Here’s how to easily turn your MacBook into your own personal WiFi access point.
Accessing System Preferences: Click on the Apple menu in the upper-left corner of your screen, the icon that looks like an Apple. Then, choose "System Preferences." This action opens the central control panel for your MacBook, where you manage various settings. In later versions of macOS, this same option has been moved to "System Settings".
The Internet Sharing Gateway: In System Preferences/System Settings, click on "Sharing." This panel controls various sharing options, including file sharing and, most importantly, internet sharing.
Enabling Internet Sharing: In the Sharing panel, select "Internet Sharing" from the left-hand panel. This is the gateway to transforming your MacBook into a WiFi hotspot.
Selecting Your Internet Source: Check the box next to "Internet Sharing" to activate the feature for the first time. At the "Share your connection from" section, you’ll need to specify where your MacBook receives its internet connection. If you're connected to a WiFi network, select "Wi-Fi." If you’re connected via an Ethernet cable, select "Ethernet."
Sharing with Other Devices: In the "To computers using" section, select "Wi-Fi." This tells your MacBook to share the internet connection over a WiFi network.
Configuring WiFi Options: Click the "Wi-Fi Options…" button. This is where you configure the name, security type, and password for your new hotspot. Under "Network Name," enter the name you’d like your hotspot to have. For "Channel," keep the default selection or select the one that works best for your area.
Boosting Security: From the "Security" dropdown, choose your security protocol. WPA2 Personal is a robust option, though WPA3 Personal is available on more recent macOS versions and is even more secure.
Setting a Strong Password: In the "Password" field, create a strong password for your hotspot. This should be a combination of uppercase and lowercase letters, numbers, and symbols. Confirm the password in the "Verify" field.
Starting the Hotspot: Click "OK," and the system will save your network settings. Check the box to activate Internet Sharing. A dialog box may appear asking if you want to turn it on. Click "Start." Your MacBook is now broadcasting its internet connection as a WiFi hotspot.
Troubleshooting WiFi Hotspot Issues: The Path to Smooth Sailing
Even though the process is streamlined, there might be instances where you encounter hiccups. Here's how to resolve common challenges and ensure a smooth WiFi hotspot experience.
Connection Problems: If devices are unable to connect to your hotspot, double-check the network name and password, verifying that they are entered correctly. Ensure that the "Share my internet connection from" setting, whether on Windows or macOS, is set to the proper internet connection source (e.g., Wi-Fi or Ethernet). Check that the device you're trying to connect with has its WiFi enabled.
Slow Internet Speeds: Multiple devices connected to the same hotspot can divide the available bandwidth. Limit the number of connected devices if you encounter slow speeds. Close bandwidth-intensive applications (e.g., streaming video or large downloads) on the connected devices.
Security Concerns: Always use a strong, unique password for your hotspot. Refrain from using easily guessable information like your name or birthdate. Enable encryption (WPA2/WPA3 Personal) to protect your network from unauthorized access. Regularly change your hotspot's password to maintain security.
Driver Conflicts: In rare cases, outdated or corrupted network drivers on your laptop can affect hotspot functionality. Go to your device manager and update or reinstall your wireless network driver.
Software Interference: Install a reliable firewall or anti-virus software on your laptop to prevent malicious software from damaging your internet connection.
Advanced Tips and Tricks for the Savvy Traveler
Beyond the basics of setting up a WiFi hotspot, several advanced techniques can optimize its performance and enhance your experience.
Data Usage Monitoring: Be mindful of your data usage, especially if you have a data cap on your internet plan. Both Windows and macOS offer features to monitor data consumption, allowing you to track how much data is being used by each connected device.
Power Management: Running your laptop as a hotspot can drain the battery faster since you're using two radio transceivers (your internet source and your Wifi Hotspot). Plug your laptop into a power source whenever possible to avoid battery depletion.
Channel Selection: If you're in a crowded area with many wireless networks, change the channel your hotspot uses to prevent interference. This can boost connection speed and stability. You can usually change the channel settings in the hotspot configuration options on both Windows and macOS. A channel scanner app on your phone or an analysis tool on your computer can tell you which channel has the least amount of interference.
Guest Network Creation: Some advanced router software or third-party applications enable you to create a guest network. This allows you to share your internet connection with guests without granting them access to your primary network.
Third-Party Applications: While Windows and macOS come with built-in hotspot features, there are also a variety of third-party apps available that offer enhanced features and customization options. Research and utilize programs that suit your specific needs.
The Power of the Laptop Hotspot: Unlock Your Internet Freedom
Converting your laptop into a WiFi hotspot unleashes unprecedented flexibility and freedom. You've transformed your laptop into a versatile internet-sharing tool. This is crucial for anyone who values connectivity, security, and the comfort of a personal WiFi network. Whether you're a student, a remote worker, a frequent traveler, or simply someone who values their online privacy, the ability to transform your laptop into a WiFi hotspot is a game-changer. By following the simple step-by-step guides provided, you can effortlessly share your internet connection with any device, anywhere, anytime. Now you
