connecting wifi printer to laptop without router
Title: How to connect your Computer or Laptop in Wireless WiFi Shared Printer for Windows 10 Pro
Channel: Lantaw TV
How to connect your Computer or Laptop in Wireless WiFi Shared Printer for Windows 10 Pro by Lantaw TV
WiFi Printer Nightmare? Connect to Laptop WITHOUT Router (EASY!)
WiFi Printer Woes? Ditch the Router and Print Directly!
Let's face it: setting up a WiFi printer can feel like wrestling an octopus in a phone booth. It's frustrating. You're staring at a blinking blue light. Furthermore, the printer refuses to cooperate. It's a common struggle. Then, you remember a simpler method. Believe it, you can sidestep the router entirely. You can connect your printer straight to your laptop.
Goodbye, Router Rage: Direct Connection Fundamentals
Before we dive in, let's clarify. This hack bypasses your home network. Instead, it establishes a direct link. So, your laptop communicates directly with the printer. This eliminates router-related headaches. Because, let's admit it, routers are often the villains in this tech saga.
Things You'll Need: Your Arsenal for Printing Peace
Firstly, gather your essentials. You'll need your laptop, of course. Also, you'll need your WiFi-enabled printer. Don't forget a printer-compatible USB cable. In addition, you could use a printer driver. It's readily available on your printer's website. It's also located on the installation CD. Ensure you have the driver installed. We want to make sure the printer is recognized.
Step-by-Step: Connecting Your Printer, Router-Free
Alright, let's get started.
Step 1: Physical Connection Prep
First, power on your printer. Next, locate the USB port. It's usually on the back of your printer. Then, find the USB port on your laptop. They may have different shapes. After identifying the ports, plug the USB cable into both devices. Make sure the connection is secure.
Step 2: Laptop's Driver Dance
Now, the magic begins on your laptop. More often than not, Windows detects the printer automatically. Sometimes, you'll need to intervene. So, go to your "Settings" menu. Then, select "Devices". Choose "Printers & Scanners". If your printer isn’t listed, click "Add a printer or scanner." Follow the on-screen prompts. Furthermore, pick your printer model from the list.
Step 3: Configuration Conundrums (and Solutions!)
Even with the best intentions, hiccups may arise. It’s just the nature of things. If your printer isn’t discovered, don't fret. First, check the USB cable connection. Ensure it’s snug at both ends. Next, restart your laptop. Afterwards, restart the printer. Sometimes, a simple reboot does the trick. If that doesn't work, reinstall the printer driver. Download the latest version from the manufacturer's website. It solves many problems.
Step 4: Printing Power On!
Once the driver is installed, it's time to test. Select a document for printing. Choose "Print" from the file menu. Then, select your printer from the list. Furthermore, ensure it's the correct printer. If all goes well, your document should spring to life on paper. However, if errors still occur, there may be one last solution.
Step 5: Advanced Troubleshooting Tactics
Still nothing? Here are a few more things to consider. Check your printer's power. Ensure it’s turned on and has sufficient ink. Moreover, ensure the paper tray is loaded correctly. Go to your printer settings. Verify the correct printer is selected as the default. Try printing a test page from the printer's control panel. Finally, consult your printer’s manual. It offers specific troubleshooting advice.
Reaping the Router-Free Rewards
Printing directly via USB offers numerous benefits. First, it removes the router as a middleman. Second, it simplifies the setup process. Third, it's often faster than printing over WiFi. This is true, especially for large documents. It frees you from network-related glitches.
Printer Perfection: Tips for Continued Success
To ensure smooth sailing, follow these tips. Regularly update your printer drivers. They often include bug fixes. Keep your printer firmware up-to-date. Clean the print heads periodically. This ensures top-quality prints. Moreover, use high-quality paper. It enhances results.
Final Thoughts: Printing Freedom Achieved!
Now, go forth and print! You have successfully bypassed the router. You've established a direct connection. So, you have conquered the WiFi printer challenge. Enjoy the simplicity and speed. Because, let's face it, printing should be easy. So, start printing without any further delay.
HP Pavilion 5G Laptop: Blazing-Fast WiFi That'll Blow Your Mind!WiFi Printer Nightmare? Connect to Laptop WITHOUT Router (EASY!)
Let's face it, technology can be a fickle beast. We've all been there, you're staring at the dreaded blinking light on your printer, the document you desperately need is staring back at you, and the router, that seemingly innocent box, is playing hard to get. You're thinking, "WiFi printer nightmare!" But hold the phone! There's a secret weapon, a workaround that bypasses the whole router drama, a method to connect your WiFi printer directly to your laptop. And guess what? It's easier than you think! Welcome to the world of direct connectivity, where printing becomes a breeze, not a battle.
1. The Router's Revenge: Why We Sometimes Don't Need It
Okay, the router is a crucial piece of the internet puzzle, the central hub for all our devices. But, sometimes, it just throws a wrench into things. Maybe it's acting up, the WiFi signal is weaker than your patience, or you're just in a situation where a router isn't readily available. Whatever the reason, the idea of a router dictating whether or not you can print is, frankly, ridiculous. Think of it like this: your printer has a direct route to your laptop, a private lane, bypassing the congested highway of the router.
2. Understanding the Magic: Ad-hoc Network Explained
The secret sauce to this whole operation is something called an ad-hoc network. Imagine two friends wanting to exchange information. They could go through a mutual acquaintance (the router), or they could just chat directly. An ad-hoc network is similar. Your laptop creates a temporary, direct connection with your printer, allowing them to "talk" without needing a third party (the router) involved. It's like a secret handshake between two devices!
3. Check Your Arsenal: What You Need Before You Begin
Before we dive in, let's make sure you have the right tools. You'll need:
- A WiFi-enabled printer: This is a must-have. If your printer only has a USB port, this guide won't work.
- A laptop with WiFi: Most laptops these days have this built-in.
- Your printer's driver software: You'll need this installed on your laptop. If you haven't already, download it from the printer manufacturer's website. Think of this as the translator ensuring your laptop and printer "speak" the same language.
- Patience: Sometimes, technology needs a little nudge.
4. Unleashing the Power: Setting Up the Ad-hoc Connection (Windows)
Alright, let's get to the nitty-gritty. Here's how to set up the ad-hoc connection on your Windows laptop:
- Open Network and Sharing Center: You can find this by typing "Network and Sharing Center" in the Windows search bar. Think of this as your network control panel.
- Set up a new connection or network: Click on this option.
- Choose “Set up a wireless ad hoc (computer-to-computer) network”: This is the key!
- Follow the on-screen instructions: You'll be prompted to create a network name (something memorable, like "PrinterNetwork"), security type (WPA2-Personal is usually a good choice), and a security key (password).
- Start the connection: Once you've filled in the details, click "Next" and let Windows create the network.
5. The macOS Approach: Making the Connection (Mac)
Mac users, fear not! The process is a little different, but just as straightforward:
- Open System Preferences: Click the Apple logo in the top-left corner of your screen and select "System Preferences."
- Choose "Network": This is your central hub for network settings.
- Click the "+" button: Located at the bottom-left of the Network window, this adds a new network interface.
- Select "Create": In the "Interface" dropdown, select "Create."
- Give it a Name: Create a network name (e.g., "PrinterNetwork") and set the security type. WPA2-Personal is recommended.
- Click "Apply": After changing the settings, select “Apply” and the Mac will attempt the connection.
6. Fine-Tuning the Connection: Printer Settings
Now that your laptop has created the ad-hoc network, it’s time to tweak your printer settings. The steps vary slightly depending on your printer model, but the general idea is:
- Access your printer's control panel: This is usually a small screen on the printer itself.
- Go to Network Settings: Find the option related to WiFi or network settings.
- Select the ad-hoc network: Your printer should be able to scan for available networks. Choose the network you just created on your laptop (e.g., "PrinterNetwork").
- Enter the security key (password): This is the password you set when creating the network.
7. The Crucial Step: Adding the Printer to Your Laptop
After setting up the ad-hoc network and getting your printer connected, you need to let your laptop know about your printer!
- Windows: Go to "Devices and Printers" in your Control Panel. Click "Add a printer". Select "The printer that I want isn't listed" (or a similar option depending on your Windows version.) Choose "Add a printer using a TCP/IP address or hostname." Enter the IP address of your printer (you can usually find this in your printer's network settings). Follow any remaining on-screen instructions, including selecting the correct printer driver.
- macOS: Go to "System Preferences" > "Printers & Scanners". Click the "+" button. Your printer should appear in the list. If it doesn't, make sure the printer is turned on and connected to the ad-hoc network. Select the printer and click "Add."
8. The Troubleshooting Toolkit: When Things Go Wrong
Sometimes, even with the best instructions, things can go sideways. Here are some common issues and solutions:
- Printer Not Detected: Double-check that both your laptop and printer are connected to the correct ad-hoc network.
- Incorrect Driver: Ensure you've installed the latest printer driver from the manufacturer's website.
- Firewall Issues: Your laptop's firewall might be blocking the connection. Temporarily disable your firewall (for testing purposes only!) and see if this resolves the issue. If it does, add an exception for your printer's IP address.
- Security Key Mismatch: Carefully double-check that you've entered the correct security key (password) on both your laptop and printer.
- IP Address Problems: Sometimes, the printer's IP address might change. Consult your printer's manual on how to set a static IP address.
9. Beyond the Basics: Advanced Tips and Tricks
- Range Matters: Ad-hoc networks have a shorter range than traditional WiFi. Keep your laptop and printer relatively close to each other.
- Security: While WPA2-Personal offers good security, be mindful of the ad-hoc network. Anyone within range could potentially connect.
- Power Saving: Some laptops have aggressive power-saving settings that can disconnect the ad-hoc network. Adjust your power settings to prevent this.
- Printer Firmware: Make sure your printer's firmware is up to date. Check the manufacturer's website for updates.
10. The Power of Direct Connection: Benefits and Drawbacks
Let's weigh the pros and cons:
Benefits:
- No Router Required: Perfect for situations where a router isn't available or is malfunctioning.
- Direct Connection: Potentially faster printing speeds as the data travels directly between your laptop and printer.
- Simple Setup: Once you get the hang of it, the setup process is relatively straightforward.
Drawbacks:
- Limited Range: The ad-hoc network's range is shorter than a typical WiFi network.
- Single Device Connection: Only one device (your laptop) can connect to the printer at a time.
- Compatibility: Not all printers support ad-hoc connections.
- Security Concerns: If you're on a public network, be careful using an ad-hoc connection.
11. Ad-hoc in Action: Real-Life Scenarios
Think about this:
- Traveling with your laptop: Print important documents on the go without relying on hotel WiFi.
- Temporary Office Setup: Create a simple printing solution in a shared workspace without needing to configure a complex network.
- Router Issues: When your main network is down, you can still print essential paperwork.
12. The Future of Printing: Trends to Watch
While ad-hoc networks offer a convenient workaround, the future of printing is likely to be even more streamlined. We might see:
- Simplified Setup: Even easier setup processes with automatic configuration.
- Enhanced Security: More robust security protocols for direct connections.
- Improved Compatibility: Wider support for ad-hoc connections across various printer models.
- Mobile Printing: Seamless integration with smartphones and tablets
How to Connect a Wireless Printer to Windows 1110 2022

By EasyTechGeek How to Connect a Wireless Printer to Windows 1110 2022 by EasyTechGeek
How to Print via Direct Wi-Fi Wireless Direct AP Mode Without Router

By KD TECH How to Print via Direct Wi-Fi Wireless Direct AP Mode Without Router by KD TECH
How to set up your wireless printer on your computer

By Telstra How to set up your wireless printer on your computer by Telstra
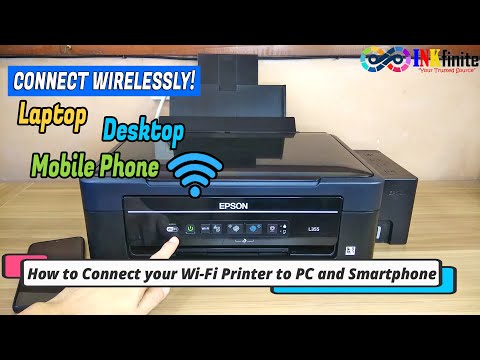
Title: How to Connect Epson L355 L365 L385 L405 L3060 Wi-Fi to PC Laptop and Android Phone INKfinite
Channel: INKfinite
How to Connect Epson L355 L365 L385 L405 L3060 Wi-Fi to PC Laptop and Android Phone INKfinite by INKfinite
My Laptop Work
WiFi Printer Nightmare? Conquer Connecting Your Printer to Your Laptop Without a Router (Simplified Guide!)
Are you entangled in the frustrating web of printer connectivity woes? Does the absence of a router seem to amplify the challenge, leaving you staring blankly at your recalcitrant device? Fear not! We understand the common headaches stemming from this situation, and we're here to illuminate the path toward seamless printing, even sans a traditional router. This comprehensive guide will demystify the process, breaking down the steps into easily digestible chunks. Forget the complex jargon and confusing manuals; we’re focusing on practical, actionable solutions to get you printing in no time. Let's begin untangling this WiFi printer nightmare!
Understanding the Challenge: Why No Router?
Before we dive into solutions, let's briefly touch upon the core issue. A router, in most home or office setups, acts as the central traffic controller for your network. It facilitates communication between your various devices – laptops, printers, smartphones – allowing them to share data and resources, including printing capabilities. When a router isn't available, either due to a temporary outage, a specific environment, or a deliberate design choice, direct connections become crucial. This is where our guide shines, providing the best methods to bypass the router and establish a direct link between your laptop and your WiFi printer.
Method 1: Direct WiFi Connection – The Ad-hoc Approach
The most straightforward method to connect your WiFi printer to your laptop without a router relies on the printer’s inherent ability to create its own WiFi network, often called an “ad-hoc network” or a “direct WiFi” connection. This essentially turns your printer into a miniature WiFi hotspot, allowing your laptop to connect directly to it.
Step 1: Prepare Your Printer
Begin by ensuring your printer is powered on. Consult your printer's manual or manufacturer's website for instructions on enabling direct WiFi or ad-hoc mode. This process varies slightly between printer brands. Some printers have a dedicated button for direct WiFi setup; others require navigating the printer's control panel. Typically, you'll be looking for options like “Direct WiFi,” “Ad-hoc Mode,” or “WiFi Direct.” The printer will then broadcast its own WiFi network, often with a default name and password.
Step 2: Locate the Printer’s WiFi Network
On your laptop, click on the WiFi icon in your system tray (usually located in the bottom right corner of the screen). A list of available WiFi networks should appear. Locate the WiFi network created by your printer. Its name will likely include the printer’s model number or brand, making it easy to identify.
Step 3: Connect to the Printer’s Network
Select your printer’s WiFi network from the list and enter the password, if prompted. The password should be found within your printer’s manual, on a sticker on your printer, or displayed on the printer's control panel during the initial setup. Once connected, your laptop is now directly linked to your printer.
Step 4: Install or Update the Printer Driver
In most cases, you’ll need to have the correct printer driver installed on your laptop. If you already have it installed, it is wise to ensure it is up to date. If not, you can get the driver from your printer manufacturer's website. Search for your printer's model and download the appropriate driver, selecting the specific operating system of your laptop (Windows, macOS, etc.) as needed. During installation, choose the option to connect via WiFi, and the installation wizard will typically find your printer automatically. If the option isn't available, you may need to manually add the printer.
Step 5: Add the Printer to Your Laptop (If Necessary)
If the driver installation doesn't automatically configure the printer, or if you are having trouble, you will need to add it manually through your operating system's settings. Navigate to the "Printers & Scanners" settings on Windows (search for it in the Start menu) or System Preferences > Printers & Scanners on macOS. Click on “Add Printer” or the corresponding "+" button. Your printer should appear in the list of available devices. Select your printer and follow the on-screen instructions. You might need to enter additional information about the printer or specify its connection type (WiFi).
Step 6: Test the Connection
Once the printer is installed, perform a test print. Open a document in any application, click "File," then "Print," and select your printer from the printer selection menu. If the test page prints successfully, congratulations! You've successfully connected your printer to your laptop without a router.
Method 2: Utilizing a USB Connection as a Bridge
If the direct WiFi method proves problematic, or if your printer doesn't support direct WiFi, a USB connection can act as a reliable workaround. Essentially, you connect the printer to your laptop via USB, then configure your laptop to share the printer wirelessly. This allows other devices, and most importantly, your laptop to connect to the printer.
Step 1: Connect the Printer to Your Laptop with USB
Connect your printer to your laptop using a USB cable. Ensure the printer is powered on.
Step 2: Install or Update the Printer Driver
Similar to the direct WiFi method, installing or updating the printer driver is crucial. Download the correct driver from the manufacturer's website. During driver installation, select the USB connection option. Complete the installation process as prompted. The driver will allow your laptop to communicate with the printer.
Step 3: Share the Printer on Your Laptop
- Windows: Go to “Printers & Scanners” in Settings (search for it in the Start menu). Find your printer in the list. Click on the printer, then select “Manage” and then “Printer properties”. Click on the “Sharing” tab. Check the box that says "Share this printer". Give the printer a share name (this is the name other devices will see). Click “Apply” then “OK”.
- macOS: Go to System Preferences > Printers & Scanners. Select your printer from the list. Check the “Share this printer” box. This inherently shares the printer on your network.
Step 4: Connect Other Devices (Laptop) to the Shared Printer
Now, other devices, specifically your laptop, can connect to the shared printer wirelessly (provided the laptop and the printer are connected).
- Windows: Go to “Printers & Scanners” in Settings (search for it in the Start menu). Click "Add a printer or scanner." Wait for Windows to search for available printers. Your shared printer should appear in the list (look for its share name). Select the printer and follow the on-screen instructions. You may be prompted to install the printer driver if it's not already installed.
- macOS: Go to System Preferences > Printers & Scanners. Click the "+" button to add a printer. Your shared printer should appear in the list of available printers. Select the printer and follow the on-screen instructions. macOS will usually automatically detect the printer and install the necessary drivers.
Step 5: Test the Connection
Open a document on your laptop and try printing. Select the shared printer from the printer selection menu. If the print job succeeds, you have successfully established a wireless printing connection using the USB method.
Method 3: Employing a Print Server (For Advanced Users)
For users seeking a more robust and feature-rich solution, a dedicated print server provides advanced functionality. A print server is a small or standalone device that connects to the printer via USB or network cable and allows multiple devices to print wirelessly. This method is particularly useful in office environments or homes with a variety of devices. Using a print server helps eliminate driver issues.
Step 1: Obtaining a Print Server
Purchase a dedicated print server. These devices are readily available online and in electronics stores. Ensure your chosen print server is compatible with your printer model and operating systems.
Step 2: Connecting the Print Server to the Printer
Connect the print server to your printer using a USB cable. Power on the print server.
Step 3: Connecting the Print Server to Your Network
Most print servers use an Ethernet cable to connect to your laptop. Connect your laptop to the print server via ethernet or directly to the computer. Follow the print server's instructions for configuring its network settings. This typically involves logging into the print server's web interface using its IP address (found in the print server's manual).
Step 4: Installing the Print Server Driver on Your Laptop
The print server will act as the go-between for your printer and your laptop. You will need to set up the print server on your laptop.
- Windows: In “Printers & Scanners” Settings, click “Add a printer or scanner.” Your laptop will likely detect the print server. If not, you may need to add the printer manually, providing the print server's IP address and selecting the appropriate print driver.
- macOS: In System Preferences > Printers & Scanners, click the "+" button. Choose "IP" from the top of the window. Enter the print server's IP address in the "Address" field. Select the proper protocol. Finally, select your printer's model from the “Use” dropdown menu (or locate the driver if it isn’t listed).
Step 5: Testing the Connection
Print a test page. If successful, your print server is correctly configured, and you can now print wirelessly from your laptop and any other devices with which you have connected it to the print server.
Troubleshooting Common Printer Connection Issues
These methods are generally effective
