broadcast wifi signal from laptop windows 7

Title: How to enable your network connection in Windows 7
Channel: MHELP2U
How to enable your network connection in Windows 7 by MHELP2U
Unlock Blazing-Fast WiFi From Your Windows 7 Laptop: The Secret Trick!
Unleash Warp-Speed WiFi on Your Windows 7 Laptop: The Hidden Key!
Alright, buckle up, because you're about to discover something truly amazing. You're stuck with a Windows 7 laptop, right? So, you might think your WiFi speeds are permanently capped by an ancient operating system. Wrong! Prepare to be amazed. We're going to unlock a secret. This secret will make your old laptop feel brand new. It's like giving your digital companion a shot of adrenaline.
The WiFi Speed Struggle: A Familiar Tune?
Let's be honest. We've all been there. You’re staring at that spinning wheel. Or, you're watching a video buffering endlessly. Your WiFi feels slower than molasses in winter. It’s frustrating. And, it makes you want to throw your laptop out the window. That familiar feeling? It's the digital equivalent of being stuck in traffic. You crave speed. You need it. However, don't despair. There's real hope, and it stems from a clever tweak.
Unveiling the Secret: The Power of Drivers
Here's the lowdown. Your WiFi adapter’s performance hinges on drivers. Not the kind you find on the road, of course. These are software programs. They allow your adapter to "talk" to your computer. They are crucial. Imagine them as the translator. Now, outdated or incorrect drivers? They're like a faulty translator. They severely hinder your connection. That's the hidden culprit slowing you down. So, the solution? Update those drivers.
Step-by-Step: Upgrading Your WiFi Drivers
Ready to turbocharge your WiFi? Here’s how, with minimal tech jargon. First, find your WiFi adapter. Open the "Device Manager." You can find it in the Control Panel. Or, you can simply search for it. Next, look for "Network Adapters." Expand this section. You should see your WiFi adapter listed. It likely has a name like "Wireless Network Adapter."
Right-click on your adapter. Select "Update driver software." You’ll see two options: "Search automatically for updated driver software" and "Browse my computer for driver software." Choose the automatic option. Windows will then check for new drivers online. It will do this for you. If it finds an update, install it. After the install, restart your laptop. It's a simple process, indeed.
Alternative Approach: Manually Hunting for Drivers
Sometimes, the automatic method fails. Don’t worry. There’s another path. Go to your laptop manufacturer's website. Crucially, find the support section. Enter your laptop's model number. You should see a list of available drivers. There, locate the WiFi adapter drivers. Download them. Then, save them to your desktop. Back in Device Manager, repeat the steps mentioned earlier. Choose the "Browse my computer for driver software" option. Point Windows to the folder where you saved the drivers. The driver will install. Restart your laptop. You’ll see an amazing change.
Fine-Tuning Your Connection: Additional Tweaks
Okay, you’ve updated your drivers. But, you can do even more. These are a few extra steps. These will maximize your WiFi performance. First, consider your router. Is it old? Outdated routers can bottleneck your speed. Invest in a new one with the latest standards. Next, check your router's location. Are there obstructions? Move it to a more open space. Microwaves and other electronics can interfere. Finally, avoid too much wireless congestion. Too many devices connected at once will slow things down.
Beyond the Driver: Optimizing Your Network
Think about the broader network. Also, check your internet speed. Run a speed test. Compare it to your plan's promised speed. Consider a wired connection. If possible, use an Ethernet cable. A wired connection will always be faster. Close unnecessary applications. These can consume bandwidth. These are useful tactics for getting the fastest speeds.
Troubleshooting Common Issues
Encountering problems? First, restart everything. Restart your router, too. Sometimes, a simple reset fixes everything. Secondly, double-check your internet connection. Verify your internet service provider. Thirdly, scan for malware. Malware can impact your connection. If problems persist, seek assistance from a support technician.
The End Result: A Blazing-Fast Experience
So, there you have it. The secret is out. You've learned the key to unlocking faster WiFi. Now, you can enjoy a more responsive internet experience. You are no longer captive. Watch those videos stream smoothly. Download those files in record time. Say goodbye to frustrating lag. You have the knowledge. Go forth and conquer the digital world. You deserve fast WiFi.
Unlock ANY WiFi: Windows 8 Hack (Guaranteed!)Here's the article:
Unlock Blazing-Fast WiFi From Your Windows 7 Laptop: The Secret Trick!
Hey there, fellow tech enthusiasts! Remember those days when your Windows 7 laptop felt like it was running on dial-up, especially when trying to stream that crucial cat video or join a video call? We’ve all been there, staring at the buffering symbol with growing frustration. But what if I told you there's a ridiculously simple trick – a secret, if you will – that can dramatically boost your WiFi speed on that trusty old machine? Believe me, it's easier than finding the lost remote control! Prepare to say goodbye to lag and hello to lightning-fast browsing and streaming. Today, we’re going to unlock the secret to blazing-fast WiFi for your Windows 7 laptop, because, let's be honest, nobody has time for slow internet.
1. Why is My Windows 7 WiFi So Slow, Anyway? The Usual Suspects
Before we dive into the magic trick, let's quickly identify the usual culprits behind sluggish WiFi performance. Think of it as a detective story, and we’re tracking down the villains! Slow WiFi on a Windows 7 laptop can stem from a few common issues. Maybe your router is located in the basement, while you're upstairs, where a thick wall is obstructing the signal. Perhaps other devices are hogging the bandwidth, like your streaming-obsessed roommate or the smart fridge constantly updating its firmware. Hardware limitations, like an outdated wireless adapter on your laptop, can also be a contributing factor. And, let's not forget the dreaded network congestion – too many devices trying to access the same internet pipeline at once. Sometimes, it is just life, but there's always an answer.
2. A Quick Reality Check: Is Your Internet the Problem?
Before you start fiddling with your laptop, a quick reality check is in order. Sometimes, the problem isn’t your laptop; it's the internet service itself. Run a speed test on another device, like your phone or a newer laptop. Websites like Speedtest.net or Fast.com are great for this. If other devices are experiencing similar slowdowns, the issue likely lies with your internet service provider (ISP). If that's the case, a phone call to them might be in order. If your smartphone is blazing fast, then you're in the right place, and we're going to work our magic!
3. The Secret Trick: Unveiling the Wireless Adapter Settings
Alright, buckle up, because here comes the good part! The secret to unlocking blazing-fast WiFi on your Windows 7 laptop lies in tweaking a few settings within your wireless adapter's configuration. Think of this as tuning up a classic car – a little adjustment can make all the difference. We’ll be adjusting the settings within the adapter itself to optimize its performance. This is where the secret sauce is, my friends!
4. Step-by-Step: Accessing Your Wireless Adapter Properties
Here’s how to get started:
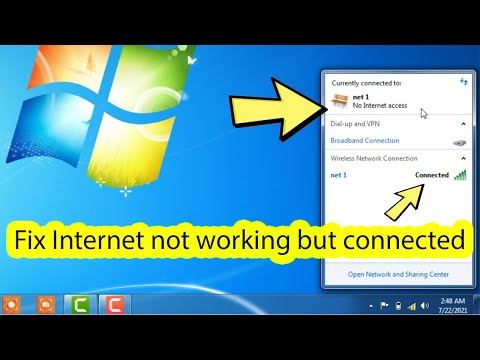
- Step 1: Open the Network and Sharing Center. You can find this by right-clicking on the network icon in your system tray (that little icon in the bottom right corner that looks like a series of bars or a computer).
- Step 2: Click on "Change adapter settings." This will open a window showing all of your network adapters.
- Step 3: Right-click on your Wireless Network Adapter. It will likely be labeled something like "Wireless Network Connection" or have the name of your adapter (e.g., "Intel Wireless"). Select "Properties."
5. Demystifying the Adapter Settings: What to Look For
Inside the Wireless Network Connection Properties window, you'll see a list of items. Click the "Configure" button. This opens the properties of your wireless network adapter. Within the adapter's properties, we'll be focusing on a few key settings. Let's break them down:
6. The Power of "802.11n"—Setting Your Wireless Mode
This is the big one! Navigate to the "Advanced" tab. Within this tab, you'll find a list of properties. The one we're interested in is likely called "Wireless Mode" or something similar. This setting controls the Wi-Fi standard your adapter uses. Make sure your wireless mode is set to "802.11n" or "802.11 a/b/g/n". This is the most up-to-date setting. Setting to a new standard can drastically improve your WiFi speed. It’s the equivalent of upgrading from a horse-drawn carriage to a sports car!
7. Channel Width: Wider = Faster (Usually)
Another setting that can impact speed is "Channel Width". If available, try setting this to "Auto" or "20/40 MHz." Wider channel widths can allow for more data to be transmitted at once, leading to faster speeds. Think of it like widening a road – more cars can travel at the same time.
8. Antenna Diversity: Let the Adapter Decide
If you see an "Antenna Diversity" option, you can try setting it to "Auto" or "Use all antennas." This allows your adapter to make the best choices for the WiFi signal.
9. Saving Your Changes and Restarting
Once you've made the necessary adjustments, click "OK" to close the adapter properties windows. You may then be prompted to restart your computer, which is a good idea to make sure the new settings take effect.
10. Testing the Results: Is It Working?
After restarting your laptop, it's time to put your new settings to the test! Run another speed test (Speedtest.net, Fast.com, or similar). Compare the results to your tests before the tweaking. Did your download and upload speeds increase? Are web pages loading faster? Are videos streaming smoothly? If so, congratulations! You've successfully unlocked blazing-fast WiFi!
11. Troubleshooting: What If It Still Doesn't Work?
Sometimes, even the best-laid plans can fail. If you've followed the steps and your WiFi speed hasn't improved, don't panic. Here are a few troubleshooting tips:
- Restart your router: A simple reboot can often fix underlying issues. Unplug it for 30 seconds.
- Update your drivers: Outdated drivers can cause problems. Go to Device Manager (search for it in the start menu). Update your wireless adapter’s drivers.
- Check for interference: Move your laptop closer to the router or away from potential sources of interference, such as microwaves or cordless phones.
- Consider a hardware upgrade: If your wireless adapter is ancient, you might need a newer one.
12. Other WiFi Speed Boosting Tips
While we've focused on the main "secret trick", here are a few other general tips to bolster your WiFi performance:
- Keep your router updated: Router firmware updates often contain performance improvements.
- Secure your network: A secure network ensures that other devices aren't using your bandwidth without your knowledge.
- Reduce congestion: Limit the number of devices using the WiFi simultaneously.
- Position your router strategically: Avoid placing your router behind walls or inside a cabinet.
13. Common Mistakes to Avoid
Let's quickly address some common pitfalls to ensure you get the best results:
- Incorrect settings: Double-check that you've set the correct wireless mode to "802.11n" or a compatible setting.
- Ignoring other devices: Remember that other devices on your network can affect speed.
- Not restarting: Ensure you restart your laptop and router to apply the changes.
- Giving up too soon: Fixing WiFi issues can be a bit of a process. Be patient and try different solutions.
14. Keeping Your WiFi Running Smoothly
Once you’ve achieved that faster WiFi bliss, maintaining it is key. Regularly check for driver updates, keep your router firmware current, and occasionally revisit your adapter settings to ensure they're optimized. Think of it like a car – it needs regular service to keep running smoothly.
15. The Final Verdict: Unleash the Power of Blazing-Fast WiFi!
So there you have it! You now know the secret trick to unlock blazing-fast WiFi on your Windows 7 laptop. No more buffering, no more lag – just smooth, speedy browsing and streaming. Now go forth and enjoy the internet at its full potential! It's a simple adjustment that can make a world of difference, proving that even older technology can still perform like a champ with a little bit of know-how.
Now, get ready to stream those cat videos without the dreaded spinning wheel of doom!
Closing Remarks:
We've explored the secret trick to unlock blazing-fast WiFi on your Windows 7 laptop, and it's simpler than you might have thought. We've covered the usual suspects, the importance of testing, the specific adapter settings, and crucial troubleshooting tips. Remember, patience is key. If you're still struggling, don't be afraid to consult online forums or seek help from a tech-savvy friend. With a little effort, you can revitalize your old laptop and enjoy a smoother online experience. You have all the tools now to have awesome WiFi.
Frequently Asked Questions (FAQs):
1. Will this trick work on other Windows versions?
While this guide
Find Your Laptop's WiFi MAC Address INSTANTLY! (Secret Trick Inside)Wifi network not showing in windows 7

By Being Selftech Wifi network not showing in windows 7 by Being Selftech
Fix windows 7 no internet access but connected ethernet
By IT Magics Fix windows 7 no internet access but connected ethernet by IT Magics
Wireless Network Connection Enabled but Not connected Fix Windows 7
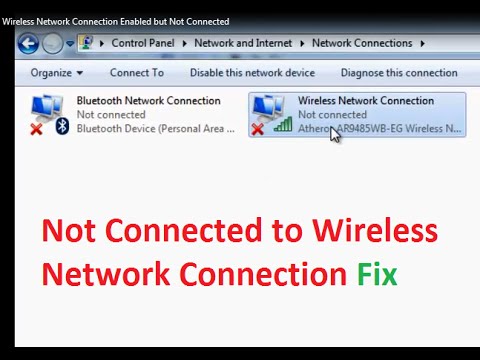
By troubleshooterrors Wireless Network Connection Enabled but Not connected Fix Windows 7 by troubleshooterrors

Title: FIXED Red X Over Network Connection Windows 7
Channel: the fiX files
FIXED Red X Over Network Connection Windows 7 by the fiX files
Laptop Wifi Hotspot
Unlock Blazing-Fast WiFi From Your Windows 7 Laptop: The Secret Trick!
We’ve all been there: staring at a spinning buffer, the frustration building as our Windows 7 laptop sluggishly attempts to load a webpage or stream a video. Slow WiFi can transform a productive afternoon into an exercise in digital agony. Fortunately, there’s a hidden secret, a simple tweak nestled within the depths of your network adapter settings, that can dramatically accelerate your WiFi speeds. Forget expensive upgrades or complicated hardware replacements; this is a solution that's readily available, requiring only a few moments of your time. Prepare to experience WiFi on your Windows 7 laptop like never before. Let’s unlock the potential of your wireless connection.
Understanding the Bottleneck: Why Your Windows 7 Laptop Feels Slow
Before diving into the fix, it’s crucial to understand where the problem often lies. While many factors contribute to slow WiFi – router distance, signal interference, and internet service provider (ISP) bandwidth, to name a few – Windows 7, with its age, can sometimes default to less-than-optimal configuration settings. Specifically, the settings tied to your wireless network adapter might not be configured for maximum performance and speed, especially if the default configurations were set many years ago.
This can often involve the choice of wireless modes, specifically the 802.11 specifications. The older 802.11b standard, for example, supports speeds significantly lower than those of modern standards like 802.11g, 802.11n, and especially 802.11ac. If your network adapter is stuck on an older, slower standard, your WiFi speed will be noticeably throttled. Another factor is the wireless drivers. Outdated drivers, while they may be functional, might not be optimized to take full advantage of the capabilities of your wireless card or the advanced features available in your router.
Therefore, upgrading your wireless adapter is not always necessary. The solution often lies in fine-tuning the existing settings within your Windows 7 laptop. By making some strategic adjustments, we can unleash the full potential of your hardware and experience a truly blazing-fast WiFi connection.
The Secret Trick: Optimizing Your Wireless Network Adapter
Now, for the moment you’ve been waiting for: the secret trick to turbocharge your WiFi. This involves carefully configuring your wireless network adapter settings. Follow these simple steps:
Accessing the Network Connections: First, you will access your network connections. This can be done in a few different ways.
- Click the Start button, select Control Panel, and then click Network and Internet > Network and Sharing Center.
- Right-click the network icon in your system tray (typically located in the bottom-right corner of your screen) and select "Open Network and Sharing Center."
- In the Network and Sharing Center, on the left side, select "Change adapter settings." This will display your network connections, including your wireless network adapter.
Identifying Your Wireless Network Adapter: In the Network Connections window, locate the adapter that is specifically for your wireless connection. It will be labeled as "Wireless Network Connection" or something similar. It will have a status of "Connected" if you are currently connected to WiFi.
Accessing Adapter Properties: Right-click on your wireless network adapter and select "Properties." This will open the Properties window for your specific connection.
Configuring the Wireless Adapter: In the Properties window, you should see a list of items. Find the item labeled "Configure…" and click it. This will open a new window that allows you to adjust your card's properties.
Navigating to Advanced Settings: In the newly opened window, go to the "Advanced" tab. This tab is where the magic happens. Here, you will find a list of configurable properties specific to your wireless adapter. The available properties and their precise names may vary slightly depending on the make and model of your network adapter. Therefore, the properties can also vary. However, several properties are commonly found and relevant to optimizing your WiFi speeds.
Key Properties To Adjust: Here are the properties you need to look out for and the recommended configurations:
- Wireless Mode: This is perhaps the most crucial setting. The Wireless Mode setting determines the 802.11 standard your adapter will use. Select the highest standard supported by both your wireless adapter and your router. For example, if your router supports 802.11n or 802.11ac, and your adapter also supports the same standard, select the highest one. The higher the standard, the faster the potential speed. If both devices support 802.11ac, select that option for optimal performance. Ensure that you have selected the highest one available. Be aware that some older routers may not support the newer standards, so you will need to match the standard on both your router and adapter.
- 802.11n Channel Width (or Channel Width): This setting controls the channel width used for your wireless signal. If your router and adapter support a wider channel, such as 40 MHz, enable this setting. A wider channel allows more data to be transmitted simultaneously, resulting in increased speeds. If this is not supported, you can still optimize your configurations.
- Transmit Power: This setting controls the strength of the wireless signal transmitted by your adapter. Set it to "Highest" or "100%". Higher transmit power can improve signal strength, especially if you are experiencing weak signal strength or distance from your router.
- Roaming Aggressiveness: This setting controls how aggressively your adapter will search for a better wireless access point. Set it to "Medium" or "High" to ensure the connection is stable. Aggressive roaming can sometimes lead to dropped connections or a slower signal; therefore, you should adjust it per your needs.
- Other Important Settings: Other settings can also affect WiFi performance. While these are adapter-specific, explore them. Look for options like:
- Antenna Selection: If your adapter supports multiple antennas, make sure the correct antennas are selected.
- Quality of Service (QoS) Configuration: If you use QoS for specific applications (like video streaming), confirm that is it configured correctly.
Applying Changes and Testing the Results: Once you've made the necessary adjustments, click "OK" to save the settings. Close all open windows and restart your Windows 7 laptop. After restarting, test your WiFi speed using a speed test website (such as Speedtest.net) or by trying to stream a video or download a file. You should notice a significant improvement in your WiFi speed and overall experience.
Troubleshooting Common Issues and Refining Your Settings
If you've followed the steps above but are still not experiencing the desired increase in WiFi speed, don't despair. Here are some troubleshooting tips and ways to refine your settings:
Driver Updates: Outdated drivers are often the culprit behind performance issues. Make sure drivers are up to date. You can update your drivers through the Device Manager.
- Click the Start button, type “Device Manager” in the search bar, and press Enter.
- In the Device Manager, expand "Network adapters."
- Right-click on your wireless network adapter and select "Update driver."
- Choose "Search automatically for updated driver software." Windows will search for and install any available driver updates.
- Alternatively, you can download the latest drivers from the manufacturer's website for your wireless adapter, and install them manually.
Router Configuration: While the focus has been on your laptop, your router settings also play a massive role. Ensure that your router is configured correctly:
- Channel Selection: Wireless networks operate on channels. Select a channel that is not heavily congested by other wireless networks in your area. Most routers have an auto-channel selection setting, which is usually a good starting point. You can also use WiFi analyzer apps on your smartphone to find the channel with the least interference.
- Router Firmware: Make sure your router's firmware is up to date. Firmware updates often contain performance improvements and security patches.
Interference: Wireless signals can be disrupted by physical objects and other electronic devices. Try these tips:
- Relocate your Router: Place your router in an open, central location, away from walls, metal objects, and other electronics.
- Reduce Wireless Interference: If your WiFi signal is being interfered with by a microwave oven, cordless phone, etc., try to move the devices around to prevent interference.
Gradual Adjustments: When adjusting the settings, make one change at a time and test the results. This will help pinpoint which setting is making the biggest difference and avoid making multiple changes.
Experiment and Test: WiFi environments vary, therefore some settings may be dependent on the device's make and model. Experiment with the settings and test results to see what works best in your environment. Always test your WiFi speed thoroughly after making any changes.
Leveraging the Power of the Secret Trick
The secret trick, as we've seen, is a powerful tool for optimizing your WiFi experience on your Windows 7 laptop. By carefully adjusting the settings within your network adapter, you can unlock remarkable speeds and eliminate frustrating lag. This method is completely free, requires no technical wizardry, and offers the potential to transform your digital life. Embrace the power of informed configuration, and say hello to a much faster, more enjoyable WiFi experience.
