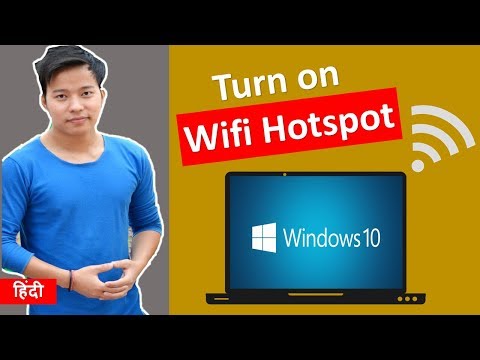
how to use laptop as wifi hotspot without software

Title: turning your pc into a wifi hotspot without software or application
Channel: Babanature
turning your pc into a wifi hotspot without software or application by Babanature
Laptop WiFi Hotspot: No Software Needed! (Secret Trick Inside!)
Turn Your Laptop Into a Wi-Fi Hotspot – No Downloads Necessary!
Ever wished you could share your laptop's internet connection with other devices? Maybe you’re on the road, or perhaps your home Wi-Fi has gone kaput. Well, fortunately, you don't need to install any fancy software. You can create a Wi-Fi hotspot directly from your laptop. This is a hidden gem, and it is simpler than you think!
The Built-in Magic: Using Your Laptop's Power
Most modern laptops come equipped with capabilities beyond just browsing. They often include a concealed feature that allows them to broadcast a Wi-Fi signal. You might not realize it; however, it's there, ready to be unleashed. This built-in functionality bypasses the need for extra apps. Consider this a secret weapon in your digital arsenal.
Unveiling the Secret: The Command Prompt Method
This trick involves a few simple commands. Don't let the term "command prompt" intimidate you. It is easier than it sounds. Follow these steps, and you'll be up and running in minutes.
Setting Up Your Virtual Network Adapter
First, you'll need to open the Command Prompt. You can find it by typing "cmd" in the Windows search bar. Click "Run as administrator." Now, let’s get down to business.
Type this command and press Enter:
netsh wlan set hostednetwork mode=allow ssid="YourHotspotName" key="YourPassword"- Replace
"YourHotspotName"with the name of your desired hotspot. - Substitute
"YourPassword"with a strong password. - Make it something memorable!
- Replace
Then, type this command and press Enter:
netsh wlan start hostednetwork- This activates your hosted network.
- It starts the Wi-Fi hotspot.
Sharing Your Internet Connection
Now, you have successfully made the hotspot. But you need to share your internet connection as well. This is the final step.
Open "Network Connections." You can find this by searching for it in the Windows search bar.
Locate the network adapter currently connected to the internet (e.g., Ethernet or Wi-Fi).
Right-click on that adapter and select "Properties."
Click on the "Sharing" tab.
Check the box that says, "Allow other network users to connect through this computer’s Internet connection."
In the "Home networking connection" dropdown, select the virtual Wi-Fi adapter you created.
Click "OK."
It's a pretty straightforward process, isn't it?
Connecting Your Devices
Your hotspot is now broadcasting a Wi-Fi signal. Grab your phone, tablet, or any other device with Wi-Fi capability. Search for available Wi-Fi networks. Look for the name you designated as “YourHotspotName.” Enter the password you established. You should now be connected! It's that simple.
Troubleshooting Common Issues
Sometimes, things don’t go as planned. Don't fret if you encounter any problems. Let's tackle some common hurdles.
- The Hotspot Isn't Showing Up: Double-check the hotspot name. Ensure it's not hidden by a firewall. Restarting your laptop might also work.
- Unable to Connect: Verify that the password is correct. Consider restarting the hotspot. Also, check your firewall settings.
- Slow Internet Speed: Proximity to your laptop matters. Move closer to the hotspot. Check other devices using the connection. The internet might be slow for everyone.
Why This Method is Superior
Why should you choose this built-in method? There are several benefits. First, it's convenient. You don’t need to download or install anything. Second, it's secure. It eliminates the need for potentially risky third-party software. Third, it's reliable. The native features are integrated with your operating system.
Beyond the Basics: Optimizing Your Hotspot
You might want to elevate your hotspot experience. Thus, you can customize settings for peak performance.
- Change the Hotspot Name and Password: You can easily modify these settings through the command prompt. Just use the same
netshcommands with your desired changes. - Monitor Usage: Keep track of data usage. This is especially important if you have a limited data plan. You can find helpful tools to track data usage.
- Consider a Strong Password: Protect your network from unauthorized access. Pick a strong, difficult-to-crack password.
Wrapping Up: Your Portable Wi-Fi Oasis
You can now create a Wi-Fi hotspot from your laptop without software. You have mastered the secret. This hidden function provides flexibility. You can share your internet connection wherever you are. So, whether you're traveling, working remotely, or simply want to share your Wi-Fi, you're all set. Embrace the power of your laptop. Enjoy your new freedom!
Laptop with Dual-Band Wi-Fi: Blazing-Fast Speeds You Won't Believe!Laptop WiFi Hotspot: No Software Needed! (Secret Trick Inside!)
Hey there, fellow tech adventurers! How many times have you been stuck in a digital desert, desperately needing an internet connection but finding yourself miles away from Wi-Fi? We've all been there, staring longingly at our phones, yearning to tether that sweet, sweet data to our laptops. But guess what? You don't need to download sketchy software or spend hours wrestling with confusing settings. Today, we're diving deep into a secret weapon that turns your laptop into a Wi-Fi hotspot without any software installations! Intrigued? We thought so! Let's get this show on the road.
1. The Universal Digital Lifeline: Why You Need a Laptop Hotspot
Think of your laptop as a Swiss Army knife of digital connectivity. It's a powerhouse, capable of so much more than just browsing cat videos (though, let's be honest, we all do that!). We're talking about creating a personal Wi-Fi hotspot, a digital lifeline that can save you in a pinch. Imagine being at a remote work location or a friend's house without Wi-Fi. Suddenly, your laptop becomes the hero, allowing you to connect your phone, tablet, or even another laptop to the internet using your existing mobile data plan. This isn’t just about convenience; it's about unlocking freedom. We’re talking about staying connected, no matter where your adventures take you.
2. Debunking the Myth: You Don't Need Software!
For years, we’ve been told we need specialized software to transform our laptops into hotspots. Apps with clunky interfaces, endless permissions requests, and the unsettling feeling that they might be siphoning off our data. But the truth is far more elegant. Your operating system already has this built-in functionality! It’s like discovering a hidden compartment in your favorite backpack – you've had it all along, you just didn't know where to look.
3. Windows Revealed: The Secret Hotspot Recipe (Step-by-Step)
Let's start with the powerhouse: Windows. The process is surprisingly simple. Follow these steps, and you'll be broadcasting your own Wi-Fi signal in minutes:
Step 1: Dive into Settings: Click the Start button (that Windows icon in the bottom-left corner) and then select the Settings gear icon. Or, use the search bar (the magnifying glass), and type "Mobile hotspot".
Step 2: The Mobile Hotspot Tab: In Settings, click on "Network & Internet," followed by "Mobile hotspot."
Step 3: Activate Your Hotspot: Toggle the switch to the "On" position. Boom! Your laptop is now theoretically broadcasting Wi-Fi, but we're not done yet.
Step 4: Customize Your Connection: Click "Edit" to the right of the hotspot name. Here, you can personalize your network name (SSID) and set a secure password. Choose a strong password! Think of it as a digital lock.
Step 5: Share Your Internet Connection: In the "Share my internet connection from" dropdown, typically, you're going to select the source. For instance, if you are using Ethernet cable select Ethernet. If using Wi-Fi (your laptop is connected to a pre-existing network) choose Wi-Fi.
And there you have it! Your laptop, armed and ready to share your internet connection.
4. Unveiling Mac's Magic: Turning Your MacBook into a Hotspot
Apple's macOS is just as capable, but the process is a bit different. Don't worry, it's just as easy:
- Step 1: Head to System Preferences: Click the Apple menu (top-left corner of your screen) and choose "System Preferences." It is now called "System Settings".
- Step 2: Embrace the Sharing Power: Click on "Sharing."
- Step 3: Internet Sharing is King: In the left-hand menu, select "Internet Sharing."
- Step 4: Select Your Internet Source: In the "Share your connection from" dropdown, choose the source you want to share (e.g., Wi-Fi if you're connected to a Wi-Fi network, or Ethernet if using a wired connection).
- Step 5: Choose How to Share: Check the box next to "Wi-Fi."
- Step 6: Customize Your Network (Key!): Click the "Wi-Fi Options…" button. Here, give your hotspot a name, set a password, and choose a security type (WPA2 Personal is generally a good choice).
- Step 7: Activate Sharing: Check the box next to "Internet Sharing" to activate the hotspot. A confirmation message will pop up; click "Start."
And that’s it! Your Mac has transformed into a Wi-Fi beacon, ready to connect your devices.
5. Troubleshooting Troubles: Common Problems & Quick Fixes
Sometimes, things don't go as planned. Here are some common problems and how to fix them:
- Can't See the Hotspot: Double-check that your hotspot is turned on. Make sure your device is within range (usually, a few feet). Sometimes, restarting your laptop or device can do the trick.
- Limited Connectivity: Ensure your laptop has an active internet connection. Check your mobile data allowance if you're tethering using cellular data.
- Slow Speeds: Hotspot speeds can be slower than your regular internet connection. This is often due to bandwidth limitations. Consider using a faster data plan if you rely on the hotspot regularly. The amount of devices connected at once will also affect it.
- Security Issues: Ensure your Wi-Fi password is strong and secure.
6. Data Dilemma: Monitoring Your Mobile Data Usage
Since you're using your mobile data, it's essential to keep an eye on your usage. Most phones have built-in data usage tracking. Check your carrier's app or website to stay informed. We don’t want any unexpected charges! Think of it like a fuel gauge; keep an eye on it, so you don't run out of gas unexpectedly.
7. Safety First: Security Best Practices for Your Hotspot
Creating a secure hotspot is crucial. Here's how to stay safe:
- Strong Passwords: Use a robust password (at least 12 characters, including a mix of letters, numbers, and symbols).
- Network Name Privacy: Avoid using personally identifiable information in your hotspot's name.
- Monitor Connected Devices: Regularly check which devices are connected to your hotspot. If you see something suspicious, disconnect it.
- Keep Software Updated: Ensure your operating system and other software are up-to-date to patch any security vulnerabilities.
8. The Hotspot in Action: Real-World Applications
Let's get practical! What can you actually do with a laptop hotspot?
- Remote Work: Work from anywhere, even if you don't have Wi-Fi.
- Gaming Fun: Connect your gaming console to the internet when Wi-Fi is unavailable.
- Tablet Connectivity: Keep your tablet online for streaming movies or browsing.
- Travel Buddy: Create a Wi-Fi zone for your family during travel.
- Emergency Backup: When your home internet goes down, your laptop can save the day.
9. Beyond the Basics: Expanding Your Hotspot's Reach
Want to get even more out of your hotspot?
- Range Extenders: If you need to extend the range, consider a Wi-Fi range extender.
- Bandwidth Management: Some operating systems have built-in tools to manage bandwidth and prioritize traffic. Look into these settings to manage your hotspot use.
- Smartphone Compatibility: Make sure your smartphone is compatible with hotspot functionality.
10. The Advantages of Avoiding Software
Why is this approach better than using third-party software?
- No Bloatware: No need to install unnecessary software that might slow down your laptop.
- Increased Security: Built-in features from your operating system are generally more secure than third-party apps.
- Simplified Setup: Easy to set up and use, even for beginners.
- More Reliable Performance: Eliminate the chance of software conflicts.
- Control over your experience: Less privacy concerns.
11. Power Consumption: Hotspot vs. Battery Life
One thing to keep in mind: using your laptop as a hotspot will drain your battery faster. Think of it as your laptop working harder, like climbing a hill. Be sure to keep an eye on the battery level and plug it in whenever possible.
12. Comparing Hotspots: Laptop vs Portable Router
Why choose a laptop hotspot over a dedicated portable router?
- Cost-Effective: You don't need to buy any additional hardware if you already have a laptop.
- Convenience: It's easy to set up in seconds, without extra peripherals.
- Flexibility: Take advantage of your laptop's processing power.
- Data Sharing: Easy to share files between devices connected to the hotspot.
13. The Mobile Data Trade-Off: Factors to Consider
- Data Limits: Monitor your data consumption to avoid overage charges.
How To Make Laptop WiFi Hotspot Without Any Software to Share LAN

By NeSky India How To Make Laptop WiFi Hotspot Without Any Software to Share LAN by NeSky India
Use Your Computer As WiFi Router Without Any Software

By A2MTech Use Your Computer As WiFi Router Without Any Software by A2MTech
How to Create Enable a Wi-Fi Hotspot in Windows 10 PC Without Software Hotspot kaise banaye
By Technology Gyan How to Create Enable a Wi-Fi Hotspot in Windows 10 PC Without Software Hotspot kaise banaye by Technology Gyan

Title: How to create WiFi Hotspot Without using any software in LAPTOP On all windows Easy Tutorial
Channel: TECH SLK
How to create WiFi Hotspot Without using any software in LAPTOP On all windows Easy Tutorial by TECH SLK
Unlock Your Acer Laptop's WiFi Password: The Secret's Inside!
Laptop WiFi Hotspot: Unleash Your Connection – No Software Required! (The Undisclosed Method)
In an increasingly interconnected world, the ability to share your internet connection seamlessly is no longer a luxury; it's a necessity. Whether you're a frequent traveler, a remote worker, or simply someone who wants to provide internet access to guests, the convenience of a laptop-created WiFi hotspot is undeniable. What if we told you that this capability isn't reliant on cumbersome software installations or complicated configurations? Prepare to be amazed, because we're about to reveal a hidden trick that allows you to transform your laptop into a powerful WiFi hotspot, all without the need for third-party programs.
Bypassing the Software Bottleneck: A Novel Approach
The conventional wisdom surrounding laptop-generated hotspots often centers around software solutions. However, these applications can sometimes be riddled with bloatware, consume valuable system resources, and may even introduce security vulnerabilities. We, however, advocate a different strategy - a direct, built-in approach that leverages the inherent capabilities of your operating system. This method grants you granular control, exceptional performance, and, most importantly, eliminates the requirement for any additional software.
Unmasking the Hidden Feature: Command Line Mastery
The secret to unlocking this powerful feature lies within the command line interface, a sometimes-intimidating, but ultimately incredibly versatile, tool. By directly interacting with your operating system's network configuration, we can bypass the limitations imposed by software, offering unparalleled flexibility. The following steps are meticulously designed to guide you through the process, ensuring a smooth and effortless experience.
Accessing the Command Prompt (Windows) or Terminal (macOS):
- Windows: Press the Windows key, type "cmd" or "command prompt," and press Enter. Alternatively, you can right-click the Start button and select "Command Prompt" or "Windows PowerShell." In some Windows 11 versions, you might need to select "Terminal."
- macOS: Open "Finder," navigate to "Applications" -> "Utilities," and double-click "Terminal."
Setting Up Your Virtual WiFi Adapter:
- Windows: Type the following command and press Enter:
netsh wlan set hostednetwork mode=allow ssid="YourHotspotName" key="YourPassword"- Replace "YourHotspotName" with the desired name for your hotspot (e.g., "MyLaptopHotspot").
- Replace "YourPassword" with a strong password (at least eight characters).
- macOS: macOS handles this process a bit differently. Head to System Preferences > Sharing. Select “Internet Sharing.” Choose your internet source from the “Share your connection from” dropdown menu. Then, select the protocols for sharing, like Wi-Fi. Click “Wi-Fi Options” and set your network name and password.
- Windows: Type the following command and press Enter:
Starting the Hotspot:
- Windows: Type the following command and press Enter:
netsh wlan start hostednetwork - macOS: Check the box next to “Internet Sharing” to activate the hotspot.
- Windows: Type the following command and press Enter:
Stopping the Hotspot:
- Windows: Type the following command and press Enter:
netsh wlan stop hostednetwork - macOS: Uncheck the box next to “Internet Sharing” to deactivate the hotspot.
- Windows: Type the following command and press Enter:
Detailed Explanation of the Commands
Let's delve deeper into the mechanics of these commands. netsh is the Windows Network Shell, a powerful command-line utility for managing network configurations. The wlan context specifies that we're working with wireless network settings. set hostednetwork is the command for configuring the hosted network interface, essentially creating a virtual WiFi adapter that your laptop can broadcast.
mode=allow: Enables the hosted network, allowing it to function.ssid="YourHotspotName": Specifies the Service Set Identifier (SSID), the name that will be displayed when devices scan for available WiFi networks. Choose a descriptive and recognizable name.key="YourPassword": Sets the password for your hotspot. This is crucial for securing your connection and preventing unauthorized access. Select a strong, unique password.
The start hostednetwork command activates the hosted network, turning your laptop into a functional WiFi hotspot. Conversely, stop hostednetwork deactivates the hotspot, disabling the broadcast.
Optimizing Your Hotspot: Fine-Tuning for Peak Performance
Once your hotspot is up and running, you can further optimize its performance for the best possible experience.
Network Adapter Selection: Ensure that the correct network adapter is being used for internet sharing (this is especially important if you have multiple network adapters).
- Windows: Go to Control Panel -> Network and Internet -> Network and Sharing Center -> Change adapter settings. Right-click on your primary internet connection (e.g., Ethernet or WiFi) and select "Properties." Click the "Sharing" tab and check the box that says “Allow other network users to connect through this computer’s Internet connection.” In the dropdown, select the virtual adapter created by the hosted network.
- macOS: In System Preferences > Sharing, ensure that the “Share your connection from” option is set to your primary internet connection, and the “To computers using” option is set to Wi-Fi.
Channel Selection: WiFi networks operate on different channels. To avoid interference, it's advisable to select a channel that is less congested. Some laptops and devices have integrated tools to determine this. You can often change the channel in the settings of your wireless router.
- Windows: You can view your current channel using the aforementioned commands.
- macOS: macOS usually handles channel selection automatically. However, you can access a more advanced setup with additional software like Wireless Diagnostics.
Security Protocols: The default security protocol for your hotspot is usually WPA2-PSK or WPA3-PSK. These offer strong encryption.
Troubleshooting Common Issues: A Swift Guide
While this method is generally reliable, you may encounter some issues. Here's how to address them:
- "Hosted network failed to start" Error: This might indicate a driver issue or a conflict with other network software. Try updating your wireless network adapter drivers. Go to Device Manager (search for it in Windows) and update your drivers. Consider restarting your laptop.
- No Internet Connection: Confirm that your laptop has a working internet connection. Verify that you've correctly shared the internet connection as outlined above. Double-check your password and network name.
- Slow Speeds: Interference from other devices can impact speeds. Try moving your laptop closer to the devices connecting to your hotspot or experiment with different WiFi channels. Ensure you are running the latest network adapter drivers.
- Devices Cannot Connect: Ensure that devices are using the correct security key (password) and that the hotspot is active. Check that the devices have sufficient signal strength.
Advantages of the Software-Free Approach
The advantages of using this approach are numerous:
- No Software Bloat: You bypass the need for potentially resource-intensive and often cluttered software applications.
- Enhanced Security: By minimizing the software footprint, you reduce the attack surface of your system.
- Complete Control: The command-line method offers granular control over network settings.
- Seamless Integration: This approach works natively. There is no need to install any software.
Beyond the Basics: Advanced Customization
For those who desire even greater control, the command-line method allows for advanced customization.
- Configure Maximum Clients: You can limit the number of devices that can connect to your hotspot, enhancing security and bandwidth management.
- Set a Custom MAC Address: While less common, you can manually configure the MAC address of the virtual network adapter.
- Script Automation: Automate the hotspot creation and management process using batch scripts (Windows) or shell scripts (macOS).
Conclusion: Embrace the Software-Free Revolution
The ability to create a WiFi hotspot from your laptop without relying on any software is a powerful tool, offering both convenience and control. By embracing the hidden capabilities of your operating system, you can enjoy easy internet sharing. Following these steps, you'll be well on your way to unlocking a more connected and efficient digital experience. No software installation is required. This approach ensures robust performance and is the best and most streamlined way to transform your laptop into a personal WiFi hotspot.
