how to make your laptop wifi hotspot windows 7

Title: How to Create a WiFi Hotspot with Windows 7
Channel: 1stepatatime
How to Create a WiFi Hotspot with Windows 7 by 1stepatatime
how to turn my laptop into a hotspot windows 7
Turn Your Windows 7 Laptop into a WiFi Hotspot in 60 Seconds!
Unleash Your Inner Wireless Guru: Transform Your Windows 7 Laptop into a WiFi Hotspot
Hey there, fellow tech enthusiasts! Ever found yourself in a connectivity conundrum? Maybe your phone's data is running low, or perhaps you're stuck in an area with spotty Wi-Fi. Fear not! Because today, we're diving headfirst into a nifty trick. You can transform your trusty Windows 7 laptop into a fully functional WiFi hotspot. And the best part? It's surprisingly easy and fast. Get ready to embrace the power of wireless freedom!
Setting the Stage: The Magic of a Virtual Hotspot
Before we jump in, let's clarify a few things. Creating a hotspot on your Windows 7 laptop utilizes a feature. It's essentially a virtual router. Your laptop will broadcast its internet connection as a wireless signal. This allows your other devices to connect. Think of it as a secret conduit for internet access. But consider this a quick, discreet, and user-friendly solution. So, without further ado, let's proceed.
Step-by-Step: Your Swift Guide to WiFi Liberation
Ready to witness the transformation? Follow these straightforward steps to create your own WiFi hotspot. It will undoubtedly take less time than brewing a cup of coffee. Trust me—you'll be amazed at how simple it is.
Firstly, navigate to your Windows 7 desktop. Then, right-click on the network icon. This icon is in the system tray, often found in the bottom-right corner of your screen. From the context menu, choose "Open Network and Sharing Center." Now, you're on the path to WiFi enlightenment.
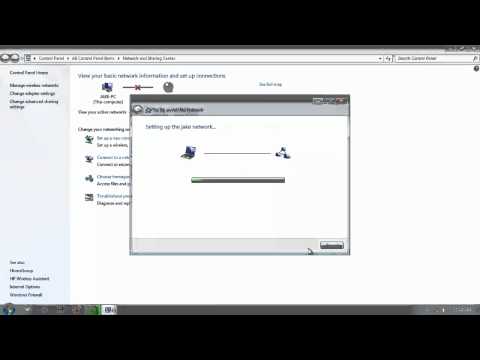
Next, click on "Set up a new connection or network." A window will appear with several options. Select "Set up a wireless ad hoc (computer-to-computer) network." Don't let the "ad hoc" terminology throw you. It's perfectly suitable for creating a hotspot. Click "Next" to proceed.
Here comes the fun part—configuring your hotspot. In the following window, enter a network name. This is the name that other devices will see. Give your hotspot a memorable name. Alternatively, you can go for something practical. After that, choose a security type. WPA2-Personal is generally a good choice for security. Finally, create a strong password. This password will protect your network from unauthorized access. Then, tick the box next to "Save this network." Click "Next" to finalize these settings.
Finally, you will see a confirmation screen. Your hotspot is now set up! You can start the connection by clicking "Turn on Internet Connection Sharing." Don't worry if it takes a moment to initiate. Your laptop will now act as a wireless router. Consequently, your hotspot is now active.
Sharing the Love: Understanding Internet Connection Sharing
But how does your laptop share its internet? The answer lies in Internet Connection Sharing (ICS). ICS is a feature in Windows. It allows one device to share its internet connection with others. Initially, you will need a connection, such as Ethernet or existing Wi-Fi. Your laptop then shares this connection with the devices connected to your new hotspot. This is a fundamental concept to grasp.
Moreover, if you are using an Ethernet cable for internet access, that's perfect. However, if you are using Wi-Fi to connect to the internet, you may face some limitations. In this case, the wireless adapter will be responsible for receiving and transmitting data. So, it might impede the speed of your connection. As a result, a wired connection generally yields the best performance.
Connecting Your Devices: The Wireless Symphony
Now that your hotspot is active, it's time to connect your other devices. Grab your phone, tablet, or any other gadget. They will now join the party!
First, go to your device's Wi-Fi settings. Then, scan for available networks. You should see the name you entered when you set up the hotspot. Select it and enter your password. After a moment, your device should connect. Congratulations—you've successfully joined your own wireless network!
Troubleshooting: Navigating Common Roadblocks
Occasionally, things don't go perfectly. But don't fret. Let's address some common issues. If you encounter problems, remember these tips.
If your hotspot isn't visible, ensure the "Internet Connection Sharing" is enabled. Check your network adapter settings to confirm. Additionally, make sure your firewall isn't blocking the connection sharing. In the event that any of these don't work, restart your laptop. This simple step often resolves minor glitches.
If devices connect but can't access the internet, double-check your internet connection on the laptop. Make sure you have an active internet connection. Verify your hotspot password as well. Finally, consider updating your network adapter drivers. They can occasionally cause problems.
Beyond the Basics: Exploring Advanced Settings
Want to fine-tune your hotspot? You can delve into advanced settings within your network adapter properties. For example, you can adjust the channel your hotspot uses to minimize interference. You could also limit the number of devices connected. These advanced configurations will increase your control. Exploring these options can improve your experience.
Wrapping Up: The Power in Your Hands
There you have it! You've successfully transformed your Windows 7 laptop into a WiFi hotspot. This is a valuable skill in today’s world. You are now ready to share your internet connection anywhere. You have the power to create your own wireless network on demand. So, go forth and spread the Wi-Fi love! I hope you have enjoyed this article.
Laptop WiFi: The SHOCKING Truth You NEED to Know!Let's craft an awesome guide!
Turn Your Windows 7 Laptop into a WiFi Hotspot in 60 Seconds!
Hey there, fellow tech enthusiasts! Ever been in a sticky situation needing Wi-Fi, desperately clinging to your Windows 7 laptop, and wishing you could share your precious internet connection? We've all been there. Stuck in a hotel room with a flaky connection, trying to get work done on a train, or maybe just wanting to share your mobile data with your tablet. Well, guess what? You don't need magic, just a little know-how! Today, we're diving headfirst into the super-simple world of turning your Windows 7 laptop into a personal Wi-Fi hotspot, and, promise, it’s going to blow your mind with how fast it is. Consider it your laptop’s superpower—a secret weapon against the digital drought.
1. The "Why" and the "Wow": Understanding the Need
Before we jump in, let's take a quick moment to appreciate why this is so valuable. Think of your laptop as the internet’s Swiss Army knife. It’s got the potential to connect multiple devices, allowing you to share your single internet connection (whether it's wired Ethernet or a mobile broadband dongle) with all your other gadgets. Phones, tablets, gaming consoles—they can all join the party. It’s like having a personal, on-demand Wi-Fi signal in your pocket, a beacon of connectivity wherever you go. Pretty cool, right? No more frantic searching for open Wi-Fi networks or paying exorbitant fees for hotel internet. It's all about freedom, flexibility, and a touch of digital wizardry.
2. The Magic Ingredient: Your Windows 7 Laptop
Yes, you heard right! Even with the older Windows 7, the capability to create a Wi-Fi hotspot is built right in, ready and waiting to be unleashed. (Don't worry, we won't ask you to rummage through any complex settings menus or wrestle with tricky installations. It's all about finding the right path, which we’ll illuminate through this article.) Your laptop is essentially a broadcasting station, using its Wi-Fi adapter to transmit a signal that other devices can connect to. You don't need to install any extra software; it's all about manipulating Windows settings. Think of it as unlocking a hidden talent your laptop always possessed. Like teaching a dog to do tricks or a cat to sing.
3. The Easy Road: Setting Up Your Virtual Wi-Fi
Now, for the fun part. We're going to set up the virtual Wi-Fi network. Remember, this is the core of how you create the hotspot, so pay attention!
Step 1: Open Command Prompt (Run as Administrator). The Command Prompt is like a secret portal to your laptop's inner workings. You can find it by searching for "cmd" in your Start menu. Make sure to right-click on it and select "Run as administrator." Think of it as putting on your invisibility cloak, allowing you to access hidden command functionality. Trust me, it's easier than it sounds.
Step 2: Enter the Magic Commands. This is where the real magic happens. Type the following commands into the Command Prompt and hit Enter after each:
netsh wlan set hostednetwork mode=allow ssid="YourHotspotName" key="YourPassword"
Replace "YourHotspotName" with the name you want to give your Wi-Fi hotspot (e.g., "MyAwesomeWiFi"). Make it something memorable! And for "YourPassword," choose a strong password (at least eight characters) that you will remember. This is your security guard, preventing unwanted guests from crashing your party.
netsh wlan start hostednetwork
This command activates your virtual Wi-Fi network. It's like flipping the switch to turn on the broadcast.
4. Sharing the Love: Sharing Your Internet Connection
The network is alive, but we still need to route traffic through it. We link your internet connection to the hotspot. Here's how:
Step 1: Open Network and Sharing Center. You can usually find this by clicking the network icon in your system tray (the bottom-right corner of your screen) and selecting "Open Network and Sharing Center." Alternatively, you can find it in the Control Panel.
Step 2: Change Adapter Settings. In the Network and Sharing Center, click on "Change adapter settings" (usually on the left side). This will bring up a list of your network adapters.
Step 3: Share Your Existing Connection. Identify your active internet connection (e.g., Ethernet or Wi-Fi). Right-click on it and select "Properties."
Step 4: Enable Internet Connection Sharing. A "Sharing" tab exists in the properties window. Select it, and tick the box that says "Allow other network users to connect through this computer's Internet connection.” Then, in the dropdown menu under "Home networking connection," select the "Microsoft Virtual Wi-Fi Miniport Adapter." It's usually labelled as "Local Area Connection* X," but don't worry if you have a few of these adapters. Note down the one that aligns with the virtual network.
Now click "OK" and you're all set!
5. Troubleshooting: When Things Don't Quite Click
Not everything works flawlessly; sometimes, we hit a snag. Don't worry; it's a common part of the tech journey. Here are some common problems and their solutions:
- Problem: The hosted network won't start.
- Solution: Make sure your Wi-Fi adapter is enabled. Run the command
netsh wlan show driversin Command Prompt (as administrator) and check if your adapter supports hosted networks. If the status is "No," your adapter might not be compatible. Update your drivers.
- Solution: Make sure your Wi-Fi adapter is enabled. Run the command
- Problem: Other devices can't connect.
- Solution: Double-check the name and password you entered and ensure you haven't reached the maximum number of connected devices.
- Problem: Devices connect, but there's no internet.
- Solution: Make sure you've correctly shared your internet connection with the virtual adapter following our instructions in section 4.
6. The 60-Second Guarantee? Well, Almost!
We promised 60 seconds, and while the actual execution might vary based on your tech prowess, that's the overarching goal, isn't it? Think of it this way: from the moment you know the steps, it can take less than a minute. It's all about familiarity. After a few practice runs, turning on your hotspot will become as natural as brushing your teeth.
7. Security First: Protecting Your Digital Fortress
While convenience is great, security is non-negotiable. Here's a quick reminder:
- Use a Strong Password: Never use something obvious or easy to guess. Combine uppercase and lowercase letters, numbers, and symbols.
- Keep Your Software Updated: Ensure your Windows 7 system is up-to-date with security patches.
- Monitor Connected Devices: Occasionally check who's connected to your hotspot in Network Connections.
8. Why This Matters: Beyond Convenience
Why go through all this? Sure, it's about sharing internet, but it's also about:
- Cost Savings: Avoiding hotel Wi-Fi fees or data overage charges.
- Enhanced Productivity: Staying connected on the go, whether working or streaming.
- Digital Freedom: Controlling your internet experience wherever you are.
9. The Power of Command Prompt: Unlocking Hidden Potential
We utilized the Command Prompt, but it goes beyond simply starting your hotspot. It's a versatile tool to manage your computer's network settings, which offers powerful capabilities for troubleshooting and customization.
10. Mobile Connectivity: Sharing your Phone's Data
Using the laptop as a hotspot often comes in handy with a mobile phone. Let’s say you have a data connection on your phone, but no built-in Wi-Fi for the tablet? You can use your Windows 7 laptop as a go-between, and now, both devices are connected and share data.
11. What About Battery Life? Tips to Maximize Usage
Running a hotspot uses up battery life.
- Be Mindful: Keep the number of connected devices to a minimum.
- Power Saver: Place your laptop in power-saving mode.
- Close Applications: Close down the apps you are not using.
12. Beyond Windows 7: Adapting the Strategy
While this guide focuses on Windows 7, the fundamental concepts are transferrable. Other Windows versions have similar capabilities, though the exact steps might be different. Research for your specific operating system, and you will find corresponding guides.
13. The Future of Connectivity: What's Next?
Expect advancements in mobile data technologies and hotspot functionality. Hotspot capability is only growing more vital as we become increasingly reliant on mobile devices.
14. Personal Anecdotes: My Wi-Fi Saving Stories
We all have anecdotes. I remember an urgent client call. I was in a hotel with a slow connection and a deadline looming. The laptop hotspot was my salvation. It saved the day!
15. Unleash the Power: Your
Unlock Blazing-Fast Mobile WiFi on Your Laptop!Turn Your Windows 7 Laptop into a WiFi Hotspot 2
By AvoidErrors Turn Your Windows 7 Laptop into a WiFi Hotspot 2 by AvoidErrors
Create a laptop WiFi hotspot in under 30 seconds Windows 7
By jacobspeeds Create a laptop WiFi hotspot in under 30 seconds Windows 7 by jacobspeeds
Turn Your Windows 7 Laptop into a WiFi Hotspot

By AvoidErrors Turn Your Windows 7 Laptop into a WiFi Hotspot by AvoidErrors
Title: How to make your Windows 7 PC, a Wi-Fi hotspot
Channel: Tech Raj
How to make your Windows 7 PC, a Wi-Fi hotspot by Tech Raj
Working With Laptop
Turn Your Windows 7 Laptop into a WiFi Hotspot in 60 Seconds!
In this digital age, the need for seamless connectivity is paramount. We find ourselves increasingly reliant on the internet for work, communication, and entertainment. Whether you're a seasoned professional or a casual user, the ability to create a WiFi hotspot from your Windows 7 laptop can be a game-changer. It transforms your portable device into a mobile internet hub, allowing you to share your internet connection with other devices, irrespective of your location. This guide offers a straightforward, step-by-step method to achieve this, all within a minute’s time.
Understanding the Underlying Technology: The Hosted Network
The magic behind this transformation lies in a built-in Windows 7 feature known as the Hosted Network. This is a virtualized version of your laptop's wireless adapter. Windows 7 and versions above, provide the capacity to share both your wired and wireless internet connection over a new wireless network that your laptop creates. Effectively, Your portable computer acts as a router. It broadcasts a WiFi signal that other devices can connect to, thus, giving them internet access.
Prerequisites: Ensuring Your Laptop is Ready
Before we dive into the process, it's absolutely crucial to ensure that your laptop is equipped to handle this functionality. Not every device is created equal, and specific requirements must be met for this method to work smoothly.
- Wireless Network Adapter: Your laptop must have a functional wireless network adapter. This is the component that transmits the WiFi signal. Most Windows 7 laptops come equipped with this, but it's prudent to check, especially if you're using an older model. You can verify its presence by opening the Device Manager (search for "Device Manager" in the Start menu) and looking under "Network adapters." A listed wireless adapter signifies that you are fit and prepared.
- Operating System: This guide is tailored specifically for Windows 7. Make sure your device is running this specific operating system.
- Administrative Privileges: You need to be logged into an account with administrative privileges. This enables you to make system-level changes.
Step-by-Step Guide: Creating Your Hotspot in Under 60 Seconds
Now, the moment we have been awaiting is upon us. Let's jump right into creating the WiFi hotspot. The steps, when followed correctly, will have you connected to the internet in your new WiFi network rapidly.
Launch the Command Prompt as Administrator: This is the control center for our configuration. Click Start, type "cmd" in the search box, and then right-click "Command Prompt" in the results. Choose "Run as administrator." This is vitally important; the command prompt must have administrative permissions.
Enable the Hosted Network: In the Command Prompt window, type the following command, and press Enter:
netsh wlan set hostednetwork mode=allow ssid="YourHotspotName" key="YourPassword"- Replace "YourHotspotName" with the desired name for your WiFi hotspot network and "YourPassword" with a secure password. Choose a strong password (at least eight characters) to ensure the security of your connection. This command creates a new virtual network interface, allowing other devices to join your access point.
Start the Hosted Network: Next, type the following command and press Enter:
netsh wlan start hostednetworkThis command will activate the hosted network and begin broadcasting the WiFi signal, which is now ready for connection.
Sharing Your Internet Connection: This step is crucial to the ultimate functionality.
- Open the Network and Sharing Center (search for it in the Start menu, or access it from the control panel).
- Click on "Change adapter settings" on the left-hand side.
- Identify the network adapter that connects to the internet (this is usually your wired Ethernet connection or your primary WiFi adapter).
- Right-click the connection and select "Properties."
- Navigate to the "Sharing" tab.
- Check the box that says, "Allow other network users to connect through this computer's Internet connection.”
- In the "Home networking connection" dropdown, select the Microsoft Hosted Network Virtual Adapter.
- Click "OK."
This allows your internet connection to be shared through your new WiFi network.
Connecting Devices to Your Hotspot: On any device with WiFi capability (smartphone, another laptop, tablet), search for available WiFi networks. Your newly created hotspot name, "YourHotspotName", will be visible in the list. Select it, enter your password, and connect. Your device should now have internet access.
Troubleshooting Common Issues: Ensuring a Smooth Experience
Even with a simple process, things can go awry. Here's how to identify and resolve frequent issues.
- "The hosted network couldn't be started." This is the most common hiccup. Potential causes include:
- Driver Issues: Outdated or corrupted wireless network adapter drivers can hinder the operation. Update drivers from the manufacturer's website.
- Conflicting Software: Certain security software or other network management programs can sometimes interfere. Temporarily disabling them can help diagnose the issue.
- Unsupported Hardware: Although rare, some wireless adapters may lack full support for the Hosted Network feature.
- Devices unable to connect:
- Incorrect Password: Double-check the password you entered on the connecting device.
- Radio Interference: Ensure the laptop is not too far from the connecting device or obstructed by physical barriers.
- Limited Device Connection: Some wireless adapters may have a limited number of simultaneous connections.
- No Internet Access on Connected Devices:
- Incorrect Sharing Settings: Carefully review the internet connection sharing settings (step 4 above). Make sure you've selected the correct network adapter and the virtual adapter.
- Firewall Issues: Your Windows Firewall or a third-party firewall might be blocking the connection. Temporarily disable the firewall (for testing purposes only!) and check if it resolves the issue. Then adjust firewall rules to allow traffic.
Customization and Advanced Settings: Fine-Tuning Your Hotspot
While the basic setup is straightforward, you may want to tailor the hotspot to your needs.
- Changing the Hotspot Name and Password: If you need to change the hotspot name or password, you will need to disable the hosted network first by typing
netsh wlan stop hostednetworkin the Command Prompt, and then repeating the setup process. - Monitoring Connected Devices: The command
netsh wlan show hostednetworkin command prompt will show you the details like the number of connected devices. - Setting the Network Bandwidth: While Windows 7 does not offer direct control over the bandwidth, you can set up Quality of Service (QoS) settings to prioritize certain types of traffic.
- Using the WiFi Hotspot for the Long Run: The process is effective for the long term. Your WiFi hotspot will continue to work until one of the following happens; your laptop restarts, or the hosted network is manually disabled.
Security Best Practices: Protecting Your Connection
Security is paramount when setting up a WiFi hotspot. Here's how to ensure a secure connection:
- Strong Passwords: Always use a strong, unique password. Avoid easily guessable words or phrases.
- Encryption: Ensure WPA2 or WPA3 encryption is enabled on your wireless network adapter.
- Monitor Connected Devices: Regularly check which devices are connected to your hotspot and disconnect any unrecognized ones.
- Keep Your Laptop Secure: Ensure your Windows 7 laptop is up-to-date with the latest security patches and that you have an active antivirus program.
Beyond the Basics: Further Applications
The ability to create a WiFi hotspot opens up a realm of possibilities:
- Sharing Internet on the Go: Ideal for connecting multiple devices when a public WiFi is unavailable.
- Testing Network Connectivity: Useful for troubleshooting or testing network connections.
- Creating a Temporary Network: This method creates a temporary network where you can share a connection with other devices.
- Connecting Devices with No WiFi: Great for connecting devices such as older game consoles and other devices.
Conclusion: Unlocking Your Laptop's Hidden Potential
Creating a WiFi hotspot from your Windows 7 laptop is a valuable skill, providing a convenient and versatile way to share your internet connection. With the steps outlined above, you can transform your laptop into a mobile internet hub within just a few seconds. Remember to troubleshoot any issues diligently and to prioritize security to ensure a safe and seamless experience. Embrace this capability, and enhance your internet activities and your versatility.
