how to reset wifi card on laptop

Title: How To Reset Wifi and Ethernet Network Adapter in Windows 11
Channel: HOWZA Office Software
How To Reset Wifi and Ethernet Network Adapter in Windows 11 by HOWZA Office Software
how to reset wifi card on laptop, how to change wifi card on laptop, how to restart wifi card on laptop, how to reset wireless card in laptop, how to change wifi card in dell laptop, how to change wifi card in hp laptop, can you change wifi card in laptop, how to reset wifi on laptop
WiFi Nightmare? Reset Your Laptop's Card NOW!
Is Your Wi-Fi Giving You the Wireless Blues? Breathe New Life Into Your Laptop's Connection!
Have you ever stared at your laptop, a frustrating blue screen reflecting the turmoil in your digital life? Is your Wi-Fi the villain in this story? Do you yearn for the days of seamless streaming and lag-free video calls? If so, you're in the right place. Today, we'll uncover a simple, yet often overlooked, solution that could banish those wireless woes forever. We’re talking about resetting your laptop's network card.
The Silent Saboteur: Recognizing the Signs of a Troubled Connection
Before we dive into the fix, consider this: are you experiencing intermittent dropouts? Are pages loading at a glacial pace that rivals the age of dial-up? Perhaps your connection has become unreliable, and it constantly disconnects. Maybe it's even refusing to connect altogether. Then, you almost certainly have a problem. These are all telltale signs that your laptop's wireless adapter may be experiencing a hiccup. In fact, it could be a full-blown digital meltdown.
Unearthing the Culprit: Why Your Wi-Fi Might Be Failing You
So, what's the root cause of these connection calamities? Well, it could be a myriad of things. The most common culprits? Software glitches, outdated drivers, or even temporary conflicts with other programs. But don't worry! The cure might be simpler than you expect. It's often just a matter of resetting your network card. Moreover, it offers a quick and easy solution that you can often do yourself. It's a digital reset button for your Wi-Fi.
The DIY Doctor: Resetting Your Laptop's Network Card – A Step-by-Step Guide
Now, let's equip you with the knowledge to take action. Fortunately, the process is generally straightforward. The actions are usually very similar across different operating systems, like Windows or MacOS. Follow these simple instructions.
Step 1: Accessing Your Network Settings: First, navigate to your network settings. On Windows, you can search for "Network Connections" in the Start menu. On macOS, you'll find these settings in "System Preferences" under "Network".
Step 2: Disabling the Adapter: Locate your Wi-Fi adapter in the list. Right-click on it, and select "Disable." This effectively shuts down your wireless connection.
Step 3: Waiting Patiently: After disabling your adapter, give it about 10-20 seconds. Remember, it's a brief digital pause, allowing the system to clear its internal cache.
Step 4: Re-enabling the Magic: Right-click on your Wi-Fi adapter again. Select "Enable." You're now giving your network card a fresh start.
Step 5: Reconnecting and Testing: Finally, reconnect to your Wi-Fi network by entering your password. Test your connection by browsing the web or streaming a video. Hopefully, everything works smoothly, and your wireless troubles are in the past.
Troubleshooting Titans: What to Do If the Reset Didn't Work
However, what if you still experience issues? Do not despair. Sometimes, a simple reset isn’t enough. Begin with the driver. Ensure that your network adapter drivers are up-to-date. In Windows, you can check for updates through the Device Manager. On macOS, driver updates are generally handled automatically through the system updates. Furthermore, consider restarting your router and modem. It's a classic, but it often resolves connectivity problems. Maybe there's a conflict with another device on your network? Perhaps you should temporarily disable any firewalls or security software. Furthermore, check your physical environment. Obstructions can sometimes affect your Wi-Fi signal.
Beyond the Reset: Proactive Habits for Wireless Wellness
Once you've addressed the immediate problem, adopt some habits. Thus, you'll keep your Wi-Fi running smoothly. Regularly update your router's firmware. This is also crucial for security and performance. Moreover, consider your router’s placement. Position it in a central location, away from walls and other obstacles. Another idea: limit the number of devices connected to your network if you notice a slowdown. Also, occasionally clear your browser's cache and cookies. These can sometimes interfere with your connection.
The Final Connection: Reclaiming Your Digital Freedom
In conclusion, a simple reset of your laptop's network card can often be the key to unlocking a flawless Wi-Fi experience. You don't need to be a tech expert. Follow the steps, and you'll be back online in no time. So go ahead, take control of your wireless destiny, before that dreaded blue screen appears. Breathe easy, embrace the possibilities, and enjoy a seamless, frustration-free online experience. After all, in a world of digital connectivity, a stable Wi-Fi signal is indeed a precious commodity. Now, connect, stream, and browse with renewed confidence!
Unlock Your PS3's Power: Wireless Gameplay on Your Laptop!WiFi Nightmare? Reset Your Laptop's Card NOW!
Let's face it: we've all been there. You're in the middle of an important video call, that epic online game, or just trying to binge-watch your favorite show, and bam! The dreaded buffering symbol appears, mocking your connectivity dreams. The WiFi, that seemingly magical portal to the digital world, has decided to go on strike. But before you hurl your laptop across the room (we've all considered it!), there's a simple, often overlooked solution: resetting your laptop's WiFi card. Think of it as giving your digital connection a much-needed reboot, like hitting the reset button on a temperamental toddler.
1. The Frustration of a Crummy Connection: Recognizing the WiFi Blues
We all know the feeling. That slow internet, the dropped Zoom calls, the inability to stream anything without the spinning wheel of despair. It's infuriating! It's like trying to navigate a busy city street with a blindfold on. You stumble, you get frustrated, and you waste precious time. And the worst part? You often don't know why the connection is so bad. Is it the router? The internet provider? Or perhaps, just perhaps, it's your laptop's WiFi card throwing a tantrum?
2. Why Resetting Your WiFi Card Is Your Digital Superpower
So, why reset the WiFi card? Well, think of your WiFi card as a tiny messenger between your laptop and the router. Sometimes, this messenger gets a little… confused. It gets bogged down with temporary files, cached data, or just plain glitches. Resetting the card clears out the cobwebs, so to speak, and allows it to establish a fresh, clean connection. It is akin to rebooting your car's engine when it stalls on the highway. It is often the simplest and quickest fix for a whole host of WiFi woes.
3. Unveiling the Culprit: Common Signs It's Time for a Reset
How do you know when it’s time to give your WiFi card a digital spanking and reset? Here are some tell-tale signs:
- Slow Internet Speeds: Websites loading at a snail's pace? Downloads taking forever? This is a major red flag.
- Intermittent Connectivity: Dropped connections, frequent disconnects, or the dreaded "no internet" message.
- Unable to Connect: Your laptop can't see or connect to the available WiFi networks.
- Poor Signal Strength: Despite being close to the router, your signal strength is weak or fluctuating.
- Unexplained Errors: You might encounter error messages related to network connectivity.
If you're experiencing one or more of these issues, a WiFi card reset is a good first step.
4. The Great Divide: Windows vs. macOS - Different Strokes, Different Folks
The process of resetting your WiFi card varies slightly depending on whether you're a Windows or a macOS user. That said, both systems offer relatively simple solutions. It is like having different car manufacturers: both will get you there, but some features will differ.
5. Windows Warriors: Resetting Your WiFi Card in Windows 10/11
For Windows users, the process is usually straightforward. Here’s a simplified approach:
- Method 1: The Quick Restart: The simplest way is often the most effective. Click the Start button, then the Power icon, and select "Restart." This often clears up minor glitches.
- Method 2: The Device Manager Dive: Search for "Device Manager" in the Windows search bar and open it. Click the arrow next to "Network adapters" to expand the list. Right-click your WiFi adapter (it'll have a name like "Wireless Network Adapter" or similar) and select "Disable device." Wait a few seconds, then right-click again and select "Enable device."
- Method 3: The Network Troubleshooter: Windows has a built-in troubleshooter. Search for "Network troubleshooter" in the search bar and run it. It will automatically diagnose and attempt to fix network issues.
6. macOS Mavericks: Resetting Your Mac's WiFi Card
Mac users, fear not! Resetting your WiFi card is just as easy. It is a seamless process, similar to Apple's smooth aesthetics.
- Method 1: Turning WiFi Off and On: The easiest method is to click the WiFi icon in the menu bar and turn WiFi off, then back on. Obvious, but effective!
- Method 2: Restart Your Mac: A full restart, just like Windows, can often resolve connectivity issues. Click the Apple icon in the top-left corner and select "Restart."
- Method 3: Network Preferences Reset: Open System Preferences, then click "Network." Select your WiFi connection in the left-hand pane, then click the "Advanced" button. In the Advanced settings, navigate to the "TCP/IP" tab, and click "Renew DHCP Lease." Click "OK," then "Apply." This refreshes your network settings.
7. Beyond the Reset: Exploring Other Potential WiFi Issues
While resetting your WiFi card is a great first step, it's not always the silver bullet. Here are some other potential sources of WiFi problems:
- Your Router: Is it old? Is it overloaded? Have you tried restarting it (yes, the classic "turn it off and on again" trick)? Sometimes, the problem lies with the router, not your laptop.
- Internet Service Provider: Is your internet provider experiencing an outage? Check their website or contact them to see if there are any known issues in your area.
- Distance and Obstructions: The further you are from your router and the more walls or objects between you and it, the weaker your signal.
- Other Devices Interfering: Other electronic devices can interfere with your WiFi signal, especially microwaves.
- Software Updates: Outdated drivers or software can cause problems. Make sure your operating system and WiFi drivers are up-to-date.
8. Troubleshooting Tips: When the Reset Doesn't Work
If the WiFi card reset doesn't solve the problem, don't despair! Here are some additional troubleshooting steps:
- Check Your Connection: Ensure your router is connected to the internet.
- Restart Your Router: This is the first step in troubleshooting many network problems.
- Update Your Drivers (Windows): In Device Manager, right-click on your WiFi adapter and select "Update driver."
- Forget and Rejoin the Network: On your laptop, "forget" the WiFi network and then reconnect, entering your password again.
- Contact Your ISP: If all else fails, it might be time to contact your internet service provider for assistance.
9. Optimizing Your Setup: Boosting Your WiFi Performance
Once you've got your connection back on track, here are some tips to improve your WiFi performance:
- Position Your Router Strategically: Place your router in a central location, away from obstructions and other electronic devices.
- Secure Your Network: Use a strong password and enable WPA2 or WPA3 encryption to prevent unauthorized access.
- Upgrade Your Router: If your router is old, consider upgrading to a newer model with faster speeds and better range.
- Use a WiFi Analyzer: Use a tool to identify the best WiFi channels to avoid interference from neighbors' networks.
- Limit Devices: Reduce the number of devices connected to your WiFi at the same time.
10. Driver Dilemmas: Windows Driver Updates Explained
Keeping your device drivers updated is essential for optimal performance. If your WiFi is still giving you headaches, check for driver updates. Go to the Device Manager (as described earlier), expand "Network adapters," right-click on your WiFi adapter, and select "Update driver." Windows will search for and install any available updates.
11. macOS Driver Dynamics: Keeping Your Mac WiFi Drivers in Top Shape
Unlike Windows, macOS often handles driver updates automatically through its system updates. Ensure that your macOS is up-to-date by going to System Preferences > Software Update. However, if you're experiencing persistent issues, you might need to download and install updated drivers from the manufacturer of your WiFi adapter. But sometimes, it is unnecessary to fiddle with drivers.
12. The Router's Role: Understanding Your WiFi Gateway
Your router is the central nervous system of your home network. Understanding its role is key to troubleshooting WiFi problems. Check its lights; a blinking light often symbolizes an issue. If the lights are orange or red instead of green or blue, it may signify an issue with your internet connection.
13. Channel Surfing for WiFi Bliss: Optimizing Your WiFi Channel
WiFi routers broadcast on different channels. These channels can get crowded, causing interference. Use a WiFi analyzer app on your smartphone to identify the least congested channel and then configure your router to use that channel. Think of it like choosing the least busy lane on the highway.
14. Security First: Protecting Your WiFi Network
Always secure your WiFi network with a strong password. This prevents unauthorized access and protects your data from prying eyes. Use WPA2 or WPA3 encryption, the most secure encryption protocols. Ensure that whoever gets into your WiFi does not have access to all your personal data.
15. Beyond the Basics: Advanced Troubleshooting Techniques
For advanced users, there are often complex techniques to troubleshoot WiFi issues, but they often
HP 430 WiFi Driver Windows 7: Download & Fix No Internet NOW!How to Fix Missing Network Adapters on Windows Enable WiFi Network Adapter from BIOS Settings
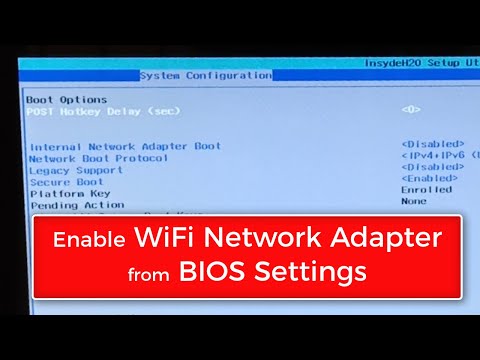
By WebbyFan How to Fix Missing Network Adapters on Windows Enable WiFi Network Adapter from BIOS Settings by WebbyFan
How to upgrade my Laptop's WiFi to WiFi 6E with M.2 card - Great choice

By Technology Moments How to upgrade my Laptop's WiFi to WiFi 6E with M.2 card - Great choice by Technology Moments
Cara Cabut WIFI Card ASUS TUF Fix Masalah WIFI Hilang Asus TUF

By Kenny DP - Tech & Games Cara Cabut WIFI Card ASUS TUF Fix Masalah WIFI Hilang Asus TUF by Kenny DP - Tech & Games

Title: How to upgrade Laptop Notebook WiFi
Channel: AVK Tech
How to upgrade Laptop Notebook WiFi by AVK Tech
Laptop Wifi Hotspot
WiFi Nightmare? Reset Your Laptop's Card NOW!
We've all been there. That infuriating moment when the little Wi-Fi icon on your laptop screen betrays you. You're in the middle of a crucial video call, attempting to stream your favorite show, or desperately trying to meet a deadline, and the dreaded "no internet connection" message appears. Before you succumb to the urge to hurl your laptop across the room, there's often a simple fix: resetting your laptop's network adapter. This often-overlooked troubleshooting step can resolve a multitude of connectivity issues, saving you time, frustration, and potentially, your sanity.
Understanding the Root of the Problem: Beyond the Router
While many immediately blame the router, the source of your Wi-Fi woes frequently lies closer to home – specifically, within your own laptop. Think of your network adapter as the translator between your laptop and the digital world. It receives and transmits the wireless signals that allow you to browse, stream, and communicate. Like any piece of hardware, this adapter can experience glitches, conflicts, or temporary malfunctions. These issues can manifest in various ways, from slow speeds to complete connection failures.
When to Suspect a Network Adapter Issue
Several telltale signs indicate that your network adapter may be the culprit. If you experience any of the following, it's time to consider a reset:
- Intermittent Connection Drops: You're connected, then disconnected, then connected again, seemingly at random intervals. This fluctuating stability can be incredibly disruptive.
- Slow Download/Upload Speeds: While slow speeds can be related to your internet plan, a malfunctioning adapter can significantly throttle your performance, even with a fast internet connection.
- Failure to Connect to Known Networks: You enter your password correctly, but your laptop simply refuses to connect to a Wi-Fi network you've used successfully countless times before.
- Limited or No Network Availability: Your laptop detects few or no available Wi-Fi networks, even when they are clearly present and functioning.
- Error Messages: System-level error messages related to networking, particularly those mentioning “network adapter,” “driver issues,” or “connection timeout.”
The Power of a Simple Reset: A Step-by-Step Guide
Fortunately, resetting your laptop's network adapter is a relatively straightforward process, most of the time. Below are the step-by-step instructions. The methodology will depend on the operating system installed on your laptop.
For Windows Users:
Accessing Device Manager: The heart of network adapter management on Windows lies within the Device Manager. To access it, right-click on the Windows start button (usually in the lower-left corner of your screen) and select "Device Manager" from the context menu. You can also search for "Device Manager" in the Windows search bar.
Navigating to Network Adapters: Once in Device Manager, locate the "Network adapters" category. Click the small arrow or triangle to expand the category and reveal the list of network adapters installed on your laptop. This list typically includes your Wi-Fi adapter (often identified by names such as "Wireless Network Adapter," "Wi-Fi Adapter," or the specific brand name of your adapter, such as "Intel Wireless-AC") and your Ethernet adapter (if you have one).
Disabling and Enabling Your Wi-Fi Adapter: Right-click on your Wi-Fi adapter and select "Disable device" from the context menu. This action temporarily deactivates the adapter. Wait a few seconds, then right-click on the same adapter again and select "Enable device." This simple toggle is often enough to reset the adapter and re-establish a stable connection.
Advanced Troubleshooting: Driver Updates: If disabling and enabling the adapter doesn't resolve the issue, the next step is to update its drivers. Right-click on your Wi-Fi adapter and select "Update driver." Windows will search for the latest drivers automatically. If it finds them, follow the on-screen prompts to install the updates. If Windows can't find any new drivers, you can also try to manually download the drivers from your laptop manufacturer's website. If you've recently updated your drivers, you may want to roll back to the previous version. To do this, right-click on the Wi-Fi adapter, select "Properties," go to the "Driver" tab, and click "Roll Back Driver."
Restarting Your Laptop: After completing the steps above, it's always recommended to restart your laptop. This ensures that all changes take effect and that any temporary glitches are cleared.
For macOS Users:
Accessing Network Preferences: On a Mac, network settings are managed through System Preferences. Click the Apple menu (in the upper-left corner of your screen) and select "System Preferences." Alternatively, you can find System Preferences in your Dock.
Selecting Network: In System Preferences, click on "Network". This will open the Network settings window.
Disconnecting and Reconnecting to Wi-Fi: In the Network window, on the left-hand side, you'll see a list of network interfaces. Select "Wi-Fi". On the right-hand side, you'll see the status of your Wi-Fi connection. You can click the "Disconnect" button to disconnect from the current Wi-Fi network. Then, after a few seconds, click the "Connect" button to reconnect.
Advanced Troubleshooting: Renewing DHCP Lease: If a simple disconnect/reconnect doesn't work, try renewing your DHCP lease. DHCP (Dynamic Host Configuration Protocol) automatically assigns your laptop an IP address when you connect to a network. Sometimes, this lease can expire or become corrupted, preventing a proper connection. Click the "Advanced…" button in the lower-right corner of the Network window. Then, go to the "TCP/IP" tab. In the "Renew DHCP Lease" area, click the "Renew DHCP Lease" button. This will prompt your Mac to request a new IP address from your router.
Deleting and Re-Adding Your Wi-Fi Network: This is a more aggressive troubleshooting step, but can prove effective. In the Network window, select "Wi-Fi" from the list of network interfaces. Click the "Advanced…" button. In "Preferred Networks," select your problematic Wi-Fi network and click the minus (-) button to remove it. Then, click "OK" and go back to the main Network window. Select "Wi-Fi" and click "Apply". Then, click "Turn Wi-Fi On" (if it isn't already on) and reconnect to your Wi-Fi network by selecting it from the list of available networks and entering your password.
Restarting Your Mac: As with Windows, restarting your Mac is always a good idea after making network changes. It allows the system to fully integrate the changes and clear any temporary issues.
Beyond the Reset: Further Troubleshooting Tips
If resetting your network adapter doesn't resolve the problem, consider these additional troubleshooting steps:
- Restart Your Router: The router is the central hub of your Wi-Fi network. It's a good practice to reboot your router as well. Unplug the router from its power source for about 30 seconds, then plug it back in. Allow the router to fully restart before attempting to connect to the internet again.
- Check Your Internet Connection: Ensure that your internet service provider (ISP) is not experiencing an outage. You can check this by visiting your ISP's website or contacting their customer support.
- Run the Network Troubleshooter: Most operating systems have built-in network troubleshooters. These tools can automatically diagnose and fix common network problems. On Windows, you can find the troubleshooter by searching for "Network troubleshooter" in the Windows search bar. On macOS, the Network Diagnostics tool can be found in the Utilities folder (Applications -> Utilities).
- Update Your Router's Firmware: Outdated router firmware can cause connectivity issues. Check your router's documentation or website to find instructions on how to update the firmware.
- Check for Interference: Wi-Fi signals can be affected by interference from other electronic devices, such as microwaves, Bluetooth devices, and cordless phones. Try moving your laptop closer to the router or away from potential sources of interference.
- Consider a Wired Connection: If you frequently experience Wi-Fi issues, consider using an Ethernet cable to connect your laptop directly to the router. This provides a more stable and reliable internet connection.
- Contact Technical Support: You might contact the laptop's manufacturer's support team for further guidance.
Prevention is Key: Maintaining Optimal Network Performance
Once you have your Wi-Fi issues resolved, remember that prevention is key. Here are some measures to maintain optimal network performance:
- Regularly Update Drivers: Keep your network adapter drivers up to date to ensure compatibility and optimal performance. Check your operating system's updates or your laptop manufacturer's website for driver updates.
- Secure Your Wi-Fi Network: Protect your Wi-Fi network with a strong password to prevent unauthorized access. Use a more secure encryption protocol, such as WPA3, if your router and devices support it.
- Monitor Your Network Usage: Keep track of the devices connected to your network and the amount of bandwidth they're using. This can help you identify any devices that may be consuming excessive bandwidth.
- Optimize Router Placement: Place your router in a central location in your home or office and away from potential sources of interference.
- **Limit the Number
