cara mengatasi laptop tidak bisa konek wifi di windows 10

Title: Cara atasi WiFi tidak bisa connect di laptop not connected
Channel: ijal tutorial
Cara atasi WiFi tidak bisa connect di laptop not connected by ijal tutorial
cara mengatasi laptop tidak bisa konek wifi di windows 10
Windows 10 WiFi Nightmare? FIX It NOW!
Here's the requested article:
Windows 10 WiFi Woes: Conquering Connectivity Chaos!
Are you perpetually battling a flaky Wi-Fi connection on your Windows 10 machine? Does the dreaded "no internet access" notification haunt your digital dreams? You're definitely not alone. Countless users worldwide grapple with frustrating wireless issues. Thankfully, there are solutions available. Let's dive in and get your connection back on track!
The Silent Saboteur: Identifying the Culprit
Before we launch into troubleshooting, consider this first. Is it truly your Wi-Fi? Sometimes, the problem isn't Windows 10. Your router, internet service provider, or even physical obstructions could be to blame. Therefore, before you tear your hair out, double-check the obvious. Test other devices and ensure your router is functioning. Is the modem showing an internet connection? Then, the issue is likely with your Windows 10 device.
Driver Dilemmas: The Root of the Problem?
Drivers can be troublesome. Outdated or corrupted network drivers are frequent culprits behind Wi-Fi problems. Because of this, updating your drivers is often the first port of call. So, how can you update them?
Navigate to Device Manager. You can find it by searching in the Windows search bar. Expand the "Network adapters" category. Right-click on your Wi-Fi adapter (it will have a name like "Wireless Network Adapter" or "Wi-Fi"). Select "Update driver." Choose "Search automatically for drivers." Windows will then scan for an updated version. If it finds one, let it install. After that, restart your computer.
In the event that this doesn't work, try uninstalling and reinstalling the driver. Right-click on your Wi-Fi adapter and choose "Uninstall device." Restart your computer. Windows should automatically reinstall the driver.
Power Saving Predicaments: Curtailing Connectivity
Sometimes, Windows attempts to conserve power by throttling your Wi-Fi adapter. This can lead to dropped connections and reduced speeds. Consequently, you might want to disable this power-saving feature.
Go back into Device Manager. Right-click your Wi-Fi adapter and select "Properties." Click on the "Power Management" tab. Uncheck the box labeled "Allow the computer to turn off this device to save power." Click "OK." Subsequently, restart your system, and check if the problem persists.
Network Troubleshooter: The Built-in Buddy
Windows 10 has a built-in troubleshooter. It can automatically diagnose and often fix common network problems. Thus, it is an excellent tool to try.
In your Windows search bar, type "Network troubleshooter" and select "Identify and repair network problems." Follow the on-screen instructions. Let the troubleshooter run its course. After it finishes, restart your computer and see if the issue is resolved.
Forget and Reconnect: A Simple Reset
Sometimes, all your Wi-Fi needs is a fresh start. Forget the network, then reconnect. This is a simple, yet effective troubleshooting step.
Click the Wi-Fi icon in your system tray. Select your Wi-Fi network. Click "Forget." Then, reconnect to the network by entering your password.
IP Address Conflicts: A Hidden Hurdle
IP address conflicts can also disrupt your Wi-Fi connection. These usually occur when two devices on your network share the same IP. Fortunately, there's a fix.
You can release and renew your IP address. Open the Command Prompt as an administrator. You can search for "cmd" in the Windows search bar, then right-click and select "Run as administrator." Type the following commands, pressing Enter after each:
ipconfig /releaseipconfig /renew
Restart your computer.
Router Reboots: The Usual Suspect
Don't underestimate the power of a good old-fashioned router reboot! Often, restarting your router can clear temporary glitches.
Unplug your router and modem. Wait for about 30 seconds. Plug them back in. Wait for the router to fully boot up. Then, try connecting to your Wi-Fi again.
Antivirus Interference: A Potential Blockade
Your antivirus software might be inadvertently blocking your Wi-Fi connection. Although rare, it can happen.
Temporarily disable your antivirus program. Try connecting to your Wi-Fi. If it works, it indicates a conflict. Check your antivirus settings. You may need to adjust the firewall settings or add your Wi-Fi adapter to a list of trusted devices. After you've done testing, re-enable.
The Last Resort: Reinstalling Windows (Carefully)
If all else fails, a full system refresh may be needed. This is a drastic step. Make sure you back up all of your essential files.
You can either reset Windows 10. Consider a clean installation. This wipes your drive and installs a fresh copy of Windows. Be warned! It will remove everything on your hard drive. Therefore, back up all important files first. Follow the on-screen instructions.
Staying Connected: Proactive Measures
Preventing problems is always better than solving them. Regularly update your Windows 10 system. Keep your network drivers current. Use a strong password for your Wi-Fi. Consider using a Wi-Fi extender. This can broaden the range of your Wi-Fi network. By following these tips, you can enjoy a faster, more reliable wireless connection.
Android Wifi Tethering: Laptop to Phone, Lightning Fast!Windows 10 WiFi Nightmare? FIX It NOW!
Hey there, internet wanderer! Are you tearing your hair out because your Windows 10 WiFi keeps dropping, acting slow as molasses, or flat out refuses to connect? Trust me, we’ve all been there. It's the digital equivalent of being stuck in rush hour traffic – utterly frustrating and incredibly time-consuming. But fear not, because we’re about to dive headfirst into the world of WiFi troubleshooting and emerge victorious. Consider this your personal survival guide to escaping the WiFi abyss. Let's get this fixed, shall we?
1. The WiFi Apocalypse: Why Is Windows 10 Giving You Grief?
Before we arm ourselves with solutions, let’s understand the enemy. Why is your Windows 10 system suddenly behaving like a grumpy teenager when it comes to WiFi? The reasons are numerous, and sometimes it's a perfect storm of factors. It could be outdated drivers, conflicting software, your router's having a bad day, or even simple hardware hiccups. Just think of your WiFi as a delicate ecosystem; if one part is off, the whole system suffers. Understanding the culprit helps us narrow down our fix.
2. Driver Drama: The Usual Suspect
Outdated drivers are the number one culprit in the WiFi drama. Think of your drivers as the translators between your computer and its WiFi adapter. If the language is outdated, the communication breaks down. It's like trying to order a pizza in ancient Greek – not going to happen!
- How to check and update your drivers:
- Right-click the Start menu and click on "Device Manager."
- Expand "Network adapters."
- Right-click your WiFi adapter (it might say something like "Wireless Network Adapter" or "WiFi Adapter") and select "Update driver."
- Choose to "Search automatically for drivers." Windows will try to find the latest drivers for you.
- If that fails, visit your adapter manufacturer's website and download the latest drivers directly.
3. Router Rumble: Is Your Router the Problem?
Sometimes, the issue isn't your computer; it's the router itself. Imagine your router as the gatekeeper of your internet connection. If the gatekeeper is grumpy, everyone suffers. First, try the simplest solution: the good old "turn it off and on again." Seriously, unplug your router and modem, wait about 30 seconds, and plug them back in. It's astonishing how often this works! It's like rebooting a cranky human – sometimes, that's all that's needed.
4. WiFi Settings Shenanigans: Tuning Your Connection
Windows 10 has default settings that, while generally okay, might not be optimized for your specific network. Let's tweak a few things to see if we can improve your connection.
- Forget and Reconnect: Sometimes, the WiFi connection gets corrupted. Forget the network and reconnect. Go to Settings > Network & Internet > Wi-Fi, click "Manage known networks," then click "Forget" next to your network name. Reconnect by entering your password.
- Network Reset: In Settings > Network & Internet > Status, there's a handy "Network reset." This resets all your network adapters to their default settings, which can often iron out any wrinkles.
5. Interference Inferno: Battling the WiFi Foe
WiFi signals, like radio waves, can be susceptible to interference. Think of it like trying to have a conversation at a very loud party – it's hard to hear! Microwaves, Bluetooth devices, and even thick walls can all interfere with your signal.
- Placement is Key: Move your router to a more central location, away from walls and electronic devices.
- Channel Surfing: Your router broadcasts on a specific channel. Other nearby WiFi networks can cause congestion. Access your router's settings (usually by typing its IP address into your browser, like 192.168.1.1) and try changing the WiFi channel. Experiment with different channels (1, 6, and 11 are often good starting points) until you find one that works best.
6. Power Saving Panic: Turning Off the Thrifty Mode
Windows 10, in its infinite wisdom, might be attempting to save power on your WiFi adapter, causing performance issues. This is a bit like trying to drive your car on fumes – not a good idea in the long run!
- Disable Power Saving: In Device Manager (see step 2), right-click your WiFi adapter, select "Properties," go to the "Power Management" tab, and uncheck "Allow the computer to turn off this device to save power."
7. Windows Updates Woes: Making Sure You're Up To Date
Like any operating system, Windows 10 regularly receives updates. These updates often include bug fixes and improvements to network functionality. Keeping your system up to date is a crucial part of maintaining a healthy WiFi connection.
- Check For Updates: Go to Settings > Update & Security > Windows Update and click "Check for updates."
8. Malware Mayhem: The Unexpected Culprit
Sometimes, malware can interfere with your network settings, causing havoc with your WiFi. Think of it like a sneaky gremlin messing with your router.
- Run a Scan: Use a reputable antivirus program to scan your system for malware.
9. Signal Strength Saga: Decoding the Bars
Weak signal strength is a common problem, especially if you’re far from your router. It's like trying to shout across a football field - your voice might not be heard.
- Check the Signal Bars: Look at the WiFi icon in your system tray. If the signal bars are low, you might need to move closer to your router or consider a WiFi extender.
- WiFi Extenders: These devices, like little boosters, amplify your WiFi signal, extending its range.
10. Troubleshooting Tools Triumph: Windows 10's Hidden Helpers
Windows 10 has built-in troubleshooting tools that can often diagnose and fix WiFi problems automatically. It's like having a digital doctor for your network!
- Run the Network Troubleshooter: Go to Settings > Network & Internet > Status and click "Network troubleshooter." Follow the prompts, and let Windows do its thing.
11. DNS Dilemma: Solving the Name Game
DNS (Domain Name System) servers translate website names into IP addresses, like a phone book for the internet. Sometimes, the default DNS servers can be slow or unreliable.
- Change Your DNS Servers: Go to Settings > Network & Internet > Change adapter options, right-click your WiFi connection, and select "Properties." Select "Internet Protocol Version 4 (TCP/IPv4)" and click "Properties." In the "Use the following DNS server addresses" section, you can enter DNS servers like Google's (8.8.8.8 and 8.8.4.4) or Cloudflare's (1.1.1.1 and 1.0.0.1).
12. Wireless Mode Mystery: Understanding the WiFI Spectrum
Your router supports different wireless modes (like 802.11n, 802.11ac, and 802.11ax). Make sure your router and your computer's WiFi adapter are using compatible modes. Modern adapters typically support 802.11ac or 802.11ax, which are faster and more reliable. If your router supports these, make sure this mode is enabled.
13. Firewall Fiasco: Is Your Firewall Blocking You?
Sometimes, your firewall (either the Windows Firewall or a third-party firewall) can inadvertently block your WiFi connection.
- Temporarily Disable Your Firewall: As a test, temporarily disable your firewall to see if it's the cause. If your WiFi starts working, you'll need to adjust your firewall settings to allow WiFi traffic. Be cautious when disabling your firewall.
14. Network Adapter Reset Reboot: A Deep Dive Fix
If all else fails, you can try resetting your network adapter. This is a more drastic step, so use it as a last resort.
- Perform a Network Reset: As mentioned earlier, in Settings > Network & Internet > Status, there's a handy "Network reset." This can often resolve stubborn network problems.
15. Asking For Help: When to Call in the Pros
Sometimes, the problem is beyond your control. If you've tried everything and still can't fix your WiFi, it's time to seek professional help.
- Contact Your ISP: Your internet service provider (ISP) can often help diagnose problems with your internet connection.
- Consult a Tech Support Specialist: A qualified technician can help identify and fix complex network issues.
Wrapping Up: Reclaiming Your WiFi Freedom!
So there you have it – a comprehensive guide to conquering the Windows 10 WiFi nightmare! Remember, troubleshooting is a process of elimination. Don’t get discouraged if the first few steps don't work. Keep trying, be patient, and eventually, you'll find the fix that's right for you. We’ve covered everything from driver updates to channel selection, and now you have a toolkit of solutions to turn your internet frustrations into WiFi wins. Now go forth and enjoy your lag-free internet!
Frequently Asked Questions (FAQs)
**1. My WiFi keeps disconnecting. What do I
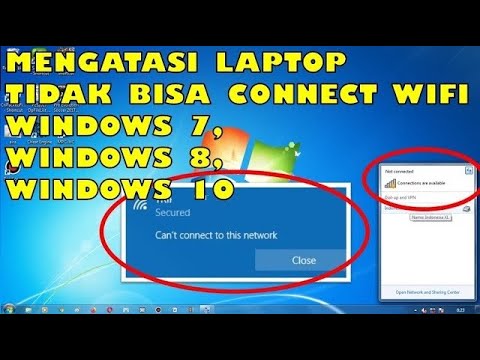
Laptop WiFi Nightmare? This FIX Will SHOCK You!Cara Mengatasi Laptop Tidak Bisa Connect Wifi Windows 10, 8 & 7
By Jari Mungil Rayyan Cara Mengatasi Laptop Tidak Bisa Connect Wifi Windows 10, 8 & 7 by Jari Mungil Rayyan
Cara atasi WiFi tidak bisa connect di laptop not connected WiFi

By Duan Dawon Channel Cara atasi WiFi tidak bisa connect di laptop not connected WiFi by Duan Dawon Channel
Wifi no connection are available ini solusinya 100 work

By Ani Saja Wifi no connection are available ini solusinya 100 work by Ani Saja

Title: 4 Cara Mengatasi WIFI Not Connected Pada Windows 7 8 10 Part 2
Channel: ZAINURI CHANNEL
4 Cara Mengatasi WIFI Not Connected Pada Windows 7 8 10 Part 2 by ZAINURI CHANNEL
Laptop Wifi Hotspot
Windows 10 WiFi Nightmare? FIX It NOW!
The flickering of the internet icon. The dreaded "Limited Connectivity" error. The frustration of dropped video calls and sluggish downloads. If these scenarios sound intimately familiar, you're likely wrestling with a common, yet conquerable, foe: Windows 10 WiFi woes. We understand your pain. We've been there, navigating the digital wilderness of connectivity issues. Consider this your comprehensive guide, your personal rescue team ready to banish the WiFi demons and restore your seamless online experience. Forget endless forum threads and convoluted solutions. We're cutting straight to the chase, providing actionable, concrete steps to transform your frustrating WiFi situation into a reliable, high-speed connection.
Acknowledge the Enemy: Common WiFi Problems in Windows 10
Before we deploy our arsenal of fixes, let's identify the primary culprits behind your WiFi misery. Recognizing these common problems is the first step towards victory.
- Intermittent Disconnections: The WiFi connection drops randomly, disrupting your work, streaming, or gaming sessions. This could be anything from a simple signal blip to a deeper software conflict.
- Slow Internet Speeds: Even when connected, browsing, downloading, and streaming feel sluggish. This could be due to driver issues, network congestion, or hardware limitations.
- "Limited Connectivity" Error: Windows 10 displays this error message, indicating the computer is connected to the network but cannot access the internet. This often points to IP address conflicts, DNS resolution problems, or gateway issues.
- Unable to Connect to WiFi Networks: The computer doesn't detect available WiFi networks, or fails to connect to known ones. This can be a driver issue, a hardware problem, or incorrect network settings.
- Persistent WiFi Dropouts after Updates: Windows 10 updates, while designed to improve the system, are sometimes the root cause of connectivity issues, especially with wireless drivers.
Understanding these symptoms is vital. Now, let's move on to solutions. Prepare to experience the internet as it was meant to be.
Diagnosis: Pinpointing the Source of Your WiFi Trouble
Before launching into a flurry of potential fixes, it's essential to perform a quick diagnostic. This will help you isolate the source of the issue and avoid wasting time on solutions that don't apply to your specific situation.
- Restart the Obvious: The first and most often overlooked solution is a simple reboot. Restart your computer and your router. This simple step resolves countless temporary glitches and clears the cache. It’s the digital equivalent of turning it off and on again.
- Check Your Router: Access your router's configuration panel using your browser and the router's IP address (usually 192.168.1.1 or 192.168.0.1). Ensure the router’s firmware is up-to-date. Obsolete firmware can cause a host of problems. Also, confirm that your router isn't exceeding its connected devices limit.
- Run the Windows Network Troubleshooter: This built-in tool is a surprisingly effective first line of defense. Right-click the WiFi icon in the system tray and select "Troubleshoot problems." Windows will automatically attempt to diagnose and resolve the issue.
- Check Physical Connections: If your computer isn't a laptop, make sure the network cable is connected securely to both the computer and the router if possible.
By methodically working through these initial steps, you'll gather clues to guide our further troubleshooting efforts.
Driver Deep Dive: The Key to Unlocking WiFi Performance
Outdated, corrupted, or incompatible network drivers are often the silent saboteurs behind WiFi problems. Updating your network drivers can dramatically improve connectivity and stability. Here's how to do it with surgical precision:
- Open Device Manager: Right-click the Start button and select "Device Manager."
- Locate Your Network Adapter: Expand the "Network adapters" section. Your WiFi adapter will likely be named something like "Wireless Network Adapter" or "Wi-Fi Adapter," often with the manufacturer's name (e.g., Intel, Realtek, Broadcom).
- Update the Driver: Right-click your WiFi adapter and select "Update driver."
- Choose Your Update Method: Windows offers two main options:
- "Search automatically for drivers": This option will search online for the latest drivers.
- "Browse my computer for drivers": If you've downloaded a driver manually (from the manufacturer's website), you can use this option.
It is recommended to choose the first option. Allow Windows to search and install the latest drivers. If the automatic update fails, visit your laptop or motherboard manufacturer's support website. Download the latest Wi-Fi driver specifically designed for your Windows 10 version. Install the driver after downloading.
Advanced Driver Manipulation: When the Basics Aren't Enough
If updating the driver doesn't solve the problem, let's delve deeper into advanced driver management techniques.
- Roll Back the Driver: If your WiFi issues started after a recent driver update, consider rolling back to the previous version. In Device Manager, right-click your WiFi adapter, select "Properties," go to the "Driver" tab, and click "Roll Back Driver."
- Uninstall and Reinstall the Driver: In Device Manager, right-click your WiFi adapter and select "Uninstall device." In the confirmation box, check the box that says "Attempt to remove the driver for this device". Next, restart your computer. Windows will automatically attempt to reinstall the driver upon reboot.
- Check for Driver Conflicts: You can also investigate potential driver conflicts by examining the "Events" tab within the WiFi adapter's properties in Device Manager. This tab logs any events related to the driver, including errors or warnings.
These advanced techniques will give you more granular control over your network adapter drivers.
Power Management: Preventing WiFi from Snoozing
Windows 10's power-saving features, while designed to conserve battery life, may sometimes inadvertently throttle your WiFi adapter, leading to intermittent disconnections or slow speeds. Let's adjust these settings.
- Access Power Options: Type "Power & sleep settings" in the Windows search bar and open it. Click on "Additional power settings."
- Change Plan Settings: Choose your current power plan (e.g., "Balanced," "Power saver," etc.) and click "Change plan settings."
- Access Advanced Power Settings: Click "Change advanced power settings."
- Adjust Wireless Adapter Settings: Expand "Wireless Adapter Settings" and then "Power Saving Mode."
- Set to Maximum Performance: Change the setting to "Maximum Performance" for both "On battery" and "Plugged in" (if available). This tells Windows not to restrict your WiFi adapter's performance.
These power settings adjustments have a dramatic impact on your WiFi performance on many machines, especially laptops.
Network Reset: A Factory Reset for Your Network Configuration
If the previous steps haven't resolved the issue, a network reset is a more drastic measure but can be extremely effective, especially if your network settings have become corrupted. This will revert your network settings to their default configurations.
- Open Network Settings: Open "Settings" (Windows key + I) and navigate to "Network & Internet."
- Access Network Reset: Scroll down and click "Network reset."
- Confirm and Restart: Click "Reset now" and confirm the action. Your computer will restart, effectively resetting your network configuration.
This process removes all WiFi passwords, so make sure you have your passwords handy before proceeding. After the restart, you'll need to reconnect to your WiFi networks.
Channel Surfing: Finding the Sweet Spot for Your WiFi Signal
Your WiFi router broadcasts on a specific channel. Interference from other routers or electronic devices can cause congestion, leading to slow speeds or connection drops. Let's explore how to find a less crowded channel.
- Identify Available Channels: Use a WiFi analyzer app (like WiFi Analyzer for Android) to scan for WiFi networks in your area. The app will display the channels used by nearby routers, and they will visually represent the congestion on each channel.
- Access Router Configuration: Log in to your router's configuration panel (usually by entering the router's IP address in your web browser).
- Change the WiFi Channel: Locate the WiFi settings and look for the "Channel" option. Select a channel that's the least crowded, based on your WiFi analyzer app's findings. Channels 1, 6, and 11 are usually recommended as they don’t overlap. Experiment with a few different channels to find the optimal setting for your environment.
- Save Your Changes: Remember to save the changes in your router settings.
Changing your WiFi channel can significantly improve your connection quality, particularly in crowded areas.
DNS Dilemmas: Navigating the Domain Name System
The Domain Name System (DNS) translates website names into IP addresses. Problems with your DNS settings can cause slow browsing speeds or prevent you from accessing certain websites. We can also change the present DNS to other more reliable or faster DNS servers.
- Open Network Connections: Open "Settings" (Windows key + I), navigate to "Network & Internet," and then click "Change adapter options."
- Access Adapter Properties: Right-click your WiFi adapter and select "Properties."
- **Select Internet Protocol Version 4
