laptop jako router wifi windows 8
Title: Cara mengaktifkan wifi di windows 8
Channel: AW Tutorial
Cara mengaktifkan wifi di windows 8 by AW Tutorial
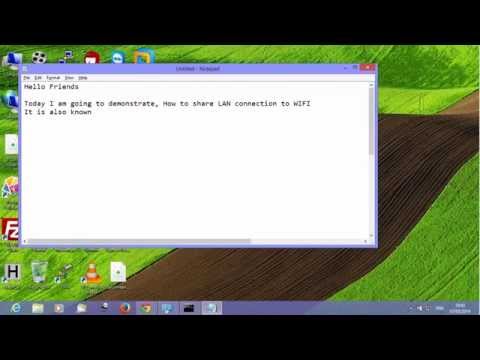
Turn Your Windows 8 Laptop into a WiFi Hotspot in 60 Seconds!
Transform Your Windows 8 Laptop into a WiFi Oasis: A Lightning-Fast Guide
Ever found yourself in a Wi-Fi wasteland, yearning for a connection? Perhaps you have multiple devices needing internet access. Or maybe you're just sharing your precious internet with a friend. You're in luck! Your Windows 8 laptop can be your personal Wi-Fi hotspot. And incredibly, it's easier than you might think. In fact, it takes mere seconds. Let’s unlock your laptop's hidden potential!
Setting the Stage: The Pre-Flight Check
Before we embark on this speedy transformation, a couple of quick things. Firstly, ensure your Windows 8 laptop is connected to the internet. That connection can be through Ethernet or, crucially, another Wi-Fi network. Secondly, make sure you have administrator privileges. This allows you to make the necessary network adjustments. Essentially, be ready to make things happen. Now, let's dive right in.
Unleashing the Power: Creating the Hotspot
Here comes the exciting part! We're about to turn your laptop into a Wi-Fi hotspot. Prepare to be amazed at how simple it is. Follow these straightforward steps, and you'll be surfing in no time.
Step 1: Access the Network and Sharing Center. Start by opening the Control Panel. You can usually find it by searching in the Start menu. Then, look for "Network and Sharing Center." Click on it.
Step 2: Setup a New Connection or Network. Now, in the Network and Sharing Center, you'll see several options. Select "Set up a new connection or network." This is where the magic begins.
Step 3: Choose "Set up a wireless ad hoc network." You'll be presented with several connection options. Choose the one that says, "Set up a wireless ad hoc network." It’s the key to sharing your internet.
Step 4: Follow the Simple Instructions. Windows will guide you through the next steps. You'll need to give your network a name (SSID). Choose a memorable one. Then, you'll set a security key (password). This is vital to protect your network from unwanted access. Make it strong!
Step 5: Enable Internet Connection Sharing. This is crucial for sharing your internet. Go back to the Network and Sharing Center. Locate the connection your laptop is currently using for internet. Right-click on it and select "Properties." Then, in the "Sharing" tab, check the box that says, "Allow other network users to connect through this computer's Internet connection."
Step 6: Configure Network Adapters. Under the drop-down menu labeled "Home networking connection," select your created hotspot. Click “OK”.
Step 7: Start Your Wi-Fi Oasis. Finally, go back to the 'Network and Sharing Center' or locate the newly created Wi-Fi network icon on the taskbar. Locate the newly created Wi-Fi network and click the "Start the connection" button.
Troubleshooting Common Hurdles: Smooth Sailing
Sometimes, things don't go precisely as planned. That's okay! Here's some quick troubleshooting.
Connection Issues: If devices can't connect, double-check the password. Also, confirm you’ve enabled the internet connection sharing.
Slow Speeds: Distance and obstructions impact Wi-Fi speed. Try moving your laptop closer to other devices. Also, ensure you have a strong internet connection to begin with.
Limited Range: Ad-hoc networks have limited range. The signal could also be distorted by physical barriers.
Beyond the Basics: Exploring Advanced Options
For those who want more, there are advanced options.
Security Protocols: Experiment with different types of encryption. WPA2-PSK is generally the most secure option.
Channel Selection: Within the properties of your wireless adapter, you can adjust the Wi-Fi channel. This helps avoid interference from other networks.
The Takeaway: Stay Connected with Ease
In conclusion, turning your Windows 8 laptop into a Wi-Fi hotspot is easy! It’s a convenient way to share your internet. Plus, you can do it in under a minute. Embrace the power of your laptop. Now, go forth and connect! Have fun sharing your internet with others. With these easy steps, you are now a Wi-Fi guru!
Laptop WiFi Dead? This SHOCKING Trick Fixes It INSTANTLY!Let's dive in!
Turn Your Windows 8 Laptop into a WiFi Hotspot in 60 Seconds!
Ever been stranded, internet-less? Picture this: You're on the road, desperately needing to send that crucial email, or maybe you're just craving some cat videos, but the hotel Wi-Fi is about as reliable as a politician's promise. Sound familiar? We've all been there. But what if I told you your trusty Windows 8 laptop could become a personal Wi-Fi hotspot, a beacon of internet connectivity in a sea of digital darkness? And, even better, that you could set it up faster than it takes to microwave a burrito? Buckle up, buttercups, because we're about to unravel how to turn your Windows 8 laptop into a Wi-Fi hotspot in, well, about a minute or less!
1. Decoding the Hotspot Hustle: Why Your Laptop is a Wi-Fi Wizard in Disguise
Think of your laptop not just as a machine, but as a versatile multi-tool. It's a word processor, a movie player, and, lo and behold, a potential Wi-Fi router. In fact, it's like having a tiny, portable cell tower in your backpack. Pretty cool, right? This magic happens because your laptop has a built-in Wi-Fi adapter capable of broadcasting a Wi-Fi signal, just like your home router. We're just going to teach it how to flex that broadcasting muscle.
2. The Secret Weapon: The Windows 8 Virtual Router
Windows 8, despite some of its quirks (we're looking at you, tiled interface!), actually has a hidden gem: the ability to create a virtual Wi-Fi router. This means you can use your laptop's Wi-Fi adapter to connect to the internet (via Ethernet or a mobile broadband connection) and simultaneously share that internet connection with other devices, like your phone, tablet, or even another laptop. It's like a digital relay race, but instead of runners, we have data packets.
3. Before We Begin: Ensuring Compatibility and Getting Ready
Before we begin, let's make sure we're on the right track. First, confirm that your laptop has a Wi-Fi adapter. Pretty much every modern laptop has one. Second, you'll need an internet connection on your laptop itself. This can be via Ethernet cable (the old-school wired connection), a mobile broadband connection (like a USB dongle), or, ironically, by connecting to another Wi-Fi network if you have that privilege. Finally, make sure you have administrative rights on your laptop. You need to be the boss to make these changes!
4. Step-by-Step: Creating Your Wi-Fi Hotspot – The Easy Way
Alright, let's get down to the nitty-gritty. This is where the magic happens. Here's how to create your Wi-Fi hotspot on Windows 8:
Open the Command Prompt (as Administrator): This is your control center. Search for "cmd" in the Windows search bar, right-click on "Command Prompt," and select "Run as administrator." This is crucial!
The Command Line Caper: Now, we're going to enter some very specific commands. Don't worry, it's not rocket science. Type the following, and hit Enter after each line:
netsh wlan set hostednetwork mode=allow ssid="YourHotspotName" key="YourPassword"- Replace
"YourHotspotName"with the name you want your Wi-Fi network to have. Something catchy is always a good idea! Like "Bob's Awesome Internet Haven" or even your own name. - Replace
"YourPassword"with a strong password. Think of it as the lock on your digital castle. Make it a mix of letters, numbers, and symbols to keep the bad guys out.
- Replace
netsh wlan start hostednetwork
Sharing is Caring: Enabling Internet Connection Sharing: Next, we'll share your laptop's internet connection.
- Go to the "Network Connections" section. You can find this by searching for "View network connections" in the Windows search bar.
- Find your active internet connection (that's the one your laptop is using to get online). It'll likely be labeled "Ethernet" or "Wi-Fi," depending on how you’re connected.
- Right-click on it and select "Properties."
- Click on the "Sharing" tab.
- Check the box that says "Allow other network users to connect through this computer's Internet connection."
- In the "Home networking connection" dropdown menu, select "Microsoft Hosted Virtual Adapter" (this is your newly created Wi-Fi hotspot).
- Click "OK."
5. Troubleshooting Troubles: When Things Go Awry
Sometimes, things don't go perfectly to plan. Don't panic! Here are some common problems and how to fix them:
- "The hosted network couldn't be started" error: This usually means the hosted network adapter isn't enabled or there's a driver issue. Try restarting your laptop. If that doesn't work, check your Wi-Fi adapter drivers. Make sure they're up to date.
- Connection issues: Are your devices connecting, but without any internet access? Double-check that you've enabled Internet Connection Sharing (step 4). Also, ensure your laptop has a stable internet connection.
- Security concerns: Always use a strong password for your Wi-Fi hotspot. This protects your data from unauthorized access.
6. Beyond the Basics: Customizing Your Hotspot Experience
Once you've got the basics down, you can customize your hotspot even further.
- Change the Hotspot Name and Password: To change the name or password, simply repeat the command in step 4, replacing the old values with your new ones.
- Power Saving Considerations: Be mindful of your laptop's battery life. Running a hotspot can drain the battery faster. Consider plugging your laptop into a power outlet.
7. Why Bother? The Benefits of a Mobile Hotspot
Why go through all this effort? Because a Wi-Fi hotspot offers a ton of advantages:
- Connectivity on the Go: Stay connected when you're traveling, working remotely, or in areas with limited Wi-Fi access.
- Sharing the Love (and the Internet): Share your internet connection with multiple devices. Perfect for families, friends, or colleagues.
- Cost Savings: In some cases, creating a hotspot can save you money by avoiding expensive hotel Wi-Fi or data charges.
8. Laptop as a Router? Unleashing the Power of Your Machine
Your laptop truly becomes a versatile device once you unlock its potential to be a Wi-Fi hotspot. It's like discovering a hidden superpower – the ability to conjure internet access whenever and wherever you need it.
9. The "60-Second" Myth Debunked: Realistically, How Long Does It Take?
The 60-second claim is, admittedly, a slight exaggeration. Setting up your hotspot will likely take a few minutes the first time you do it, depending on your computer skills. However, once you've done it once, the process becomes incredibly quick. With practice, you can get up and running in under a minute.
10. Is It Safe? Security Considerations for Your Hotspot
Security should always be your top priority. Always use a strong password for your Wi-Fi hotspot to prevent unauthorized access. Keep your laptop's operating system and software updated to patch any security vulnerabilities.
11. Wi-Fi Hotspot vs. Tethering: What's the Difference?
Tethering is similar to creating a hotspot, but it typically involves using your smartphone as a Wi-Fi hotspot. Both achieve the same goal: sharing an internet connection. However, creating a hotspot directly from your laptop can sometimes offer better performance and a more stable connection, especially if your laptop has a more robust Wi-Fi adapter.
12. Dealing with Data Usage: Monitoring Your Consumption
Be mindful of your data usage, especially if you have a limited data plan. Some operating systems and apps consume a lot of data in the background. Monitor your data usage to avoid unexpected fees.
13. Beyond Windows 8: Does This Work on Other Operating Systems?
While this tutorial focuses on Windows 8, the general concept of creating a Wi-Fi hotspot applies to other operating systems as well. Windows 10 and 11 have built-in hotspot features that are even easier to use. Mac laptops also offer hotspot functionality.
14. Common Mistakes to Avoid: Hotspot Pitfalls and How to Dodge Them
Avoid these common mistakes:
- Forgetting to run Command Prompt as Administrator. This is crucial.
- Using a weak password. Protect yourself!
- Not enabling Internet Connection Sharing. This is the crucial step for sharing your internet.
15. Unleash the Internet: Your Laptop, Your Wi-Fi, Your Control!
You now have the power! You can now transform your Windows 8 laptop into a Wi-Fi hotspot.
Closing Thoughts: Embrace the Freedom of Your Personal Wi-Fi Oasis
So there you have it. You have the key to unlocking
Laptop WiFi Booster: Insane Speed, No More Lag!Use windows 8 laptop as wifi router hotspot
By Hardik Upadhyay Use windows 8 laptop as wifi router hotspot by Hardik Upadhyay
Cara Mengatasi Laptop Tidak Bisa Connect Wifi Windows 10, 8 & 7
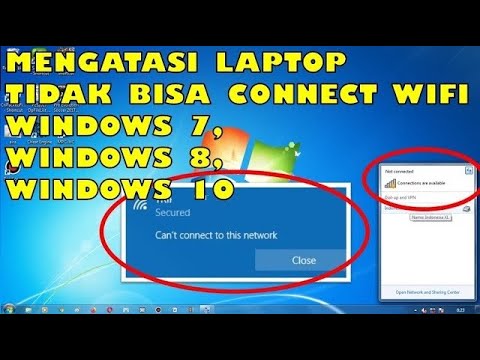
By Jari Mungil Rayyan Cara Mengatasi Laptop Tidak Bisa Connect Wifi Windows 10, 8 & 7 by Jari Mungil Rayyan
Laptop jako router Wi-Fi Windows 7 i Windows 8

By Network Systems Laptop jako router Wi-Fi Windows 7 i Windows 8 by Network Systems

Title: Cara Mengatasi Wifi Laptop Tidak Bisa di Aktifkan Windows 8
Channel: LAPTOP TUTORIAL
Cara Mengatasi Wifi Laptop Tidak Bisa di Aktifkan Windows 8 by LAPTOP TUTORIAL
Working With Laptop
Turn Your Windows 8 Laptop into a WiFi Hotspot in 60 Seconds!
In today's hyper-connected world, the ability to share your internet connection on the go is no longer a luxury but a necessity. Whether you're a frequent traveler, a student collaborating on projects, or simply needing a backup internet source, turning your Windows 8 laptop into a WiFi hotspot provides unparalleled convenience. This guide will walk you through the straightforward process, ensuring you can share your laptop's internet connection with other devices in a matter of seconds. We'll break down the steps, offering clarity and precision to ensure your success, allowing you to unlock the full potential of your Windows 8 device.
Understanding the Concept of a Hosted Network
Before diving into the practical steps, it's crucial to grasp the underlying concept. Windows 8 offers a built-in feature called a "hosted network," which essentially transforms your laptop's wireless adapter into a virtual router. This means your laptop will act as a wireless access point, allowing other devices, such as smartphones, tablets, and other computers, to connect to the internet using your laptop's existing connection (Ethernet or WiFi). The hosted network utilizes the capabilities of your wireless network adapter. This hosted network functionality is integrated directly into the operating system, eliminating the need for any third-party software or complex configurations. This streamlined approach makes it incredibly user-friendly for even novice tech users.
Step 1: Accessing the Command Prompt as an Administrator
The first step in creating your WiFi hotspot involves utilizing the Command Prompt, an interface that gives you low-level control over your operating system. To begin, you must open the Command Prompt with administrative privileges. Locate the Start button (often represented by the Windows logo) on the lower-left corner of your screen. Right-click on the icon within the Start menu. From the context menu that appears, select "Command Prompt (Admin)." This action launches the Command Prompt with the necessary permissions to modify network settings. Should the option say Windows PowerShell (Admin), that will function the same way. This grants you the power to execute commands that alter the behavior of your system, including the configuration of your hosted network.
Step 2: Initializing the Hosted Network with a Simple Command
With the Command Prompt open, you will enter the command that sets up the hosted network. Type the following command precisely, ensuring that you accurately input all characters and spacing: netsh wlan set hostednetwork mode=allow ssid="YourWiFiName" key="YourWiFiPassword"
Replace "YourWiFiName" with your desired network name (SSID). Choose a name that is familiar and easy to remember. Avoid using spaces if possible. Instead, utilize a combination of letters and numbers to avoid any potential connectivity issues.
Replace "YourWiFiPassword" with a strong, secure password. A robust password will not only protect you from unauthorized access but also safeguard sensitive data transmitted through your hotspot.
Once you have entered the command, press the "Enter" key. If the configuration is successful, you will receive a confirmation message. This message signifies that the hosted network has been successfully created. The command configures the essential settings for your hosted network.
Step 3: Starting the Hosted Network to Enable Sharing
The hosted network is now created. It's time to activate it. Enter the following command into the Command Prompt: netsh wlan start hostednetwork. Press "Enter" again. Upon successful execution, you will see a confirmation message indicating that the hosted network has started. The command activates the virtual wireless network interface, making it ready for use by other devices.
This action essentially "turns on" your WiFi hotspot, allowing other devices to search and connect to it.
Step 4: Configuring Internet Connection Sharing
The final step ensures your connected devices can actually access the internet through your laptop. This step involves sharing your current connection, which is typically your Ethernet or pre-existing WiFi connection.
Press the Windows key + "R" to open the Run dialog. Type ncpa.cpl into the dialog box and press "Enter." This command will open the "Network Connections" window, which displays a list of your network adapters.
Identify the network adapter representing your internet connection (e.g., "Ethernet," or your existing WiFi adapter). Right-click on the adapter and select "Properties" from the context menu.
In the Properties window, navigate to the "Sharing" tab. Check the box that says, "Allow other network users to connect through this computer's Internet connection."
Under "Home networking connection," select the "Microsoft Hosted Network Virtual Adapter" from the dropdown menu. This is the virtual adapter created when you enabled hosted network in the Command Prompt.
Click the "OK" button to save the changes. The sharing settings will be applied. This action configures your internet connection for sharing. You can now close the Network Connections window.
Step 5: Connecting Your Devices
With these steps completed, your Windows 8 laptop is now broadcasting a WiFi signal that other devices can connect to.
On your smartphone, tablet, or other computer, search for available WiFi networks. Your newly created WiFi hotspot (identified by the "YourWiFiName" you designated earlier) should appear in the list.
Select your WiFi hotspot and enter the password ( "YourWiFiPassword" that you also established earlier) when prompted. Your device will connect to your laptop's internet connection.
Troubleshooting Common Issues
While the process is straightforward, you might encounter a few minor issues.
- Hosted Network Not Starting: Double-check the commands entered in the Command Prompt. Ensure that there are no typos and that you've run the Command Prompt as an administrator.
- Devices Cannot Connect: Verify the password entered on your device matches the password you selected for your hosted network. Also, ensure that the "Sharing" settings are correctly configured in the Network Connections window.
- Limited Connectivity: If devices connect but have limited internet access, ensure your laptop has an active internet connection and that the "Sharing" settings are enabled for the correct network adapter. Restarting your PC can sometimes resolve these problems.
- Driver Issues: Outdated or corrupted network drivers can sometimes interfere with hosted network functionality. Ensure that your wireless network adapter drivers are up to date by checking Windows Update or visiting the manufacturer's website.
Optimizing Your Hotspot for Performance and Security
Beyond the basic setup, there are a few steps you can take to further enhance the performance and security of your WiFi hotspot.
- Choosing a Strong Password: The password is your primary defense against unauthorized access. Opt for a strong password of at least 12 characters, including a mix of uppercase and lowercase letters, numbers, and symbols.
- Regular Password Changes: Regularly changing your WiFi password will provide an additional layer of security, especially if you share your hotspot with others.
- Monitoring Connected Devices: Keep an eye on the devices connected to your hotspot through your laptop's network settings. This will allow you to detect and block any unauthorized devices.
- Using a Different Channel: While it is beyond the scope of this guide, in order to achieve optimal WiFi performance, accessing the wireless adapter's configuration settings will enable you to change the channel that it broadcasts on. This can potentially reduce interference.
Advanced Customization and Considerations
There are advanced configurations for those seeking greater control over their hosted network.
- Using PowerShell: PowerShell is the more modern iteration of the Command Prompt. It offers greater flexibility and scripting capabilities. Experimenting with PowerShell commands can unlock more options, such as setting up guest accounts or advanced firewall rules.
- Limitations: Be aware of limitations, such as the maximum number of devices that can connect simultaneously. The number can vary based on the capabilities of your wireless adapter.
- Battery Life: Running a hosted network can consume battery power. Consider plugging your laptop into a power source when sharing your internet connection for extended periods, ensuring that your laptop doesn't unexpectedly shut down when you need it the most. Check your power plan settings to maximize battery life.
Conclusion: Sharing Your Internet with Ease
By following these straightforward steps, you have successfully transformed your Windows 8 laptop into a WiFi hotspot in mere seconds. Whether you are traveling, working remotely, or simply need to share your internet connection for more devices, this guide provides the clarity and knowledge required. Be sure to consider the security recommendations and advanced customization options to maximize the effectiveness of your WiFi hotspot. Enjoy the convenience of a portable, readily accessible, wireless internet connection. With its adaptability, you can stay connected wherever you go, and share your internet connection effortlessly.
