how to run wifi hotspot in laptop

Title: How to use Your Laptop as WiFi Hotspot
Channel: Ricardo Gardener
How to use Your Laptop as WiFi Hotspot by Ricardo Gardener
how to install wifi hotspot in laptop, how to use hotspot wifi in laptop, can i use my laptop as a wifi hotspot, how to on hotspot in laptop
Unlock Your Laptop's Hidden Hotspot: Free WiFi Anywhere!
Free WiFi Freedom: Unleash Your Laptop's Secret Hotspot Power!
Have you ever craved the delightful convenience of internet access, but found yourself stranded in a digital desert? Perhaps you're at a bustling cafe, desperately needing to send an urgent email. Or maybe you're on a road trip, and the kids are clamoring for some entertainment. The good news is, your laptop might hold the key to unlocking a hidden treasure: a personal WiFi hotspot!
Unveiling the Mystery: Your Laptop's Wireless Wizardry
Many of us often underestimate the sheer power packed within our trusty laptops. Besides being a sleek productivity machine, many laptops boast a built-in capability that can transform them into mobile access points. It’s essentially a mini WiFi router. It's a secret weapon against the frustration of spotty or non-existent internet connectivity. So, get ready to learn how you can share your laptop's internet connection with other devices.
Step-by-Step: Turning Your Laptop Into a WiFi Beacon
Now, let's dive into the nitty-gritty. Setting up a hotspot is usually a relatively straightforward process. Indeed, the exact steps might vary slightly depending on your operating system. Still, the core principles remain consistent.
For Windows Users:
Firstly, navigate to your Settings menu. It resembles a gear icon. Secondly, click on Network & Internet. Afterwards, select Mobile hotspot. Thirdly, toggle the Mobile hotspot switch to On. At this juncture, you can customize your hotspot's settings. Finally, choose a network name (SSID) and a strong password. Don't use something easily guessable.
For macOS Users:
First, you will need to open System Preferences. Then, click on Sharing. Afterwards, select Internet Sharing from the left-hand panel. You’ll need to choose your Share your connection from option. For instance, this often refers to your Wi-Fi or Ethernet connection. Next, select Wi-Fi as the method for devices to connect. At this time, click on Wi-Fi Options. Finally, enter a network name and create a password before clicking OK. Make sure to check the box next to Internet Sharing.
Securing Your Digital Oasis: Important Security Tips
Now, having a hotspot is extremely useful. However, it's vital to prioritize security. Because an unprotected hotspot is like leaving your front door wide open. Therefore, you're inviting potential risks.
First of all, always use a strong, unique password for your hotspot. Never use easily guessable passwords. Moreover, avoid using personal information in the password.
Secondly, consider enabling WPA2 or WPA3 encryption. This provides a stronger layer of protection. Indeed, this encrypts the data transmitted over your hotspot. WPA3 is preferable, if your devices support it.
Furthermore, keep your laptop's operating system and security software updated. As a matter of fact, software updates often patch security vulnerabilities. Consequently, it maximizes your hotspot's overall security.
Going Beyond the Basics: Advanced Hotspot Techniques
You are now capable of setting up a basic hotspot. Nevertheless, you can further refine your skills. Therefore, here are some more advanced tips.
First, consider limiting the number of devices that can connect to your hotspot. Consequently, this prevents bandwidth hogging. Besides, this can enhance your connection speed.
Then, monitor data usage to avoid exceeding your data plan limits. If you have a capped data plan, this is exceptionally important. Furthermore, some operating systems offer data usage tracking tools.
Troubleshooting Common Hotspot Hiccups:
Sometimes, despite your best efforts, things can go wrong. Therefore, let's address some common issues.
First, if your hotspot isn't appearing on other devices, double-check your settings. Above all, carefully review your network name and password.
Second, if you experience slow speeds, consider your location. Physical obstructions can impact signal strength. Also, check the maximum number of devices connected.
Third, ensure your laptop's internet connection is active. For example, your hotspot will only share the internet connection.
The Freedom of Free WiFi: Your Digital Frontier Now
In conclusion, creating a WiFi hotspot with your laptop is a game-changer. It gives you connectivity on the go. You can work from a park or entertain your kids during a long car journey. With a little technical know-how, you can make this seemingly simple task. Therefore, it adds a great value to your digital life. So, embrace the freedom of free Wi-Fi. Enjoy your online adventures!
Unlock Your Laptop's Hidden WiFi Hotspot: The CMD Secret!Unlock Your Laptop's Hidden Hotspot: Free WiFi Anywhere!
Hey everyone! Ever been stranded with zero internet, staring at a blank screen, and feeling that familiar pang of digital disconnection? We've all been there, right? Whether you're waiting for a delayed flight, camping under the stars, or just trying to escape the exorbitant prices of hotel WiFi, the need for a reliable, free internet connection is universal. But did you know that your trusty laptop might already hold the key to your freedom, offering a hidden hotspot that can turn it into a WiFi-slinging superhero? Let's dive in and unlock this digital secret together!
1. The Silent Superhero: Unveiling Your Laptop's Hotspot Potential
Before you start picturing complex tech setups, let's get one thing straight: creating a hotspot from your laptop is often surprisingly simple. Think of your laptop as a silent superhero, equipped with the power to share its internet connection with your other devices. This capability often goes unnoticed, like a superpower hidden in plain sight. It’s like having a mini-router tucked away inside, ready to be activated. This ability isn't just for emergencies – it's about freedom, convenience, and saving a few bucks.
2. Why Bother? The Perks of a Laptop-Powered WiFi Hotspot
Why should you even bother turning your laptop into a hotspot? The benefits are plentiful. Firstly, it’s a money-saver. Imagine avoiding those expensive hotel WiFi charges or the cost of buying a data plan solely for your tablet or phone. Secondly, it’s incredibly convenient. Need to get online on your tablet in the park? No problem. Want to finish that presentation on your phone while waiting for a bus? Easy peasy. It’s about having your internet always available. Lastly, it provides a backup plan. If your home internet goes down, you can tether your other devices to your laptop’s mobile data (if you have it, of course).
3. Prerequisites: What You Need to Get Started
Before we jump into the how-to, let’s cover the basics. You'll need a laptop, obviously! The operative word is modern. This means your laptop needs to have a built-in Wi-Fi adapter. Most laptops manufactured in the last decade will have this, but it's always worth double-checking. You'll also need an internet connection. This can come in several flavors: either a wired Ethernet connection, or a mobile data connection (via a connected phone or a USB dongle). Without either, you won’t have any internet to share! Finally, you'll need to know your laptop's operating system – Windows or macOS.
4. Windows Warriors: Activating Your Hotspot on a Windows Laptop
If you're a Windows user, the process is generally straightforward. Here's a step-by-step guide to becoming a WiFi wizard:
- Step 1: Dive into Settings. Click on the Start button (that familiar Windows logo in the bottom left) and then click on the Settings gear icon.
- Step 2: Network & Internet. Select the "Network & Internet" option.
- Step 3: Mobile Hotspot. On the left-hand side, choose "Mobile Hotspot."
- Step 4: Turn it On! Toggle the "Share my Internet connection with other devices" switch to "On."
- Step 5: Customize Your Hotspot. Click "Edit" to change your network name (SSID) and password. Choose a strong password! Think of it like protecting your house from unwanted visitors.
- Step 6: Connect and Conquer. Now, on your other devices, look for the WiFi network you just created, enter the password, and boom! You’re connected.
5. macOS Mavericks: Unleashing your Hotspot Magic on a Mac
For our Mac users, the process is similar, but the interface is slightly different. Fear not, the magic is just as potent:
- Step 1: Open System Preferences. Click the Apple icon in the top-left corner of your screen, and then select "System Preferences."
- Step 2: Sharing. Click on "Sharing."
- Step 3: Internet Sharing. In the left panel, check the "Internet Sharing" box.
- Step 4: Share your Connection From: Select where your internet is coming from. (e.g., Wi-Fi, Ethernet).
- Step 5: To Computers Using: Check "Wi-Fi." Then click "Wi-Fi Options…"
- Step 6: Name and Password. Give your hotspot a name and create a strong password. Click "OK."
- Step 7: Start Sharing. Check the box next to "Internet Sharing." You might be prompted about enabling this feature. Confirm it.
- Step 8: Connect and Celebrate! Find your newly created Wi-Fi network on your other devices, input the password, and enjoy the freedom of your personal hotspot.
6. Troubleshooting Troubles: Common Issues and Quick Fixes
Sometimes, things don't go as smoothly as planned. Here are a few common roadblocks and how to overcome them:
- No Internet Access: Double-check your laptop's internet connection. Is it connected to Wi-Fi or Ethernet? Try restarting your modem/router.
- Can't Find the Hotspot: Ensure your hotspot is enabled and broadcasting. Try restarting your laptop. Verify you are not in Airplane mode.
- Slow Speeds: Consider the source of your internet connection. If you're tethering to your phone’s mobile data, connection speed will vary. Try limiting the number of devices connected to the hotspot.
- Password Problems: Make sure you typed the password correctly. Check for capitalization and special characters.
7. Security First: Protecting Your Hotspot from Unwanted Guests
Security is paramount. Your hotspot shares your internet, and you need to protect it from unauthorized access.
- Strong Passwords are Key: Use a strong, unique password that is difficult to guess. Avoid commonly used words or phrases.
- WPA2 or WPA3 Encryption: Ensure your hotspot uses WPA2 or WPA3 encryption. These are the most secure encryption protocols.
- Monitor Connected Devices: Often, your laptop's settings will allow you to see which devices are connected to your hotspot. Keep an eye on this list and disconnect any unknown devices.
- Limit the Number of Devices: Don't let everyone and their second cousin hop onto your hotspot. The fewer devices connected, the better the performance.
8. Beyond the Basics: Advanced Hotspot Tips and Tricks
Once you've mastered the basics, you can explore some advanced options:
- Bandwidth Management: Some operating systems or third-party apps let you control how much bandwidth each connected device can use. This prevents one device from hogging all the bandwidth.
- Mobile Data Savings: If you are using your mobile data to power your hotspot, be mindful of your data usage. Some operating systems allow you to set data limits.
- Third-Party Apps: Several apps can enhance your hotspot functionality, offering customization options and performance improvements. Research and choose wisely.
9. Power Saving: Extending Your Laptop's Battery Life
Running a hotspot can drain your laptop's battery faster. Here are some tips to conserve power:
- Plug In: The best option is to keep your laptop plugged into a power outlet while using the hotspot.
- Reduce Screen Brightness: Dim the screen brightness to conserve battery.
- Disable Unnecessary Features: Turn off Bluetooth and other features you aren't using.
- Close Unused Apps: Close any unnecessary apps running in the background.
10. Hotspot Etiquette: Being a Good Digital Citizen
Remember, you're sharing your internet connection. Be mindful of these etiquette tips:
- Communicate Before Sharing: If you're sharing your hotspot with others, let them know.
- Consider Data Usage: Be aware of your data plan and potential overage charges, especially when relying on a mobile data connection.
- Be Respectful of Bandwidth: Avoid activities that consume a lot of bandwidth, like streaming videos, while others are connected.
- Secure Your Hotspot: Always use a password.
11. Situational Hotspotting: When to Unleash Your Digital Hero
So, when is your laptop's hotspot most useful? It's a life-saver in many situations:
- Travel: Airport lounges, train stations, hotel rooms with slow or expensive WiFi.
- Remote Work: Working from a café without public WiFi; at a park.
- Emergency Situations: If your home internet goes down, or if your data plan has run out.
- Camping/Outdoors: Access the internet without a fixed broadband connection.
12. The Mobile Data Option: Tethering Through Your Phone
If you don't have a fixed internet connection but do have a smartphone with a data plan, you can use your phone as the internet source. This is called tethering. This gives you a mobile hotspot wherever you are. Both iOS and Android allow you to create a hotspot from your phone, and connect your laptop to that! Check your phone’s settings for Mobile Hotspot options.
**13. Testing Your Hotspot: Ensuring a Smooth
Laptop's Secret WiFi Upgrade: Insane Speed Boost!We Can't setup Mobile Hotspot Windows 10 SOLVED

By Nam Anh Cap We Can't setup Mobile Hotspot Windows 10 SOLVED by Nam Anh Cap
How to Create Wifi Hotspot in Windows 10 Tutorial

By MDTechVideos How to Create Wifi Hotspot in Windows 10 Tutorial by MDTechVideos
Use PC as WiFi Hotspot with Ethernet
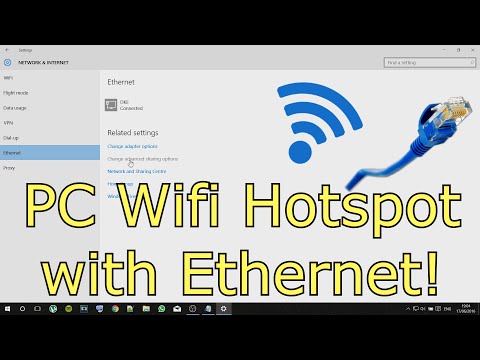
By Tech4Time Use PC as WiFi Hotspot with Ethernet by Tech4Time

Title: How to Create a WiFi Hotspot with Windows 7
Channel: 1stepatatime
How to Create a WiFi Hotspot with Windows 7 by 1stepatatime
Wifi Not Found
Unlock Your Laptop's Hidden Hotspot: Free WiFi Anywhere!
In today's hyper-connected world, staying online is no longer a luxury; it's a necessity. From responding to urgent emails to navigating unfamiliar cities with real-time directions, a reliable internet connection fuels productivity, facilitates communication, and enhances our daily experiences. But what if that connection is absent? What if you're stranded in a coffee shop with unreliable public WiFi, or stuck on a long train journey with a dwindling data plan? The solution lies in the power you already hold: your laptop. We empower you to transform your laptop into a discreet and powerful WiFi hotspot, granting you free internet access virtually anywhere.
Understanding the Magic: Your Laptop's Hidden WiFi Capabilities
Most modern laptops, whether running Windows, macOS, or even Linux, possess the inherent ability to act as a WiFi hotspot. This function, often hidden or underutilized, allows your laptop to share its existing internet connection with other devices. This can be an ethernet connection, your mobile phone’s data, or even another WiFi network you are already connected to. Think of it as a personal, portable WiFi router, capable of broadcasting a signal that other devices, such as smartphones, tablets, and other laptops, can connect to. We will dissect this process, revealing the steps to unlock this untapped potential and harness the power of your laptop for seamless, free WiFi anywhere you go.
Windows: The Gateway to Effortless Hotspot Creation
For Windows users, the process of creating a WiFi hotspot is remarkably straightforward. Microsoft has streamlined the process within the operating system, making it accessible even to those with minimal technical expertise. Here’s how to get started:
Accessing the Mobile Hotspot Settings: Begin by opening the "Settings" app. You can easily find this by clicking on the Start menu and selecting the gear icon. Alternatively, type "Settings" into the search bar and click the result. Within the Settings app, navigate to "Network & Internet." Look for the "Mobile hotspot" option in the left-hand menu and click on it.
Configuring Your Hotspot's Credentials: Within the Mobile Hotspot settings, you'll find options to customize your hotspot's configuration. The most crucial settings are the "Share my Internet connection from" and "Share over" options. The "Share my Internet connection from" dropdown allows you to select the source of your internet connectivity, should your laptop be connected via Ethernet or WiFi. This is the connection your hotspot will share. If, for example, you're connected to a WiFi network, select that network from the dropdown. If your laptop is connected via Ethernet, choose "Ethernet." After selecting your Internet connection, you will need to set up your network credentials. Click "Edit" next to "My network credentials." Here, enter a network name (SSID) for your hotspot and a password. Ensure you choose a strong password to protect your connection from unauthorized access. We strongly advise using a complex combination of uppercase and lowercase letters, numbers, and special characters.
Enabling the Hotspot: Once you've customized your hotspot settings, toggle the "Share my Internet connection with other devices" switch to the "On" position. Your laptop will now begin broadcasting a WiFi signal, ready to be connected to by your other devices. You can view the network name and password directly on this page.
Troubleshooting Common Windows Issues: If you encounter issues, such as your hotspot not appearing on other devices, check the following: confirm that your laptop's WiFi adapter is enabled, ensure that "Mobile hotspot" is allowed through your firewall, and that your network drivers are up to date. In rare cases, a restart of your laptop may be required.
macOS: A Simple Route to WiFi Sharing
macOS offers an equally elegant solution for creating a WiFi hotspot, seamlessly integrated within its system preferences. Here are the steps for Mac users:
Accessing Internet Sharing preferences: Open "System Preferences" from the Apple menu (top left corner of the screen) or by clicking the System Preferences icon in the Dock. Within System Preferences, click on "Sharing."
Selecting Internet Sharing: In the Sharing preferences window, check the box next to "Internet Sharing."
Configuring Sharing Options: Before enabling Internet Sharing, you need to configure the sharing settings. In the "Share your connection from" dropdown menu, select the internet connection you want to share (e.g., Wi-Fi or Ethernet). Then, under "To computers using," select "Wi-Fi."
Setting Up WiFi Options: Click on the "Wi-Fi Options…" button. This is where you will define your hotspot's key credentials. Enter a network name (SSID) for your hotspot. Choose a security type, such as WPA2 Personal or WPA3 Personal, for robust security. This will require a password. Enter a strong password to secure your connection. A strong password will provide optimal security. Click "OK" to save the WiFi options.
Starting Internet Sharing: Once you've selected the internet connection to share and configured the WiFi options, check the "Internet Sharing" box to enable the hotspot. Your Mac will then start broadcasting a WiFi signal that other devices can connect to. When the hotspot is enabled, the Internet Sharing service will appear as "On" in the Sharing window.
Managing your macOS hotspot. You can disconnect the sharing by unchecking the Internet Sharing box.
Linux Systems: Unleashing Flexibility and Control
Linux users often enjoy the most flexibility when it comes to network management with a range of tools available to create a WiFi hotspot. The exact method depends on the specific distribution you're using. We will give a general overview:
Using the Command Line (for Advanced Users): The command line offers unparalleled control. The
nmcli(NetworkManager Command Line Interface) is a powerful tool for managing network connections in many Linux distributions that use NetworkManager. Open your terminal and use commands likenmcli device wifi connect <your_ssid> password <your_password>If you're not connected to the internet, you can useiwconfig. You can use theiwconfigoriwlistcommands to manage your wireless network interfaces.Creating a Hotspot with
nmcli: To create a hotspot usingnmcli, you'll typically use thenmcli device wifi hotspotcommand. This command allows you to set the SSID, password, and other parameters. For example, you might execute a command like:nmcli device wifi hotspot ifname wlan0 ssid MyHotspot password MySecurePasswordWherewlan0is your wireless interface,MyHotspotis the network name, andMySecurePasswordis your password.GUI Tools for Linux: Many Linux distributions offer graphical user interfaces (GUIs) for network management. Tools like Network Manager (found in most distributions) and KDE's Network Manager provide a user-friendly way to configure and manage your WiFi hotspot.
Troubleshooting Linux Hotspot Issues: Linux can be particularly flexible but demands more technical background. Common issues involve incorrect interface settings, firewall conflicts, and missing dependencies. Ensure your wireless card drivers are installed and that your firewall allows traffic on the correct ports. Ensure you have configured the correct internet connection source on your network interface.
Enhancing Security: Protecting Your WiFi Hotspot
Creating a WiFi hotspot involves sharing your internet connection, which means safeguarding it from unauthorized access is paramount. Here’s how to enhance your hotspot’s security:
Strong Passwords are Key: Always use a strong, unique password for your hotspot. Avoid using easily guessable information such as birthdays, names, or common words. The longer and more complex the password, the harder it is for unauthorized individuals to gain access.
Utilize WPA2/WPA3 Encryption: Opt for WPA2 or WPA3 encryption when setting up your hotspot. These are the most secure encryption protocols available, providing a high level of protection against eavesdropping and data breaches. Avoid using older encryption methods like WEP, as they're significantly less secure.
Limit Simultaneous Connections: Consider limiting the number of devices that can connect to your hotspot simultaneously. Most operating systems allow you to set a maximum connection limit. This can help prevent strain on your internet connection and reduce the risk of unauthorized access.
Monitor Connected Devices: Regularly monitor the devices connected to your hotspot. Most operating systems provide a list of connected devices, allowing you to identify and remove any unrecognized or suspicious connections.
Set Usage Limits: If your internet plan has data caps, consider setting usage limits on your hotspot. This will prevent unintended data overages and keep you within the bounds of your internet plan.
Disable the Hotspot when Not in Use: When you are not actively using your hotspot, disable it. This eliminates any potential risk of unauthorized access while your laptop is idle.
Troubleshooting Common Problems and Optimizing Performance
Even with the best setup, you might encounter issues. Here's how to address common problems and enhance your hotspot's performance:
Slow Internet Speed: If your hotspot's internet speed is slow, the source of the internet is likely to blame. Try connecting your laptop to the internet via Ethernet, or select the strongest WiFi signal when sharing an existing WiFi connection.
Devices Can't Connect: Ensure your hotspot is enabled, and double-check the network name and password. Then, confirm that the device's
